About Report Manager
The Report Manager allows you to manage, run, and edit reports you have already created on service usage, and export them in multiple formats. These reports can be constrained to specific date ranges and customized with selected report parameters.
Find the Report Manager page at Reports.
To create a report, see Create a Report.
The Report Manager page consists of two tabs: Scheduled Reports and History.
Scheduled Reports Tab

The Scheduled Reports tab displays a list of existing reports and the following information:
- Detokenize Report. Click to upload and detokenize a report.
- No. Scheduled Reports. The number of Scheduled Reports currently available to view, either created by you or shared by others in your organization.
- Search Field. Search for your report via the search field.
- Report Name. The descriptive name of the report or reports set at the time of report creation. Click the name to view the report list on the History tab. The shared icon indicates that the report was created by another user and shared. Click the information icon for more information.
- Available Reports. The number of reports that have been run and are available to view. Click the number to view the report list on the History tab.
- Last Generated. The date and time that the report was last generated.
- Type. Displays the type of report, such as Service.
- Frequency. The frequency selected when the scheduled report was created. (Currently, only Run Now only is supported.)
- Next Scheduled. The date and time that the report is next scheduled to run.
- Active Filters. Displays the filters associated with the corresponding report.
- Status. Indicates the current status of a report:
- Active. The reports are generated on a user-defined date and time based on the scheduled report. For details on scheduling a report, see Schedule a Report.
- Inactive. The scheduled report is deactivated and the reports will not be generated until you activate it. Select Actions > Activate to start generating the reports again. For details, see Activate a Report.
- Owned By. The name of the user who created and owns the report.
- Actions.
- If you are the report owner, you can:
- If you are not the report owner, you can:
History Tab

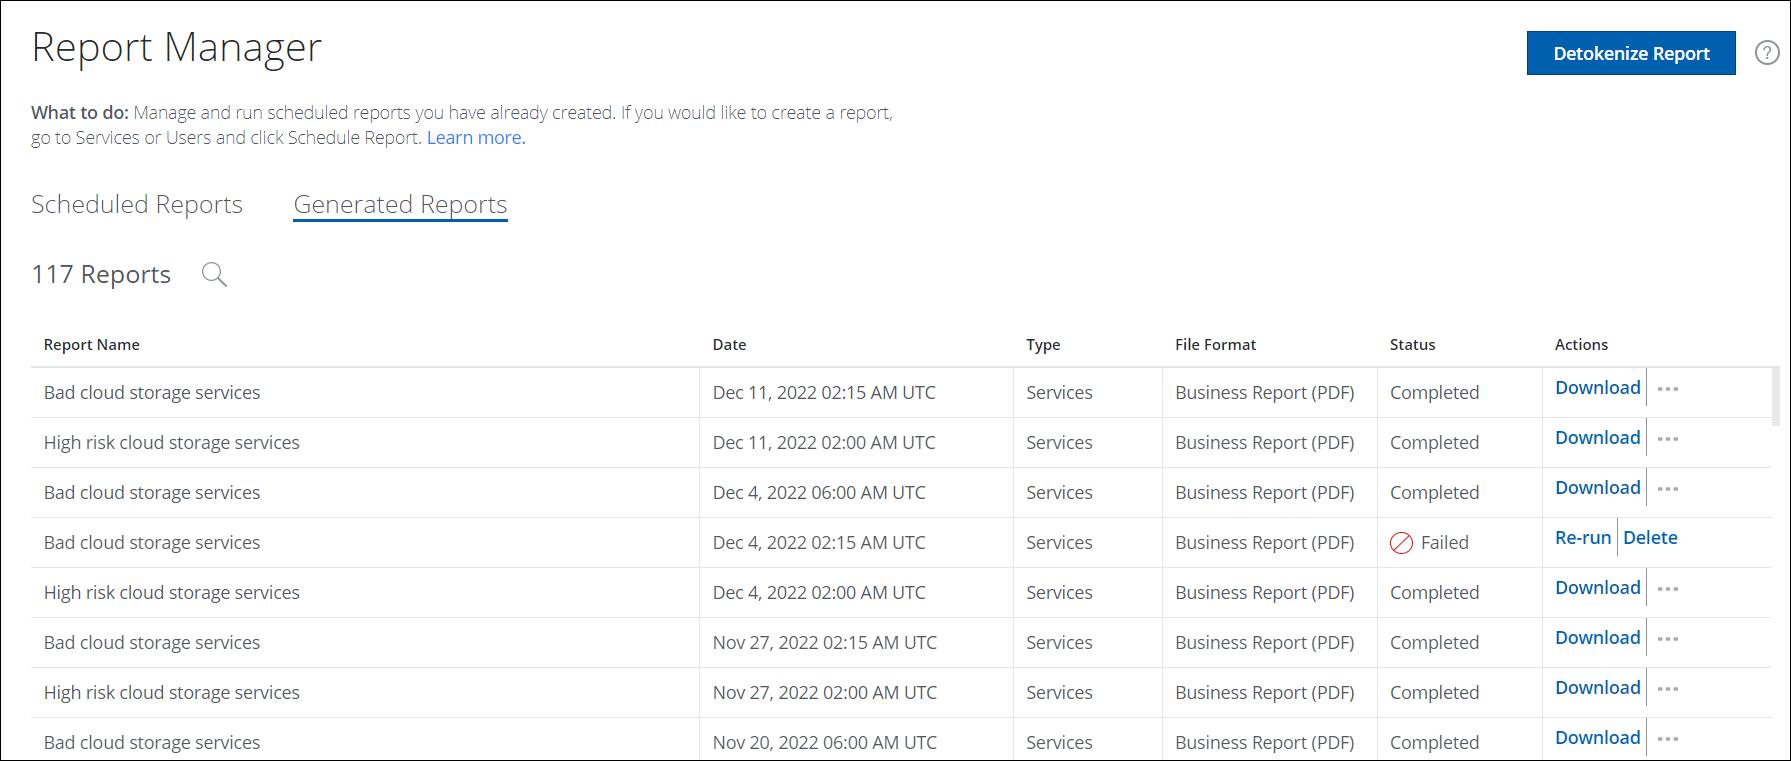
The History tab displays a list of all report incidents that have been run, and the following information:
- Detokenize Report. Click to upload and detokenize a report.
- No. Scheduled Reports. The number of Scheduled Reports currently available to view, either created by you or shared by others in your organization.
- Search Field. Search for your report via the search field.
- Report Name. The descriptive name of the report or reports set at the time of report creation.
- Date. The date and time that the report was generated.
- Type. Displays the type of report, such as Service.
- File Format. Displays the format output specified for this report: Business Report (PDF), Raw Data (CSV), or Analytical Report (XLSX).
- Status. The current stage the report is in during its creation:
- Scheduled. The report generates on a user-defined date and time based on your scheduling options.
- In Progress. The report is being generated. Depending on the size of the report, it might take several minutes.
- Completed. The report is generated and is ready to be viewed.
- Failed. The report has failed. This is typically a temporary problem that is resolved by rerunning reports.
- Actions. Displays actions available for the report, depending on its status:
