Create an On-Demand Scan for Microsoft Teams
Create an On-Demand Scan (ODS) to precisely analyze Microsoft Teams chat messages for sensitive information such as personally identifiable information (PII), suspicious links, and more. This proactive measure helps to protect your sensitive data and maintain the overall security of your organization's communication and collaboration platform. o learn additional details of ODS, see About ODS.
- ► Use Case on Protecting Sensitive Financial Data in Microsoft Teams using ODS
- An investment firm utilizes Microsoft Teams for collaboration, including a private channel dedicated to sensitive client information. However, a financial analyst accidentally shares details about client portfolios such as investment allocations and bank information in a public channel. To protect client confidentiality and prevent the unauthorized sharing of sensitive data, the firm regularly employs (ODS) to monitor all messages shared within Microsoft Teams. Based on the defined DLP policies in ODS, the system automatically deletes the sensitive message shared in a public channel.
The ODS scans are configured based on the predefined Data Loss Prevention (DLP) policies to detect sensitive information and initiate immediate actions. If any violation occurs, sensitive data is deleted immediately, and an email is sent to the user regarding the violation.
Prerequisites
Before you begin the On-Demand Scan for Microsoft Teams, complete the Microsoft Teams API Integration in Skyhigh SSE. For details, see Microsoft Teams API Integration Setup.
IMPORTANT:
- To enable the Microsoft Teams ODS scan for your tenant, contact Skyhigh Security Support.
- After the Microsoft Teams API Integration Setup, wait for 24 hours before configuring the ODS Scan. This delay ensures that the Teams channels (both private and public) will be displayed in the ODS Scan UI after 24 hours.
Create an On-Demand Scan
To create an On-Demand scan:
- Log in to Skyhigh SSE.
- Go to Policy > On-Demand Scan.
- Click Actions > Create a Scan. The Scan Creation Wizard displays.
- Scan Type. Select DLP & Malware.
- Name. Enter the name for the scan.
- Description. Add an optional description for the scan.
- Service Instance. Select the Microsoft Teams instance you want to scan.
- Click Next.

- On the Select Policies page, select the available policies that you want to use for your scan. This policy is applied to selected data to find violations of that policy, and click Next.

NOTE:
- Only Active policies are listed here.
- If you don't see any policies on the Select Policies, you must create at least one DLP policy before creating a scan.
- To create a new DLP policy, see Create DLP Policy.
- On the Configure Scan page, configure the scope for your scan.
- Data Scope. Select the type of scan:
- Full. Scans all content every time the scan is run.
- Incremental. Scan only content that has changed since the last successful scan.
- Scan Dates. Select the required option:
- Last X Day(s). Limit the scan to the specified time period. For example, scan the chat history of the past 7 days in Microsoft Teams.
- Content. By default, Messages is selected. ODS scans for Microsoft Teams are limited to messages only.
- Data Scope. Select the type of scan:
NOTE: To scan files within Microsoft Teams, see Create an On-Demand Scan for SharePoint.
- Message Type. Specify the types of messages to be scanned:
- Teams & Public/Private Channels. Select the Public or Private Teams channels to include in the scan. You can select up to 1,000 channels.
- Chat Conversations. Select to scan All Chats Conversations or With Guest Users.
- Select Users. Select the users for whom you want to scan the messages based on the selected channel or chat conversation type:
- All Users. Scan all users.
- Include Specific Users. To include only specific users, select a Predefined Dictionary, or enter users manually in a comma-separated list.
- Exclude Specific Users. To exclude only specific users, select a Predefined Dictionary, or enter users manually in a comma-separated list.
- Guest Users. Scan guest users.

- Click Next.
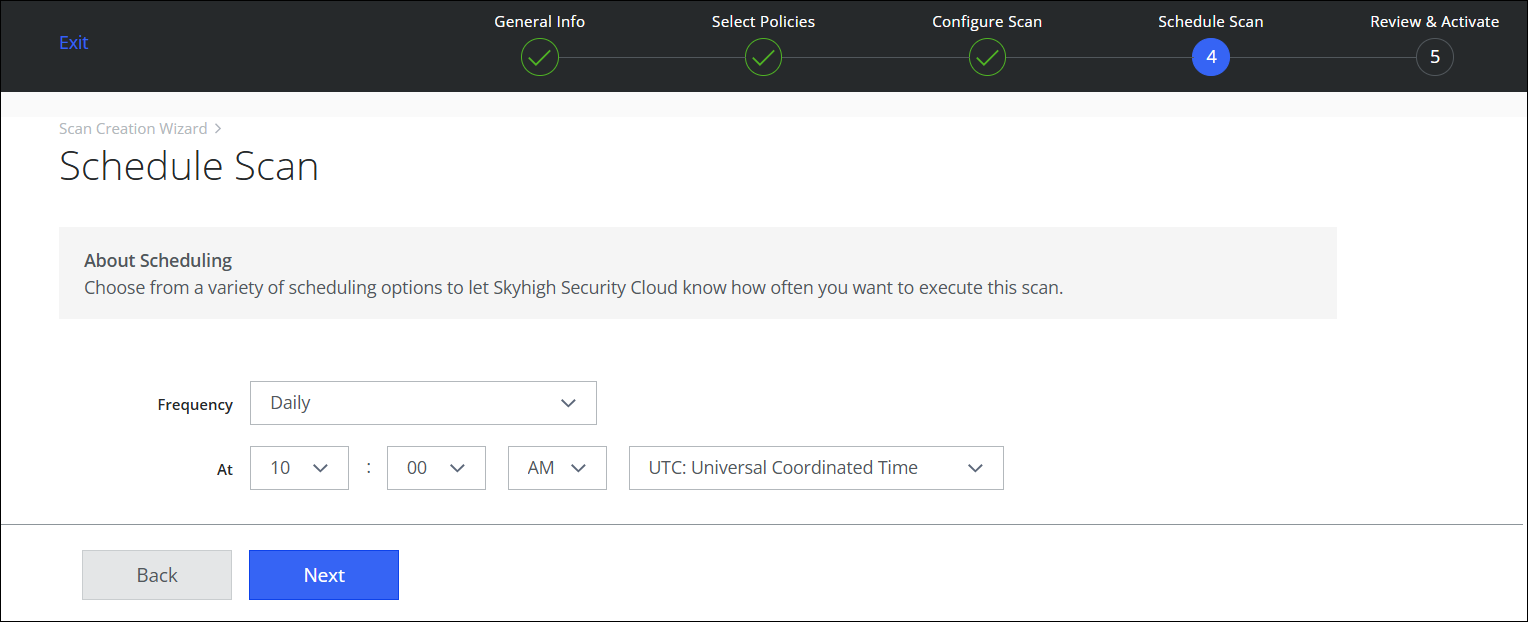
- None (On-Demand Only). Run the scan once now.
- Daily. Run the scan once a day. Configure the time and time zone.
- Weekly. Run the scan once a week. Configure the day, time, and time zone.
- On the Review & Activate page, review your settings for the On-Demand Scan, and click Save. Or click Back to make changes.

Based on the configured time period, the Daily or Weekly scan runs automatically. Once the scan is completed, you can view the results or rerun the scan anytime on the On-Demand Scan page.
During the scan, if any policy is violated, then an incident is created on the Policy Incidents page.