Google Suite SSO Integration with Idaptive
This procedure describes how to integrate Single Sign-On (SSO) with Idaptive IdP.
Prerequisites
Make sure you have the following items before integrating SSO with Idaptive IdP:
- Admin access to the Google Suite portal (https://gsuite.google.com).
- Admin access to the Idaptive portal (https://aaa4442.my.idaptive.app).
- Access to Skyhigh CASB tenant and existing Google Drive managed service (focusing mainly on G Drive app from G Suite).
Configure the Direct SSO Integration
Perform the following activities to achieve the SSO Integration directly without a proxy:
Step 1: Configure Idaptive in the IdP Portal
- Login to the Idaptive admin portal to configure IdP.
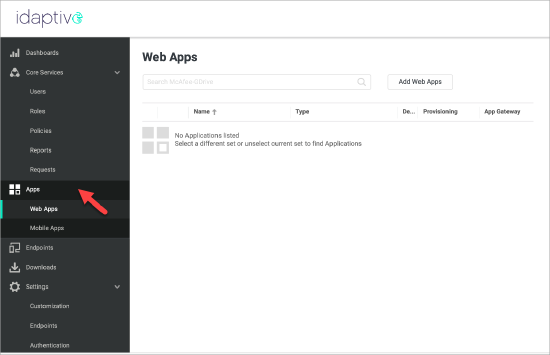
- Go to Apps > Web Apps and click Add Web Apps.
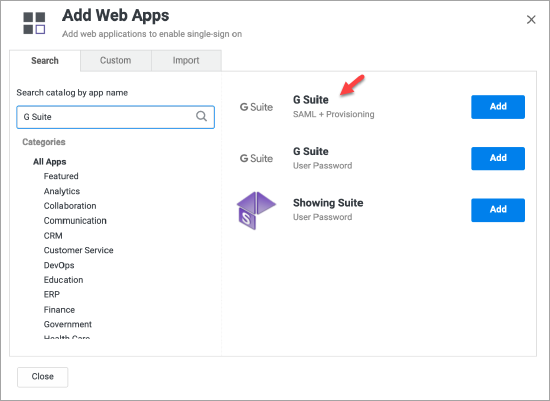
- Search for G Suite to find the required web application results.
- To add G Suite SAML + Provisioning, click Add.
- You are redirected to the G Suite Application Configuration page. To add G Suite domain, click Settings and configure:
- Description: Enter the description of the G Suite domain.
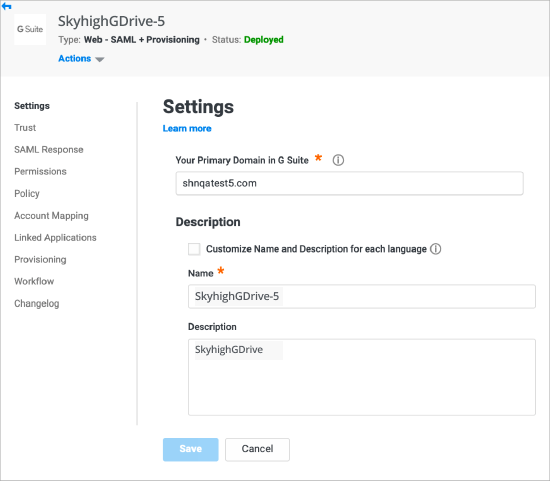
- Name: Enter the name of the G Suite domain.
- Description: Enter the description of the G Suite domain.
- Click Save.
Configure the Identity Provider
- Navigate to Trust > Identity Provider Configuration and click Manual Configuration.
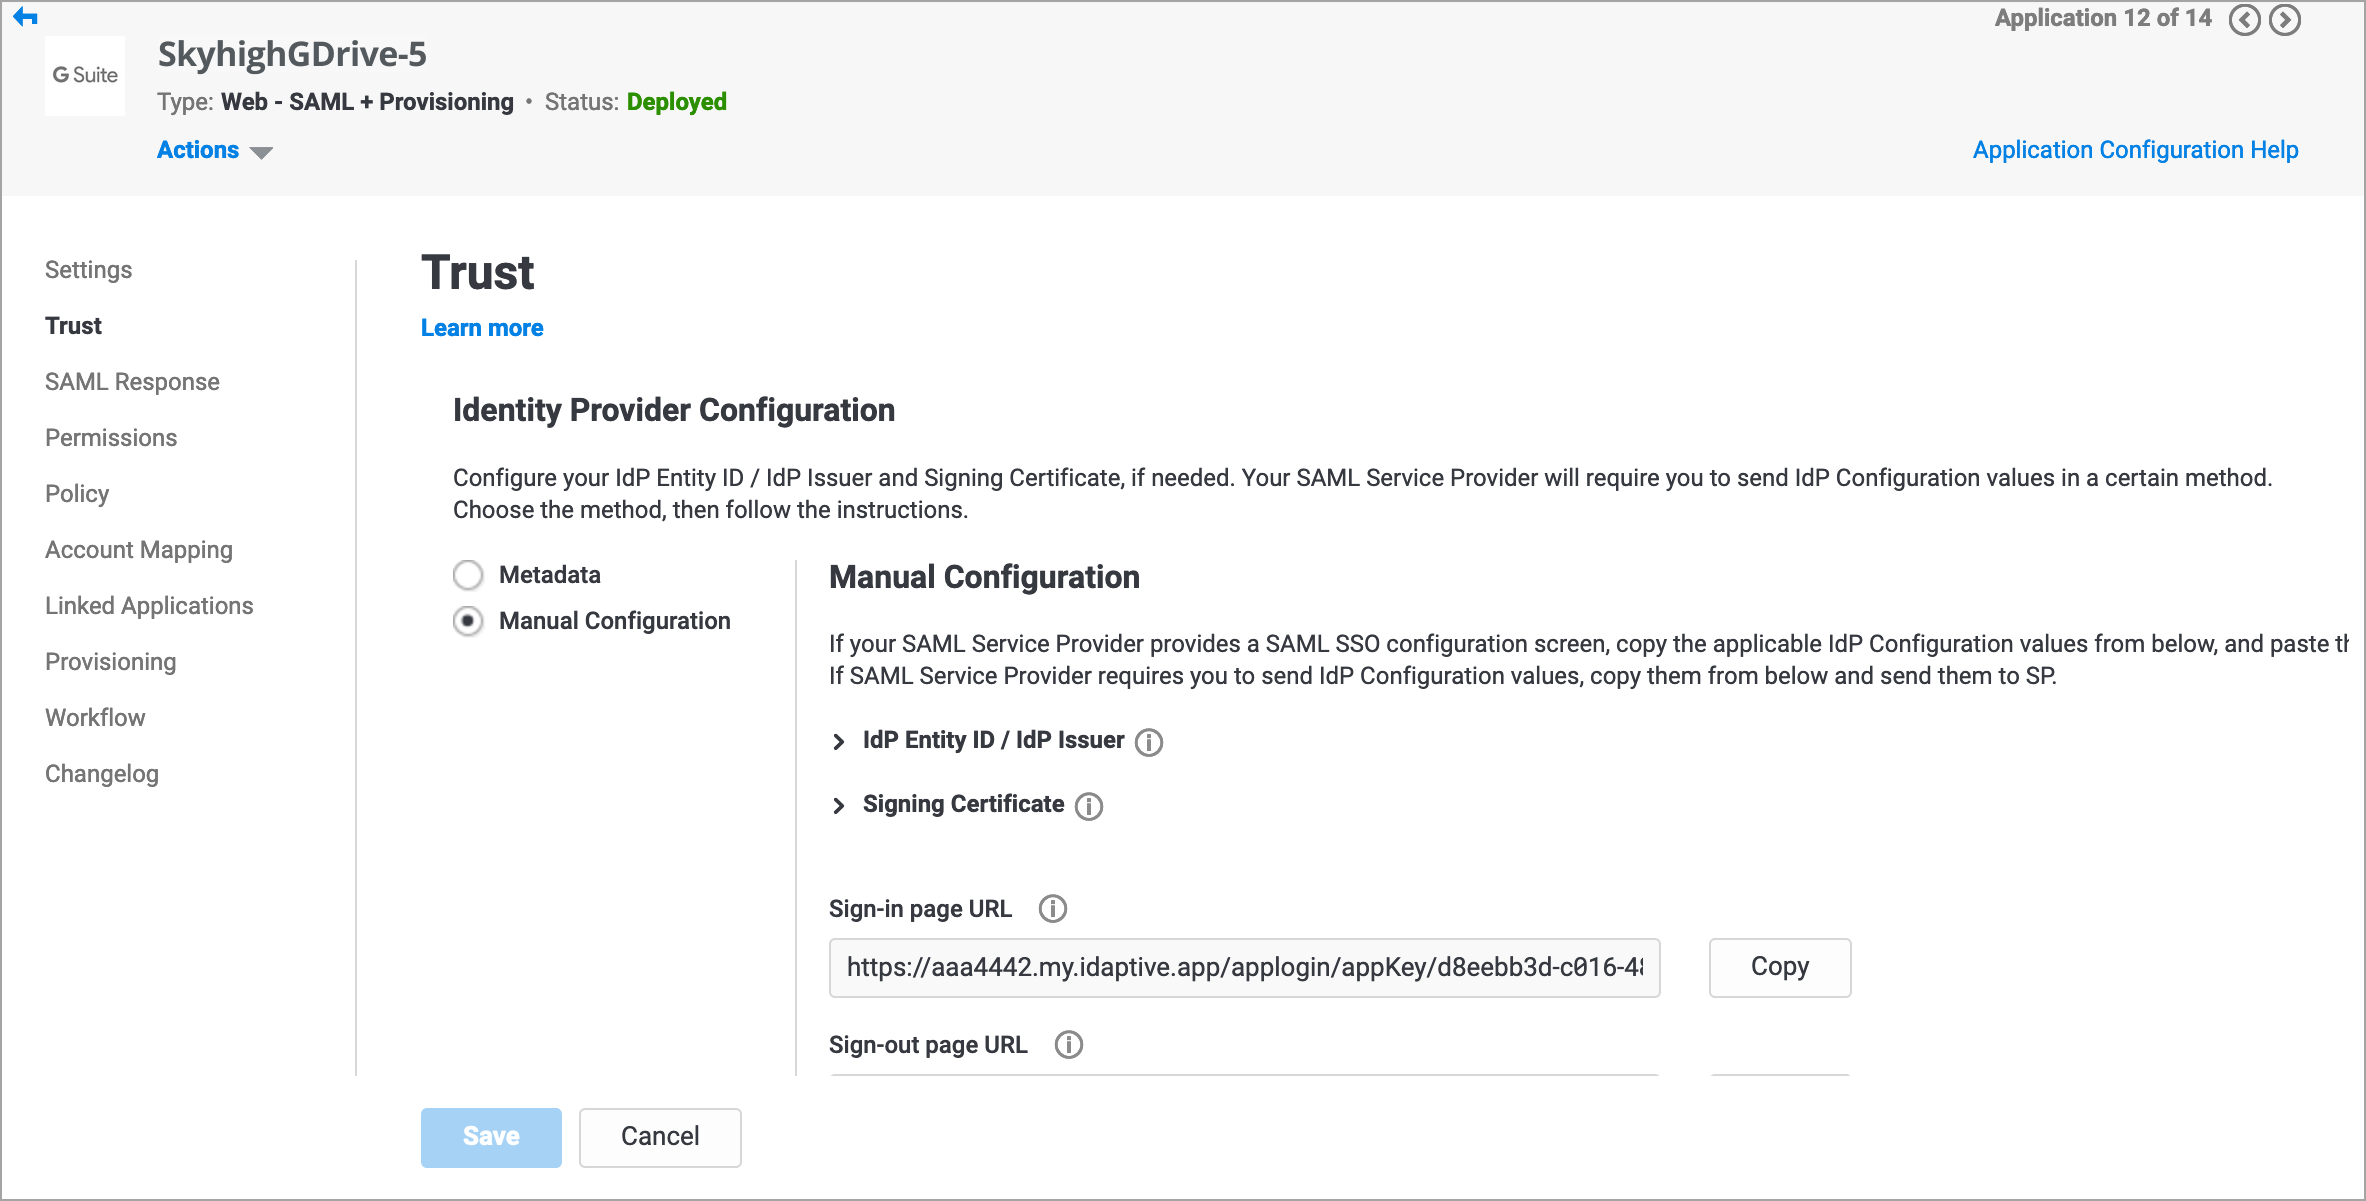
- To download the IdP Certificate, open the Signing Certificate and click DOWNLOAD CERTIFICATE.
- To copy the Sign-in page URL and Sign-out page URL, click Copy.
- You can save the URL and use it in G Suite SSO Configuration.
- Login to the G Suite admin portal to access SP Entity ID and ACS URL (listed as SSO URL).
- Choose Security > Set up single sign-on (SSO) to go to the SSO page and save the SSO URL.
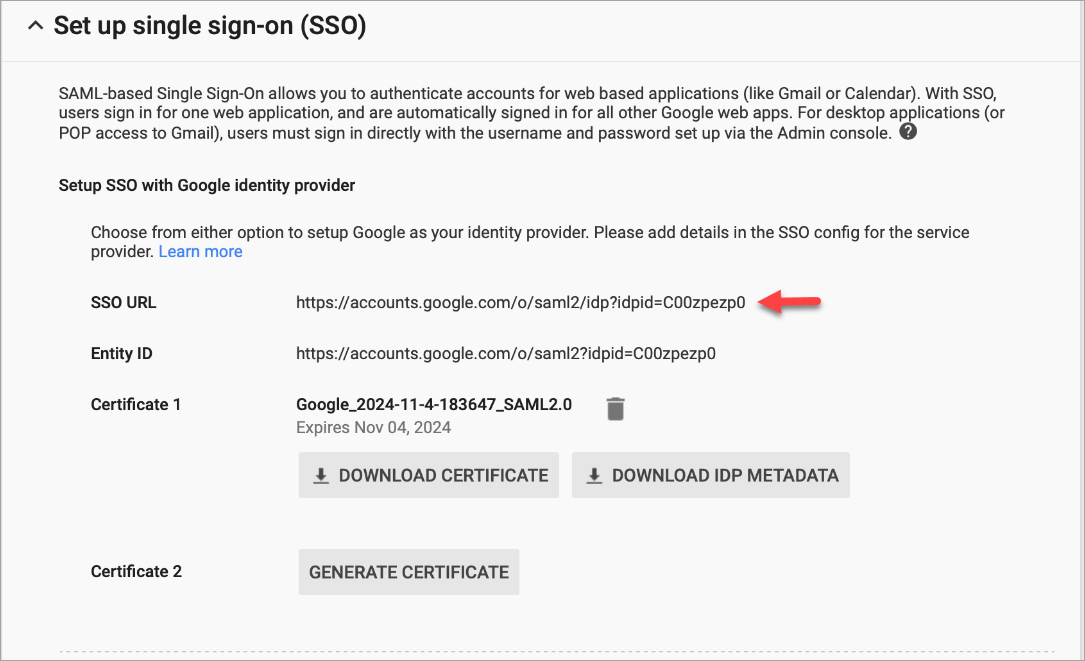
- To download the SP Certificate, click DOWNLOAD CERTIFICATE.
Configure the Service Provider
- Go to Trust > Service Provider Configuration and click Manual Configuration.
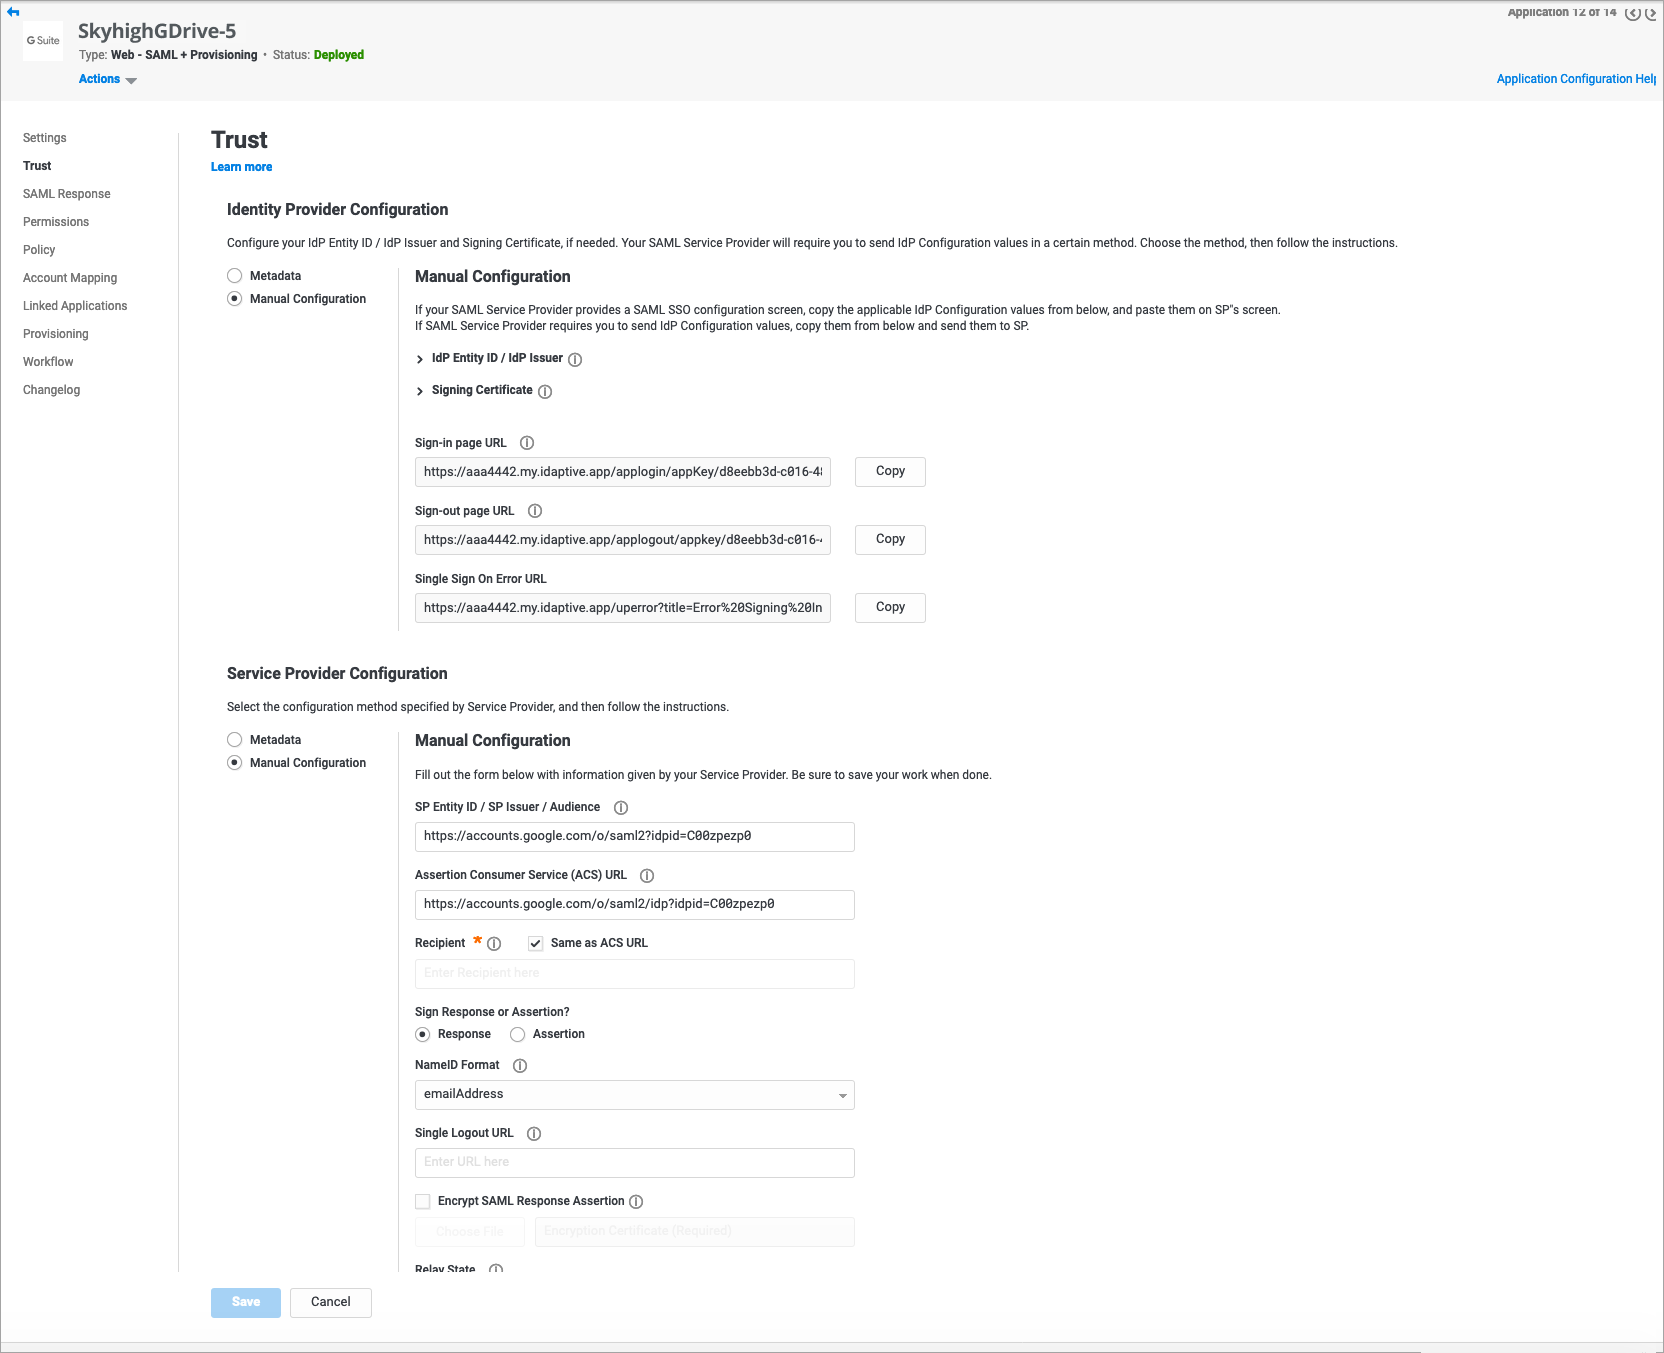
- Enter the valid details in SP Entity ID and ACS URL.
- Select Sign Response or Assertion? as Response.
- Select NameID Format as emailAddress.
- To save the Trust Configuration, click Save.
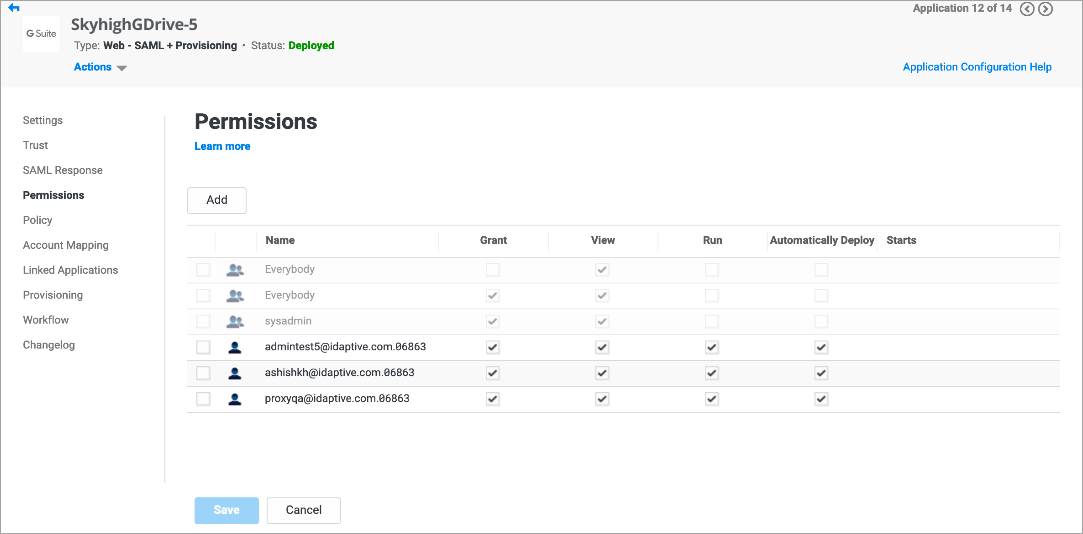
- To add users in the G Suite domain list, click Permissions > Add.
NOTE: Before configuring IdP, you should create a user (same as G Suite user) in the Idaptive portal.
- Click Linked Applications to configure the G Drive domain.
- To add the G Drive domain along with the description, click Add.
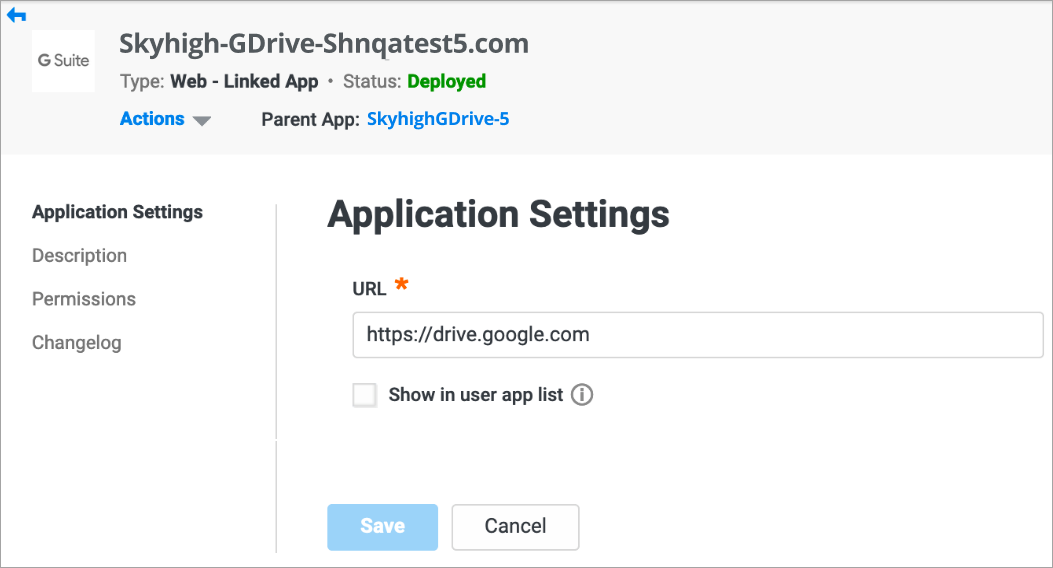
- Click Save.
Step 2: Configure SP in G Suite Portal
- Login to the G Suite admin portal to configure SP.
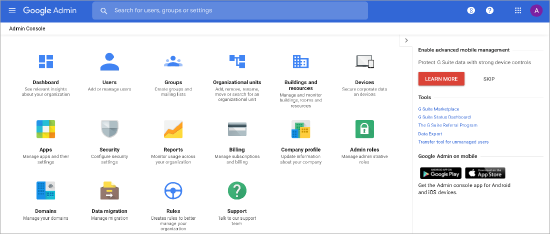
- Choose Security > Set up single sign-on (SSO) to go to the SSO page. Configure the following:
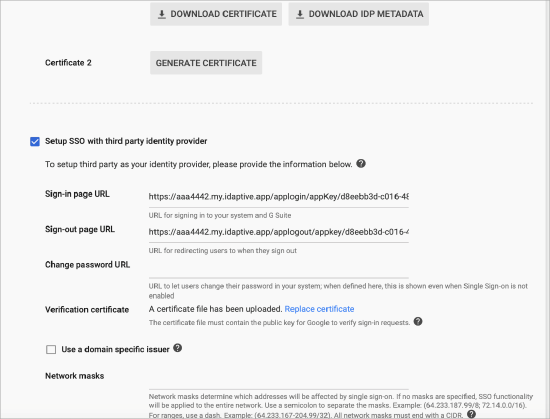
- To enable SSO with a third-party identity provider, activate the checkbox Setup SSO with third party identity provider.
- Enter the Sign-in page URL and Sign-out page URL copied from the Identity Provider Configuration.
- To verify the certificate, upload the IDP Certificate downloaded from the Identity Provider Configuration.
Step 3: Validate the SSO Direct Integration
- Log in to Idaptive using user credentials.
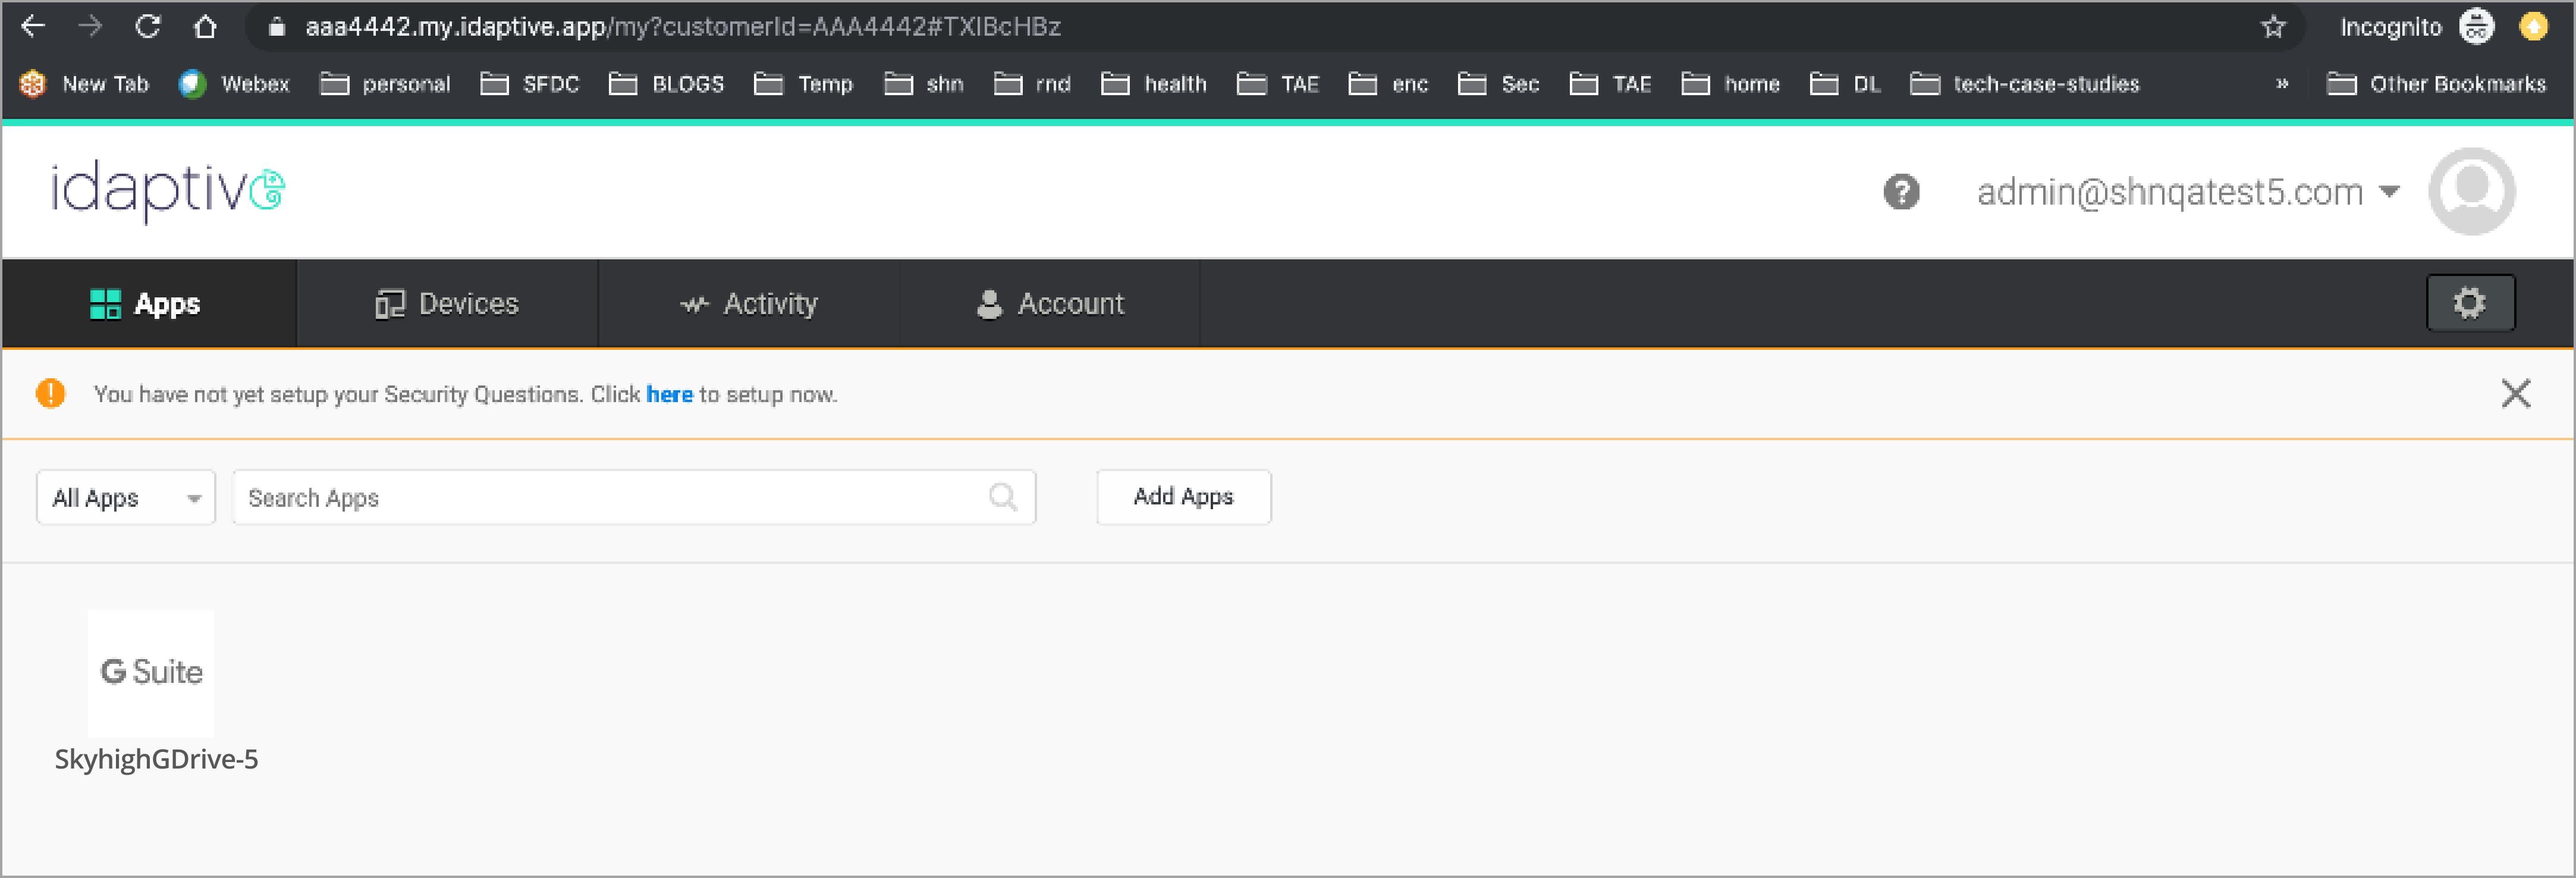
- Click G Suite listed on the homepage. You are redirected successfully to the G Drive application in a new tab.
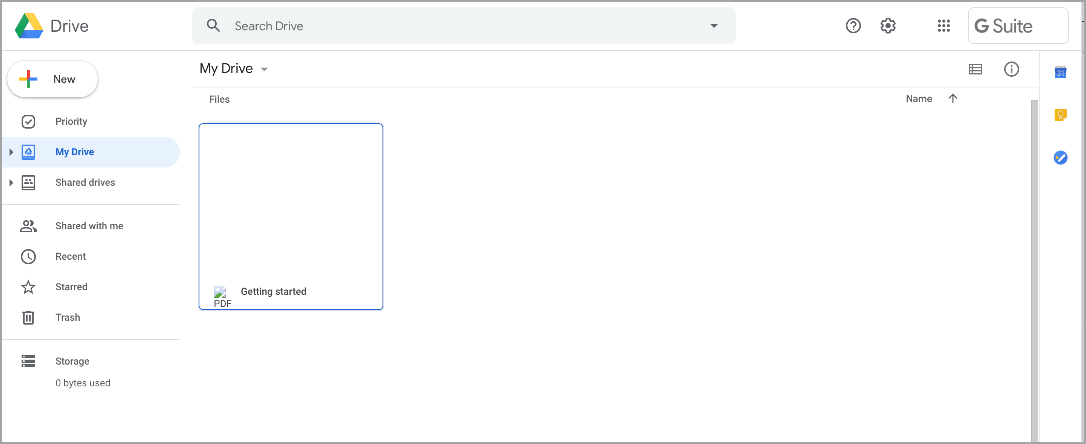
When the users can access the contents in G Drive then the SSO direct configuration is successful with Idaptive (IDP).
Setup the SSO Integration via Proxy
Perform the following steps to achieve the SSO Integration via Proxy:
Step 1: Configure Proxy in Skyhigh CASB
- Login to Skyhigh CASB to configure SAML setup for the existing G Drive managed service.
- To set up SAML, click managed G Drive instance and select Setup > Configure.
- Under Upload Identity Provider Certificate, upload the IDP Certificate and click Next.
- Under Provide Service Provider Certificate, upload the SP Certificate and click Next.
- Download Proxy Certificate and save it in your local folder.
Step 2: Configure Idaptive in the IdP Portal
- Log in to Idaptive using Administrator credentials.
- Navigate to the SSO configured G Suite.
- Go to SAML Response and scroll to Custom Logic.
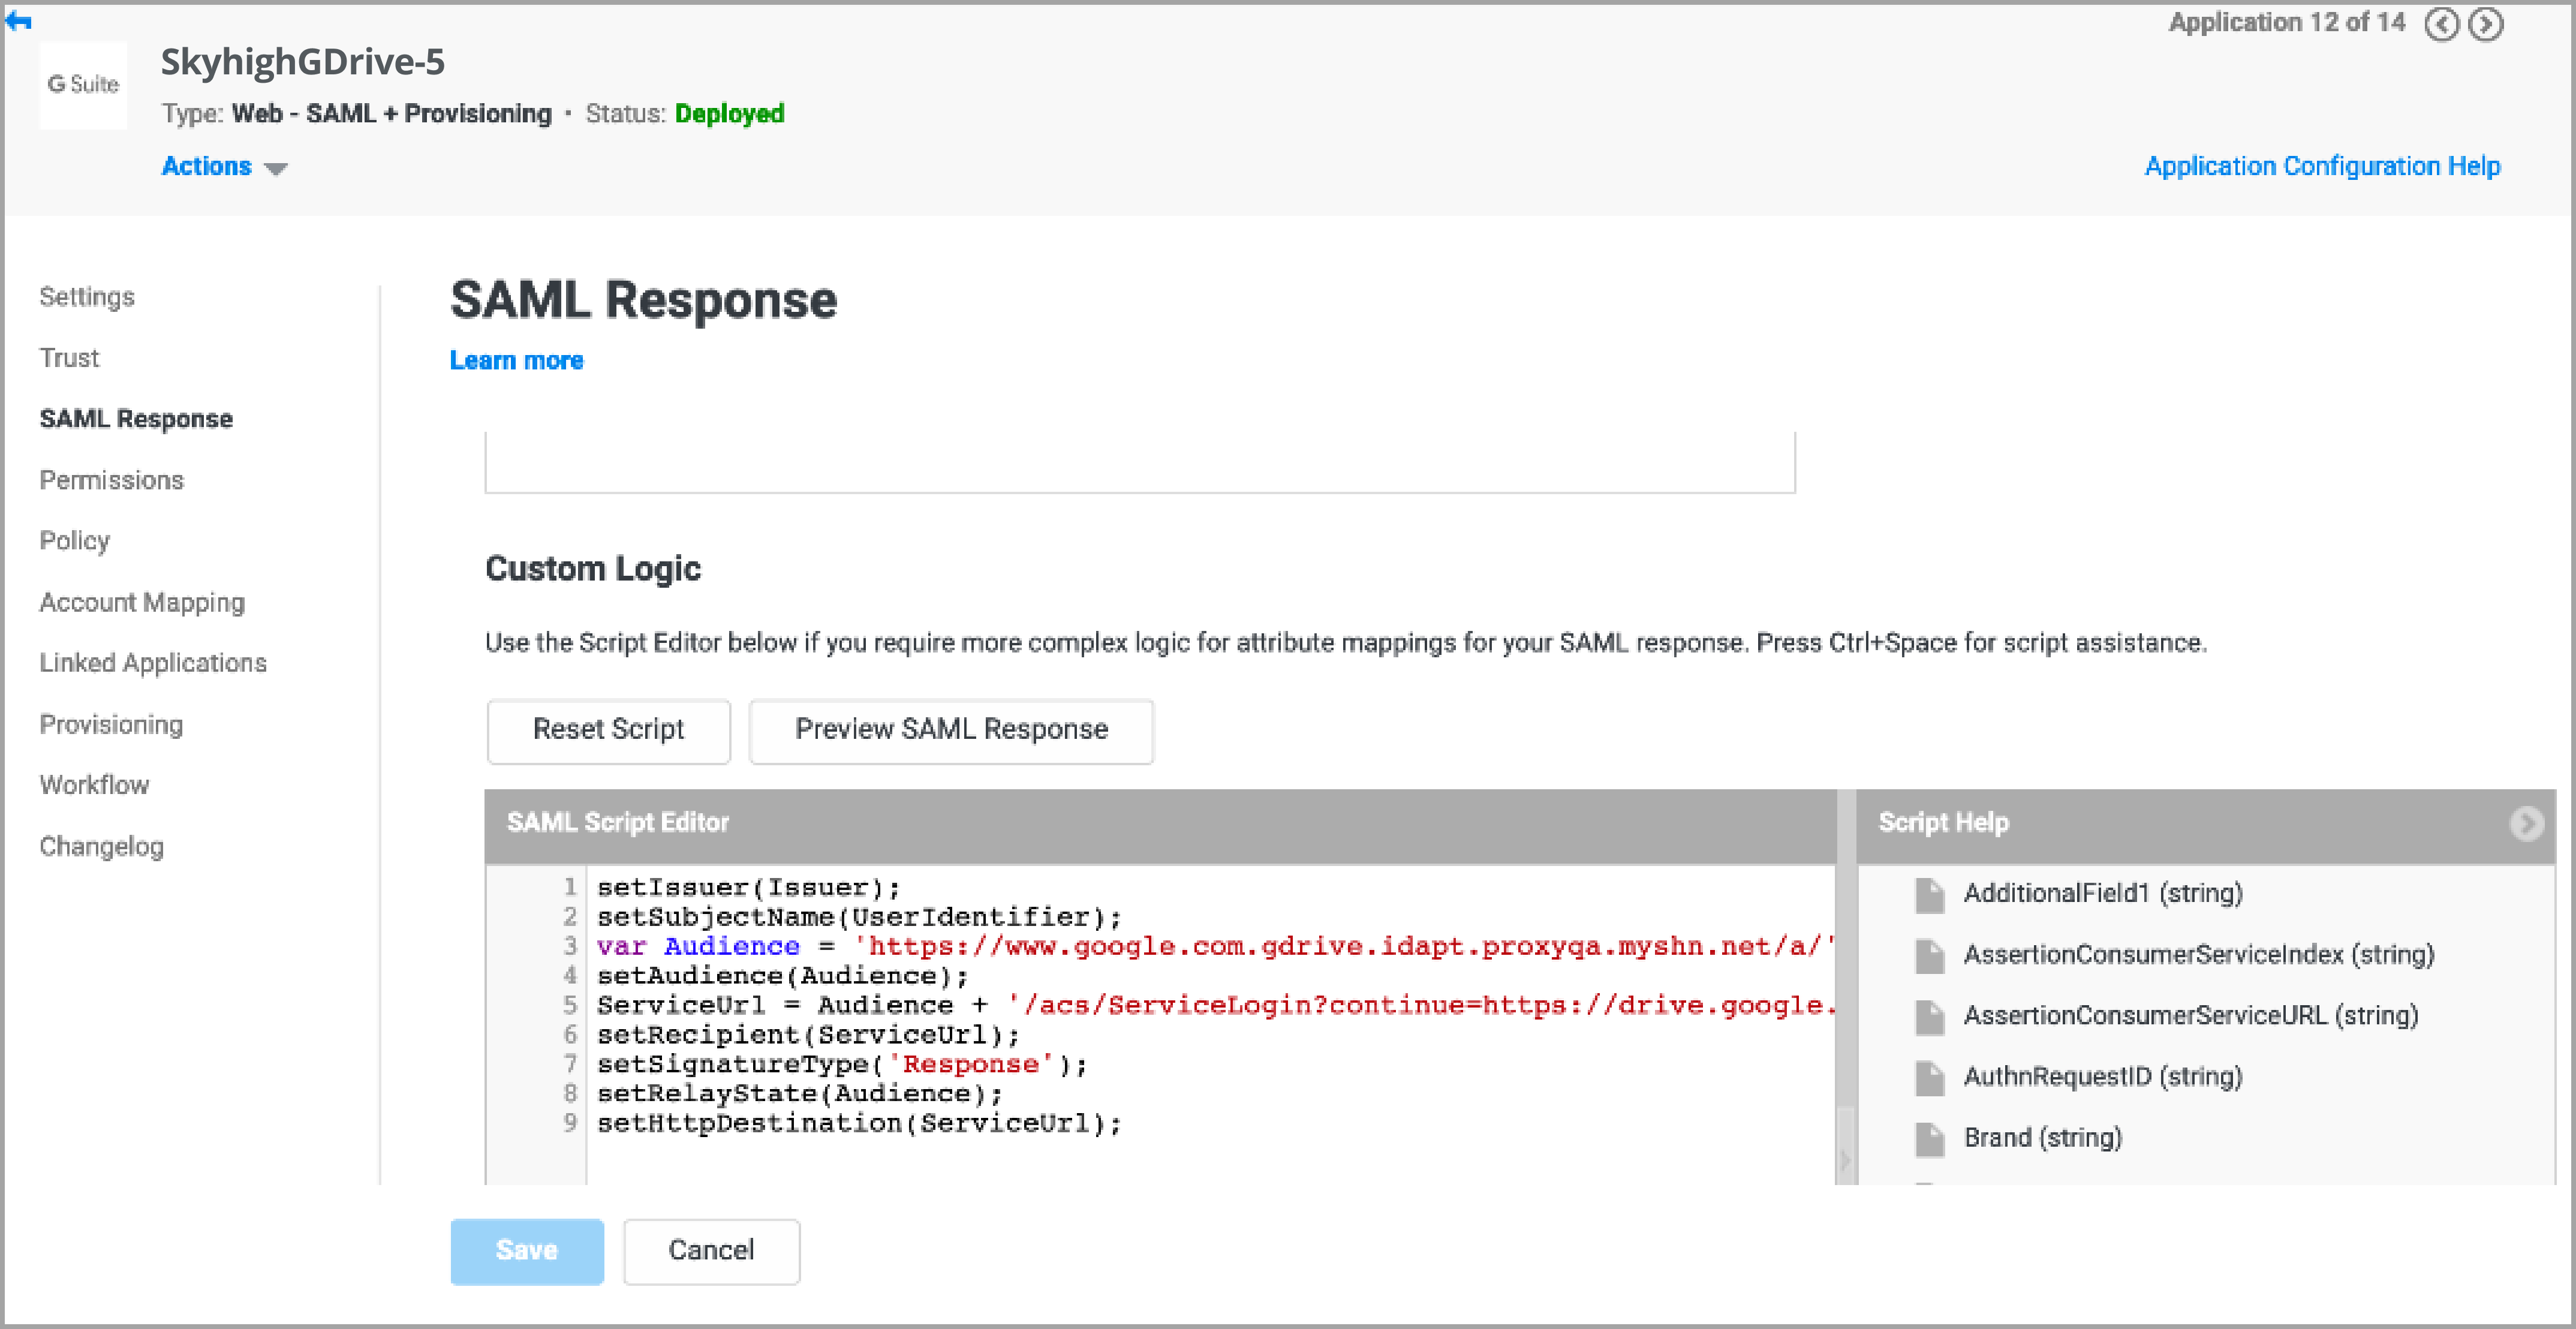
- Under Customer Logic, change the Audience and Service URL as listed:
- Existing Audience URL: var Audience = 'https://www.google.com/a/' + CorpIdentifier;
- Replace the existing Audience URL with the proxy vanity domain URL: var Audience = 'https://www.google.com.gdrive.idapt.proxyqa.myshn.net/a/' + CorpIdentifier;
- Existing Service URL: ServiceUrl = Audience + '/acs';
- Replace the existing Service URL with the proxy vanity domain URL: ServiceUrl = Audience + '/acs/ServiceLogin?continue=https://drive.google.com&shnsaml
- Click Save.
Step 3: Validate the SSO Via Proxy
- Log in to Idaptive using user credentials.
- Click G Suite listed on the homepage. You are redirected successfully to the G Drive application in a new tab. Check the address bar to confirm the access is via proxy.
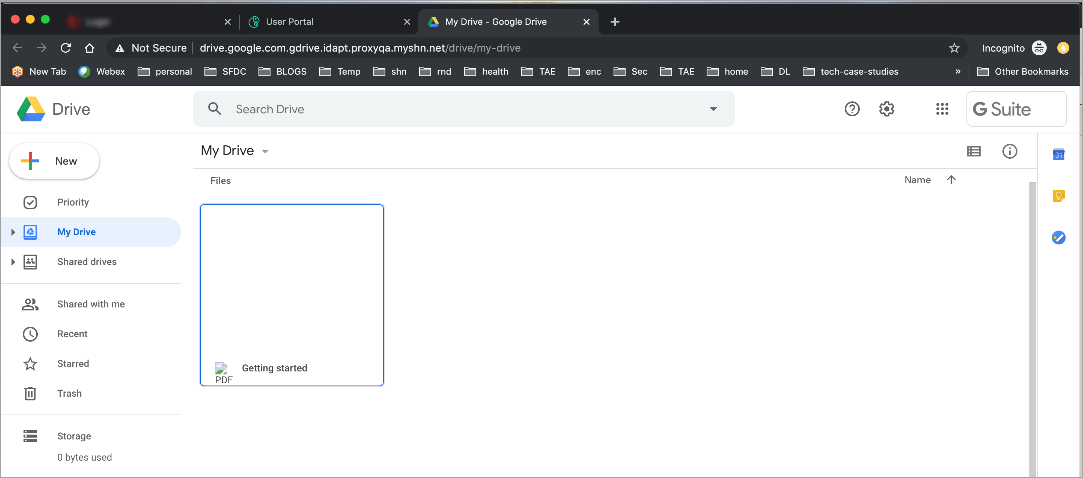
The address bar concludes that the SSO configuration via proxy is successful for Google Drive with Idaptive.
