SAP Concur SSO Integration with Microsoft Entra ID via Proxy
To integrate SAP Concur SSO with Microsoft Entra ID (formerly Azure AD) via Proxy, use the following procedure.
Prerequisites
Before you begin, make sure you have the following prerequisites:
- Admin access to Microsoft Entra ID IdP.
- Access to Skyhigh CASB and appropriate role or rights to manage the SAP Concur service.
- Admin access to SAP Concur.
Configure the SAML Proxy for SAP Concur
Perform the following activities to configure the SAML proxy for SAP Concur.
Step 1: Download the IdP Certificate from Microsoft Entra ID
- Log in to the Azure portal as an admin and go to Microsoft Entra ID > Enterprise Applications.
- Search for SAP Concur and add it. If it is not listed under Enterprise Applications, click + New application > search for SAP Concur > click Create.
- Click the SAP Concur app and select the Single Sign-On option to configure SSO.
- Click SAML.
- Under Set up Single Sign-On with SAML > Basic SAML Configuration section, click Edit.

- Under Basic SAML Configuration, configure the URIs based on the Users Concur instance and region. The instance name of the URI varies depending on the region. An example is shown below for URL format:
- Identifier (Entity ID). Enter the URL in the following format : https://<instance-name>concursolutions.com/saml2. For example: https://us-impl.api.concursolutions.com/saml2
- Reply URL (Assertion Consumer Service URL). Enter the URL in the following format: https://instance-name.concursolution...m/saml2/V1/acs. For example, https://www-us-impl.api.concursoluti.../saml2/V1/acs/
- Sign-on URL. Enter the URL in the following format: https://<instance-name>concursolutions.com/saml2. For example, https://us-impl.api.concursolutions.com/saml2
For details on the Concur Base URIs and regions, see Base URIs.
- Click Save.
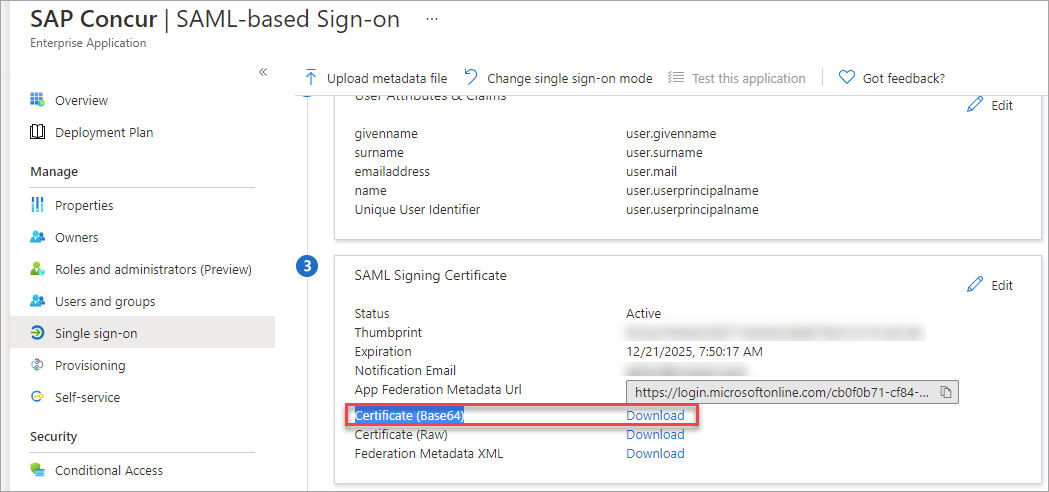
- Under SAML Signing Certificate, click the Certificate (Base64) Download link to download the IdP (Azure) certificate, then save it to your local folder. This is your IdP Certificate used to configure the SAML proxy in Skyhigh CASB.
Step 2: Download the SP Certificate from SAP Concur
- Log in to the SAP Concur portal as an admin with SSO permissions.
- Go to Administration > Company > Authentication Admin and click Manage Single Sign-On.
- Under the IdP Metadata section, select the existing IdP and view the metadata. Then export and save the metadata file to your local folder. This is your SP Certificate used to configure the SAML proxy in Skyhigh CASB.
Step 3: Configure SAML Proxy in Skyhigh CASB
- Log in to Skyhigh CASB.
- Go to Settings > Service Management.
- Select your SAP Concur instance from the Services list. (If no services are listed, contact Skyhigh Security Support for help.)
- Click the Setup tab, and under Proxy, click Get Started.

To create and configure the proxy for the SAP Concur instance, see Configure Proxy for SAP Concur.
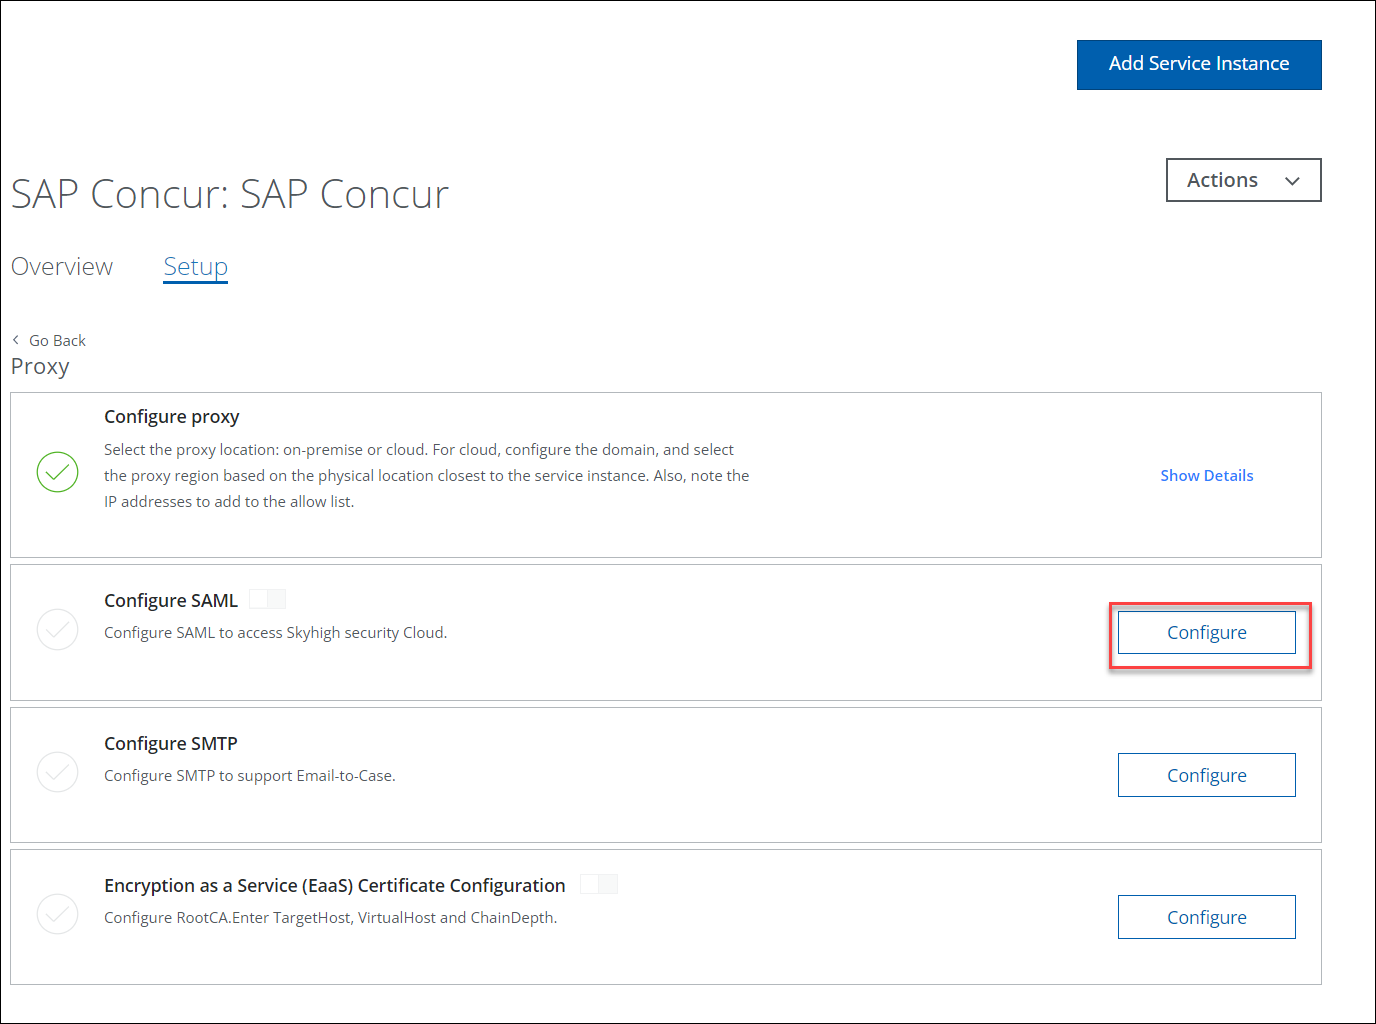
- Under Configure SAML, click Configure.
- Under Upload Identity Provider Certificate, upload the IdP Certificate downloaded earlier from Step 1 and click Next.
- Under Upload Service Provider Certificate, upload the SP Certificate downloaded earlier from Step 2 and click Next.
- Under Download SAML Certificate, download the Proxy Certificate and save it in your local folder. This certificate is used in Step 5.
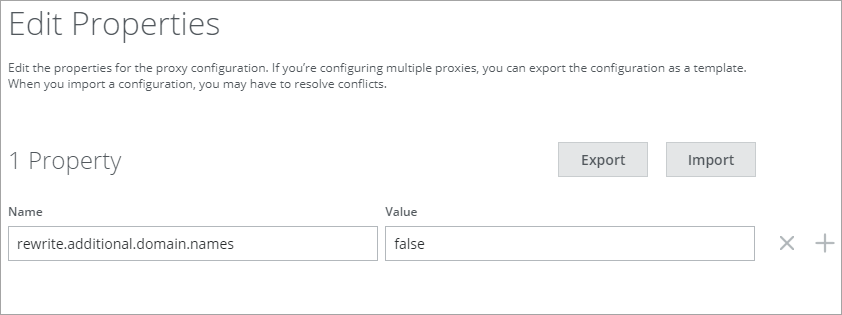
- Once the SAP Concur SAML proxy configuration is successful, go to Actions > Edit Properties and add the following Company ID property.
- Name: rewrite.additional.domain.names
- Value: False
Step 4: Configure SSO in Microsoft Entra ID
- Log in to the Azure admin portal.
- Go to Enterprise application > SAP Concur > Single Sign-on > SAML-based Sign-on.
- Click the pencil icon to edit Basic SAML Configuration. For Reply URL and Sign on URL, replace the Original URL (Concur domain) with the Proxy URL. For example,
- Reply URL (Assertion Consumer Service URL). Replace the original URL with the Proxy URL.
- Original URL: https://us-impl.api.concursolutions.com/saml2
- Modified Proxy URL: https://us-impl.api.concursolutions....yshn.net/saml2.
- Sign on URL. Replace the original URL with the Proxy URL.
- Original URL: https://www-us-impl.api.concursoluti.../saml2/V1/acs/
- Modified Proxy URL: https://us-impl.api.concursolutions..../saml2/V1/acs/
- Reply URL (Assertion Consumer Service URL). Replace the original URL with the Proxy URL.
Step 5: Add IdP Metadata in SAP Concur
SAP Concur allows only IdP configuration through metadata files. Before adding IdP metadata in Concur, make sure to modify the IdP metadata with the Skyhigh CASB Certificate and URLs.
Modify IdP Metadata with Skyhigh CASB Certificate and URLs
- Log in to the SAP Concur portal as an admin with SSO permissions.
- Go to Administration > Company > Authentication Admin and click Manage Single Sign-On.
- Under the IdP Metadata section, select the existing IdP and view the metadata. Then, proceed to export and save the current IdP.
- Create another copy of this backup file and open the exported backup IdP metadata file and modify these:
- Find the sections within the tags <X509Certificate> and </X509Certificate> and you might notice multiple sections with this tag. For each of these sections, replace the existing IdP Certificate with the Skyhigh CASB Proxy Certificate downloaded earlier to configure SAML Proxy in Step 3.
- Find all instances of the word HTTP-Redirect and replace them with the word HTTP-POST. You should replace two matches near the bottom of the metadata file.
- Notice at the bottom of the metadata file, there are three tag sections similar to:
- <SingleLogoutService … HTTP- POST … />
- <SingleSignOnService … HTTP- POST … />
- <SingleSignOnService … HTTP-POST … />
Here, delete one of the repeated line sections: <SingleSignOnService … HTTP-POST … />. Only one of the tags is required.
With the remaining two-line sections here, replace the quoted URL with the updated Skyhigh CASB proxy domain URL and ensure the replacement is in URL encoded format:
<Original protocol>://<proxy URL>/domain-access?shnsaml-request=<Original idP URL>/saml2
For example, <https://us-impl.api.concursolutions....hnsamlrequest=
https%3A%2F%2Flogin.microsoftonline.com%2F3c789172-fbb2-4850-b01c-c6a1b80e97fc%2Fsaml2
- Save the modified IdP Metadata file. This file is used in the next step, Add IdP Metadata.
Add IdP Metadata
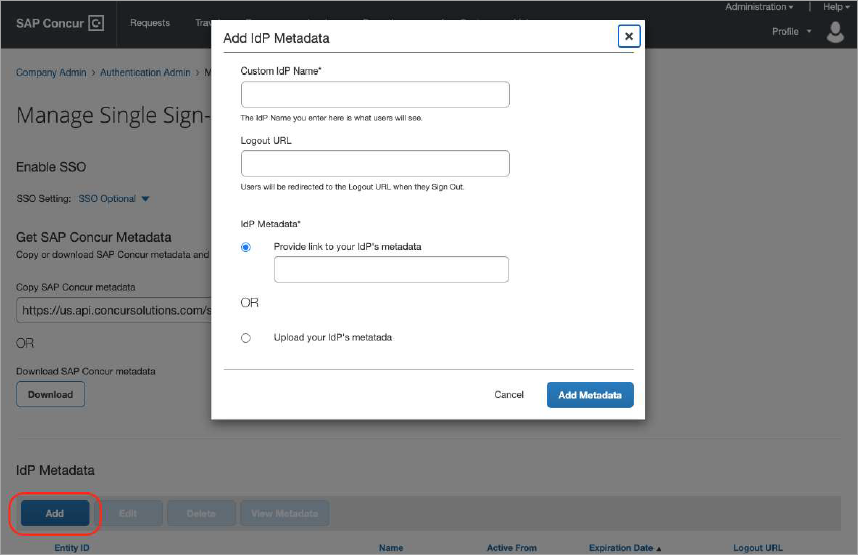
- Under the IdP Metadata section, click Add.
- Under Add IdP Metadata, configure these:
- Custom IdP Name. Enter a Custom IdP Name such as Skyhigh CASB.
- IdP Metadata. Either you can provide the IdP’s metadata link or upload your IdP’s metadata file modified and saved in the previous step Modify IdP Metadata.
Now an additional IdP (Skyhigh CASB) is added to Concur.
- Make sure the SSO Setting is set to Optional. This allows seamless fallback to the original IdP and can be adjusted as needed.