Configure Microsoft Entra ID SSO with ServiceNow
Use the following steps to configure Microsoft Entra ID (formerly Azure AD) Single Sign-On (SSO) with ServiceNow.
Prerequisites
Before you begin, make sure you have met the following prerequisites:
- A Microsoft Entra ID subscription. Activate the subscription from an Azure free account.
- A ServiceNow Single Sign-On (SSO) enabled subscription.
- For ServiceNow, an instance or tenant of ServiceNow, version Calgary or later.
- For ServiceNow Express, an instance of ServiceNow Express, Helsinki version, or later.
- Submit a Service Request to get the Multiple Provider Single Sign-On Plugin for the ServiceNow tenant.
- For automatic configuration, enable the multi-provider plugin for ServiceNow.
- Install the ServiceNow Classic (Mobile) application. To download the application, go to the appropriate store, search for the ServiceNow Classic application, then download it.
NOTE: The integration of Microsoft Entra ID with ServiceNow supports both the Microsoft Entra ID public cloud and Microsoft Entra ID US government cloud environment. Find the US Government cloud application in the Microsoft Entra ID US Government Cloud application gallery, and configure it similarly to the Microsoft Entra ID Public Cloud.
Configure Microsoft Entra ID SSO
Perform the following activities to configure the Microsoft Entra ID SSO:
Step 1: Add a New User using Microsoft Entra ID
- Log in to the Azure portal (https://portal.azure.com/) with your Azure subscription credentials.
- Click Microsoft Entra ID or search for Microsoft Entra ID in the Search bar.

- Go to Users > All Users > New user, and select Create new user.

- Enter the required user information under Basics, Properties, and Assignments tabs, then click Review + Create.

NOTE: Make sure to copy the User principal name and Password for later use. For example, User principal name: SNOWSSO@shnhydqa.onmicrosoft.com and Password: Test_Entra_890
The user is created and added to your Microsoft Entra ID.
Step 2: Configure ServiceNow SSO in Microsoft Entra ID
- Log in to the Azure portal (https://portal.azure.com/).
- Click Microsoft Entra ID > Enterprise Application and search for ServiceNow in the Search bar.
- Select the ServiceNow application and click Create.

You are redirected to the ServiceNow application page.
- Under Manage > Single sign-on, select Set up single sign on.

- Select SAML.

- Under Set up Single Sign-On with SAML, click Edit.

- Under Basic SAML Configuration, configure the following fields.
- Identifier (Entity ID). Enter the URL in the following format: https://<instance-name> service-now.com.
- Reply URL (Assertion Consumer Service URL). Enter the URL in the following format: https://instancename.service-now.com/navpage.do.
- Sign on URL. Enter the URL in the following format: https://instance.servicenow.com/logi...?glide_sso_id=<sys_id of the SSO configuration>
- Click Save.
- Under Attributes & Claims and SAML Certificate, click Edit. Configure the required fields and save the configuration.

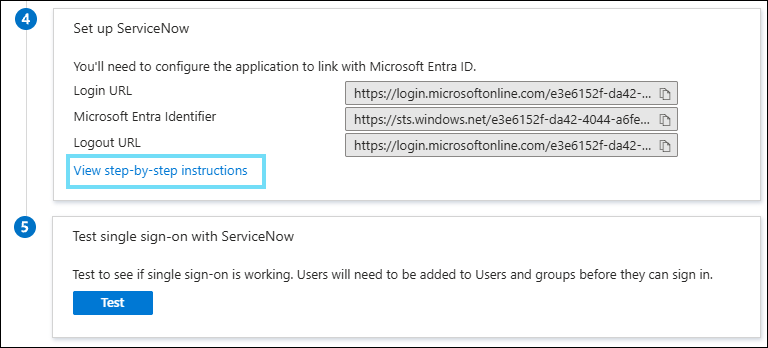
- To configure ServiceNow for SAML-based authentication automatically from Microsoft Entra ID, enable the following service:
- Under Set up ServiceNow, click View step-by-step instructions to open the Configure sign-on window.
- In the Configure sign-on form, enter your ServiceNow instance name, admin user name, and admin password, and click Configure Now.
- In the Configure sign-on form, enter your ServiceNow instance name, admin user name, and admin password, and click Configure Now.
- Under Set up ServiceNow, click View step-by-step instructions to open the Configure sign-on window.
NOTE: Once you have saved the SSO configuration, an Identifier is created automatically in ServiceNow Identity Provider.
Step 3: Configure ServiceNow SSO
- Log in to ServiceNow as an admin.
- Find the plugin Integration - Multiple Provider Single Sign-On Installer in the Search bar, and install.
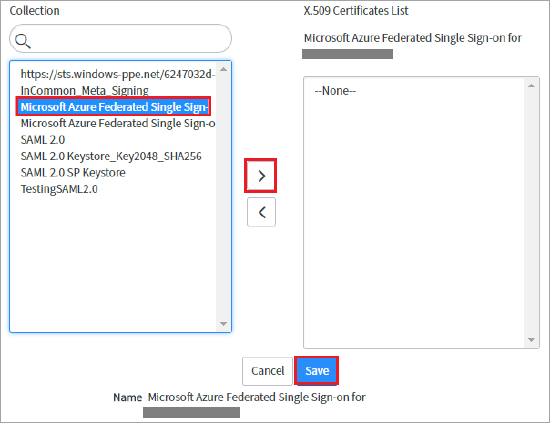
- Select the Microsoft Azure ServiceNow instance and click the right arrow icon to add it to the Certificates List.
- Click Save.
- At the upper-right corner of the page, click Test Connection.

- If the Test Connection fails to activate the connection, ServiceNow provides the override switch. Configure the following details:
- Enter Sys_properties.list in the search bar, and you are redirected to the System Properties page.
- Create a property and enter a name as glide.authenticate.multisso.test.connection.mandatory. Set the data type to True/False and set the value to False.

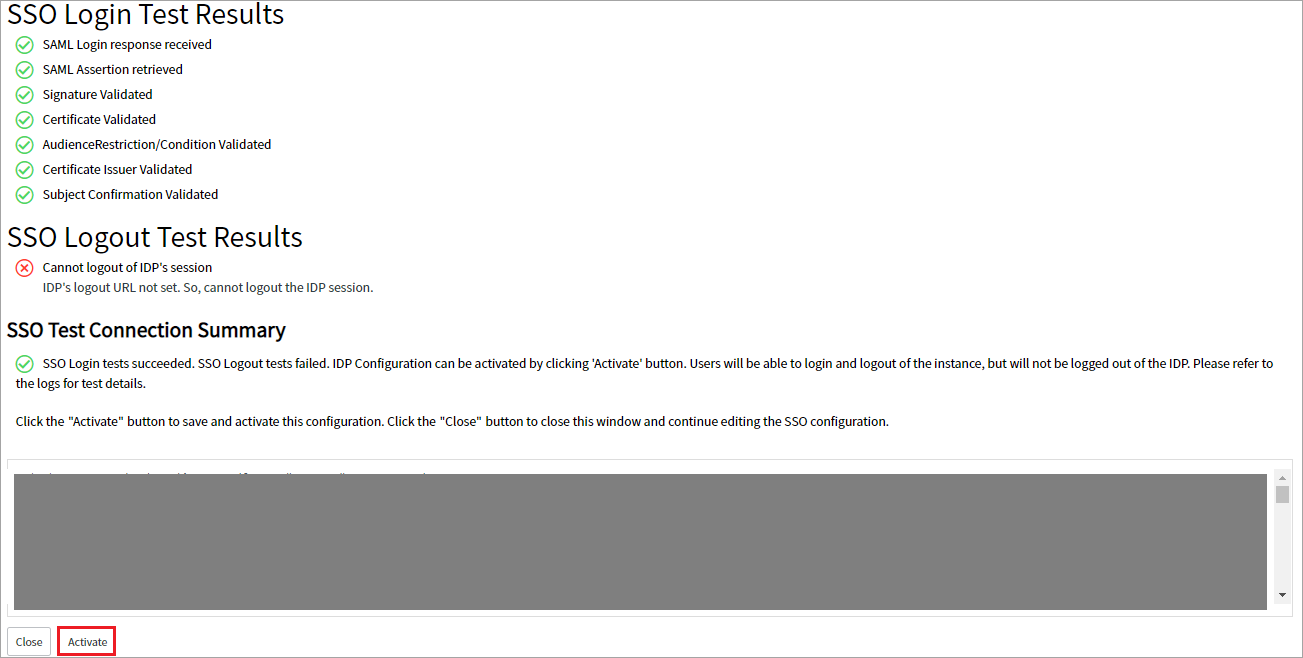
- If prompted for credentials, enter the credentials, and you are redirected to the following page. The SSO Logout Test Results display an error. Ignore the error and click Activate.
- Log in to the ServiceNow instance using the external login. You are redirected to the Office 365 page to provide your Microsoft Entra ID credentials.
Step 4: Configure Proxy for ServiceNow
Before configuring a proxy for ServiceNow, integrate ServiceNow with Microsoft Entra ID using the ServiceNow Microsoft Entra ID tutorial.
To configure a proxy for ServiceNow:
- Log in to the Azure portal.
- Go to Enterprise applications > All applications > ServiceNow > Single Sign-On > SAML-based sign-on.
- Under Basic SAML Configuration, click Edit to replace the Reply URL (ACS URL) and Sign on URL with https://www<proxy url>/navpage.do?shnsaml. Click Save.

- Log in to the ServiceNow instance as an admin. To log in, use the ServiceNow instance integrated with Microsoft Entra ID. For example, https://<instance-id>.service-now.com/side_door.do.
- Go to Multi-Provider SSO > Identity Provider and select the configured IdP created earlier.
- Replace the ServiceNow Homepage URL with https://www<proxy url>/navpage.do?shnsaml and click Update.

- Validate both IdP-initiated login and SP-initiated login.
- For IdP-initiated login, install the My Apps Secure Sign-in extension in your browser or go to https://myapps.microsoft.com for authentication and select the ServiceNow application in the application list.
- For SP-initiated login, use external login with Azure user credentials.