Integrate Skyhigh CASB for Salesforce with ADFS and SAML Proxy
You can configure Single Sign-On using ADFS for Salesforce and the Skyhigh CASB SAML proxy.
As Salesforce issues an Assertion Consumer Services (ACS) in the SAML request to the identity provider (IdP), you must use the SAML proxy for both the SAML request from Salesforce and the SAML assertion from ADFS.
NOTE: An ACS is really where the service provider (SP) wants to receive the SAML assertion. It is a web-based service that waits to receive SAML formatted messages. It is sometimes also referred to as a login URL or an endpoint.
Other terms used in this topic:
- SP. The Service Provider.
- IdP. The Identity Provider.
- Entity. This is what the SP calls itself when it presents the request to the IdP. The IdP must have a record of the entity to accept the request.
- Issuer. This is what the IdP calls itself when it presents its assertions to the SP. The SP must have a record of the issuer to accept the response.
Workflow
Configuration Before Skyhigh CASB

Configuration After Skyhigh CASB

NOTE: for some services like Office 365, it is not necessary for Skyhigh CASB to proxy the SAML request. For Salesforce, however, this is required as SFDC includes their ACS in their SAML request. Skyhigh CASB needs to change this before it gets to the IdP, otherwise the SAML response will bypass Skyhigh CASB.
Prerequisites
The following prerequisites are required:
- Add a Salesforce instance with a vanity domain.
- Configure the Skyhigh CASB reverse proxy for Salesforce (without SSO).
- A functioning ADFS server that is publicly available on the Internet with a valid SSL certificate and DNS resolvable hostname.
- User(s) in AD and in Salesforce that line up. (There is no automated user provisioning in this configuration.)
Collect the Required Information
Collect the following information from Skyhigh CASB and Salesforce:
- Skyhigh CASB Salesforce reverse proxy domain alias.
- Skyhigh CASB SAML proxy certificate.
- Salesforce vanity domain. In Salesforce, go to Setup > Domains.

- Salesforce request signing certificate. In Salesforce, go to Setup > Certificate and key management, then download the certificate.

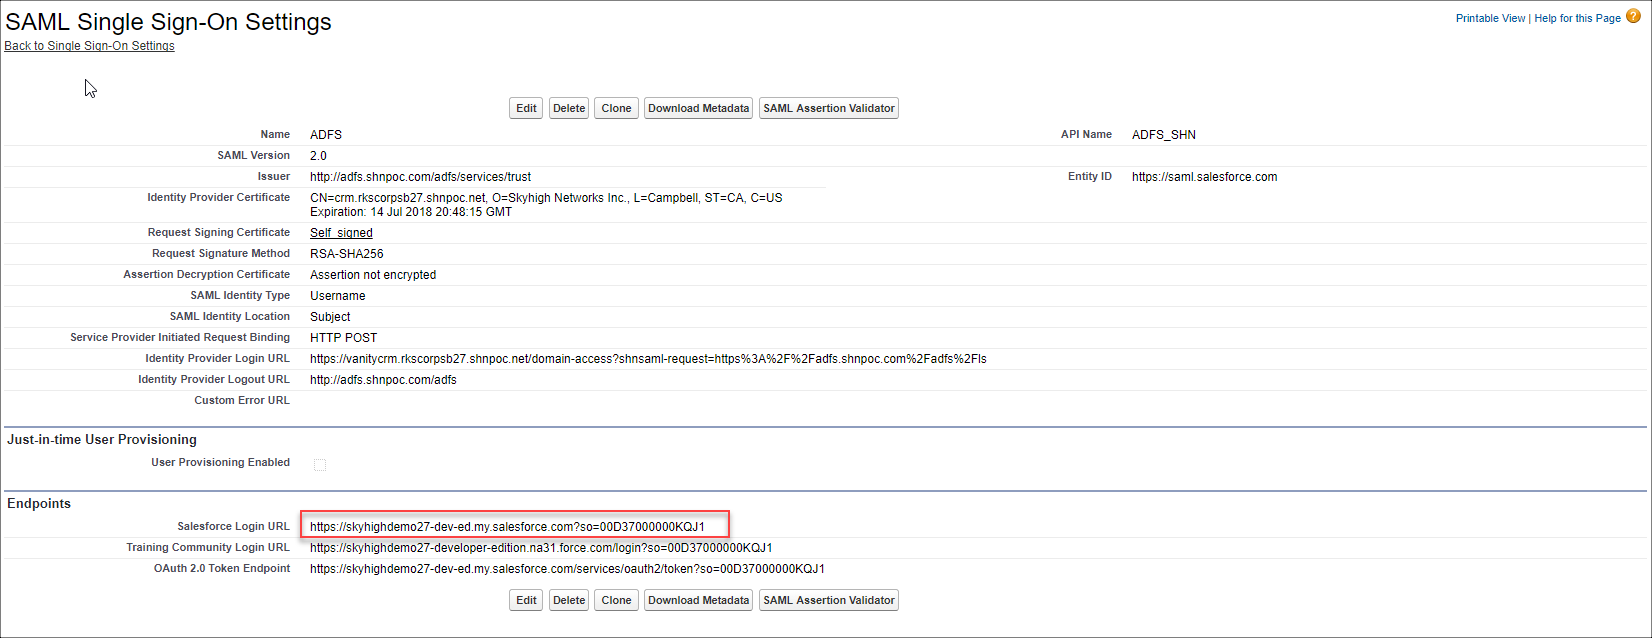
- Salesforce Login URL. In Salesforce, go to Setup > Single Sign On.
- ADFS SAML 2 endpoint. This is where the SAML request will be sent (via the SAML proxy). https:// <ADFS FQDN> + /adfs/ls
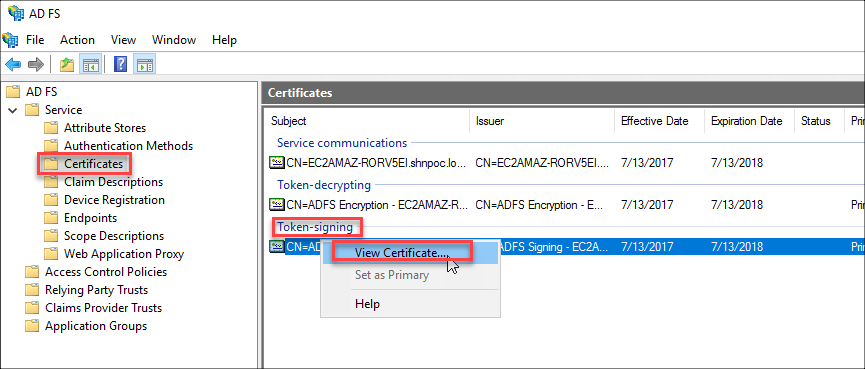
- ADFS token signing certificate. In ADFS, go to Certificates > Token signing > View Certificate. Then select the Details tab, and export to file. Export to base 64.
- ADFS federation service identifier (issuer). In ADFS, right-click ADFS > Service and select Edit Federation Service Properties.
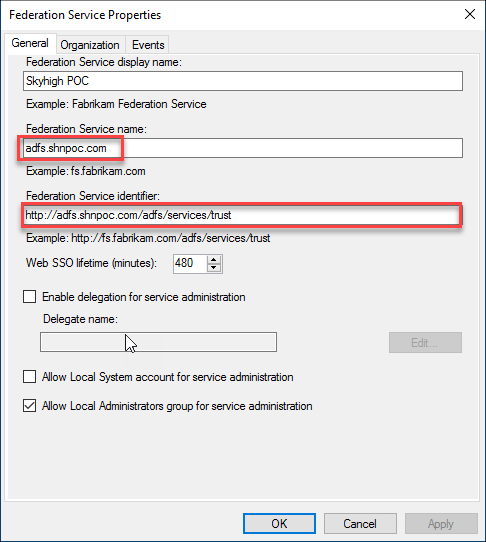
NOTE: Make sure the federation service name matches the FQDN of the public DNS record and SSL cert.
Configure Skyhigh CASB
- Log in to Skyhigh CASB and go to Settings > Service Management. Select your Salesforce instance.
- Find the Reverse Proxy Properties.
- Either make sure you already have, or add a custom.domain property that maps to your Salesforce vanity domain. You will use this value later, just remember the last part of the property name (vanity) and not the entire property name (custom.domain.vanity).
NOTE: You should only configure one custom.domain.XXXX property with the value of your vanity Salesforce domain. If you have >1 property with this configured, you will need a separate ADFS endpoint for EACH property set to the vanity domain.
- Configure the SAML proxy.
Configure Salesforce
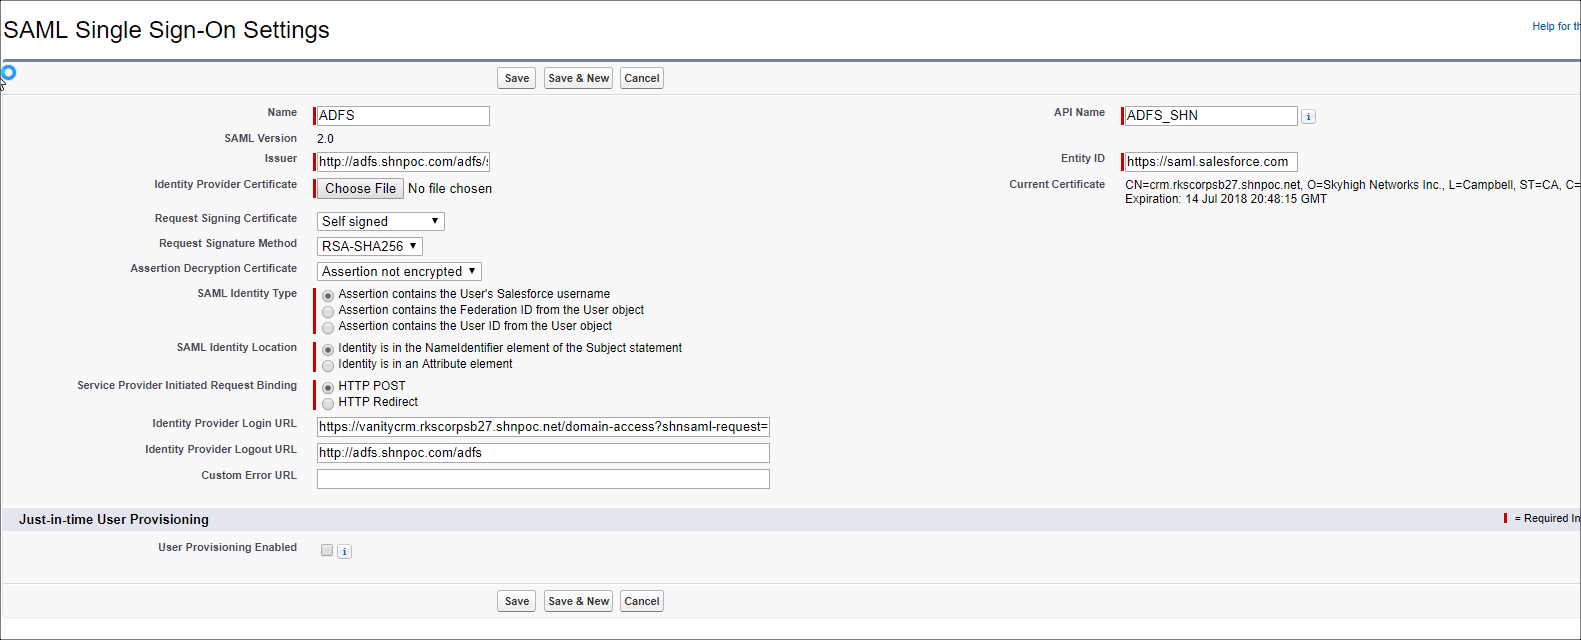
- Create a new SSO configuration (settings > single sign-on)
- Issuer. ADFS Federation Service Identifier (example: http://adfs.shnpoc.com/adfs/services/trust)
- Identity provider certificate. The Skyhigh CASB SAML proxy certificate
- Request a signing certificate. The certificate you exported from SFDC and uploaded to Skyhigh CASB SAML proxy as the service provider cert
- Request signature method. RSA-SHA1
- Entity ID. https://saml.salesforce.com
- Identity provider login URL. <vanity mapping><Skyhigh CASB Salesforce reverse proxy domain alias>/domain-access?shnsaml-request=<URL encoded version of the ADFS login endpoint>
- Example: vanitycrm.rkscorpsb27.shnpoc.net/domain-access?shnsaml-request=https%3A%2F%2Fadfs.shnpoc.com%2Fadfs%2Fls
- Identity provider logout URL. <FQDN ADFS>/adfs
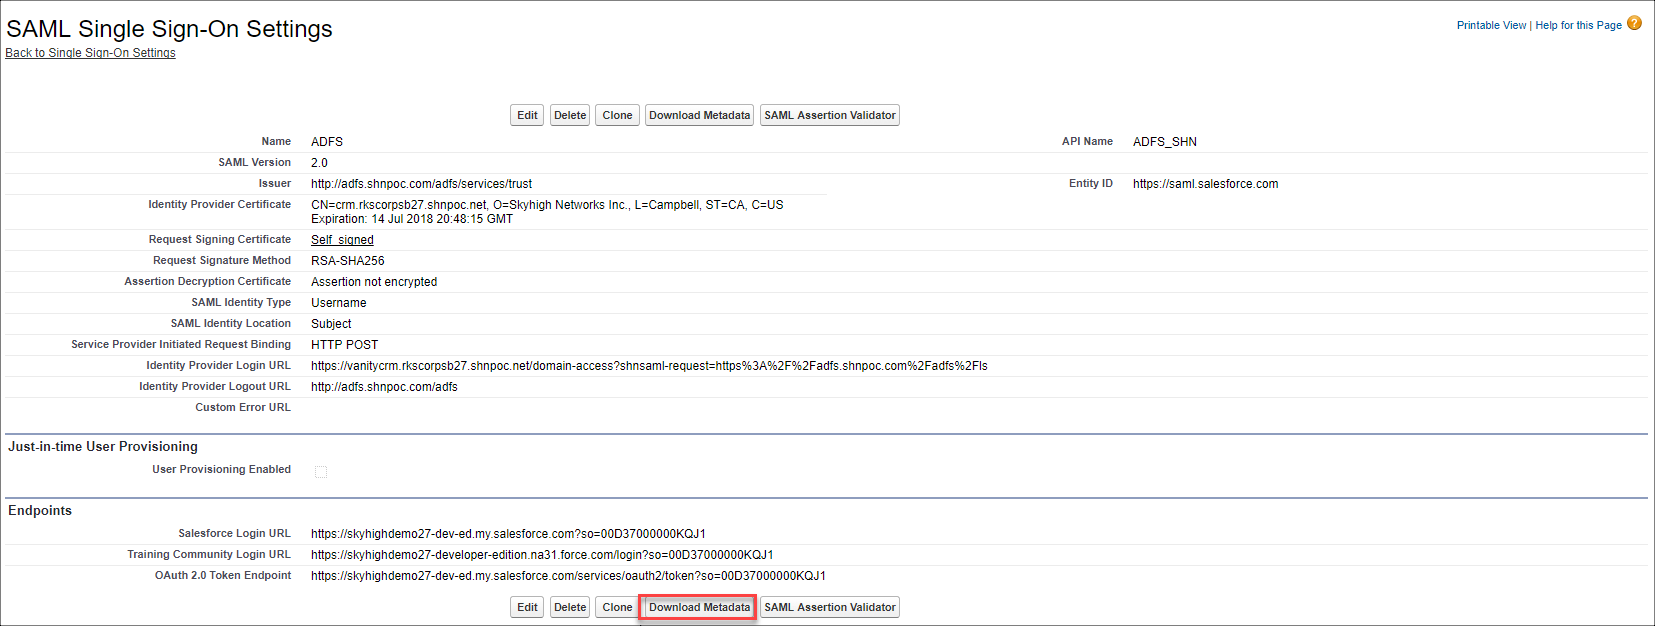
- Download the SFDC SSO metadata.
Configure ADFS
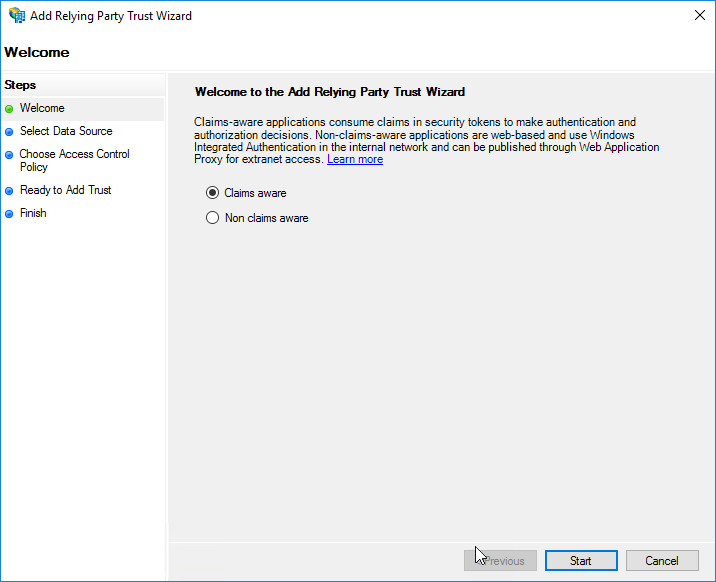
- Create a new Relying Party Trust.
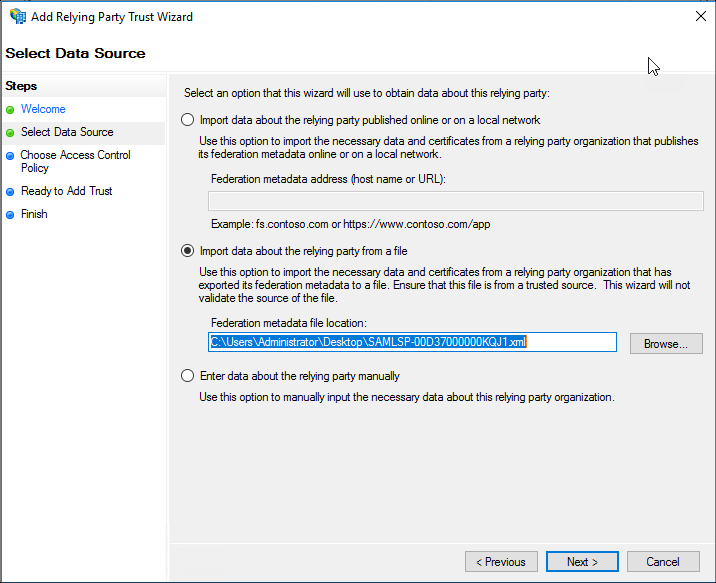
- Upload the SFDC metadata file.
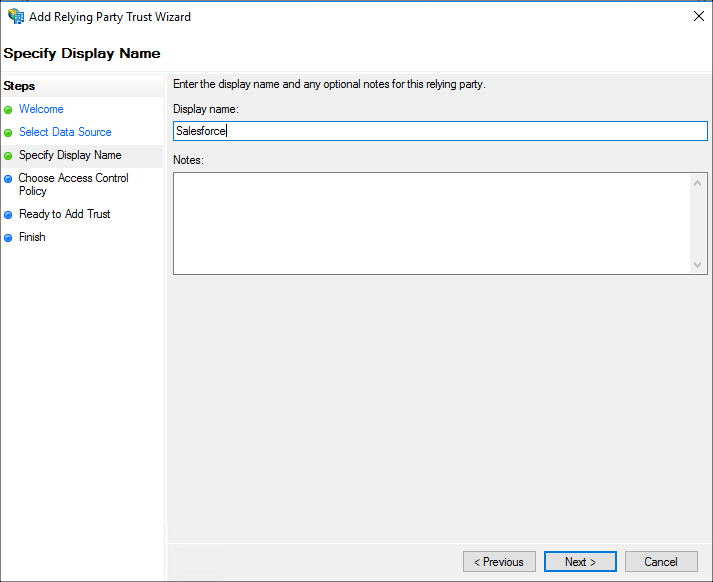
- Enter a display name.
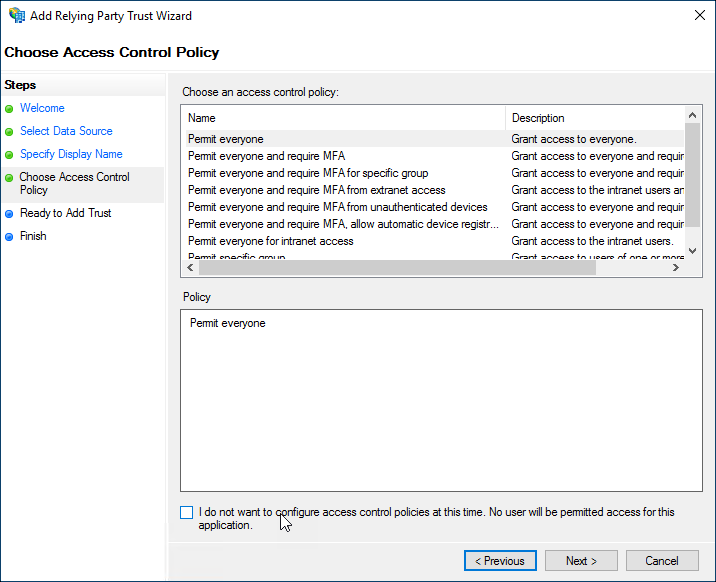
- Permit everyone to use this app.
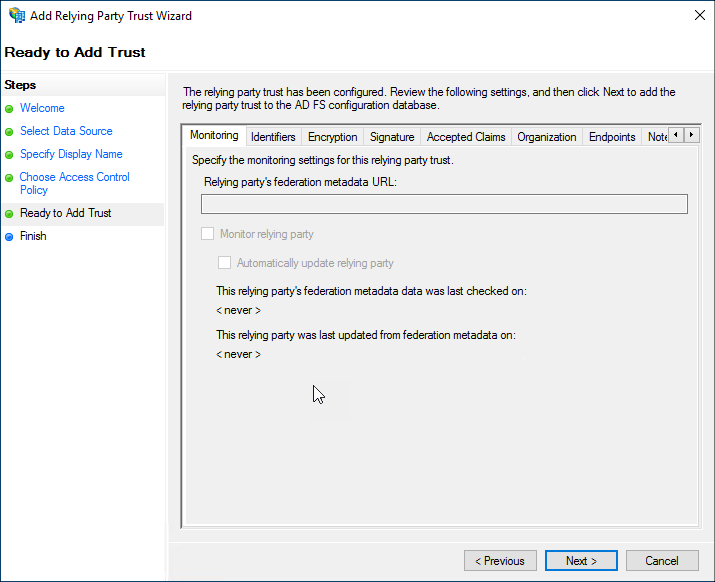
- Hit next after verifying the data that has been imported using the metadata file.
- Edit the new app's properties.

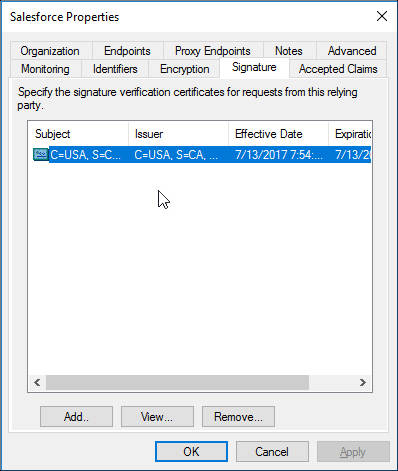
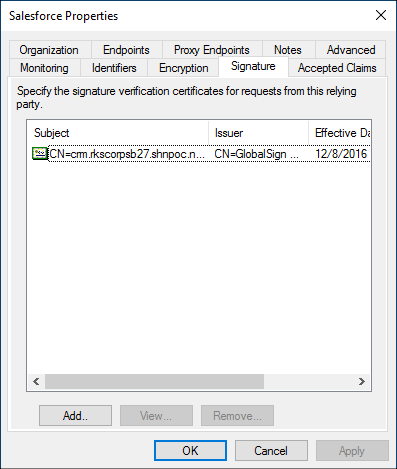
- On the signatures tab, delete the Salesforce certificate and replace it with the SAML proxy certificate.
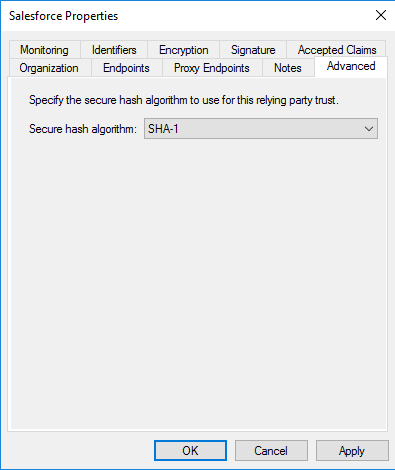
- On the advanced tab select SHA1.
- On the Endpoints tab, edit the edit the endpoint as follows:
- Original: skyhighdemo27-dev-ed.my.salesforce.com?so=00D37000000KQJ1
- New: vanitycrm.rkscorpsb27.shnpoc.net?so=00D37000000KQJ1&shnsaml
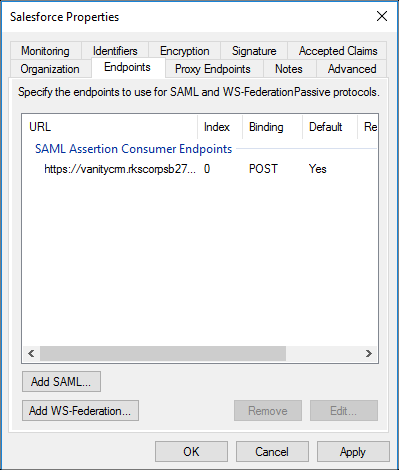
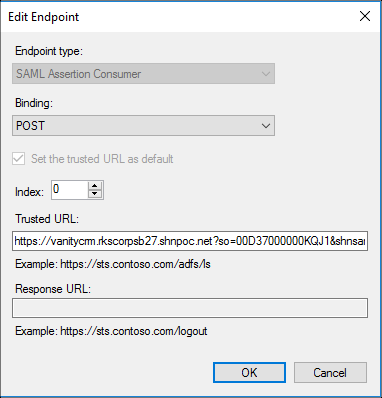
NOTE: vanitycrm will map to the custom.domain.vanity value you added earlier in the reverse proxy properties. This allows the SAML proxy to receive the SAML assertion from ADFS and then forward it onto the vanity URL in Salesforce.
- Edit the Claim Issuance Policy (or edit the Claim Rule - same thing just Microsoft change the name).
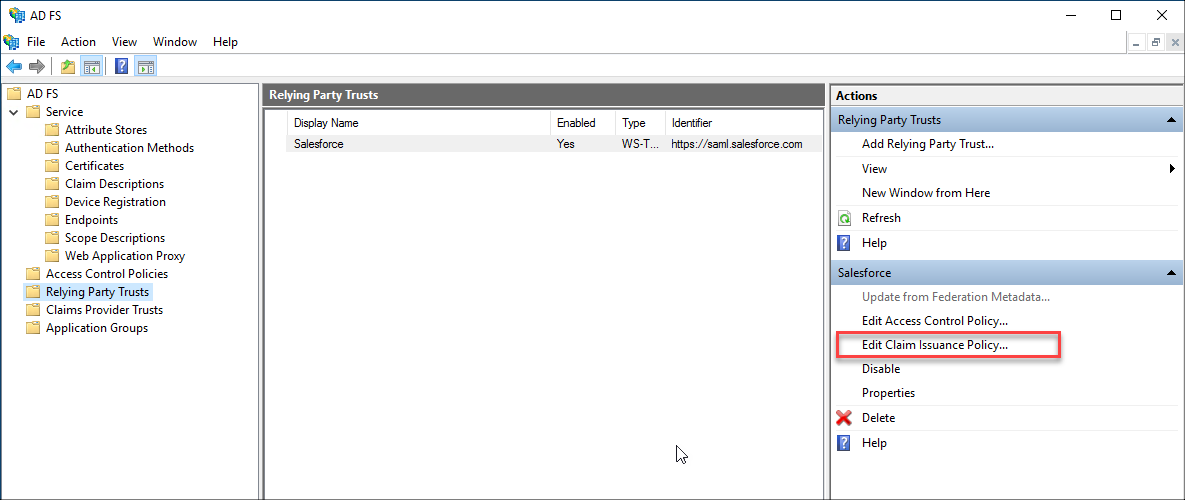
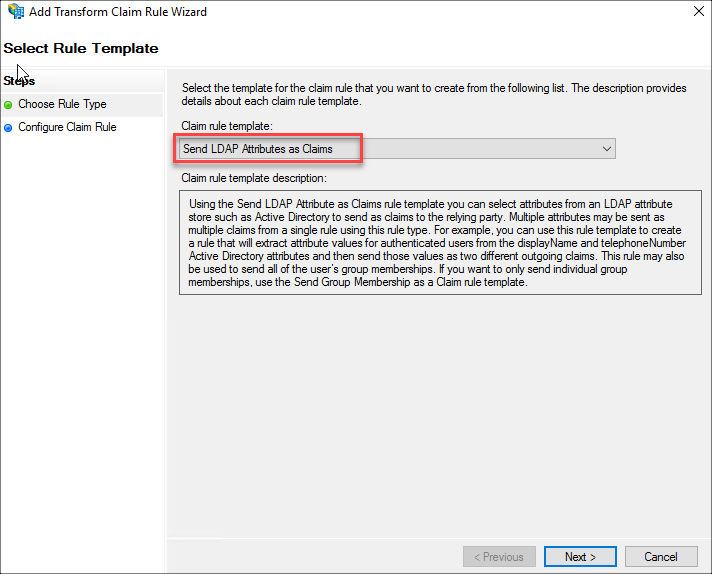
- Select Add Rule and configure the following:
- Send LDAP attributes as claims
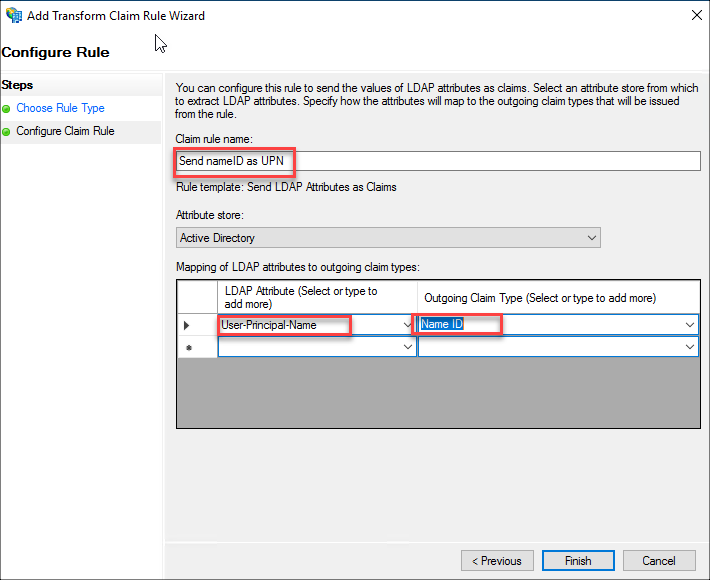
- Name. Send nameID as UPN.
- Attribute store. Active Directory.
- Mapping. User-Principal-Name = Name ID
- Send LDAP attributes as claims
Testing
If you don't already have a SAML decoder, download this one: https://chrome.google.com/webstore/d...bojelbhm?hl=en
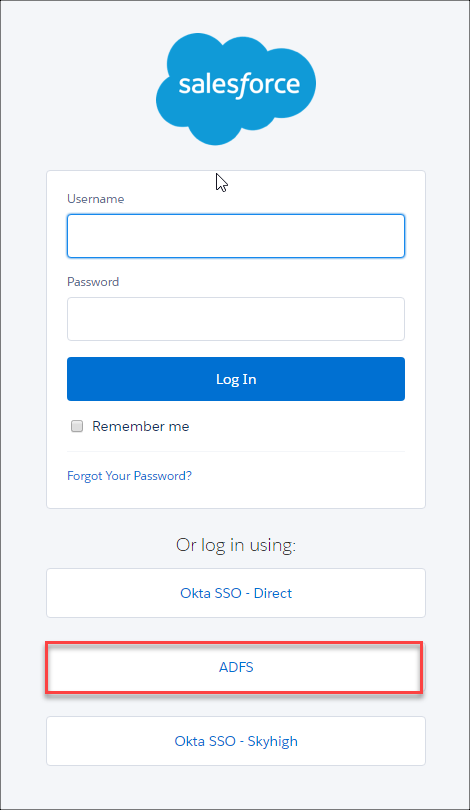
- Connect to your Salesforce instance and login using SSO (ADFS profile).
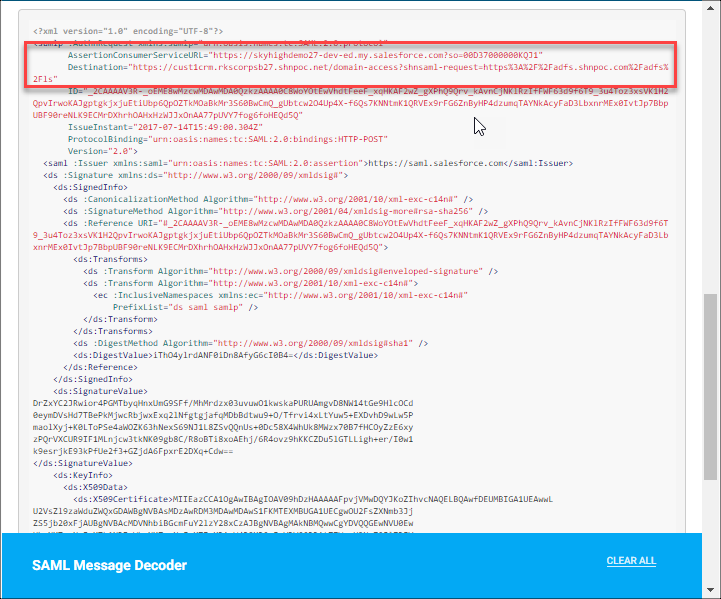
- With your SAML decoder, review the first SAML request. This is the one from SFDC to the SAML proxy.
- AssertionConsumerServiceURL. Direct to SFDC
- Destination. Skyhigh CASB SAML proxy
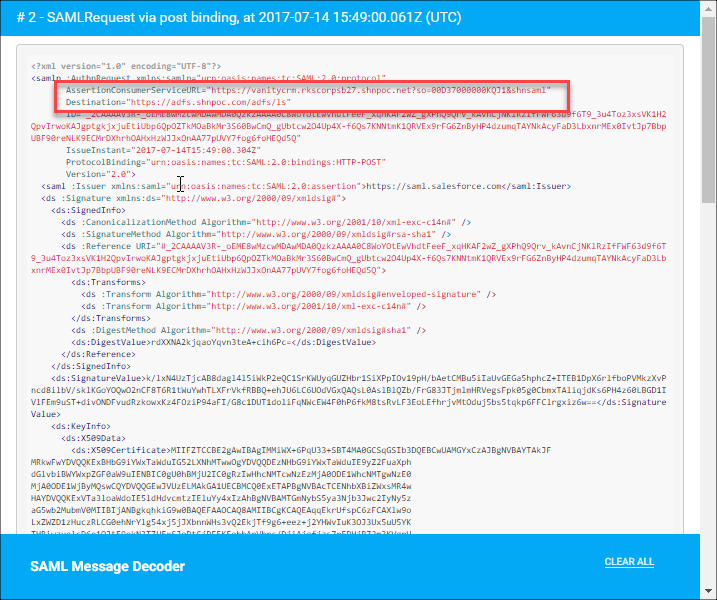
- Review the second SAML request, this is the one the SAML proxy has rewritten and the one ADFS receives.
- AssertionConsumerServiceURL. Skyhigh CASB Reverse Proxy
- Destination. ADFS
- Log in using your ADFS account. Remember, you must have the same user in SFDC as well.
- Post login you should be directed to SFDC via the Skyhigh CASB reverse proxy.

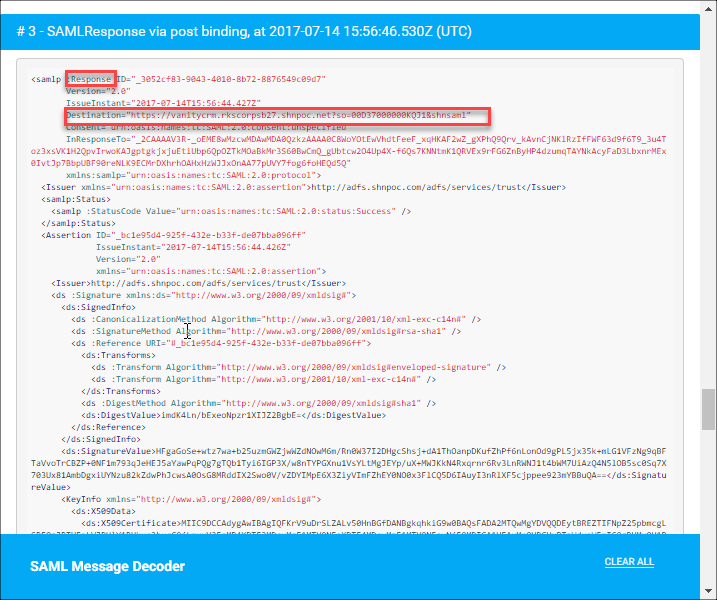
- Review the SAML response. Destination is the Skyhigh CASB reverse proxy.
