Step 2: Upload the Skyhigh CASB App to the App Catalog
In this step, you'll add the Skyhigh CASB Security Integrator app.
Prerequisites
- To perform the following steps, the user must be a Site Collection admin for the App Catalog site.
- You must also have an Outlook license, because during the app installation, the App Approval email is sent to all App Catalog admin’s email.
- Add the account to the Site Collection Admin in order to receive and approve app requests via email. Only accounts added in the Site Administrator section receive approval request emails.
If the user is not site collection admin for the App Catalog site, add the user to the admin list for the App Catalog site.
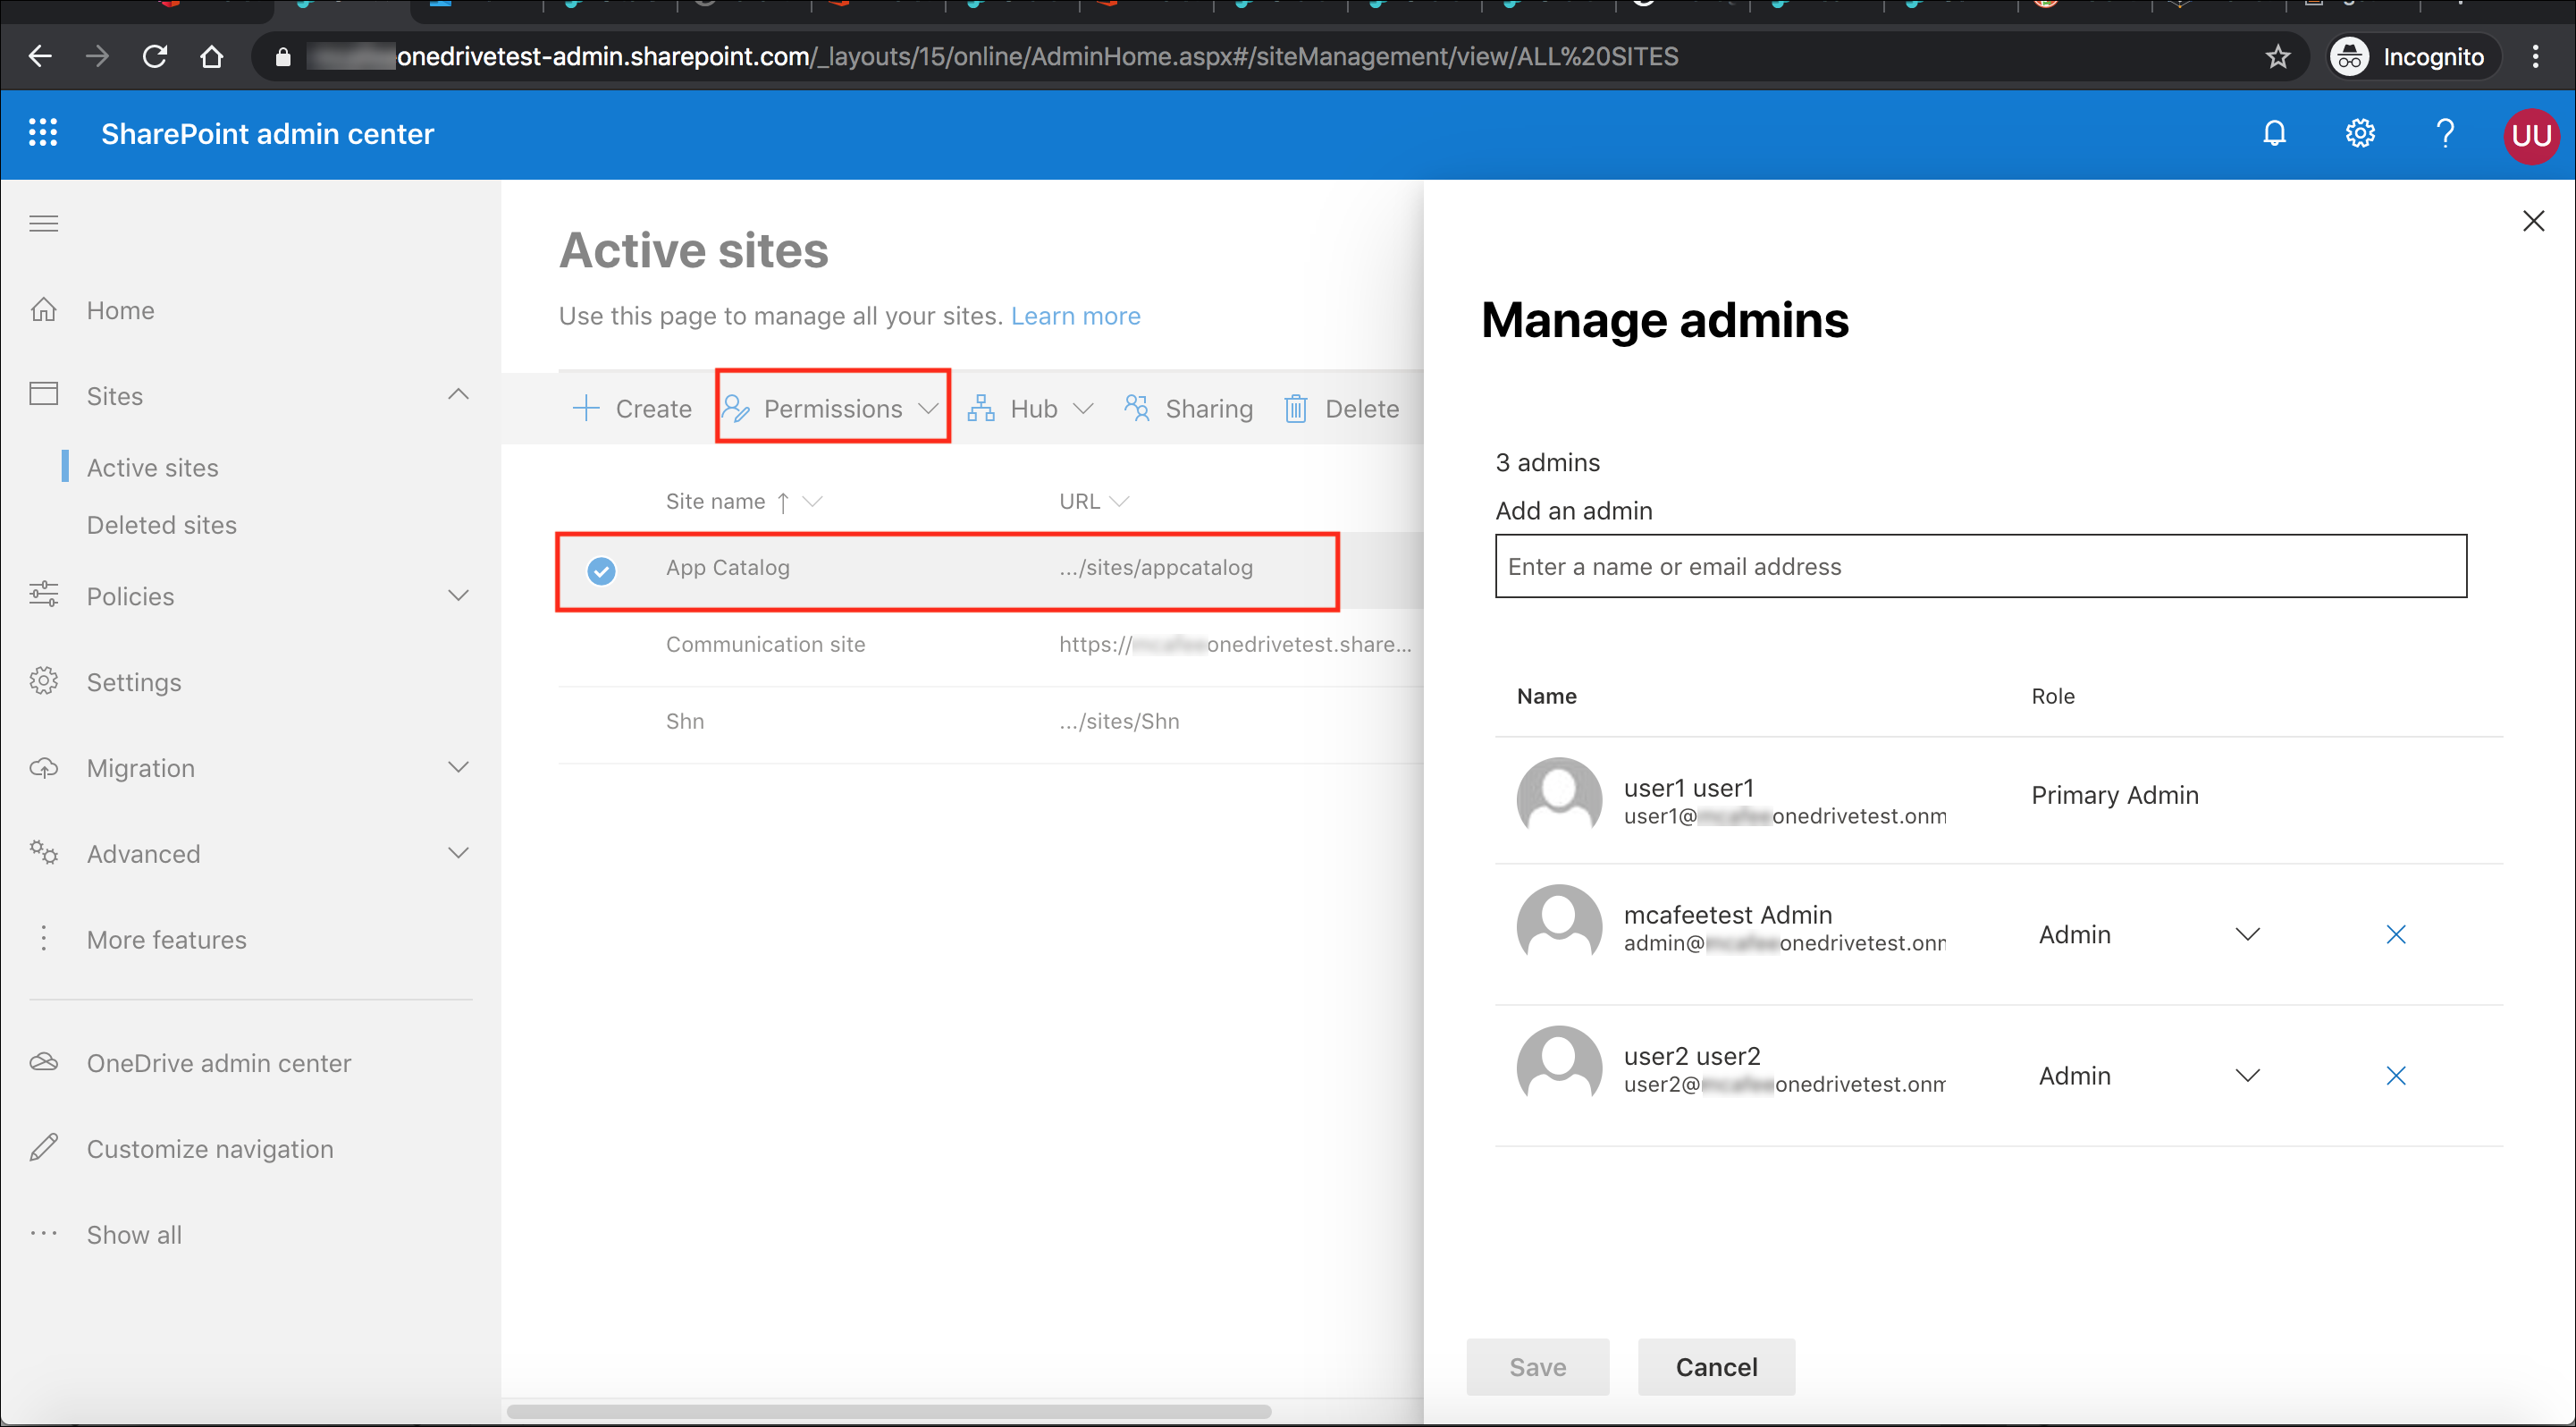
- Go to the SharePoint Admin center. Select the App Catalog > Permissions > Manage Admins, and add the user as a Site Collection admin.
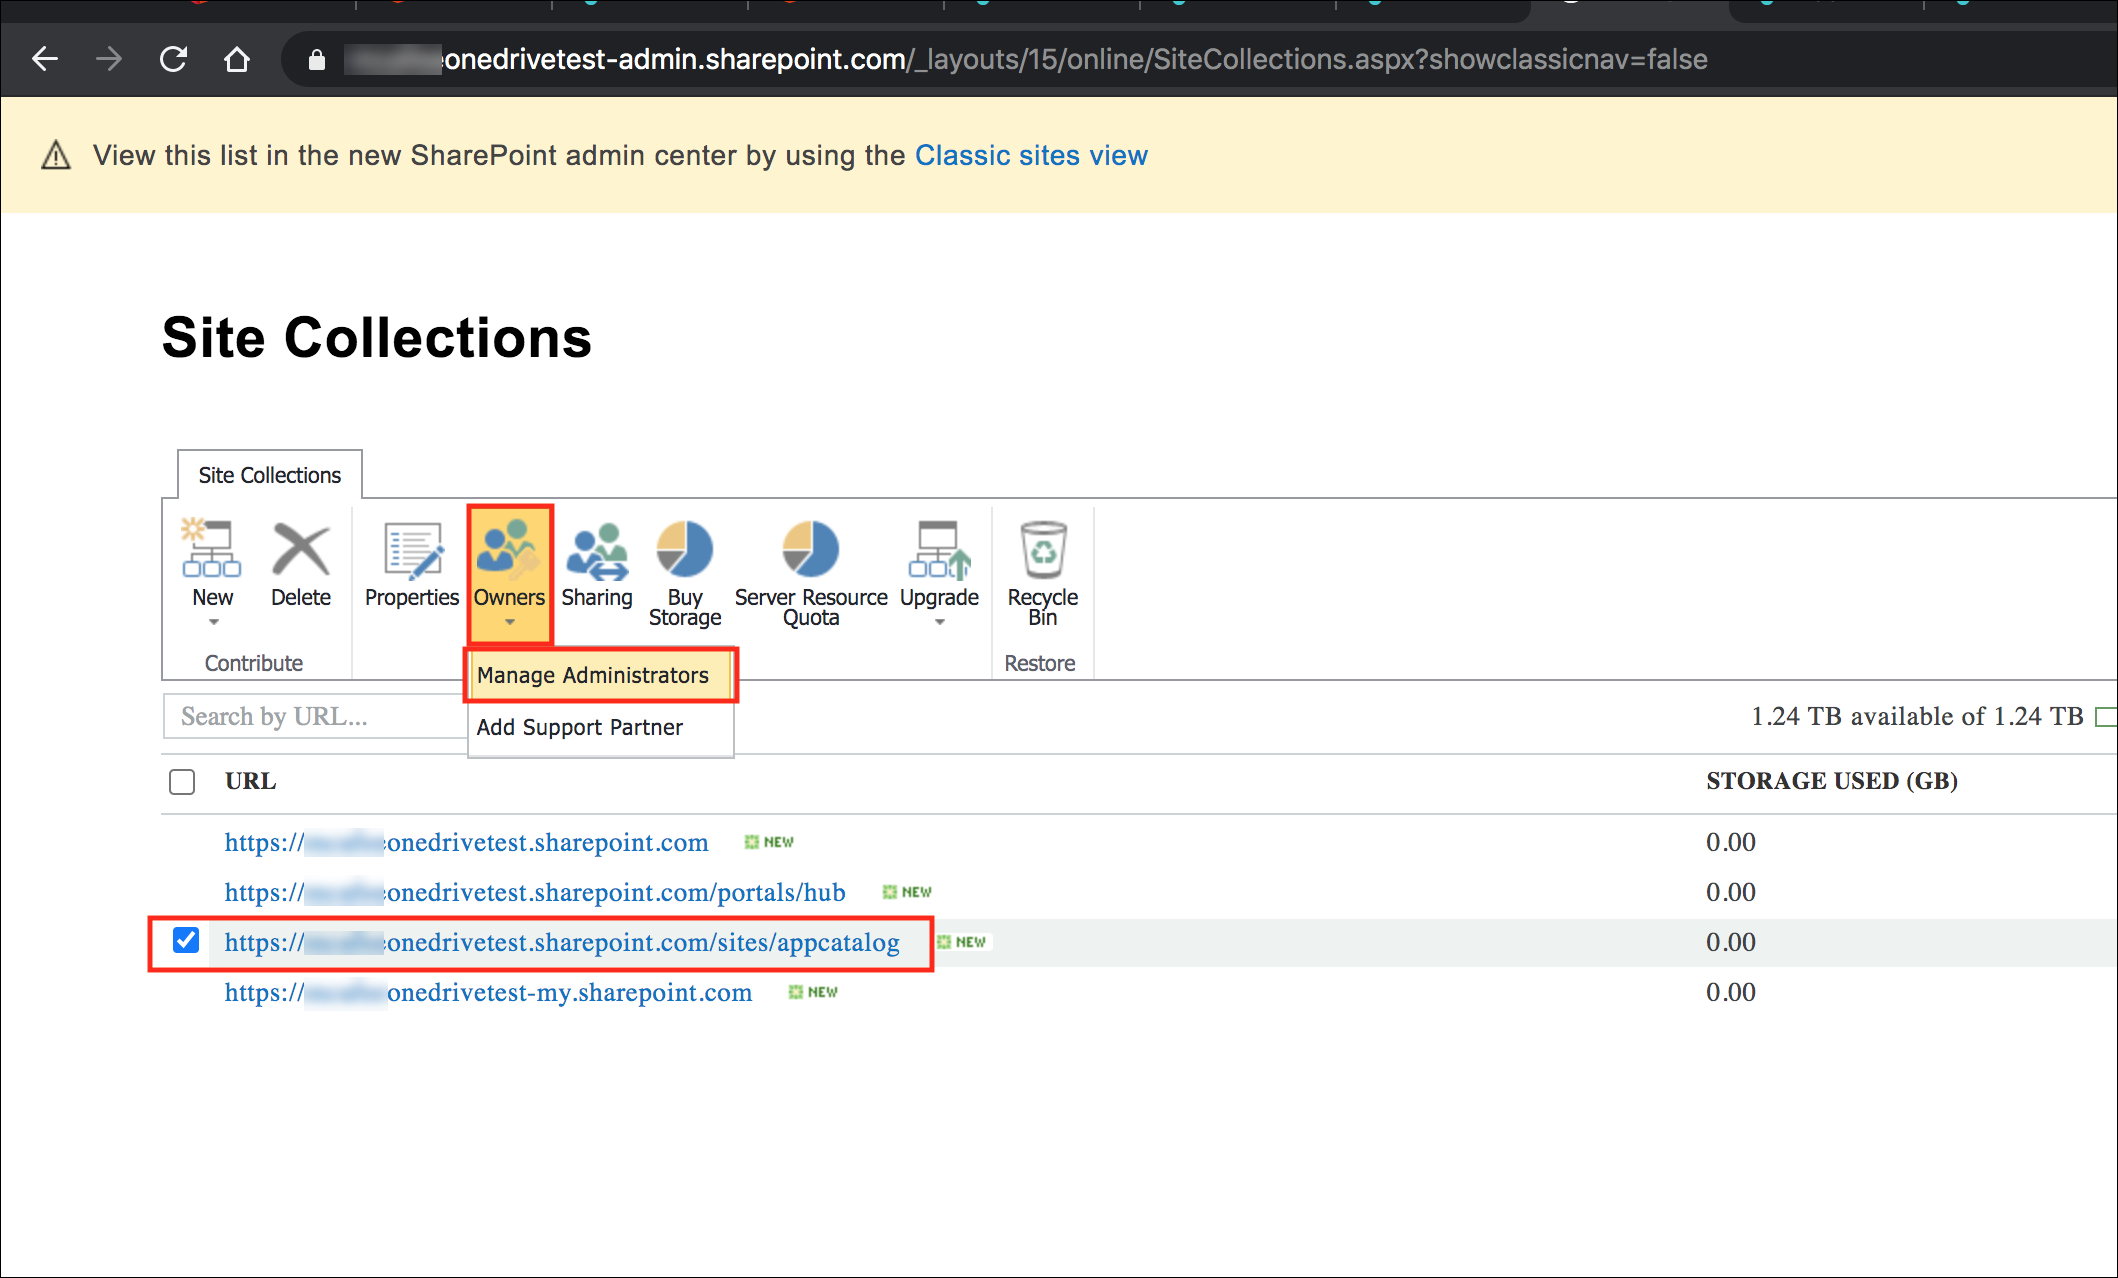
NOTE: If you are using the Classic SharePoint admin view, then select the App Catalog site > Owner > Manage Administrators.
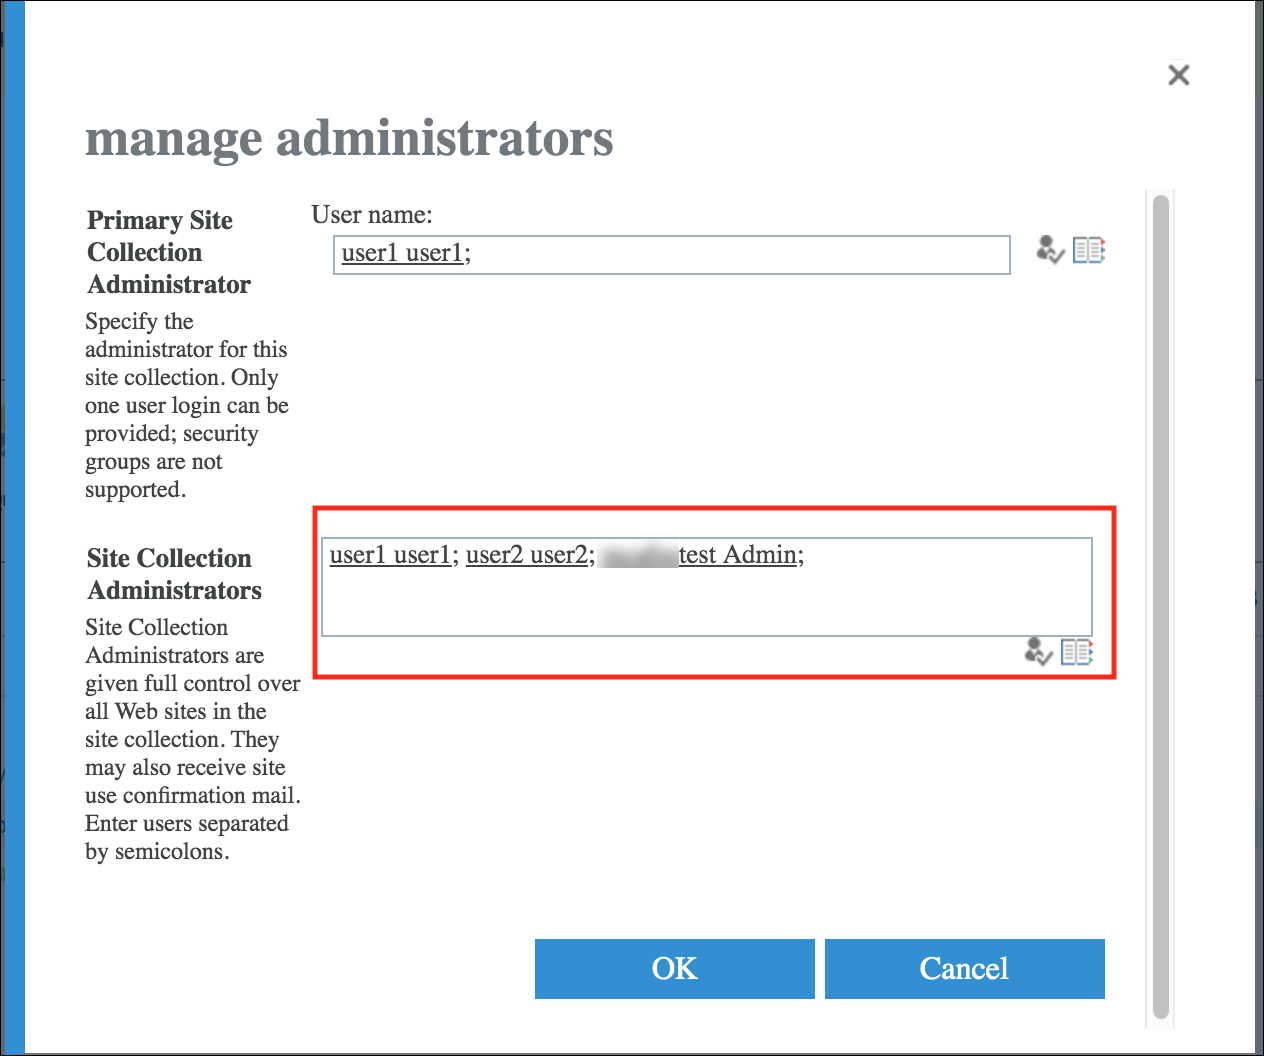
- Then add your user to the Site Collection Administrators.
Upload the App
To upload the app:
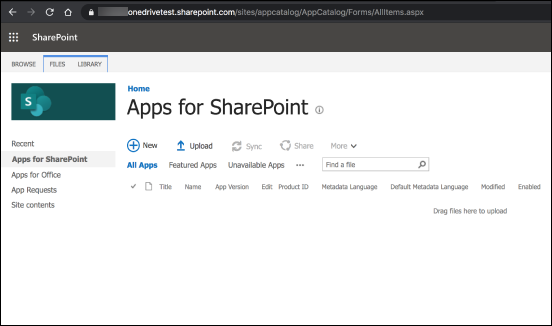
- Open the Office 365 Site App Catalog in classic view, and then select Apps for SharePoint.
- Download the latest SharePoint/OneDrive app.
- Unzip the downloaded file.
- Click Upload.
- Select the app you just uploaded. Verify that the version is 1.0.0.8.
- Go to Site Contents.
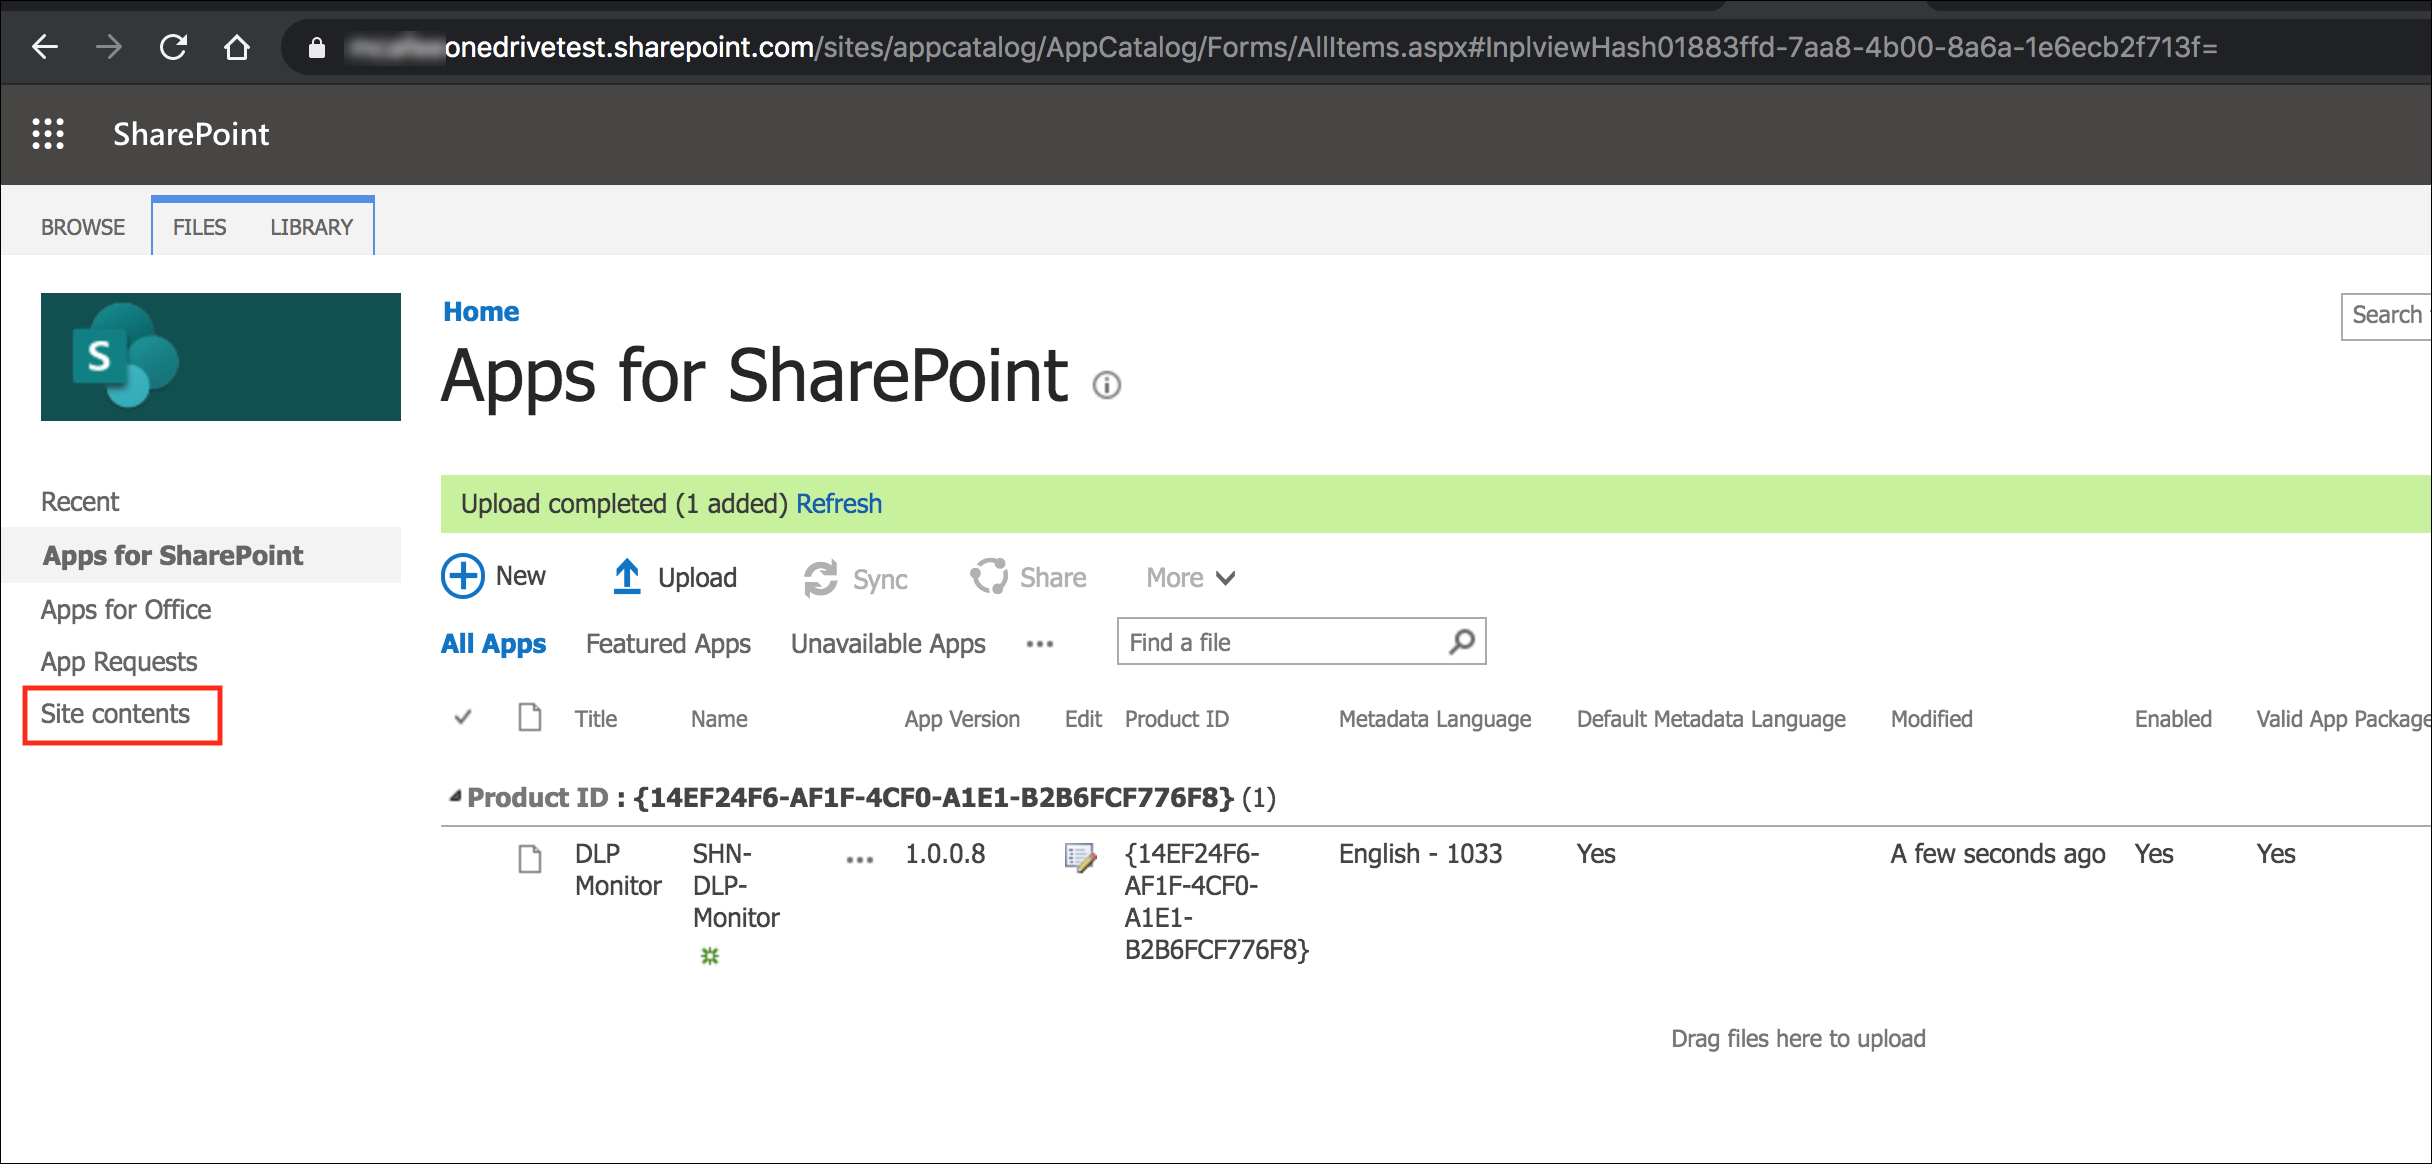
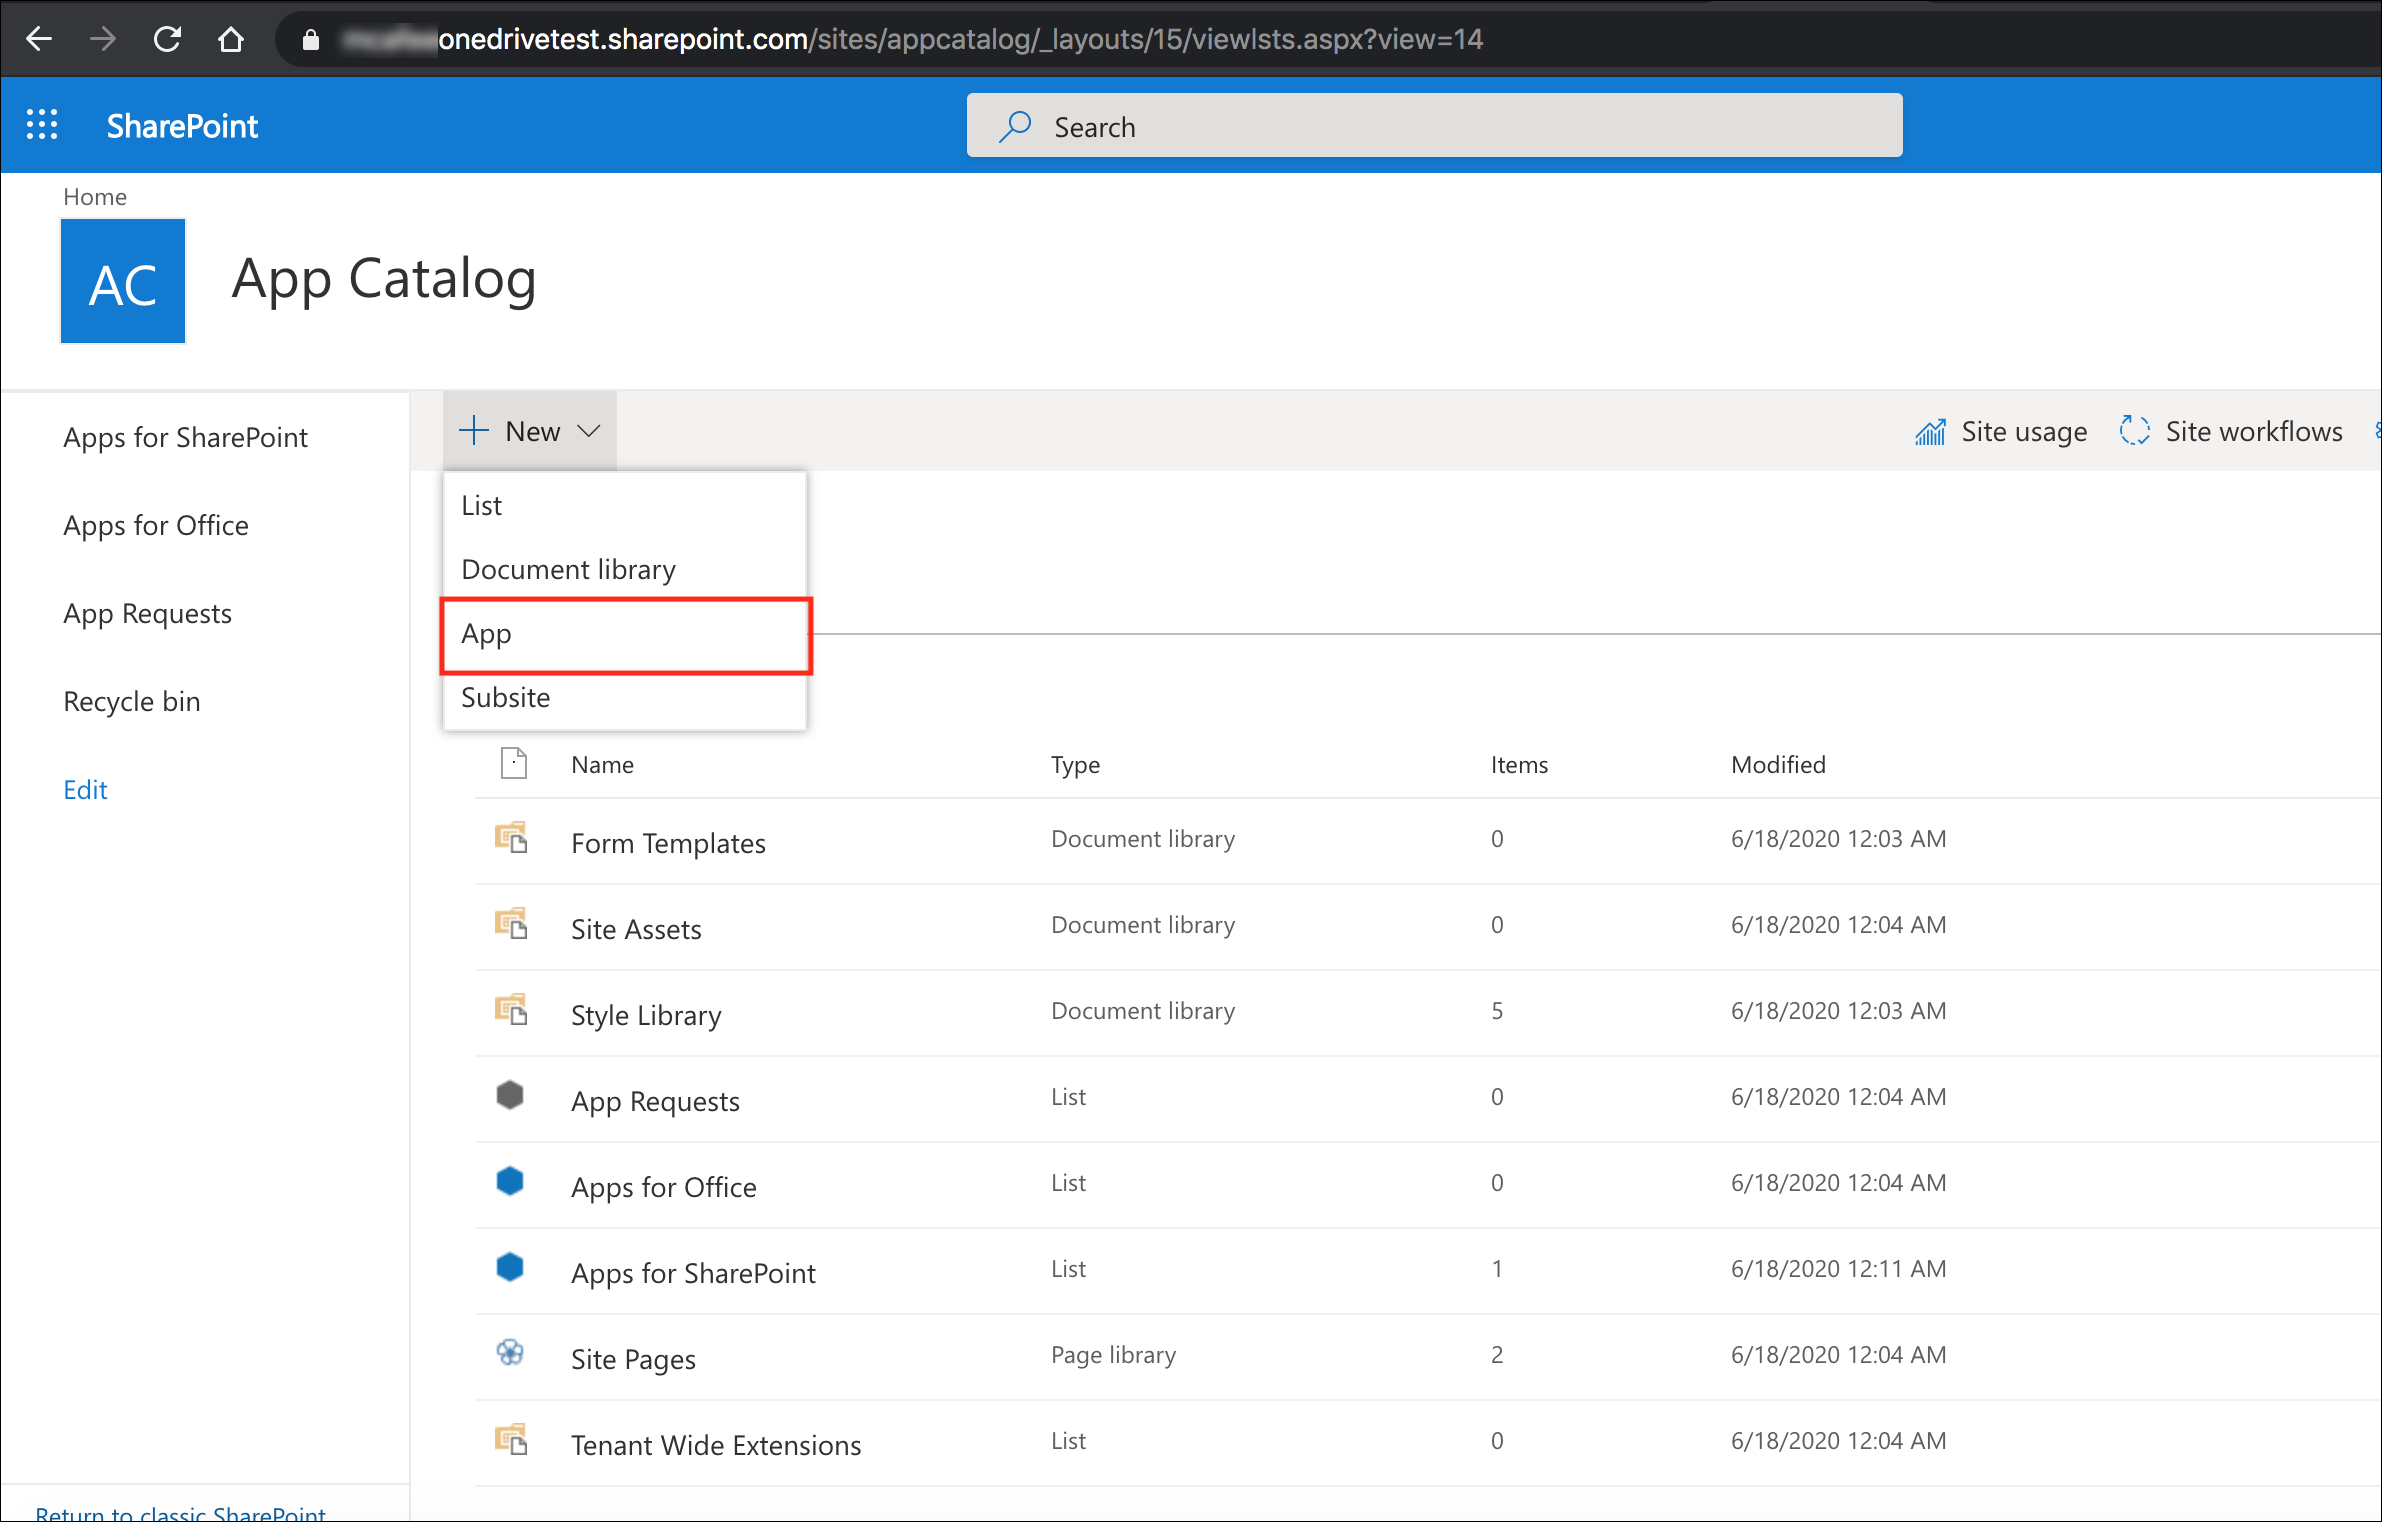
- Click Add An App. Or from the App Catalog, select New > App.
- Select DLP Monitor to add the Skyhigh CASB app to SharePoint.
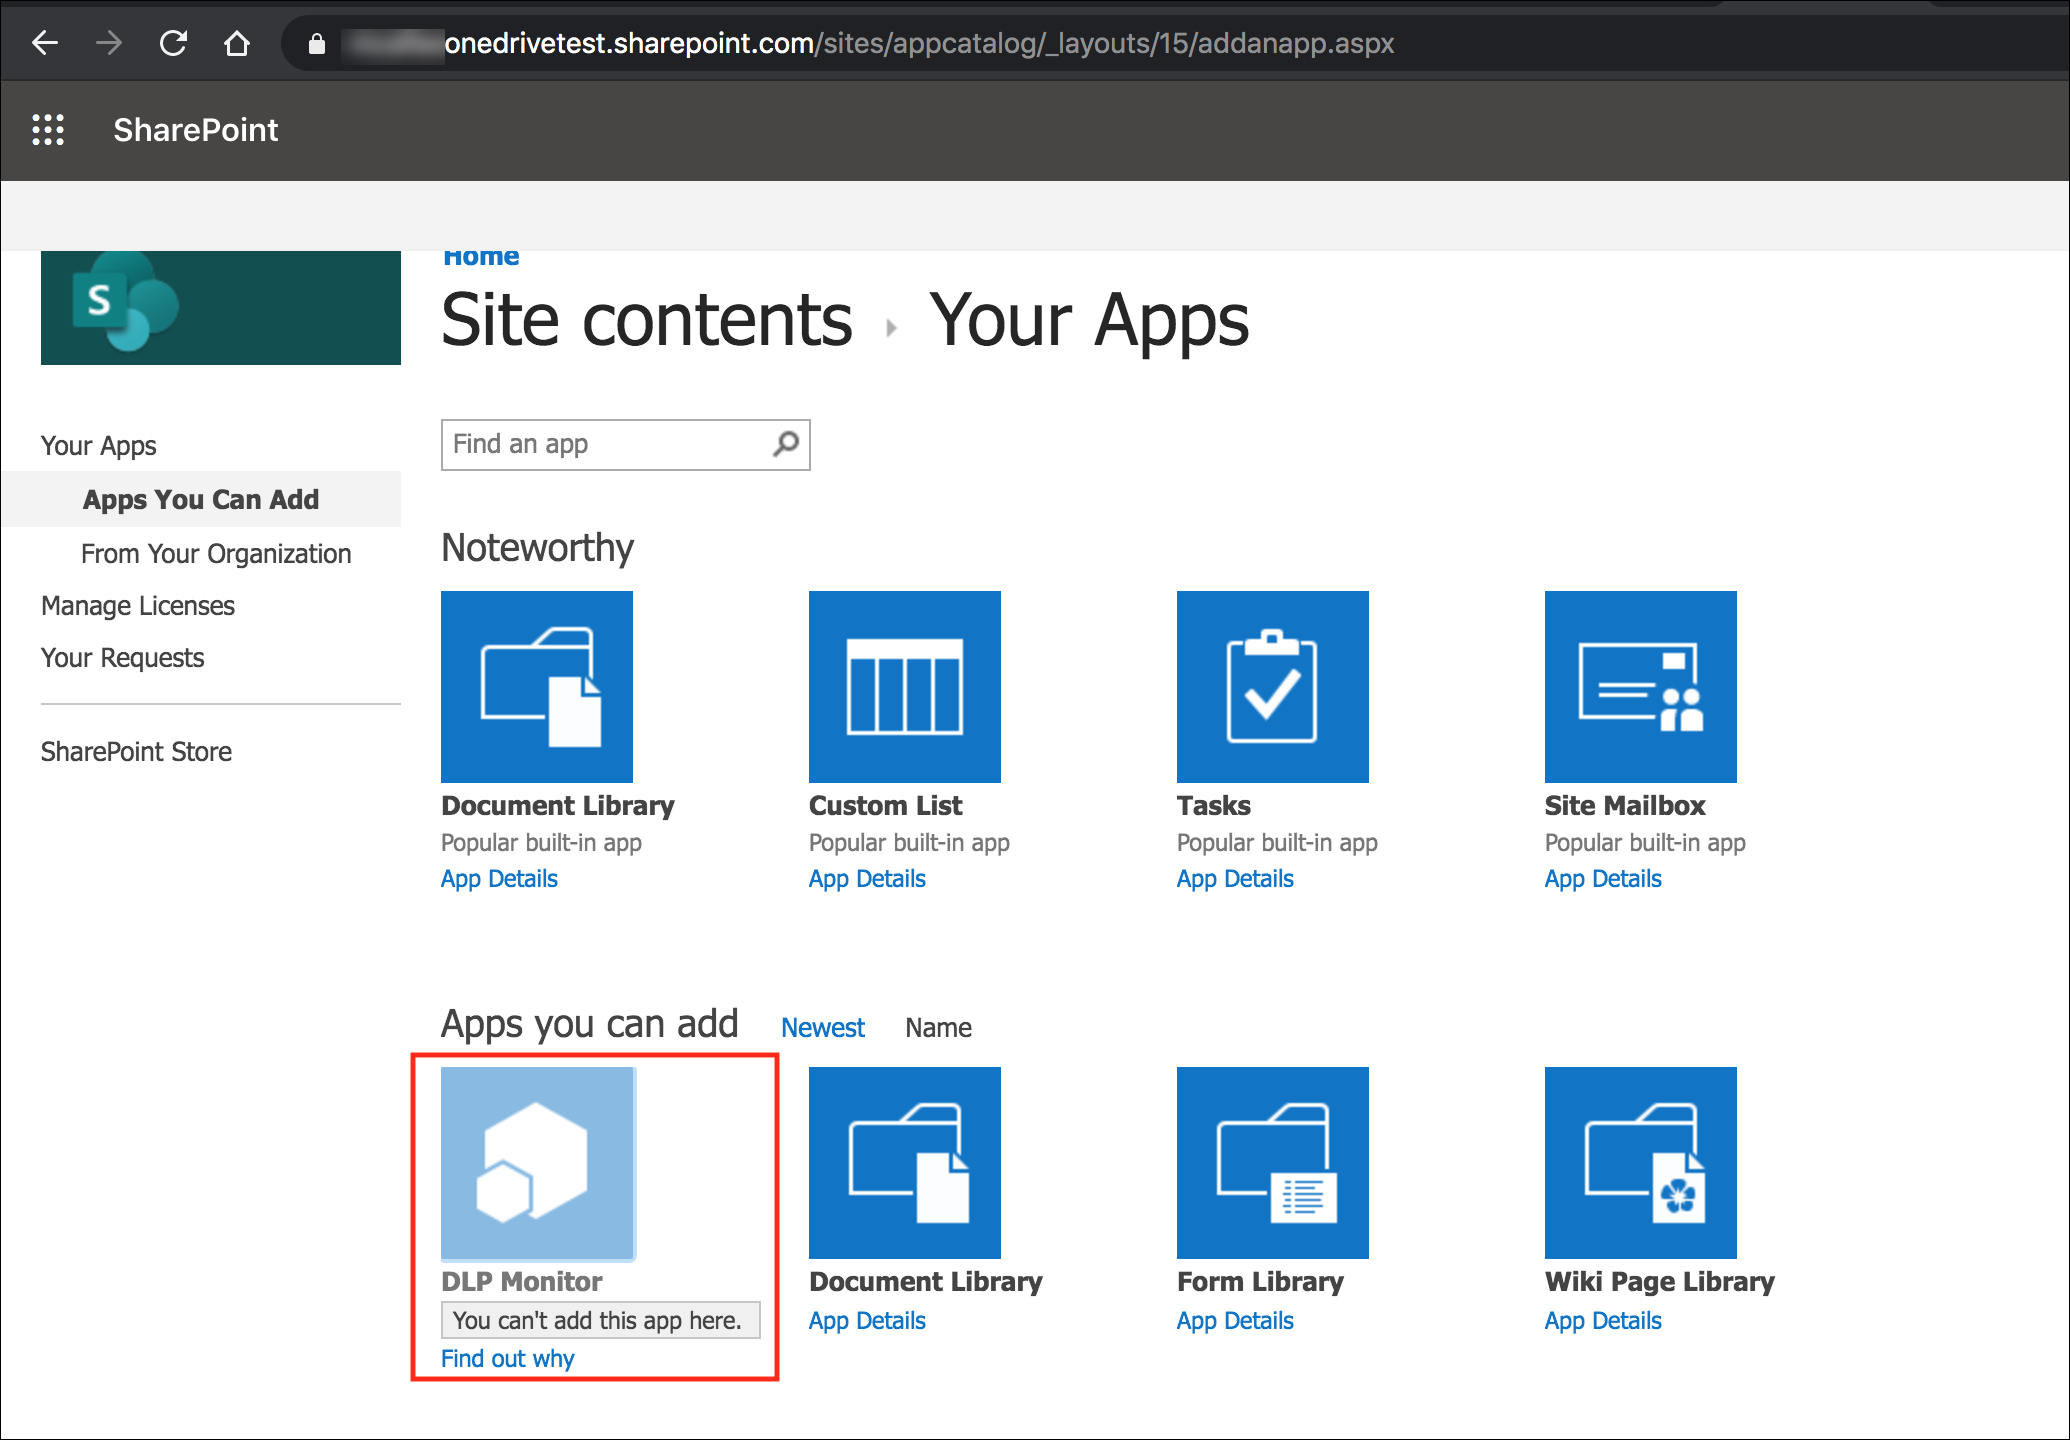
If SharePoint displays the message, "You can't add this app here", follow the remaining steps. Otherwise, proceed to Step 13.
- Click Find out why.
- Select Request approval.
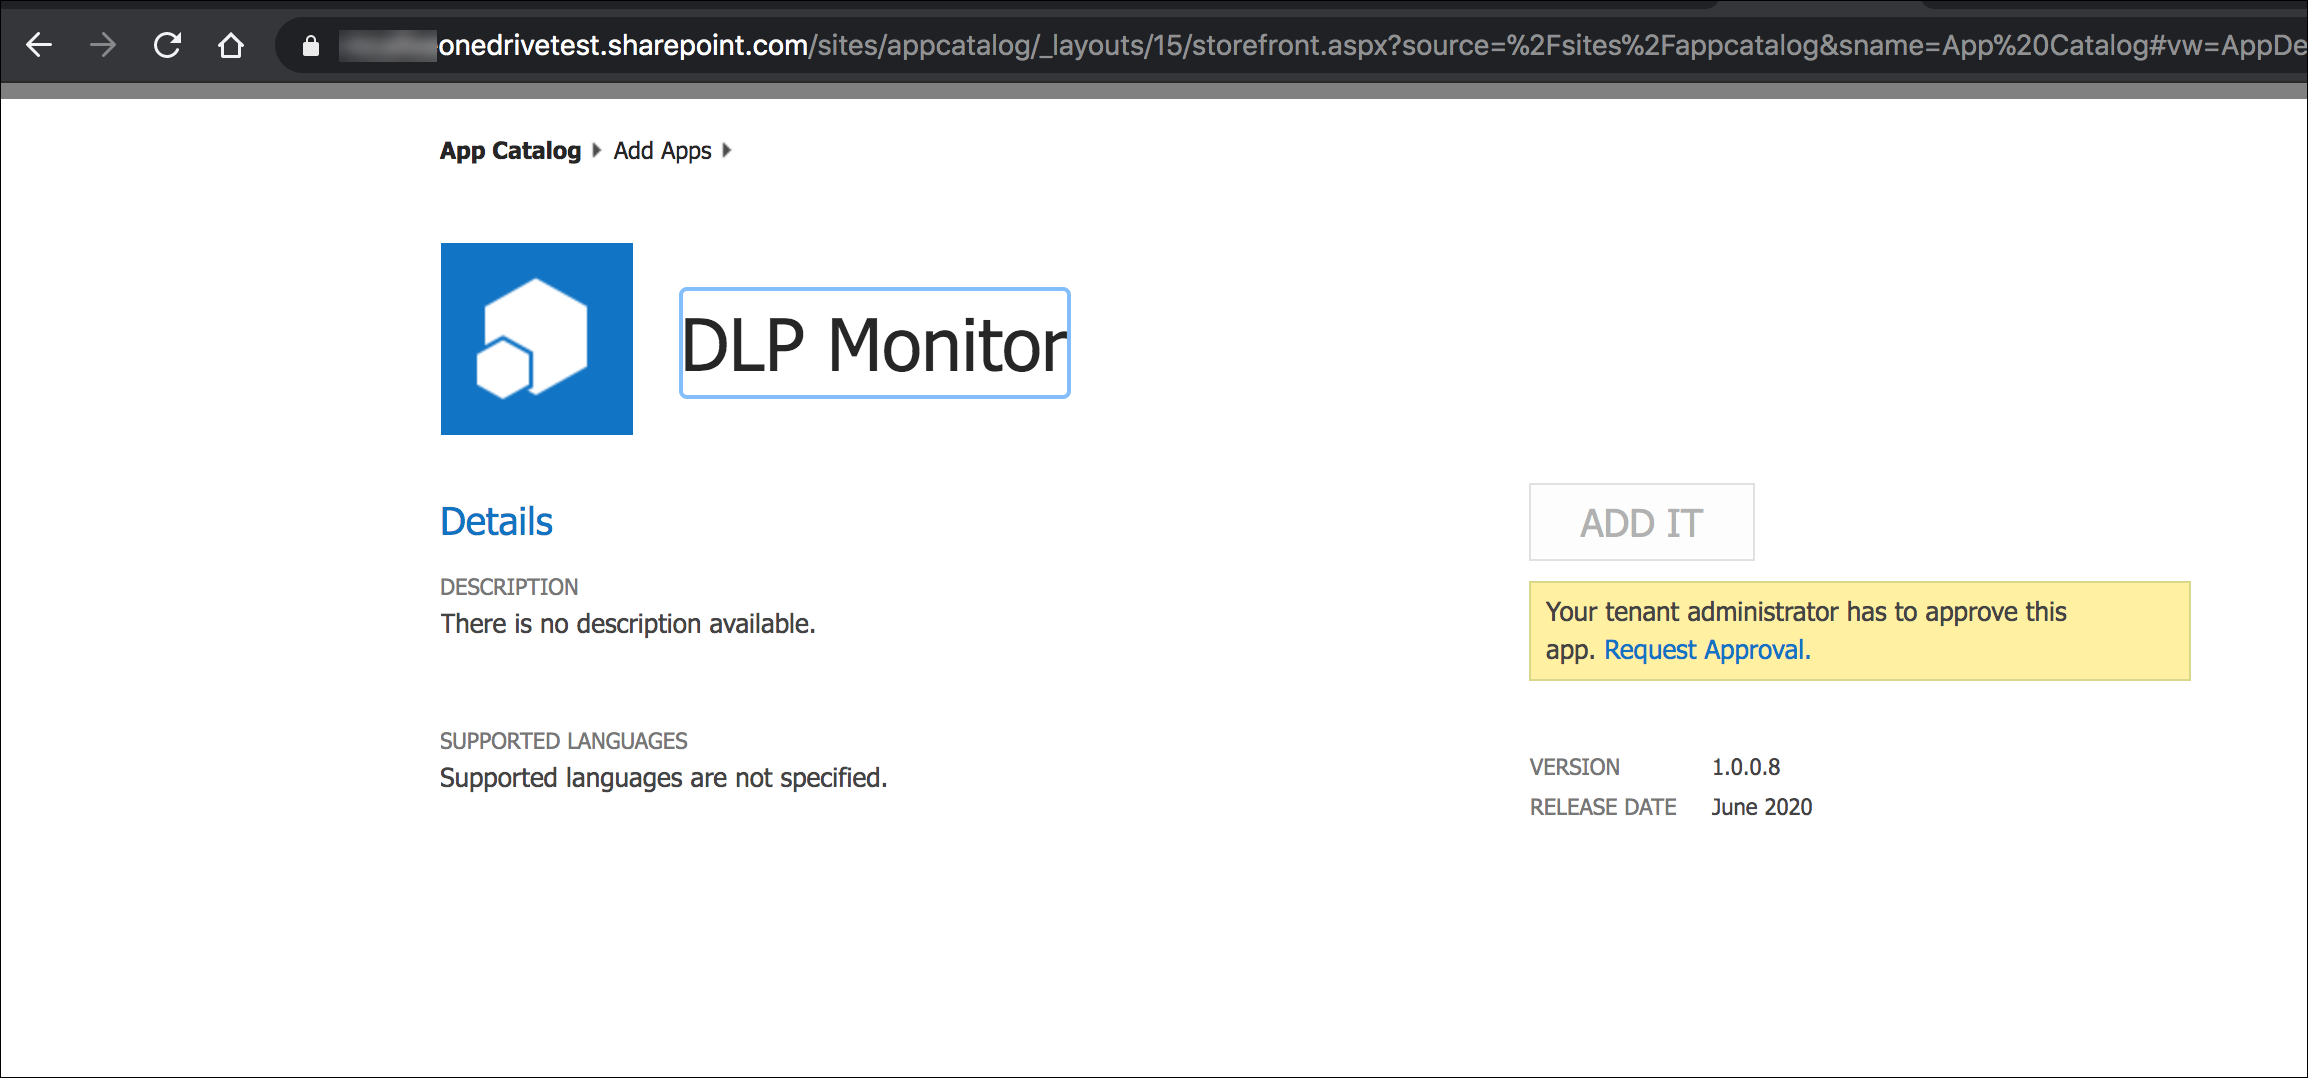
- Request an app approval by providing the reason for the request. Once you click the request, it will send an app approval email to all of the Site Collection admins for the App Catalog site.
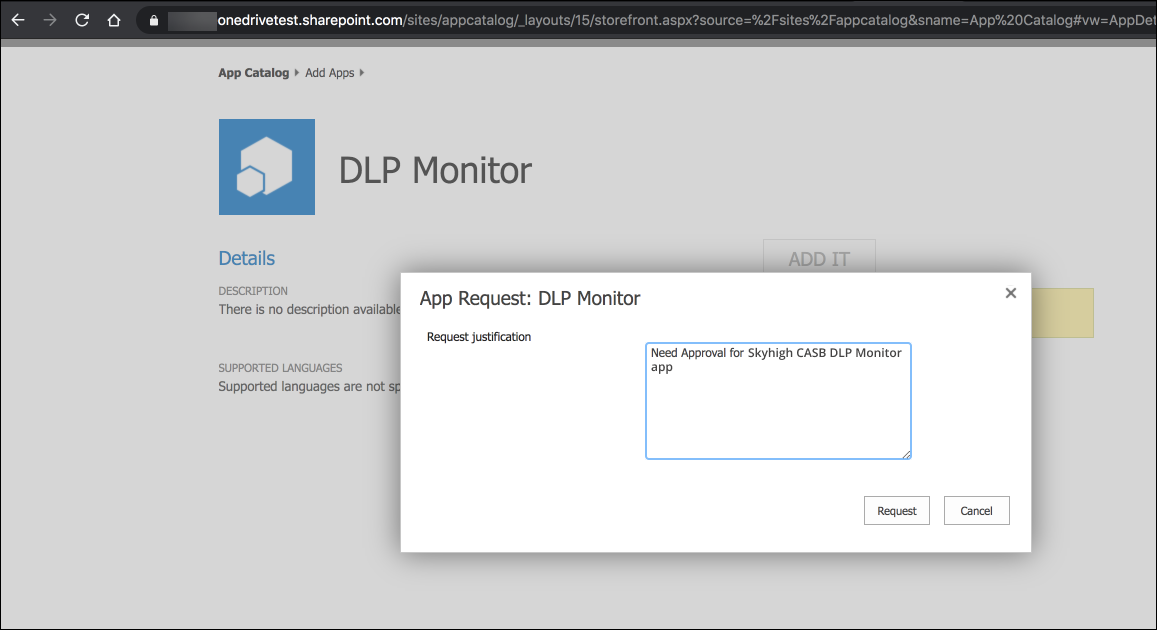
- Log into an App Catalog admin email account to approve the app installation.
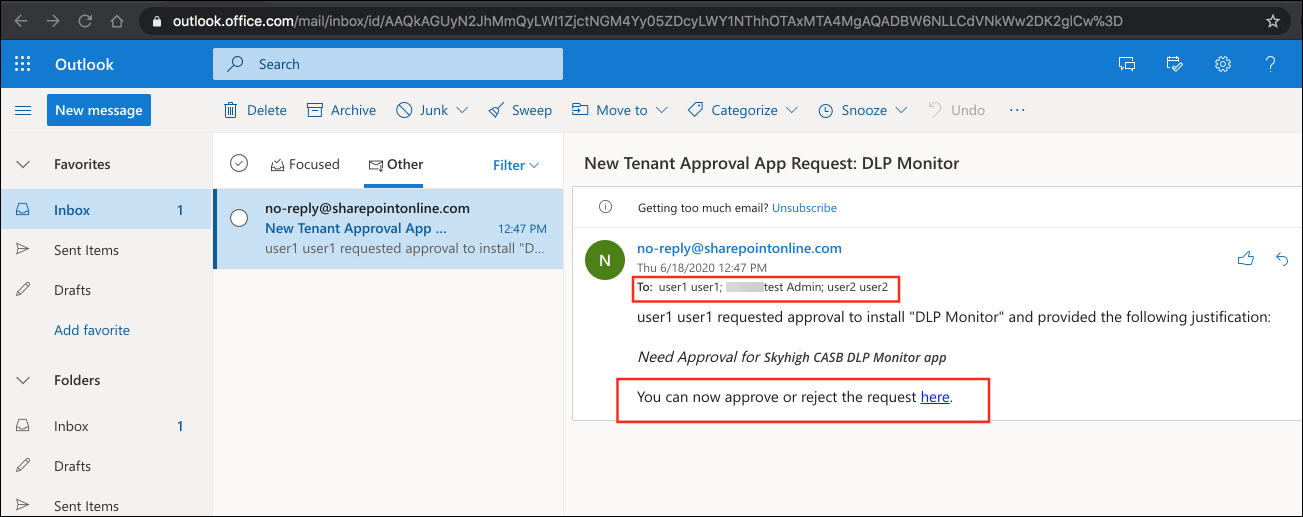
- Click Approve
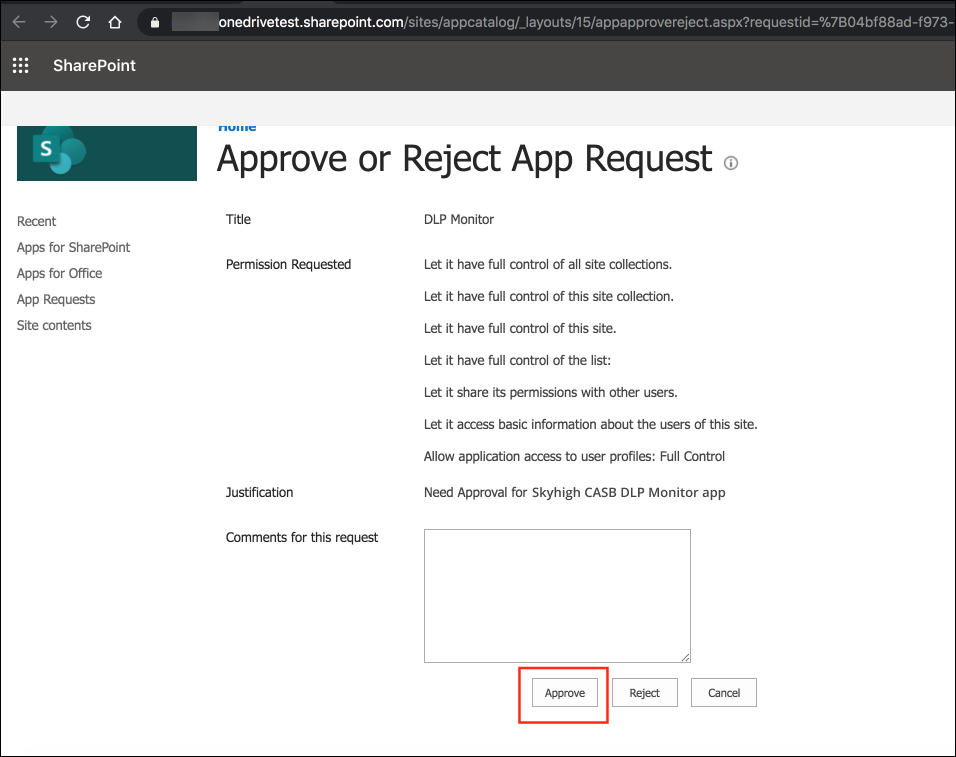
- Go back to Site Contents and attempt to add the app again.
- Click Trust It. This time it should allow you to proceed. As in Step 7.
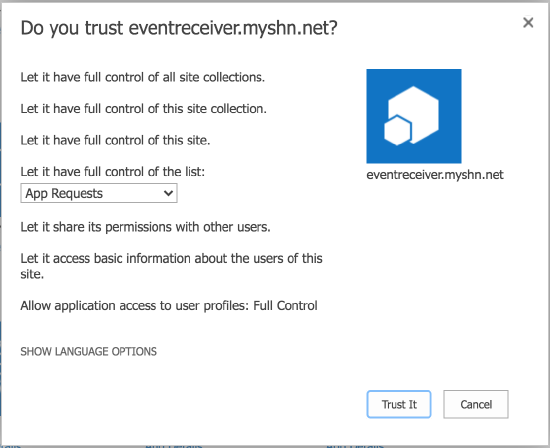
Now continue to Step 3.
