Configure CASB Connect for Atlassian JIRA
To integrate Atlassian Jira with Skyhigh CASB:
- Create a Jira instance in Skyhigh CASB
- Enable Webhooks in Jira Cloud
- Enable API access for Jira in Skyhigh CASB
Create an Instance for Atlassian JIRA in Skyhigh CASB
- Go to Settings > Service Management.
- Click Add Instance. Select JIRA, provide an instance name, and click Done. Make a note of the name of the instance, as it will be required in later steps.
NOTE: Do not enable API access for this instance yet.
Configure Webhooks in JIRA Cloud
IMPORTANT: One of the following steps requires you to contact Skyhigh Security Support to obtain the unique webhook URL for your JIRA instance.
- Log in to your JIRA cloud instance.
- Go to Settings > System.
- Select Webhooks in the navigation menu and click the Create a Webhook button.
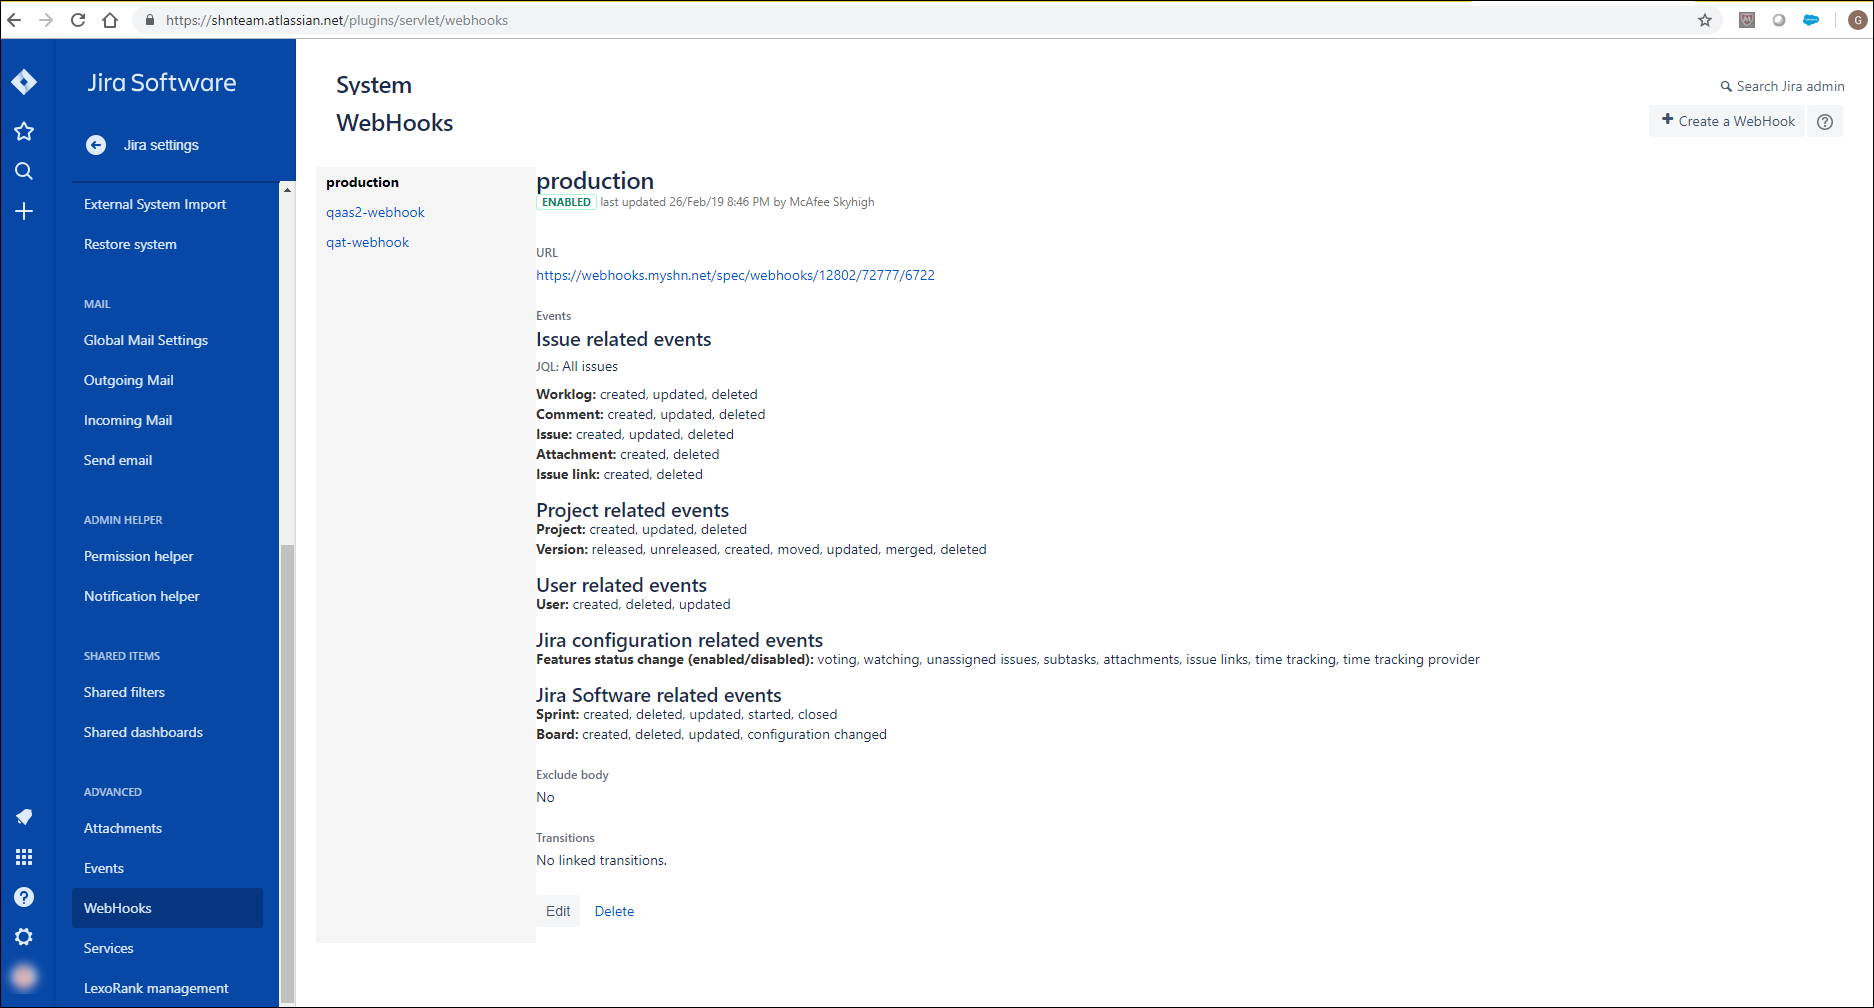
- Provide a name for the webhook.
- Contact Skyhigh Support to enter one of the webhook URLs for your JIRA instance in the URL field.
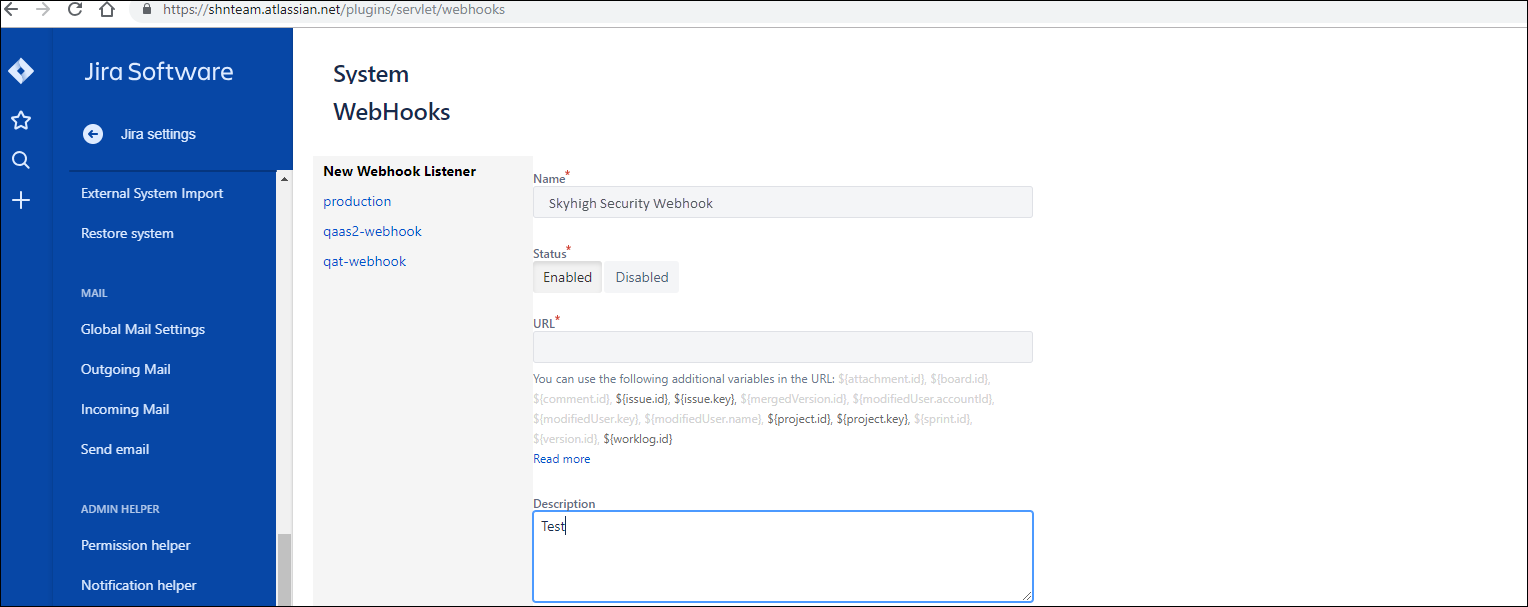
- Provide the name of the JIRA instance created in Skyhigh CASB (in step 1) while reaching out to the support team.
- Scroll down to the Events section and select all checkboxes in all categories.
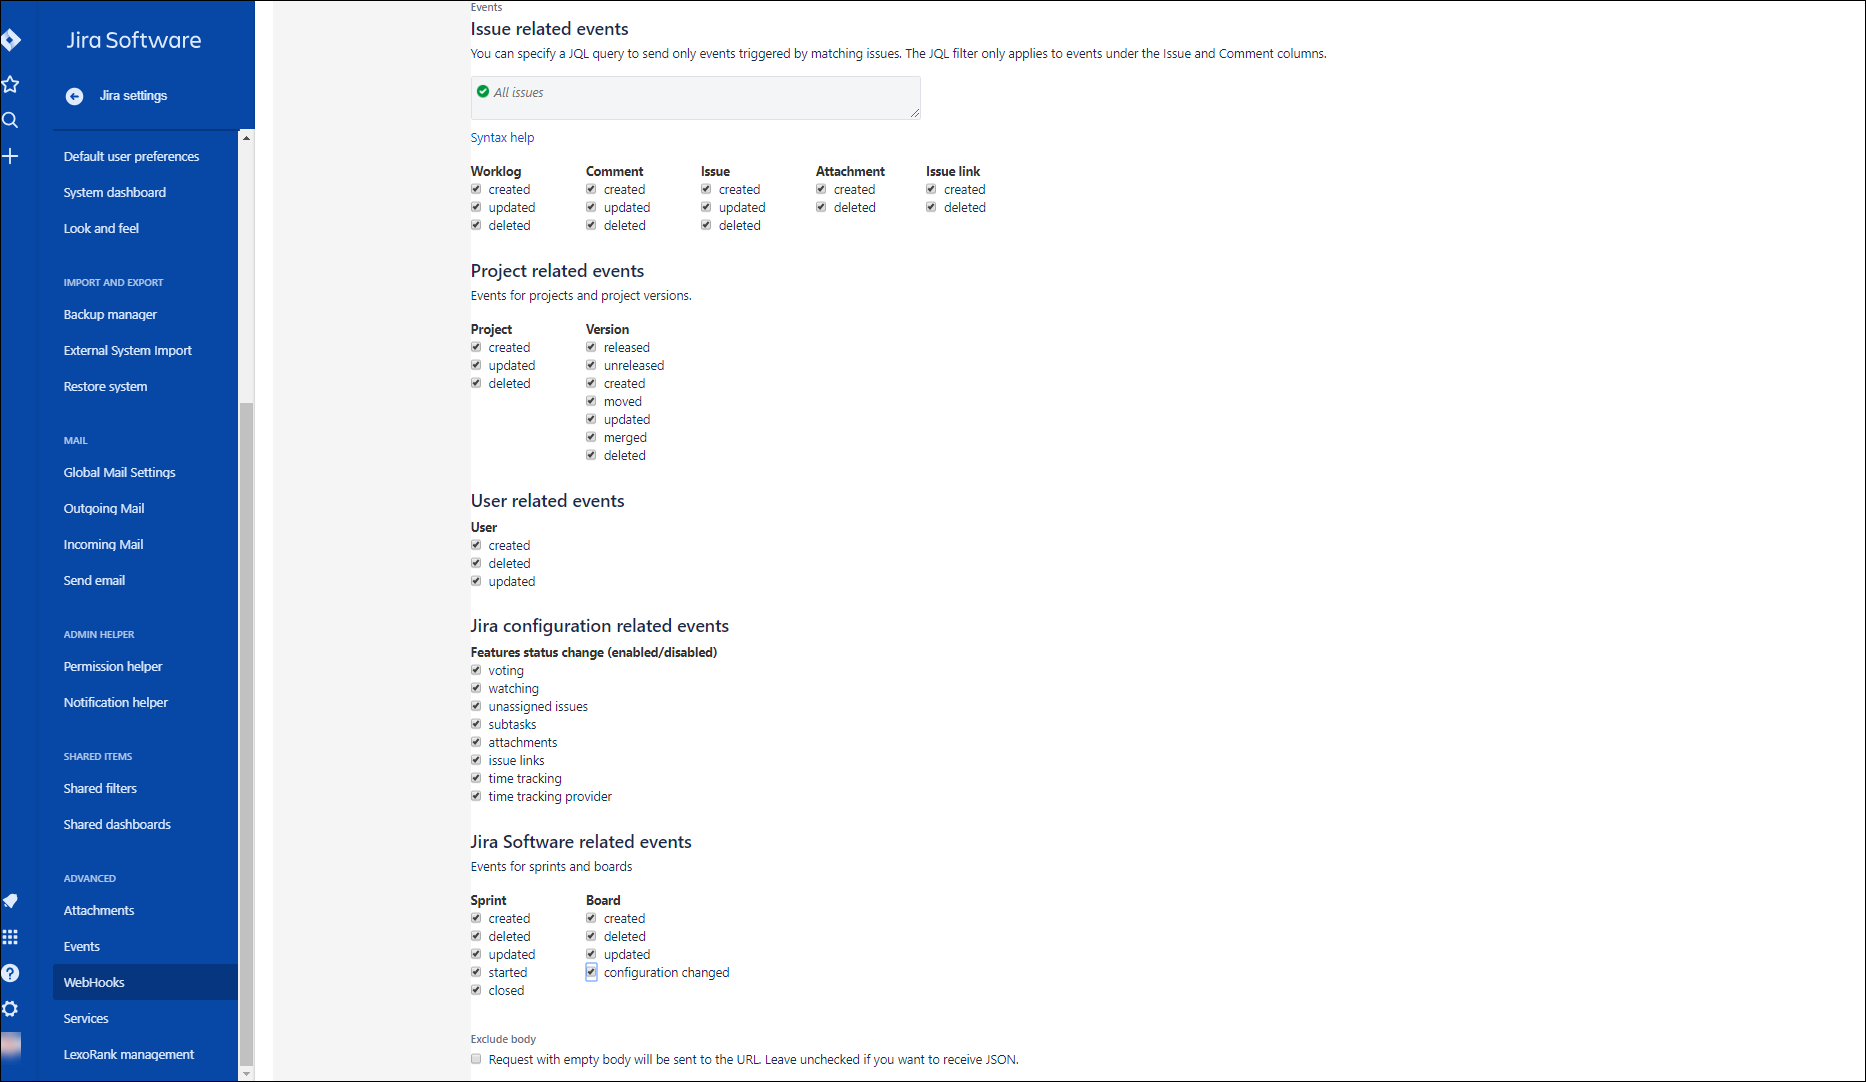
- In the WebHooks section, uncheck the Exclude body checkbox, and then click Create to complete the process of registering a webhook.

Enable API Access for JIRA in Skyhigh CASB
- Select the JIRA Instance created in Service Management, go to the Setup tab, and click Enable API access.
- Provide the domain name of your JIRA cloud account. If the domain name is "shn-xyz.atlassian.net", then enter the domain name as "shn-xyz".
- Authorize Skyhigh CASB application with appropriate permissions:

API access for JIRA is now enabled, and the JIRA integration is complete.
Migrate Instances Between PoPs
To enhance performance, scalability, and security, we are transitioning our services from the current infrastructure to a newly established Point of Presence (PoP) specifically designed for processing CASB API-based services. If your instance is part of this migration, the Skyhigh support team will contact you and assist with the process.
Perform the steps below to complete the migration:
- Follow the configuration steps to add a new webhook URL to your existing app. Contact Skyhigh Support to obtain the region-specific webhook URLs required for configuring a webhook for the new AWS PoP.
- After you add the new webhook URL to your existing app, the Support team will migrate your instances to the new PoP.
- Once the instance is successfully running in the new environment, the Skyhigh support team will contact you.
- After Skyhigh confirms the successful migration, delete the old webhook URL from the app.