Step 5: Enable API Access in Skyhigh CASB
NOTE
- You can also enable API access for existing Slack Non-Enterprise (Pro or Business+) instances via a Custom OAuth application.
- To enable API access for existing Slack Non-Enterprise instances via a Custom OAuth app, you must first disable API access for your Slack instance in Skyhigh CASB, and follow the steps from Step 2 to re-enable API access for your Slack Non-Enterprise instance.
To enable API access for Slack Non-Enterprise instance:
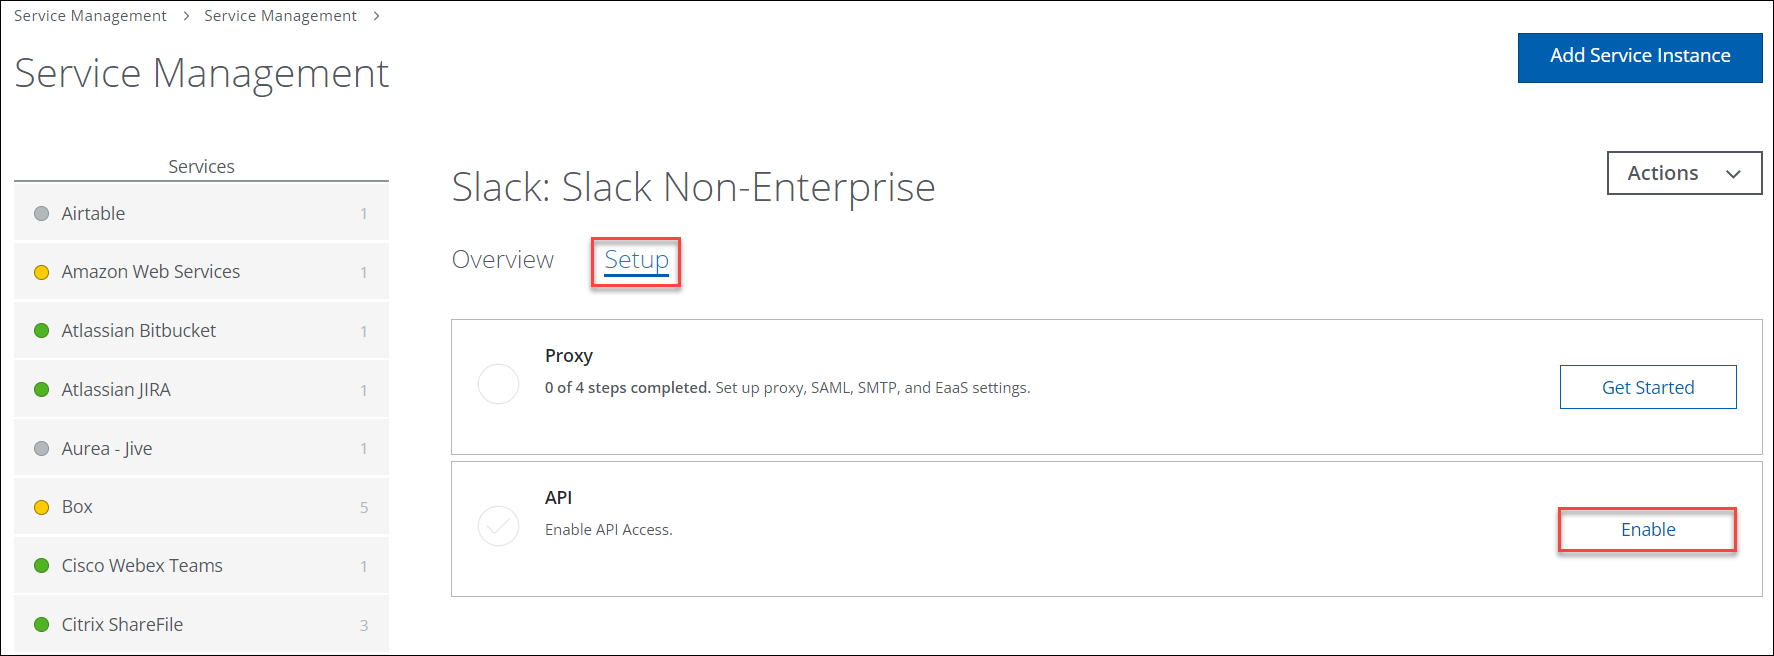
- In Skyhigh CASB, go to Settings > Service Management.
- Select the newly created Slack instance from the list of Services.
- Go to the Setup tab, and click Enable.

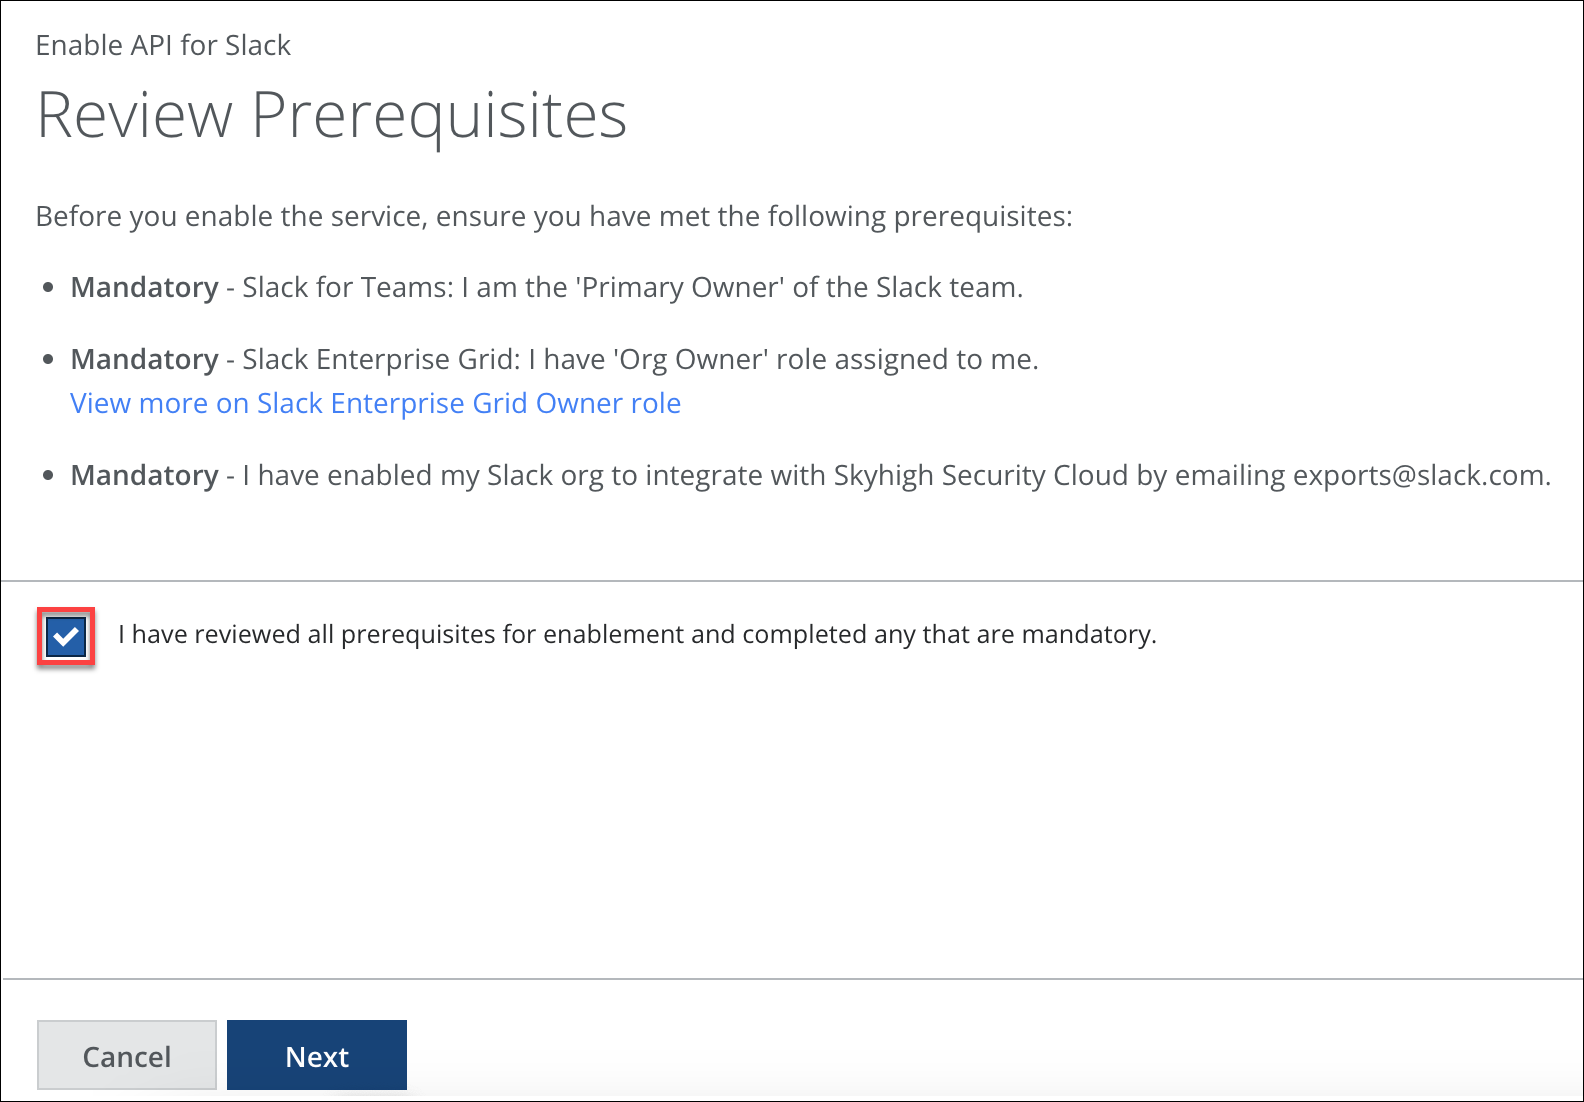
- On the Review Prerequisites page, review the mandatory prerequisites.
- Select the checkbox to confirm that you have completed the prerequisites.

- Click Next.
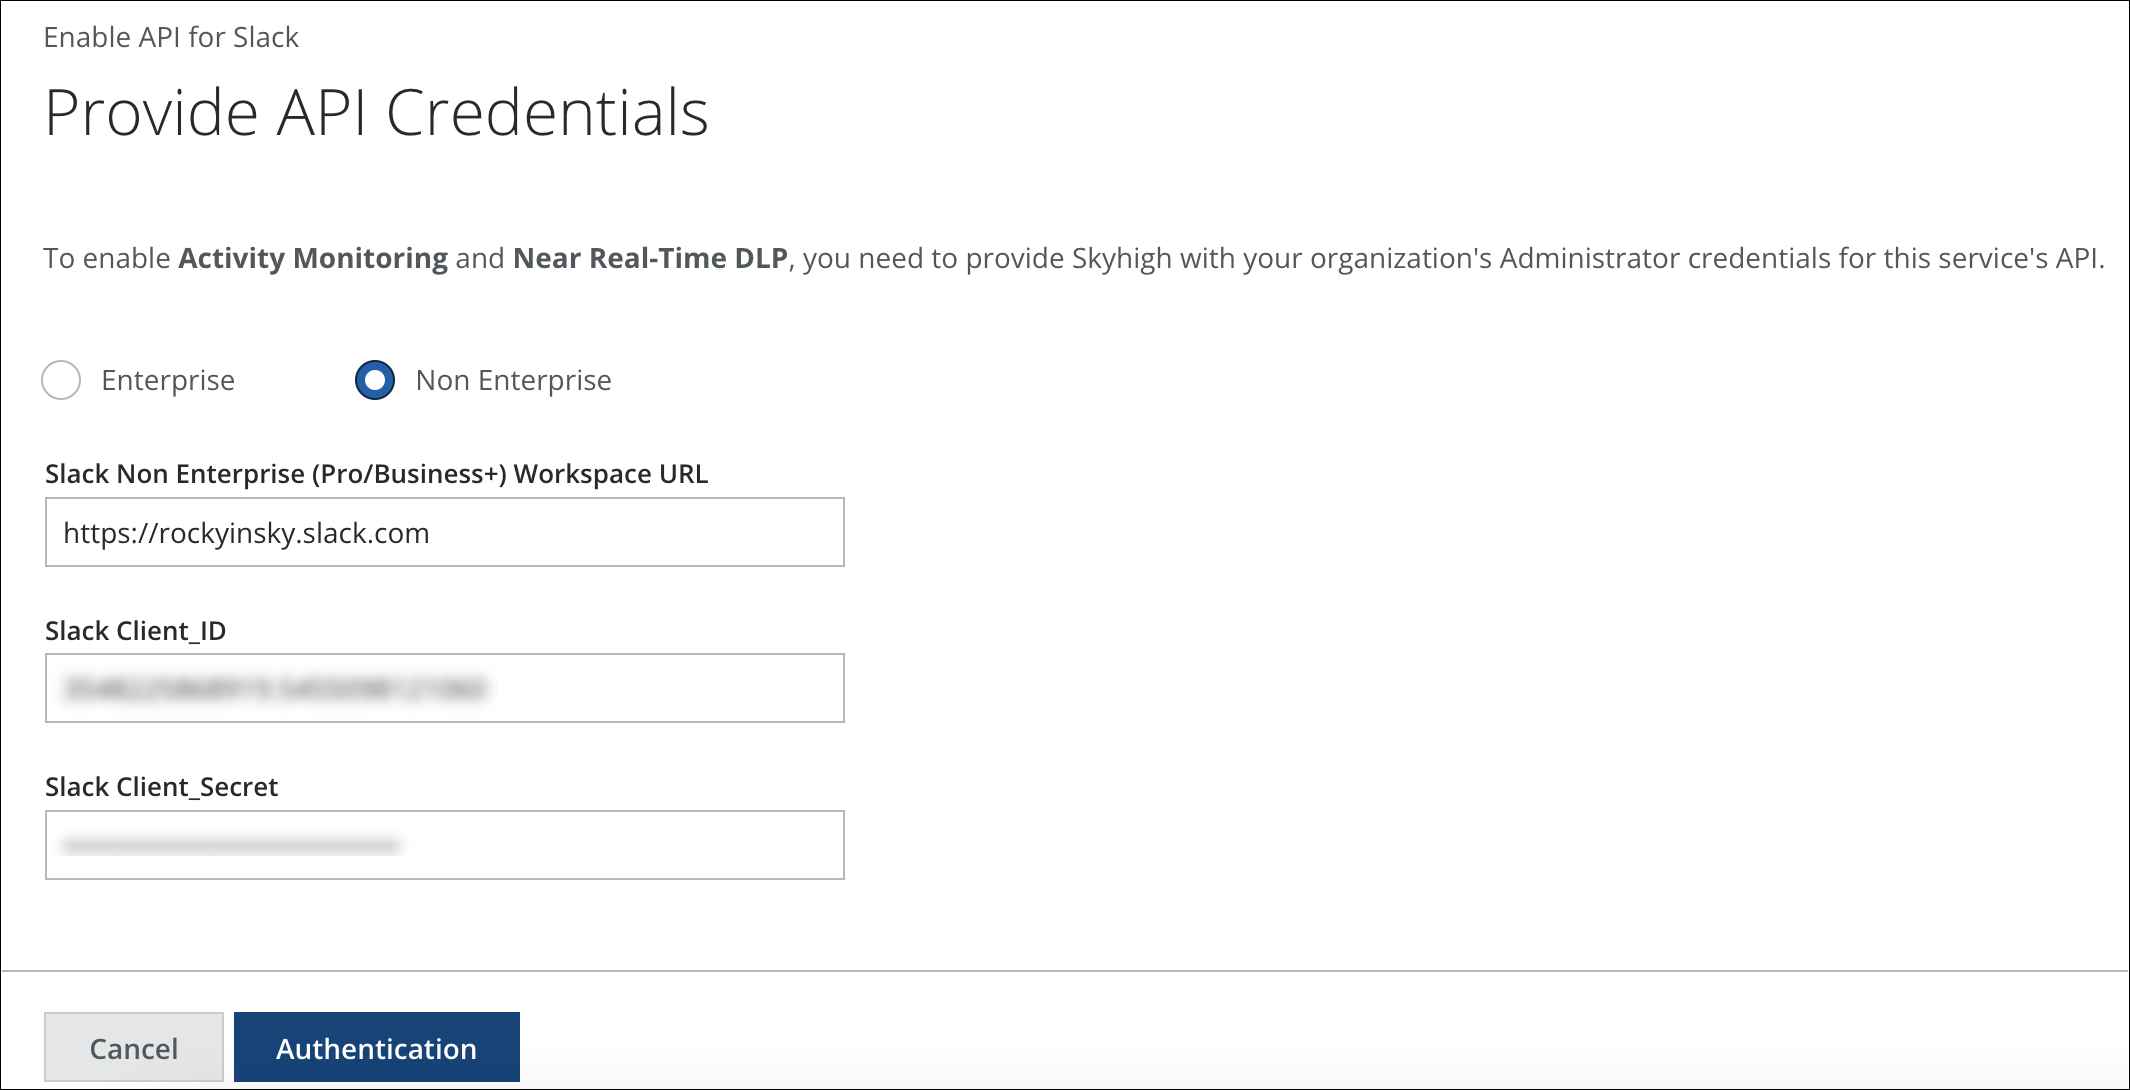
- On the Provide API Credentials page, configure the following:
- Non-Enterprise. Select this to enable API access for your Slack Non-Enterprise instance.
- Slack Non-Enterprise (Pro/Business+) Workspace URL. Enter the Workspace URL of your Slack Non-Enterprise instance.
- Slack Client ID and Slack Client Secret. Enter the Custom OAuth app credentials (Client ID, and Client Secret) retrieved from Step 4.
- Click Authentication.

You are redirected to the Slack Login page. - Log in to your Slack Non-Enterprise account using admin credentials.
- Review the list of permissions that Slack grants Skyhigh CASB, and click Allow.
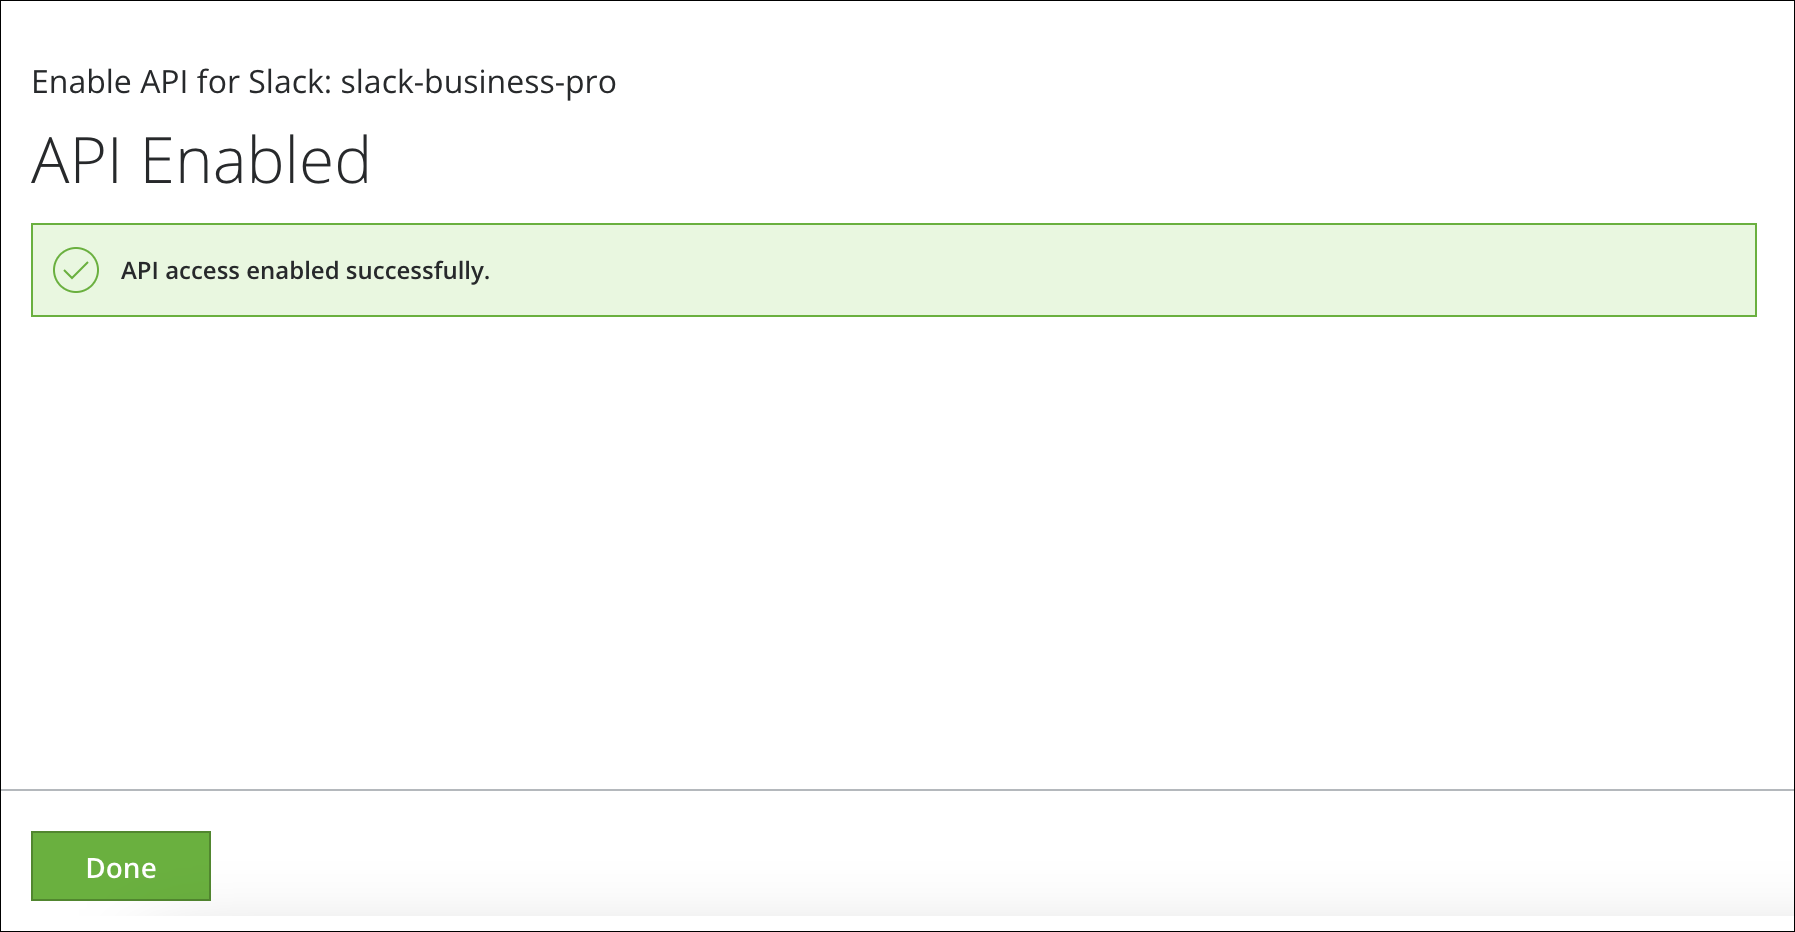
- Click Done.
API access is now enabled for your Slack Non-Enterprise instance in Skyhigh CASB.

IMPORTANT: After integrating Skyhigh CASB with Slack successfully, you can define DLP policies and attach them to your Slack Non-Enterprise instance in Skyhigh CASB. For details on supported DLP Policy Rules & Response Actions, see Supported DLP Policy Rules and Response Actions.
