Create a Custom Anomaly
| Limited Availability: Custom Anomaly AD User Groups is a Limited Availability feature. To enable the Custom Anomaly User Groups contact Skyhigh Support. |
To protect your organization's risk posture, create a Custom Anomaly using the Custom Anomalies wizard. This information can further assist your investigation of the anomaly.
A Custom Anomaly defines the criteria for generating an anomaly and the detected anomaly can be found on the Anomalies page. Use the following procedure to create or edit custom anomalies for any Skyhigh CASB Sanctioned cloud service provider.
To create or edit a custom anomaly:
- Sign in to Skyhigh CASB.
- Go to Incidents > Anomalies > Anomaly Settings.
- Click Actions > Create a Custom Anomaly.
- On the Name & Scope page, configure a Custom Anomaly by selecting attributes of activities to create rules:
- Name. Enter a descriptive name to help identify the custom anomaly rule.
- Description. (Optional) Enter a description for your custom anomaly rule.
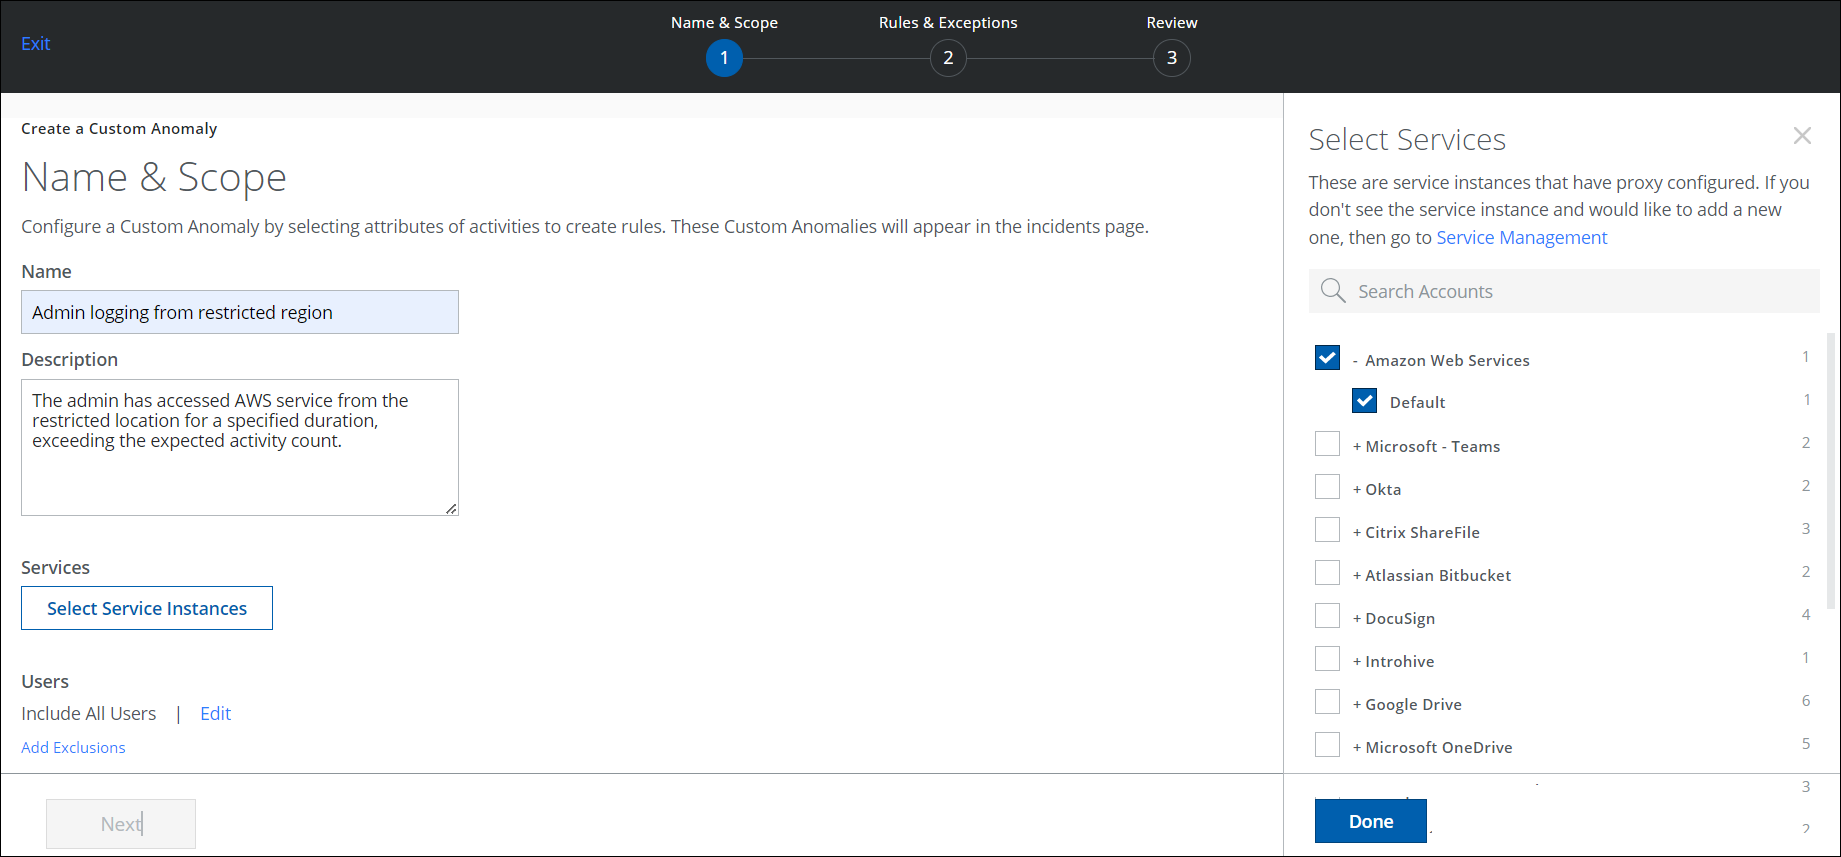
- Services. Click Select Service Instances, then select the instances you want to apply from the list. Multiple services cannot be selected. Select instances from only one service provider.
- Click Done.
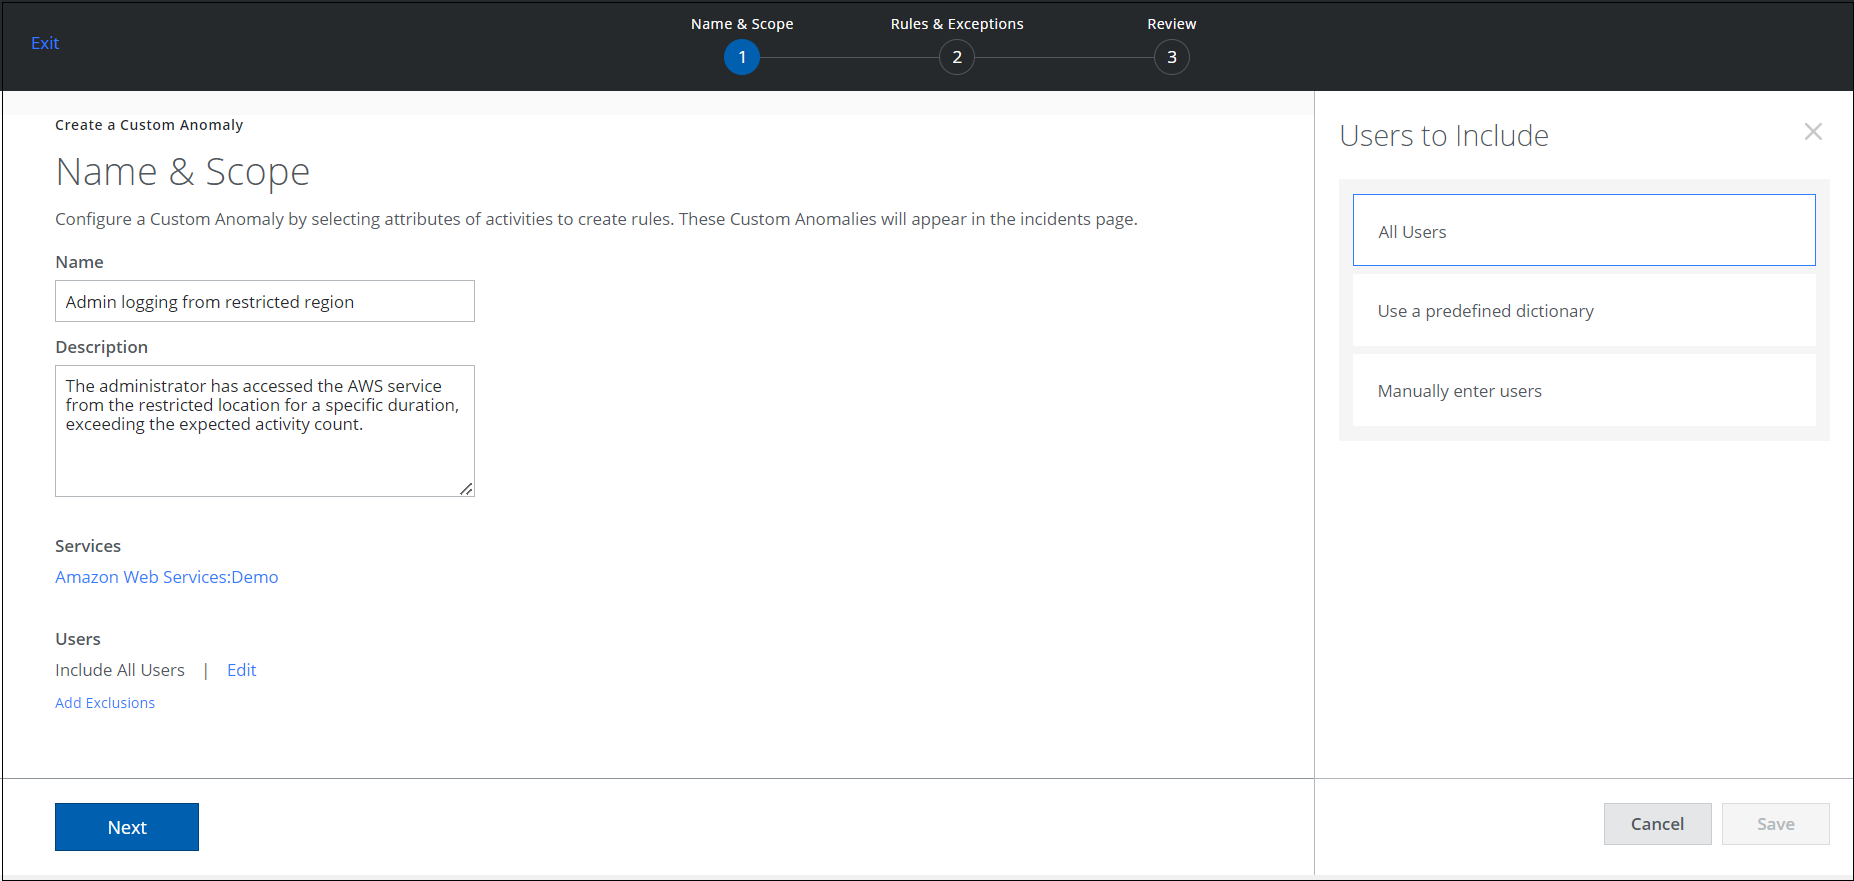
- Users. Click Edit to select one of the options for Users to Include in the rules and click Save. This is an optional field and if you do not select any option, then All Users are selected by default.
- All Users. Apply the rules to all users.
- Use a predefined dictionary. Apply the rules to a predefined dictionary. A predefined dictionary is a selected group of users. To apply the rules to a predefined dictionary, select a dictionary from the existing list of Free Form Text dictionaries. To create a new Free Form Text dictionary, go to Policy > DLP Policies > Dictionaries, and then select Free Form Text from the Type menu.
NOTES:
- The Custom Anomaly Policy rules only support the Free Form Text dictionary types.
- Only one dictionary can be selected from the list of predefined dictionaries for inclusion and exclusion.
- Include and Exclude options must not have the same predefined dictionary in the rules.
- Manually enter users. Manually enter user emails in a list. Use a comma to separate email addresses.
- Add Exclusions. Click to select one of the options for Users to Exclude in the rules, and then click Save. You can also select a dictionary from the list of predefined Free Form Text dictionaries to exclude users in the rule. This is an optional field and the rule does not exclude any user by default. For details, see Include or Exclude a User from Custom Anomaly.
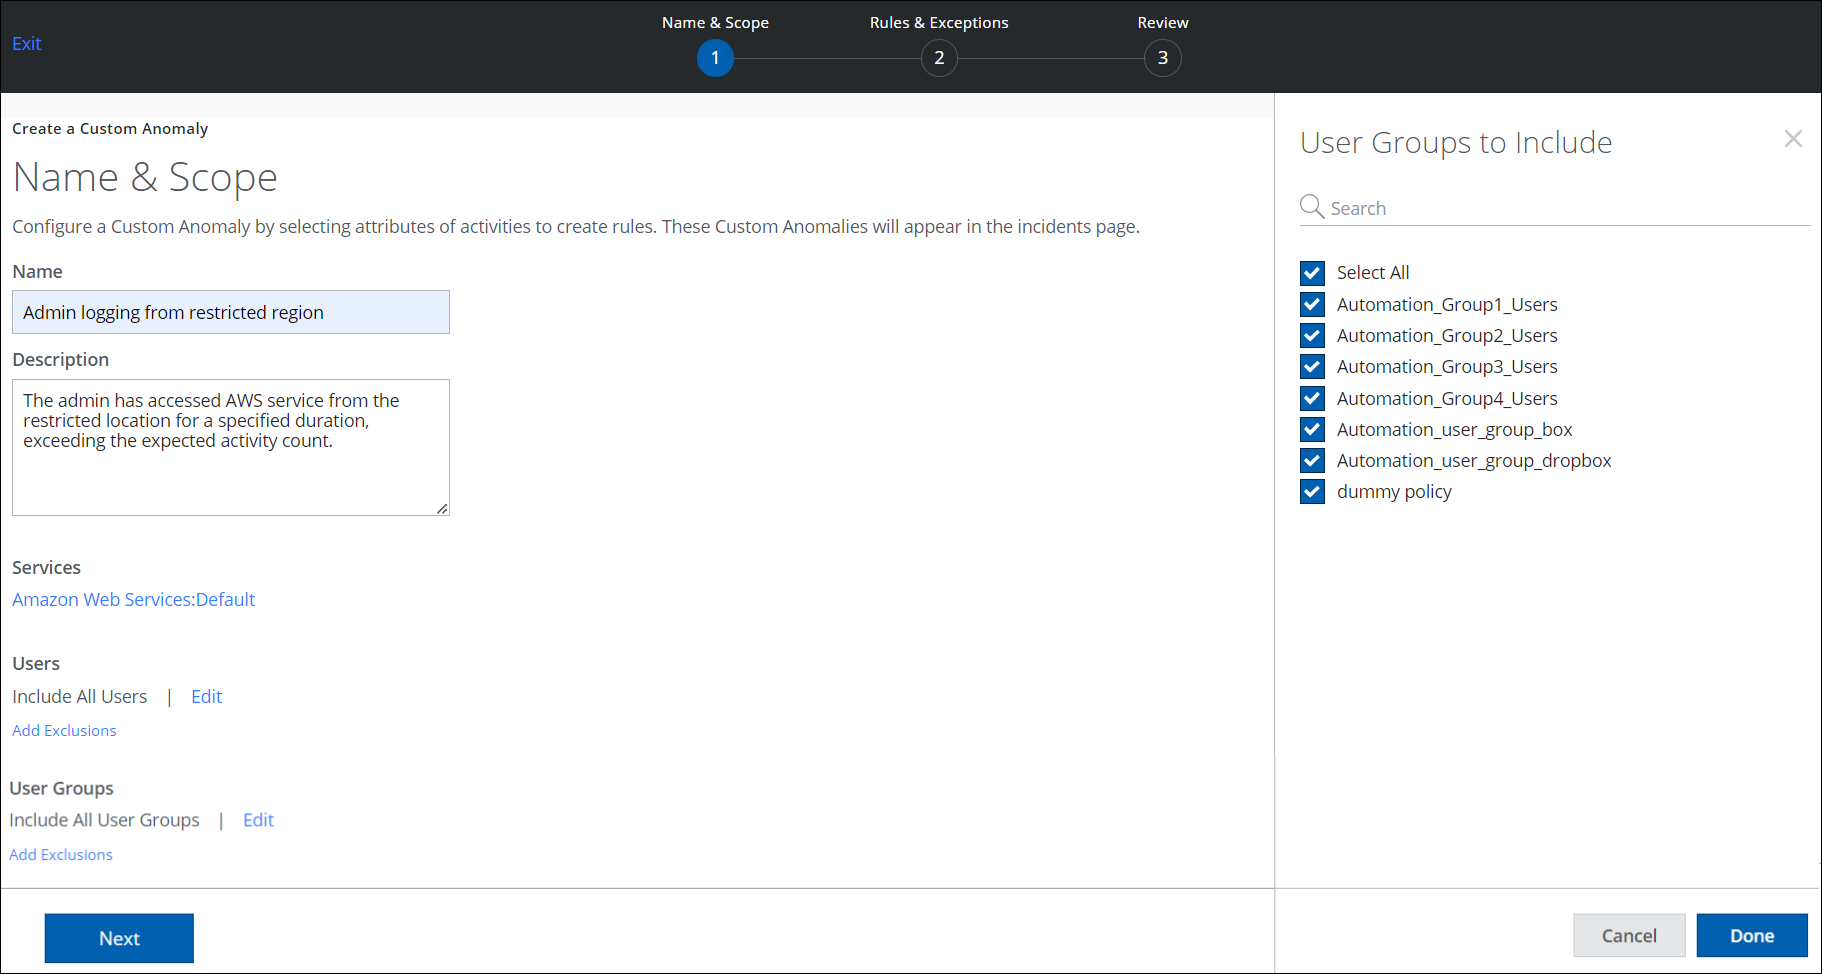
- User Groups. If your tenant has User Data (Active Directory) configured, click Edit to select all or the required User Groups to include in the rules and click Done.
- Add Exclusions. Select any User Groups to exclude from the rules and click Done.
NOTES:
- If the total number of users across all selected user groups exceeds the Active Directory(AD) user limit of 2000, the rule will not be evaluated.
- Large AD User Groups generally may have a user count exceeding the AD User limit. The user groups exceeding the supported count will be ignored. If the user group is created based on location, then it is recommended to replace these user groups with Location-based parameters on the Rules & Exception page—for example, adding location as Belarus and Australia. Click to expand the screenshot ->
 For more details on how to configure location rule parameters, see Location Rules.
- Click Next.
- On the Rules & Exceptions page, enter the following information:
- Rules. Specify the rules that the custom anomaly enforces. One or more rules can be created and deleted. Deleting the rules removes the included rules in that set. For more details on rules, see About Custom Anomalies Rules and Parameters.
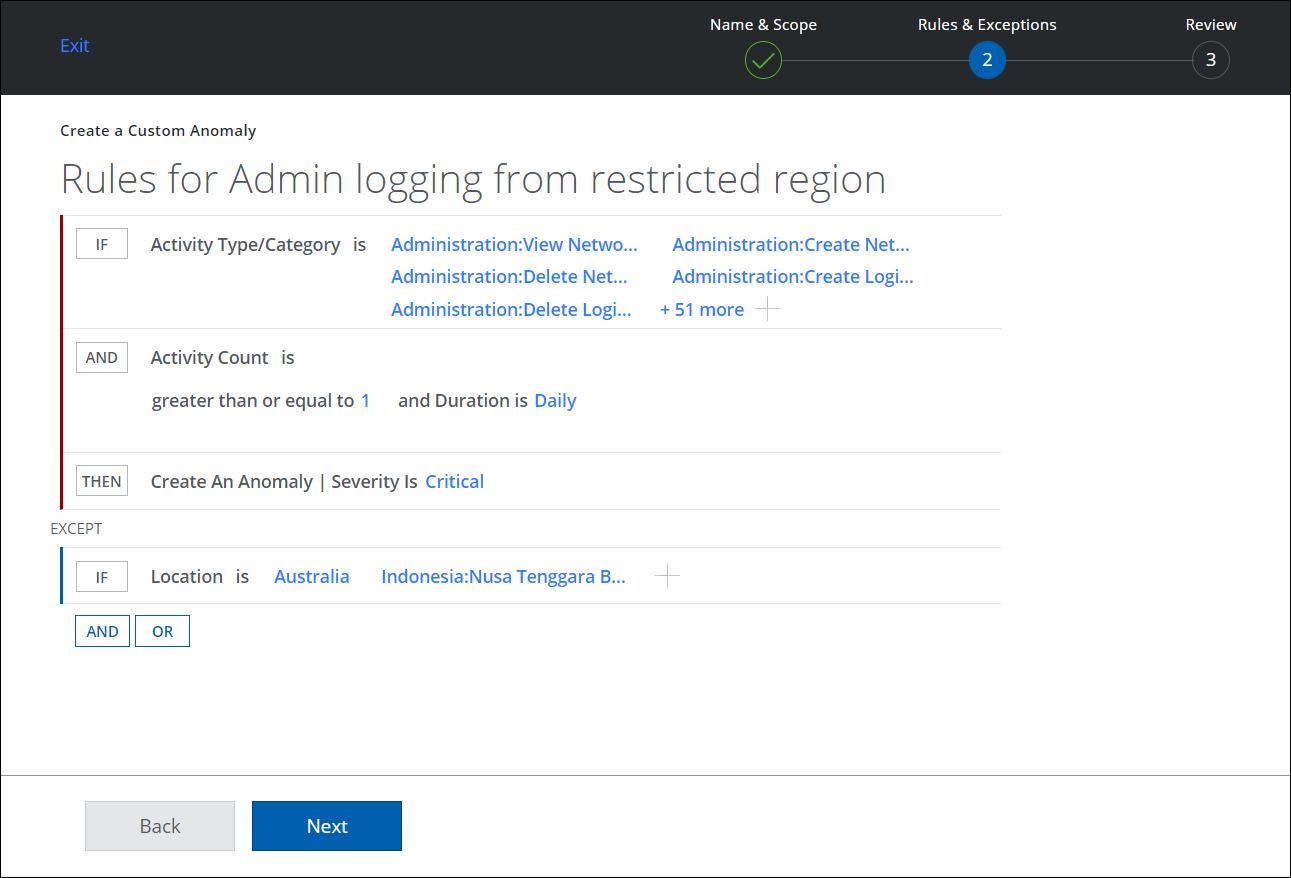
- Rules. Specify the rules that the custom anomaly enforces. One or more rules can be created and deleted. Deleting the rules removes the included rules in that set. For more details on rules, see About Custom Anomalies Rules and Parameters.
- Click IF to choose the Rules parameters. Rules can be configured with these parameters:
NOTE: Activity Type or Category and Activity Count are mandatory rules to complete your custom anomaly rule statement.
- Click AND to add another rule, if needed.
- Click THEN to create an anomaly and add a severity: Critical, Major, Minor, Warning, Info.
- Click OR to add one or more conditions to the rule.
- Click New Rule to add more if needed.
- Click Add Exception. Add one or more exceptions, if needed. The exception ignores the criteria within the rules.
- Click Next.
- On the Review page, the custom anomaly toggle status is On by default. To deactivate the anomaly, toggle the status to Off. Review all the changes made to the custom anomaly configuration and click Save.
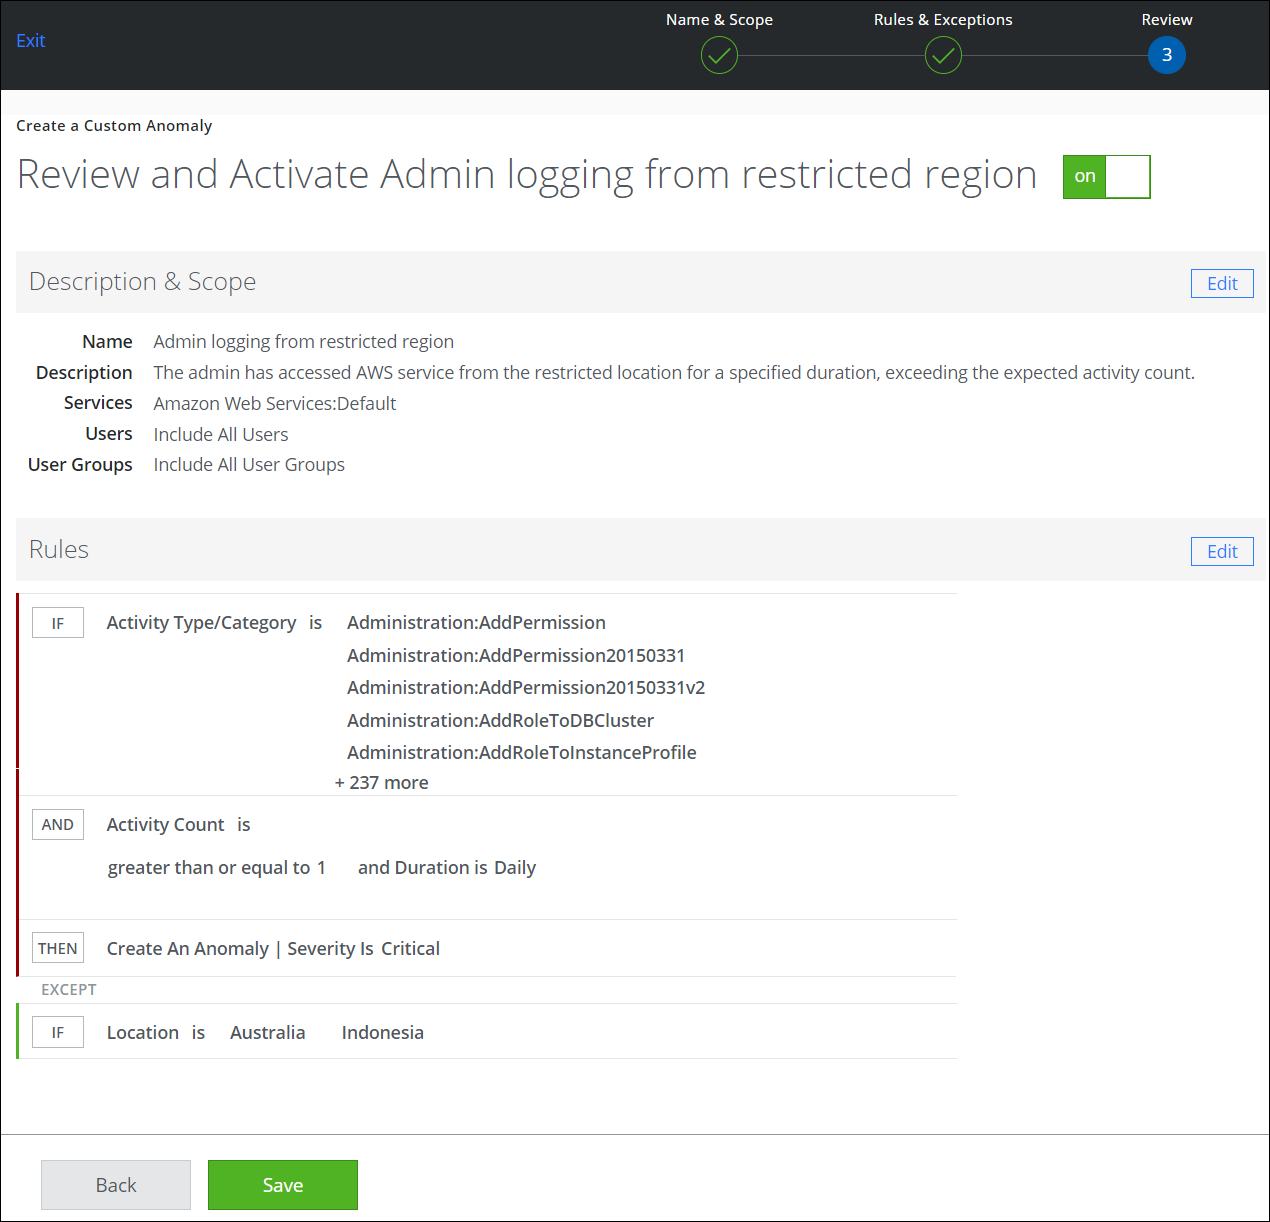
IMPORTANT: A maximum of 50 Custom Anomalies can be created and saved on the Anomaly Settings page. When the maximum limit is reached, the Custom Anomaly Limit message will be displayed. In that scenario, delete a Custom Anomaly before you can add a new one.
- On saving your configuration, the custom anomaly rule is created on the Anomaly Settings page.
The users can activate a maximum of 5 custom anomalies on the Anomaly Settings page. The Custom Anomaly rule created is either active or inactive by default based on the following criteria:
- If the maximum limit is not exceeded, then a custom anomaly is automatically activated.
- If the maximum limit is exceeded, then the anomaly is automatically deactivated. To activate, you need to deactivate a Custom Anomaly.
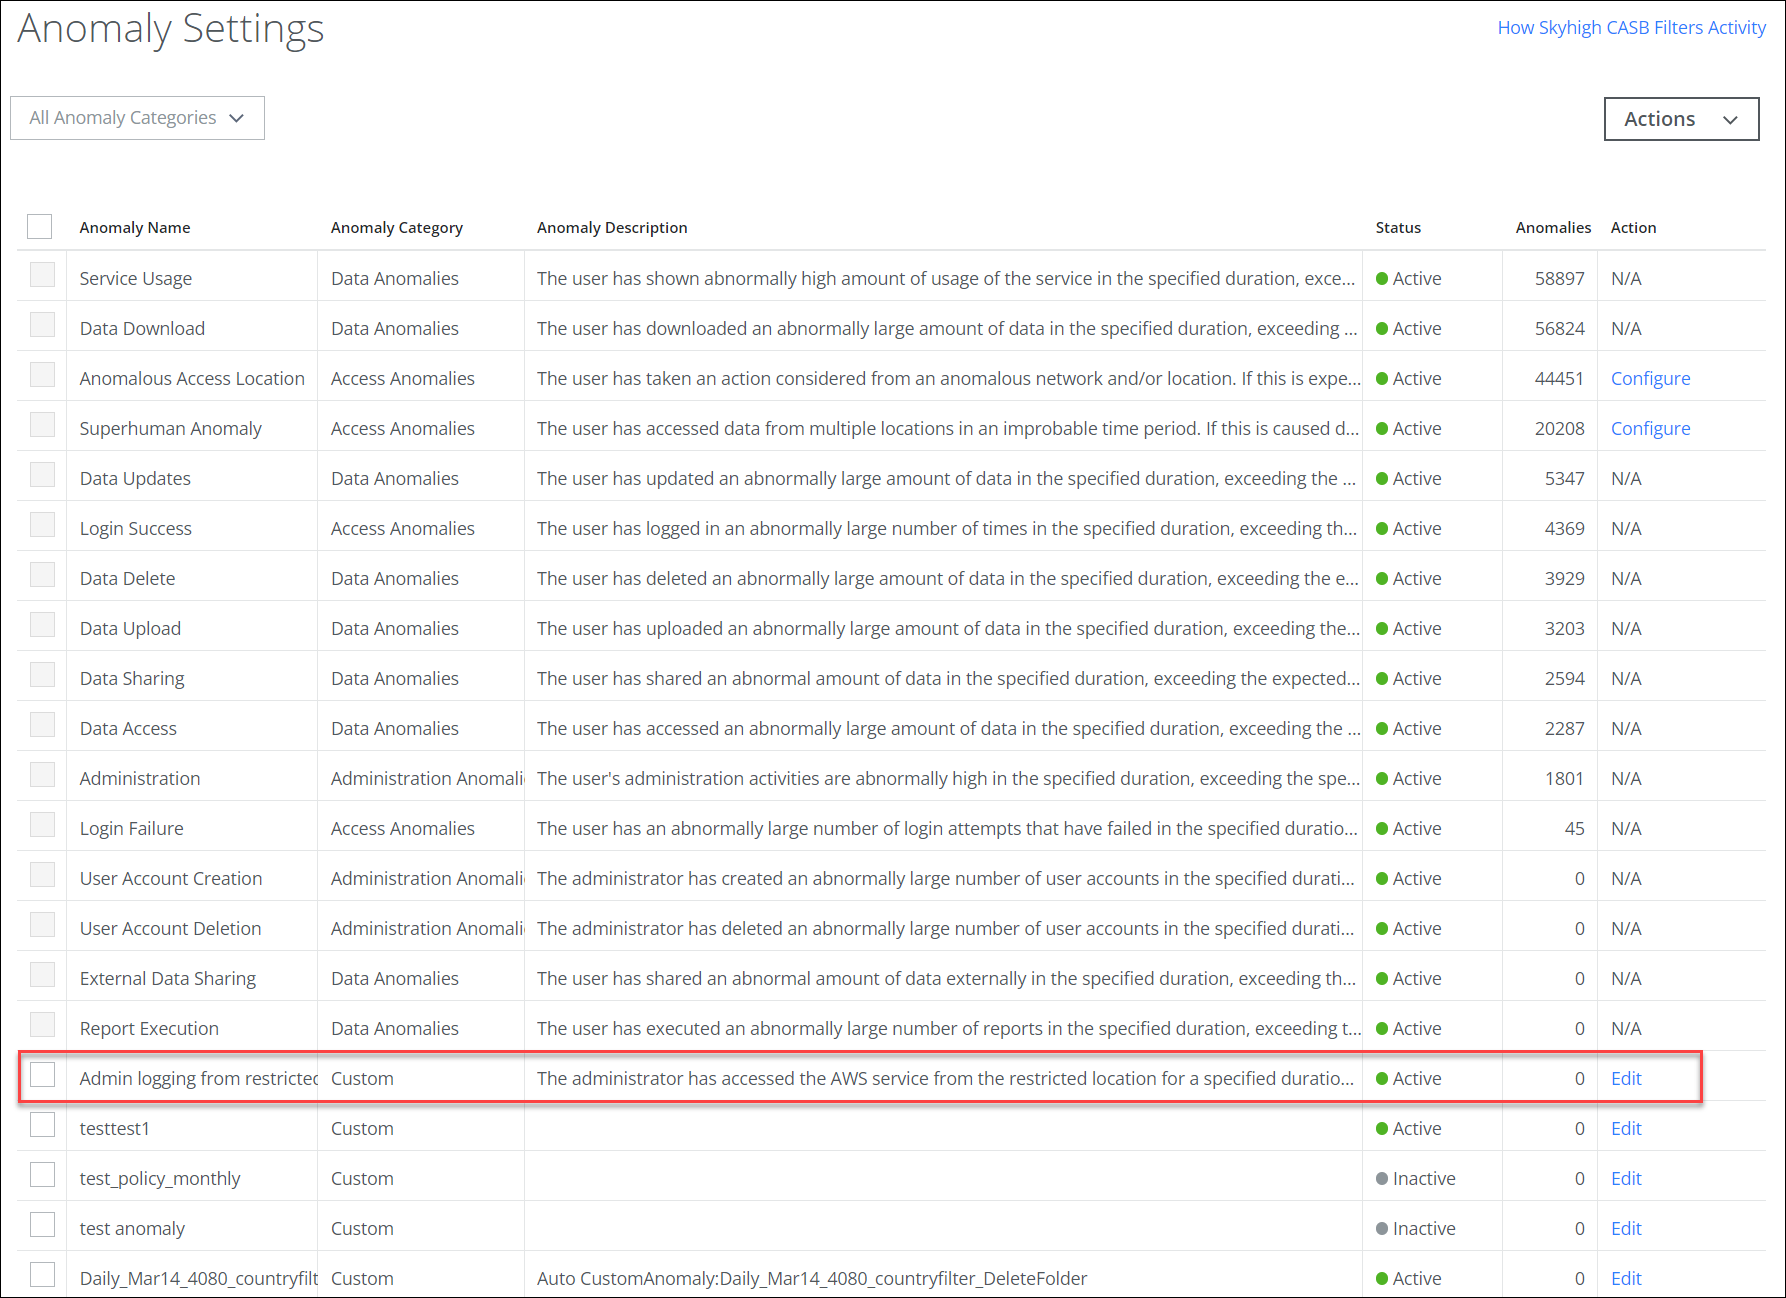
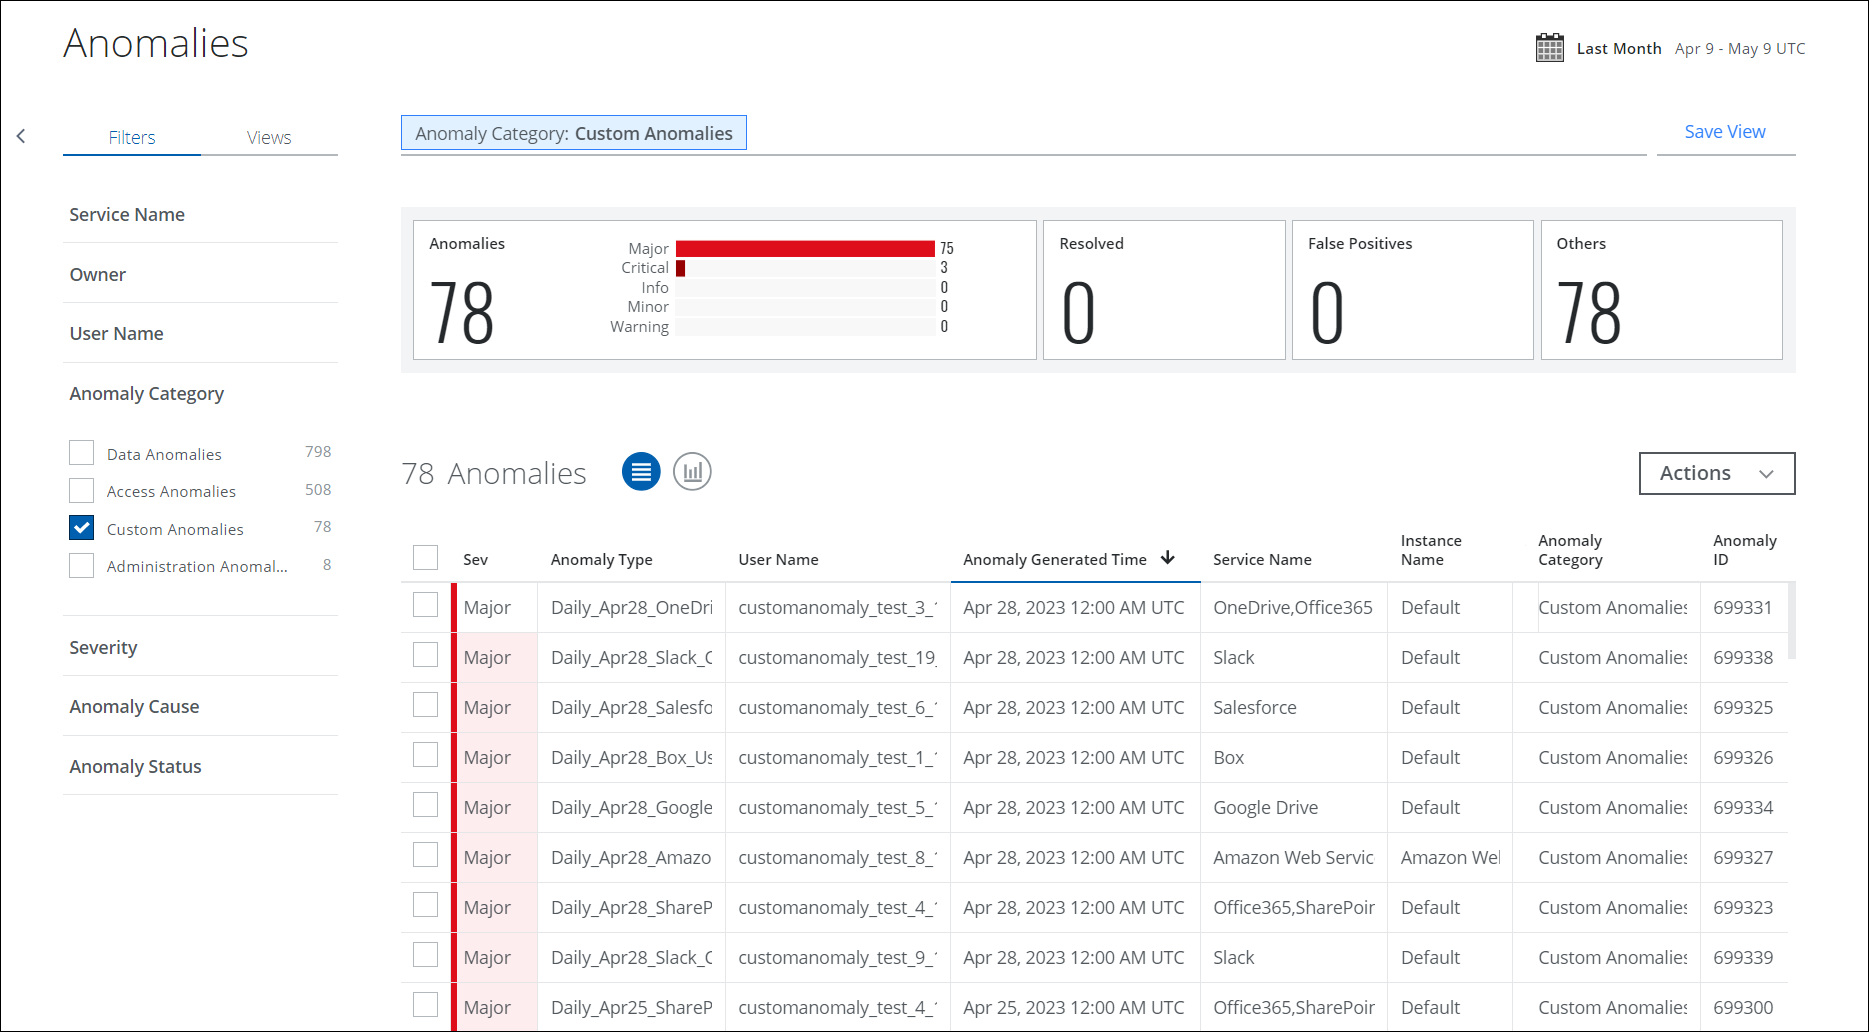
- Once the custom anomaly rule is created and activated. The rule starts to evaluate for anomalies and if any anomaly is detected, incidents are generated automatically on the Incidents > Anomalies page. For details, see About Custom Anomaly Incident.
