Check out Interactive Visual Stories to gain hands-on experience with the SSE product features. Click here.

Skyhigh Security

Auto-Remediation of SharePoint Incidents

Auto-Remediation is a triggered response to a policy violation. It is an automated approach to security, applying the appropriate response to a vulnerability in your SharePoint deployment. It ensures a high level of functionality by continuously monitoring risks. And it automatically remediates policy violation issues and reduces the window of malicious opportunity.

SharePoint Config Audit policies support both manual remediation and Auto-Remediation. You can choose the required remediation to reduce malicious activities on your SharePoint application.

  • For manual remediation, update the response action manually on the Incidents cloud card.
  • For auto-remediation, configure auto-remediation in the Config Audit policy, and the response action automatically triggers and remediates the policy violation.

Supported Remediation Actions

These are the supported remediation actions for SharePoint for the supported policy templates. 

Remediation Actions

Policy Templates

Email Notification All SharePoint policy templates
Enable configuration at global level
  • Enable notifications in SharePoint Online
  • Disable users from creating sites
  • Option to edit, copy, and paste files outside the browser for documents should be disabled at the tenant level
  • Set default link permission to view-only when users get links for sharing
  • Force external users to accept sharing invitations using the same account that the invitations were sent to
  • Prevent external users from resharing
  • Notify OneDrive owners if another user reshares a document from their account
  • Notify OneDrive for the Business owner about anonymous access link creation or change
  • Notify OneDrive for the Business owner when notifications are accepted
  • Disable users from downloading files that are detected as malicious.
  • BCC external sharing invitations
  • Disable external services in SharePoint Online
  • Apply conditional access policies to guest users
  • Enable persistent cookie for the Explorer view
  • Disable ShowEveryoneExceptExternalUsersClaim to restrict users from broadly sharing within the organization
  • Disable ShowAllUsersClaim to restrict users from broadly sharing within the organization and to users with previously accepted sharing invitations
  • Disable ShowEveryoneClaim to restrict users from broadly sharing within the organization and to external users
  • Enforce only OneDrive for the Business owner for sharing
  • Enable mobile push notifications for users to get changes to their OneDrive for Business content
  • Require a password for mobile devices
  • Prohibit password reuse for mobile devices
  • Make sure that mobile devices are set to never expire passwords
  • Wipe mobile devices on multiple sign-in failures to prevent brute force compromise
  • Ensure that mobile devices require a complex password with minimum password length to prevent brute force attacks
  • Ensure that mobile devices require a complex alphanumeric password to prevent brute force attacks
  • Ensure that mobile devices restrict simple passwords to prevent brute force attacks
  • Enable settings to lock devices after a period of inactivity to prevent unauthorized access
  • Enable mobile device encryption to prevent unauthorized access to mobile data
  • Enable antivirus and a local firewall for connecting devices
  • Do not allow users to connect from devices that are jailbroken or rooted

Configure Auto-Remediation  

You can add Auto-Remediation to the selected SharePoint policies. Changes are not applied retroactively.  

To add an auto-remediation response:

  1. Choose Policy > Configuration Audit.
  2. To customize the affected policy, click Edit.
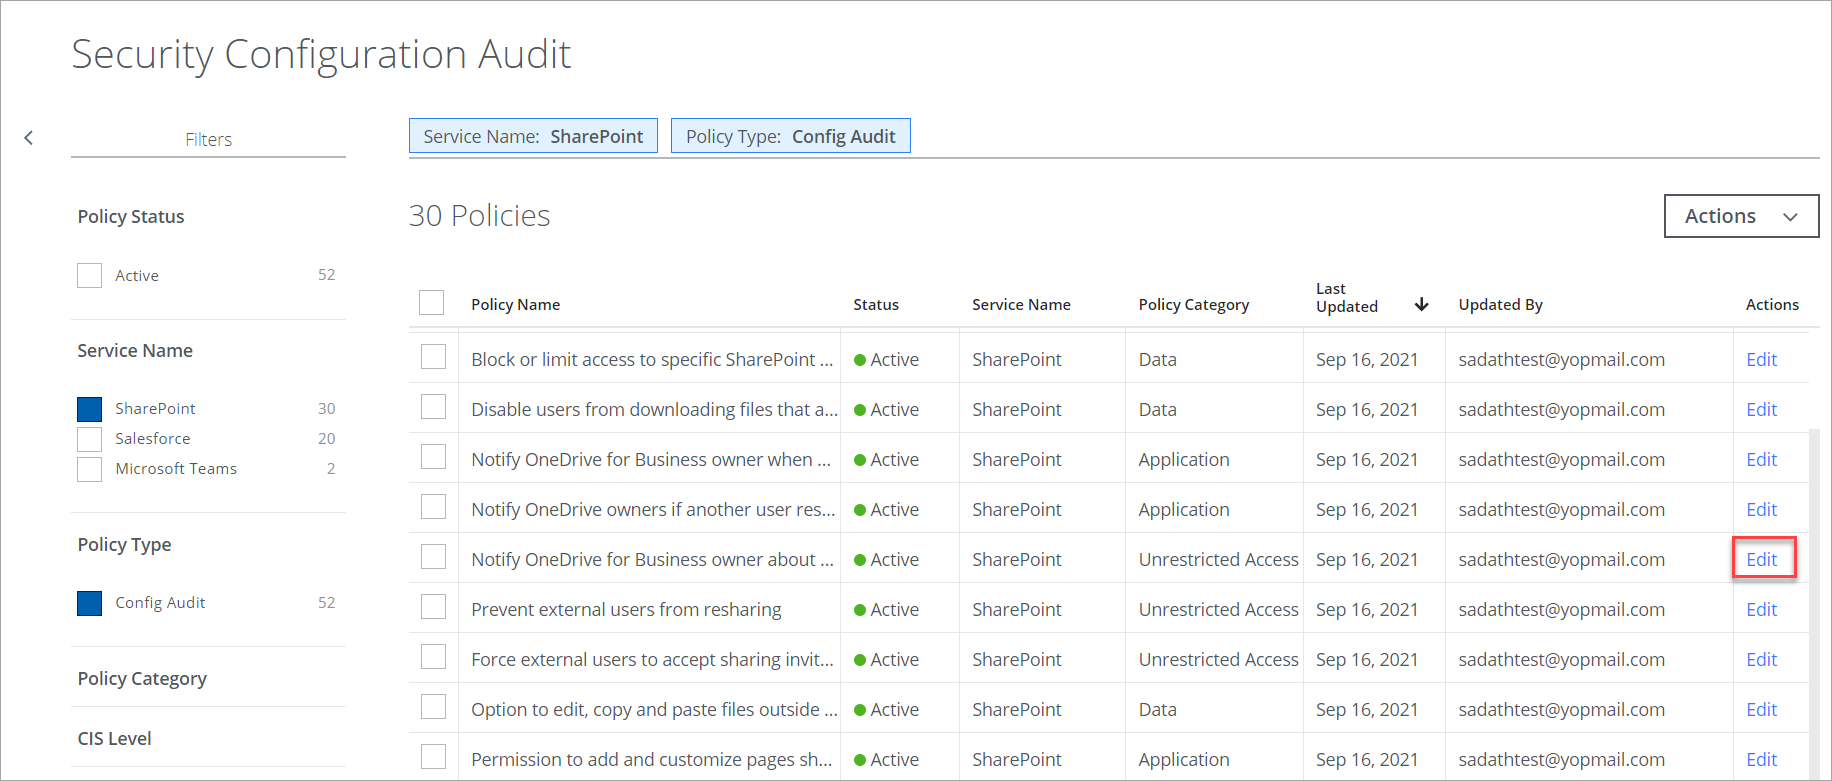
    clipboard_ec7adeb07047d3ae94f15a336d10dc54e.png
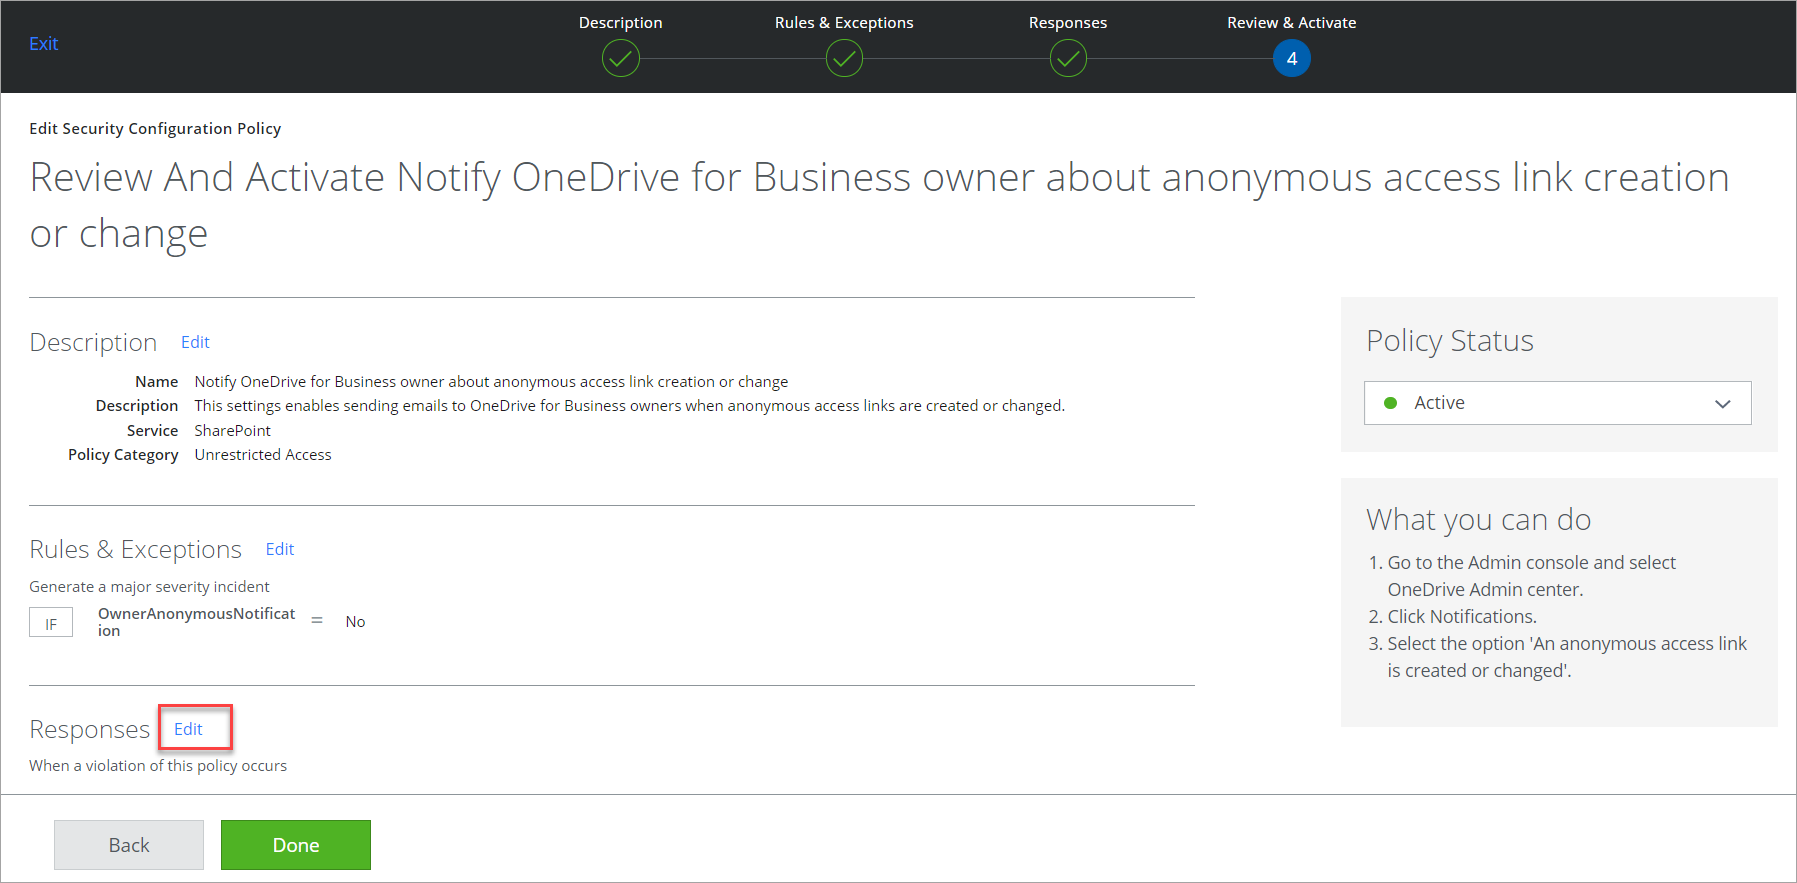
  3. Under Response, select Edit.
    clipboard_ea737d70114b5740ac0d7c8bbcd84301a.png
  4. You are redirected to the following screen. To add the responses, click Add.
    clipboard_e2037285d177b9d287a04549a4cff4213.png
  5. Select the required responses from the list and click Next.
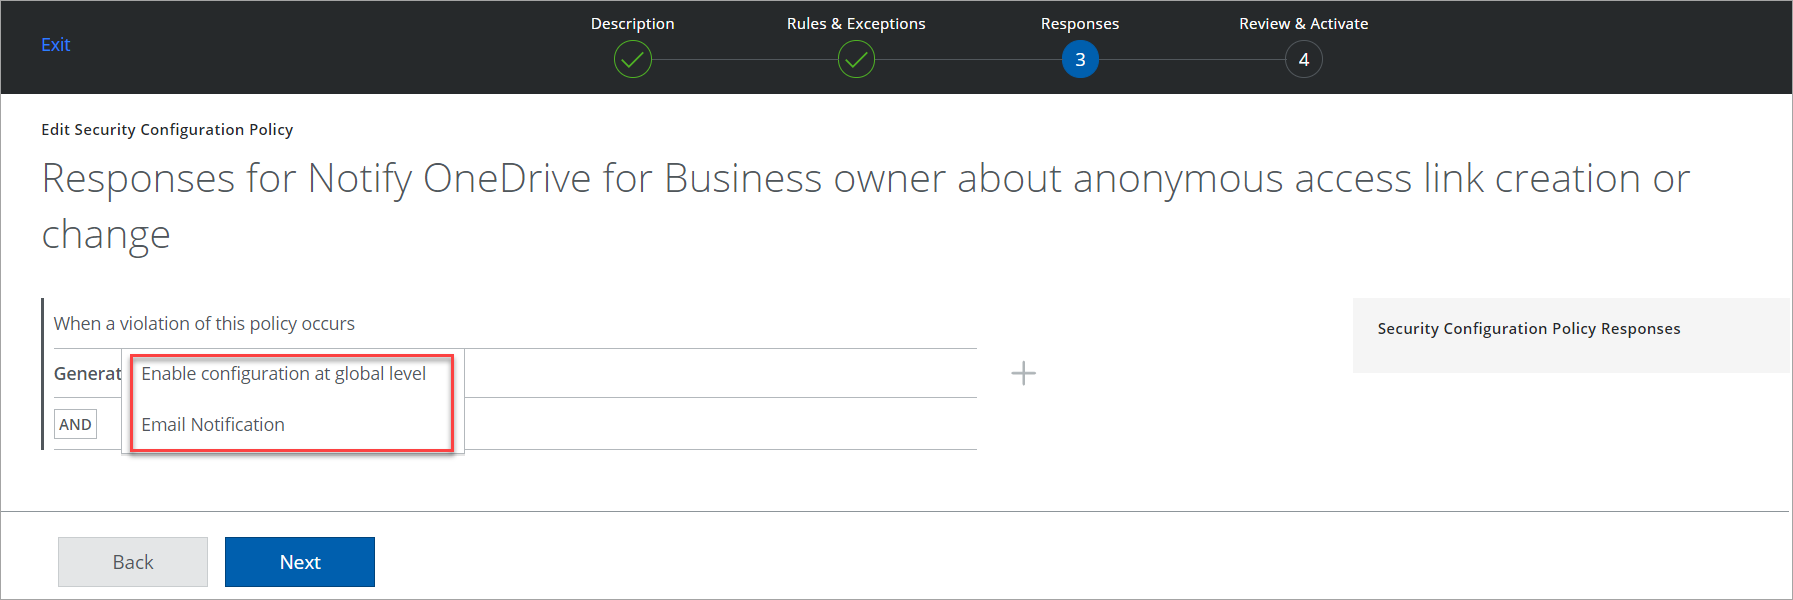
    clipboard_eda90e5e8b10b462608dc5d3d39b69c79.png
  6. Verify the selected response is shown under Responses and click Done.
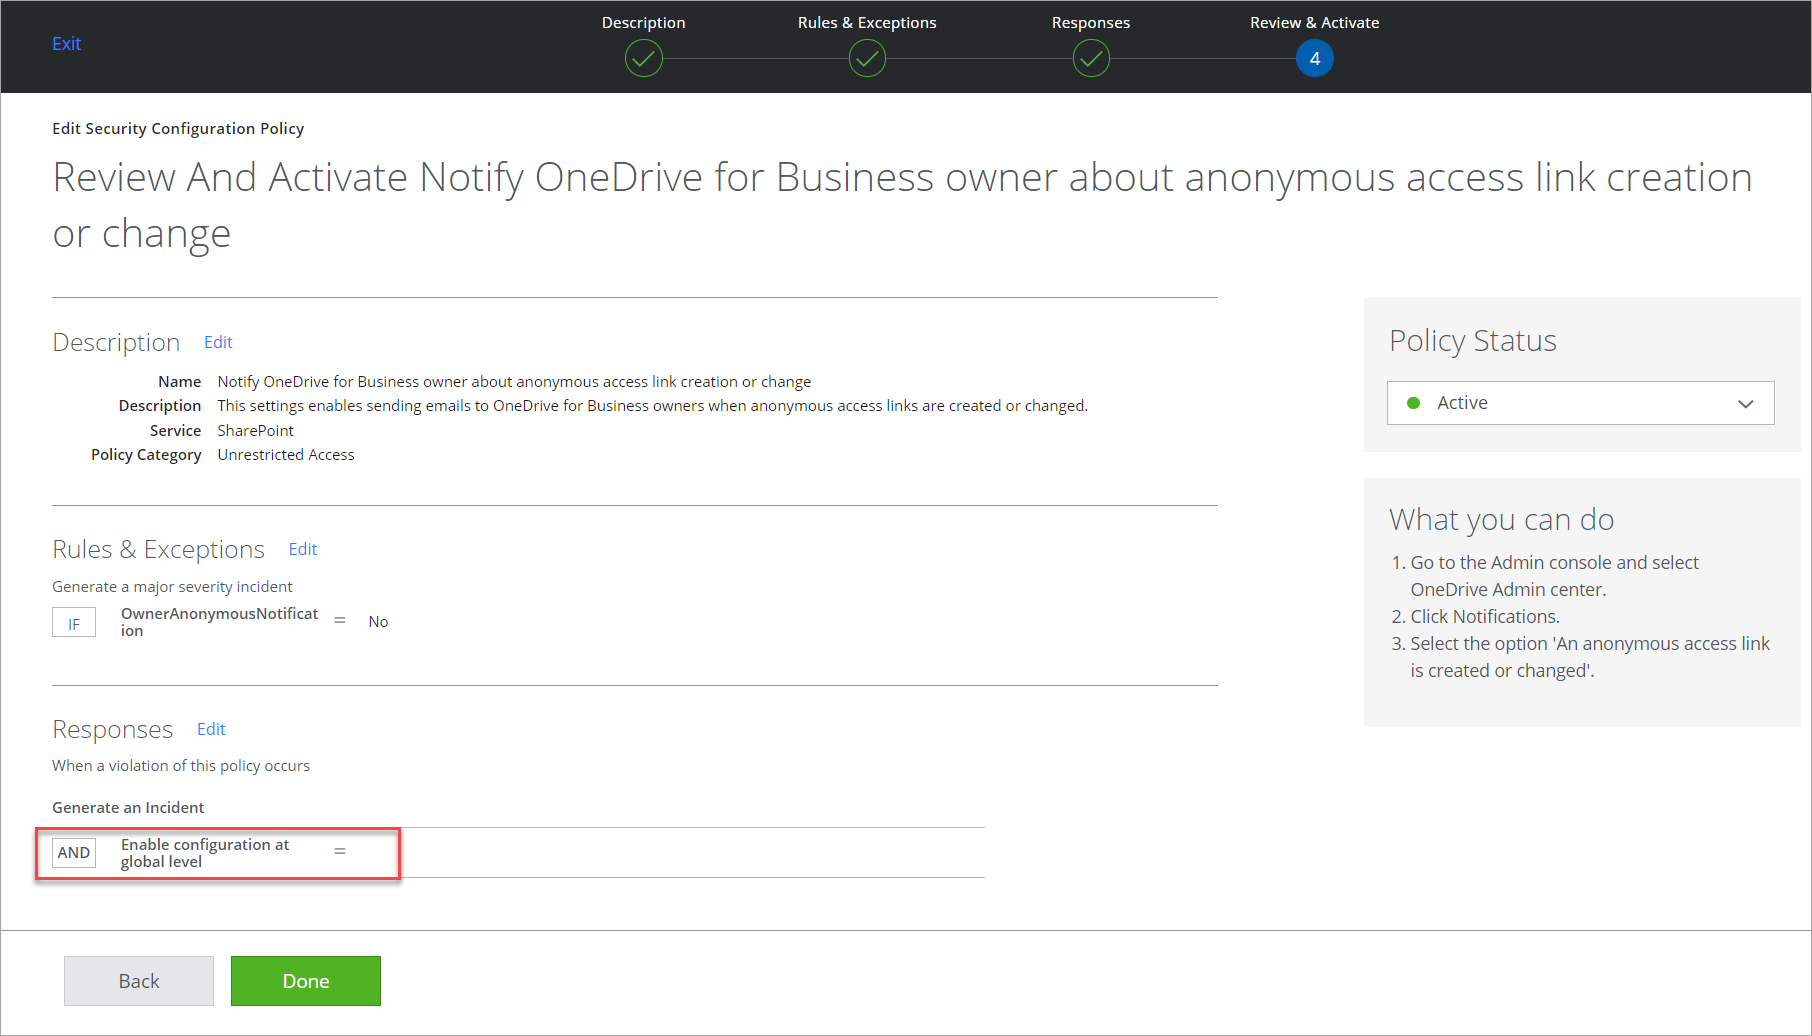
    clipboard_e94ee1774618414e93249928b592d7c94.png
  • Was this article helpful?