Primary User - Identity Provider
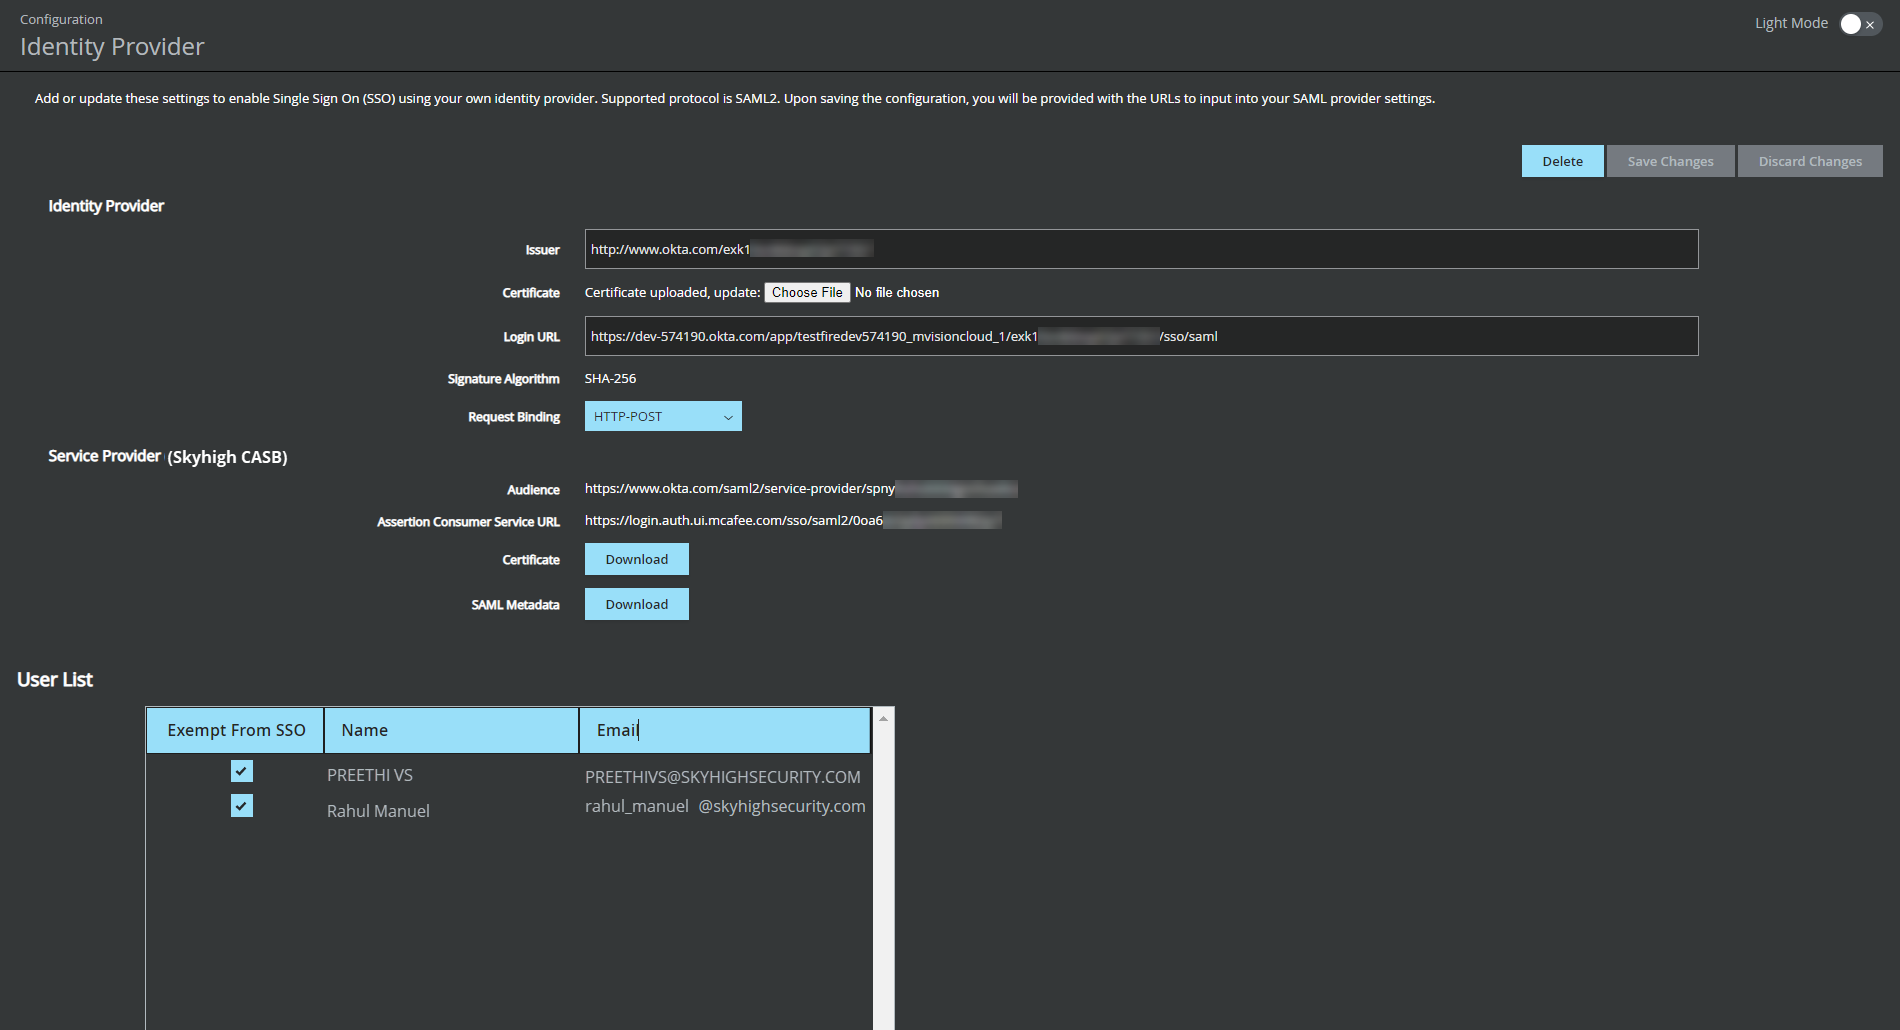
The Identity Provider page allows you to add or update the configurations to enable Single Sign-On (SSO) using your own identity provider. The supported protocol is SAML 2.
NOTES:
- If a new SAML configuration is created, or an existing configuration is updated or deleted on the Trellix Identity Provider page, the events are recorded within the audit log (found under Settings > Audit Log).
- You must have a Skyhigh User Manager role with Manage access OR a Trellix Account Administrator role to configure SAML and SSO from the Trellix Identity Provider page. To add or edit the user role, see About the Users Page and Primary User - Manage Users respectively.
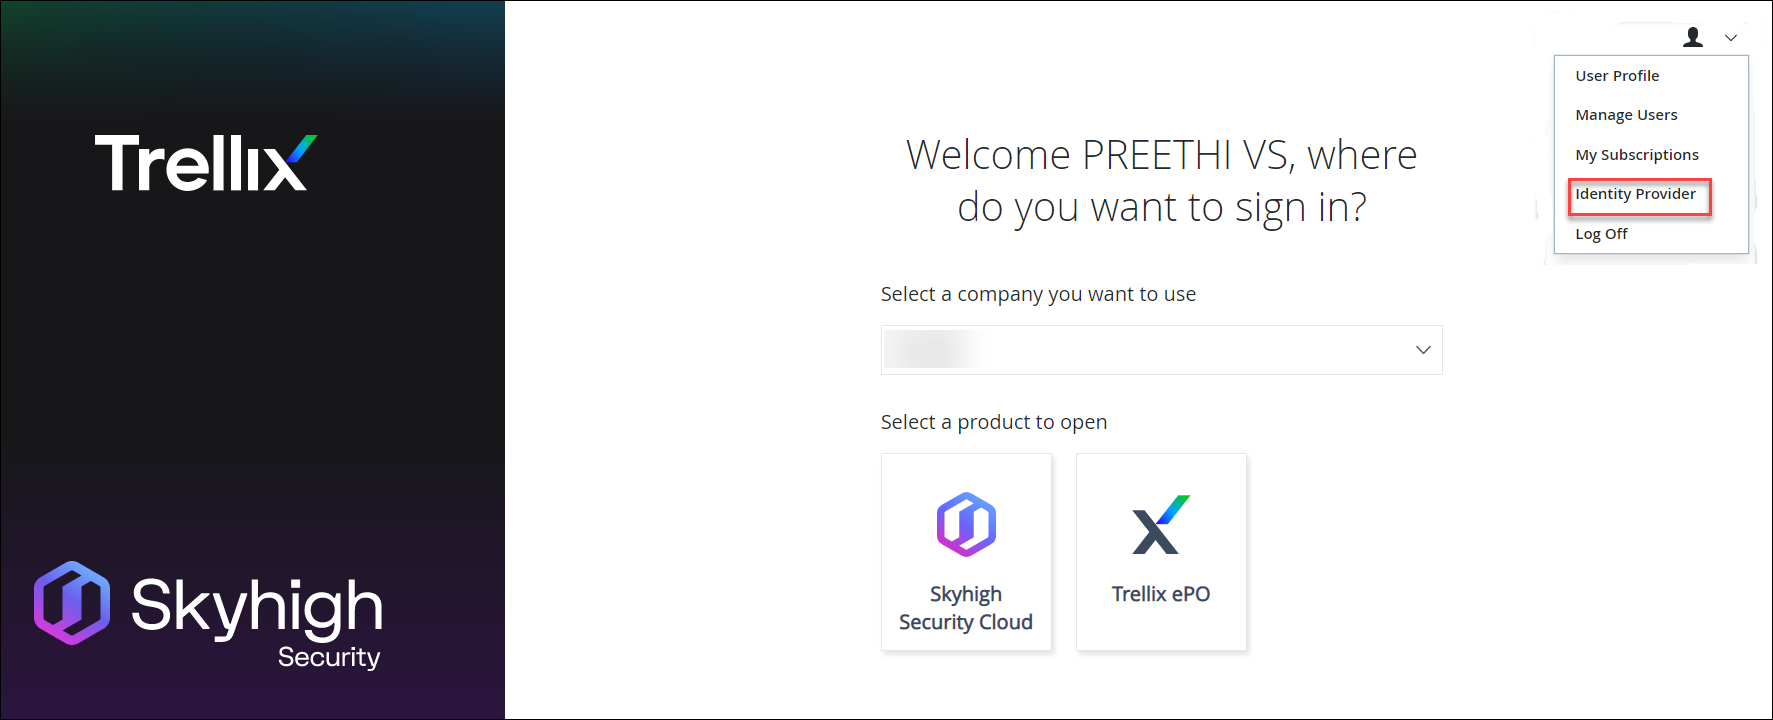
- Click Identity Provider.

- On the Identity Provider page, configure the following:
- Identity Provider. Enter the following information from your IdP.
- Service Provider (MVISION). Enter the following information to Service Provider (MVISION)
- Audience. Edit your IdP application's SAML settings to update the Audience URI.
- Assertion Consumer Service URL. Edit your IdP application's SAML settings to include the Single Sign On URL.
- Certificate. Download the SP certificate to validate our signature on the SAML request (Authentication).
- SAML Metadata. Download the SAML metadata. It can be imported into IdP to configure automatically.
- User List. You can include or exclude the user list from SSO.

-
Click Save Changes.
Upon saving the configuration, you will be provided with the URLs to add to your SAML Provider settings.
