Integrate Workday SSO with ADFS (IdP) via Proxy
Use this procedure to configure Active Directory Federation Services (ADFS), configure Workday, and integrate the proxy.
Prerequisites
Before you begin, you will need:
- Admin access to your Workday instance.
- Admin access to ADFS.
- Access to Skyhigh CASB and appropriate role/rights to manage the Workday service.
- Access to functional direct SSO setup between Workday and ADFS.
Step 1: Configure ADFS
Create the Workday Private Certificate
- Login to your Workday instance as admin and search for the task Create x509 Private Key Pair.
- Name the private certificate you want to create and click OK. For example, Workday-SP-Cert.

- Workday will show you the generated cert on the next screen. Copy the content FROM -----BEGIN CERTIFICATE----- TO -----END CERTIFICATE----- and save that into a file. For example, Workday-SP-Cert. cer. (Make sure that the copied content is clean, and do not copy the content before BEGIN and after the END section.) This is your SP certificate. Later, you can use this SP certificate to integrate proxy in Skyhigh CASB.
Configure the Relying Party in ADFS
To create a relying party trust using federation metadata:
- Create the Workday metadata file and save it in an .xml file. Later, you can upload this metadata file on the last step.
- Open Server Manager and under Tools, select ADFS Management.
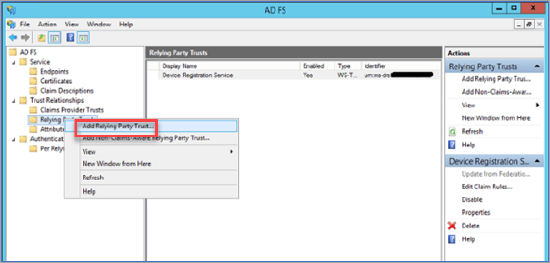
- Click ADFS Management and expand the Trust Relationships folder. Right-click the Relying Party Trusts folder and select Add Relying Party Trust.
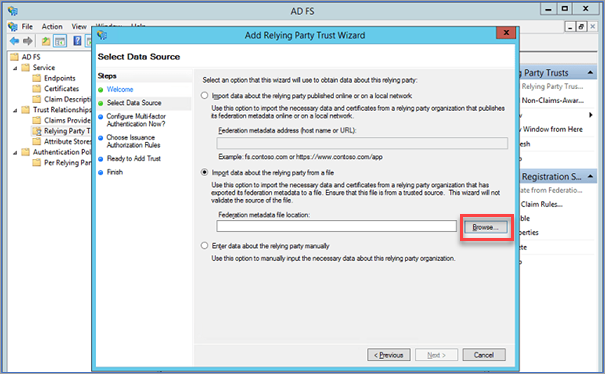
- On the Select Data Source page, choose Import data about the relying party from a file, and click Browse to select the metadata file created in the first step.
- Click Next and perform the required steps.
- Click Save.
Configuring the Relying Party Trust Claim Rules
- Go to Relying Party Trust > Workday, and right-click Edit Claim Rules.
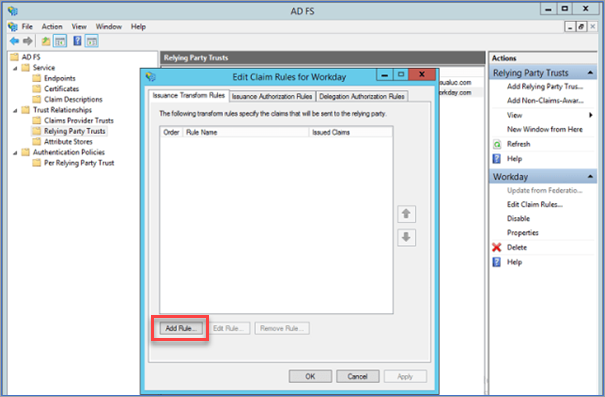
- Click Add Rule.
- Configure the following options:
- Claim rule name. Enter the name of the claim rule.
- Attribute store. Select the attribute store to extract LDAP attributes.
- Mapping of LDAP attributes to outgoing claim types. Select the LDAP attributes against outgoing claim types.
- Once the rule has been added, click Finish.
- To close the window, click OK.
Download the Token Signing Certificate
To download the Token Signing Certificate:
- Under the ADFS Management page, expand the Service folder and select the Certificates folder.
- Click the Token signing to download the token signing certificate.
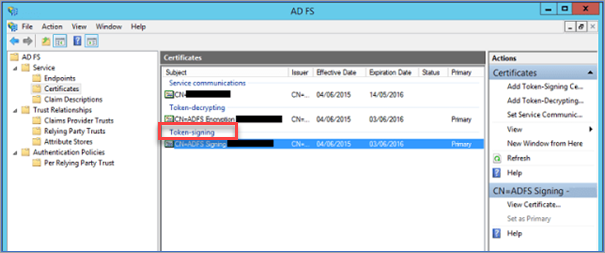
This is your IdP certificate. Later, you can use this IdP certificate to integrate proxy in Skyhigh CASB.
Step 2: Configure Workday
Configure Workday SSO Integration
- Log in to Workday as an admin and search for the task Edit Tenant Setup - Security.
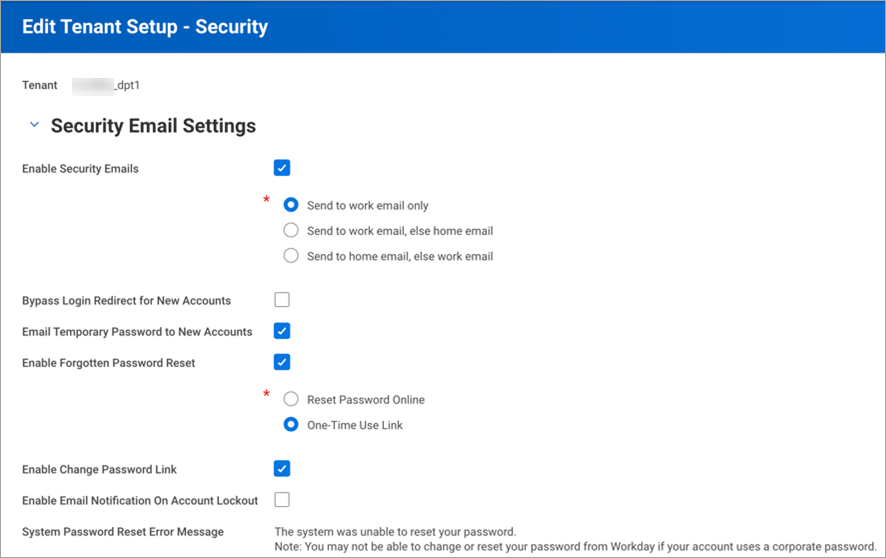
- Go to Single Sign-on and under Redirection URLs, add a new Redirection URL. Configure as follows:
- Redirect Type. Select Single URL.
- Login Redirect URL. Enter the Login URL from ADFS > SSO > Setup Workday.
- Mobile Redirect URL. Enter the Login URL from ADFS > SSO > Setup Workday.
- Logout Redirect URL. Enter the Logout URL from ADFS > SSO > Setup Workday.

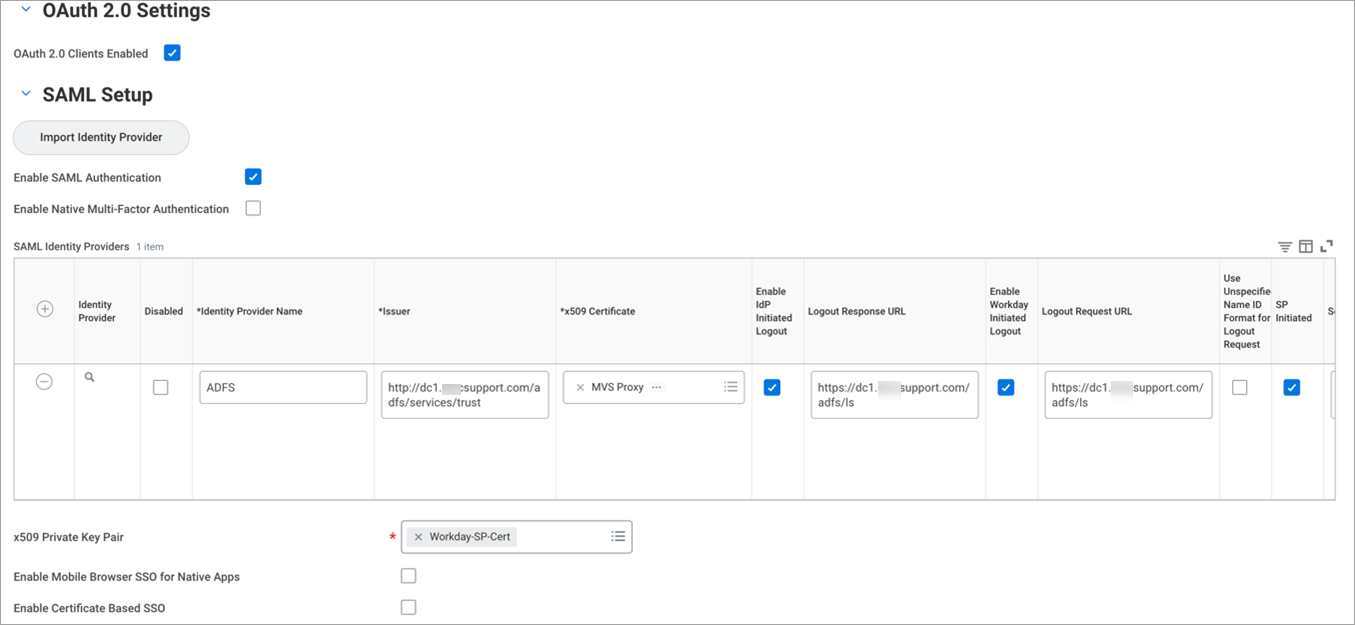
- Go to the SAML Setup section to configure Identity Provider.
- Activate the checkbox Enable SAML Authentication.
- Click + to create a new Identity Provider and configure:
- Identity Provider Name. Enter a name. For example, ADFS.
- Issuer. Enter ADFS Identifier, as copied from ADFS > SSO > Setup Workday.
- *x509 Certificate. Add the ADFS (IdP) certificate you downloaded from ADFS.
- Logout Response URL. Add the Logout URL from ADFS > SSO > Setup Workday.
- Activate the checkbox SP Initiated.
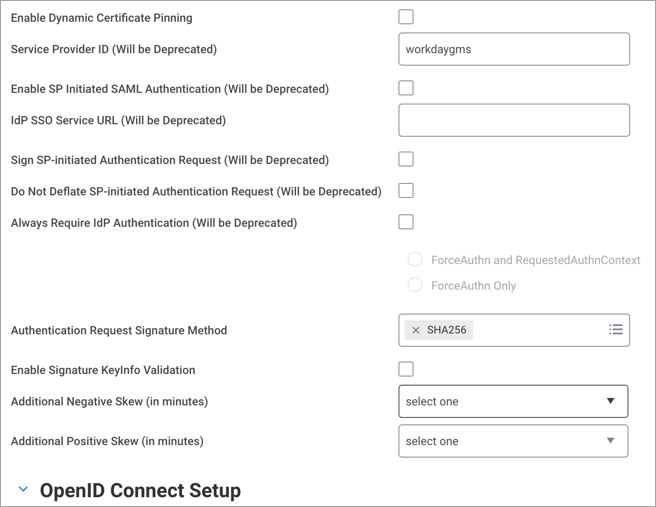
- Service Provider ID. Enter http://www.workday.com.
- Activate the checkbox Sign SP-initiated Request.
- Activate the checkbox Do Not Deflate SP-initiated Request.
- IdP SSO Service URL. Enter the Login URL from ADFS > SSO > Setup Workday.
- Used for Environments. Select Implementation type environment.
- Click OK to save.
- Configure the Identity Provider section as follows:
- x509 Private Key Pair. Select the Workday-SP-Cert that you created.
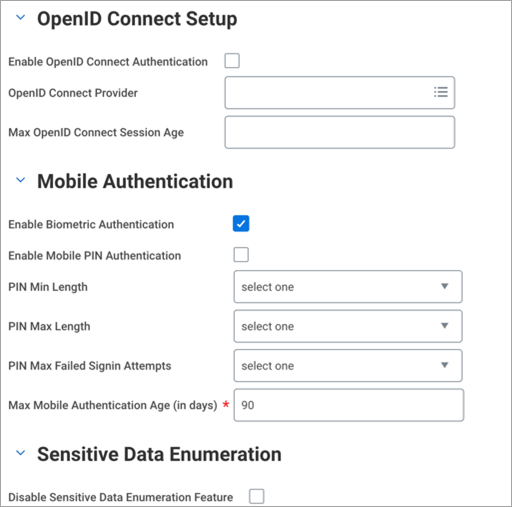
- Under Mobile Authentication, activate the checkbox Enable Biometric Authentication.
- Max Mobile Authentication Age (in days). Enter the number of days.
- Under Trusted Devices, activate the checkbox Disable Trusted Devices.
- Under Multi-Factor Authentication Settings, configure:
- Maximum Grace Signin Count. Select the maximum number of logins allowed per user once their password has expired.

- Maximum Grace Signin Count. Select the maximum number of logins allowed per user once their password has expired.
- x509 Private Key Pair. Select the Workday-SP-Cert that you created.
Validate the SSO Integration
Access the following:
- Workday login URL: https://impl.workday.com/<tenant-name>/login-saml2.htmld . (This is the SP-initiated login flow.)
- Login to the ADFS login URL for Workday and input your credentials to authenticate with ADFS. (This is IdP-initiated login flow.)
The assumption is that the ADFS user is present in Workday as well and activated.
Step 3: Integrate the Proxy
Once you know the direct SSO configuration between ADFS and Workday is working, now configure the Proxy in between.
Prerequisites
Before integrating proxy, collect the following information:
- Workday Domain or Workday URL.
- Workday Tenant Name.
- ADFS and Workday Certificates.
Skyhigh CASB
- Log in to Skyhigh CASB.
- Go to Service Management and find your Workday instance.
- To manage the proxy service for Workday, go to the Setup tab and under Proxy, click Configure.
- If you a custom domain other than workday.com, enter the Target Host (Hostname) under Identify Service Instance with custom domain information. For example, if your custom domain is wd3-impl.workday.com, the hostname is “wd3-impl.workday.com”.
- On the Setup tab, under Proxy > Configure SAML, click Configure.
- Upload the SP (Workday) and IdP (ADFS) certificates. You can get these certificates from Step 1.
- To download the Proxy Server Certificate, click Export Proxy Server Certificate. For example, proxy.crt. Save this certificate to use in Workday SP.
- Go to Service Management > your Workday instance > Actions > Edit Properties and add the service level property as remove.shnsaml.from.uri=true. Click Save.
ADFS IdP
- Log in to ADFS as admin and edit the Workday app.
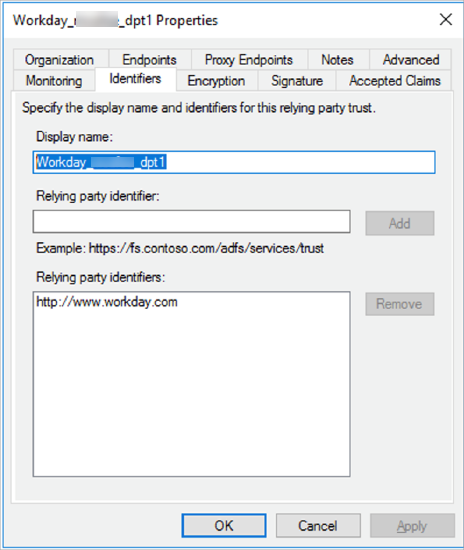
- Under ADFS Management > Trust Relationships > Relying Party Trust, modify the SAML Assertion Consumer Endpoint (ACS URL) with https://www<proxy_virtual_host>/<tenant_name>/login-saml.flex?shnsam. For example, ACS URL: https://wwwworkday.dpt1.skyhighlab.myshn.net/skyhigh_dpt1/login-saml.flex?shnsaml.
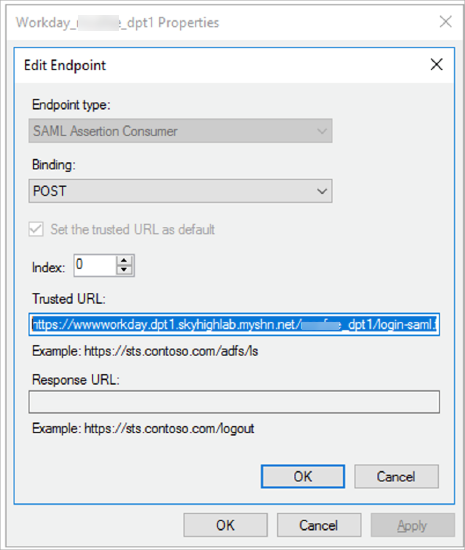
- Click Apply.
Workday SP
- Log in to Workday as an admin and search for the task Edit Tenant Setup - Security. Go to the SSO config section.
- Go to the SAML Identity Provider section.
- Under x509 Certificate, remove the existing IdP (ADFS) certificate and add the Proxy certificate downloaded earlier in the Skyhigh CASB section.
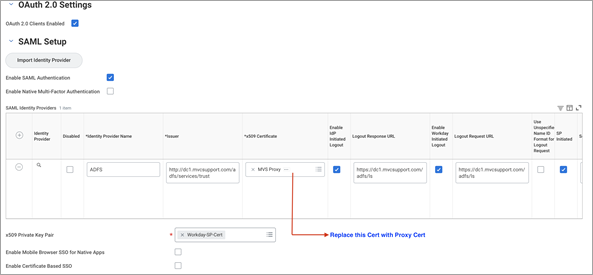
- Click OK and save the configuration.
Validate the SSO Flow via Proxy
To validate the SSO flow via proxy, access the Workday SSO URL: https://<workday_domain>/<tenant_name>/login-saml2.flex.
