Integrate Skyhigh CASB for Office 365 with PingFederate SSO and SAML 2.0
You can configure Skyhigh CASB to work with Microsoft Office 365 with PingFederate SSO. This guide shows how to integrate when using SAML 2.0 with Office 365 and Ping. If you use WSFED / SAML 1.1 then the integration only requires the change of the ACS URL
Prerequisites
Make sure the following prerequisites are in place:
- Add a Microsoft Office 365 instance to Skyhigh CASB.
- Create a new domain to federate the Office 365 managed service. For example, "demoXX.us" for PingFederate.
Configure PingFederate
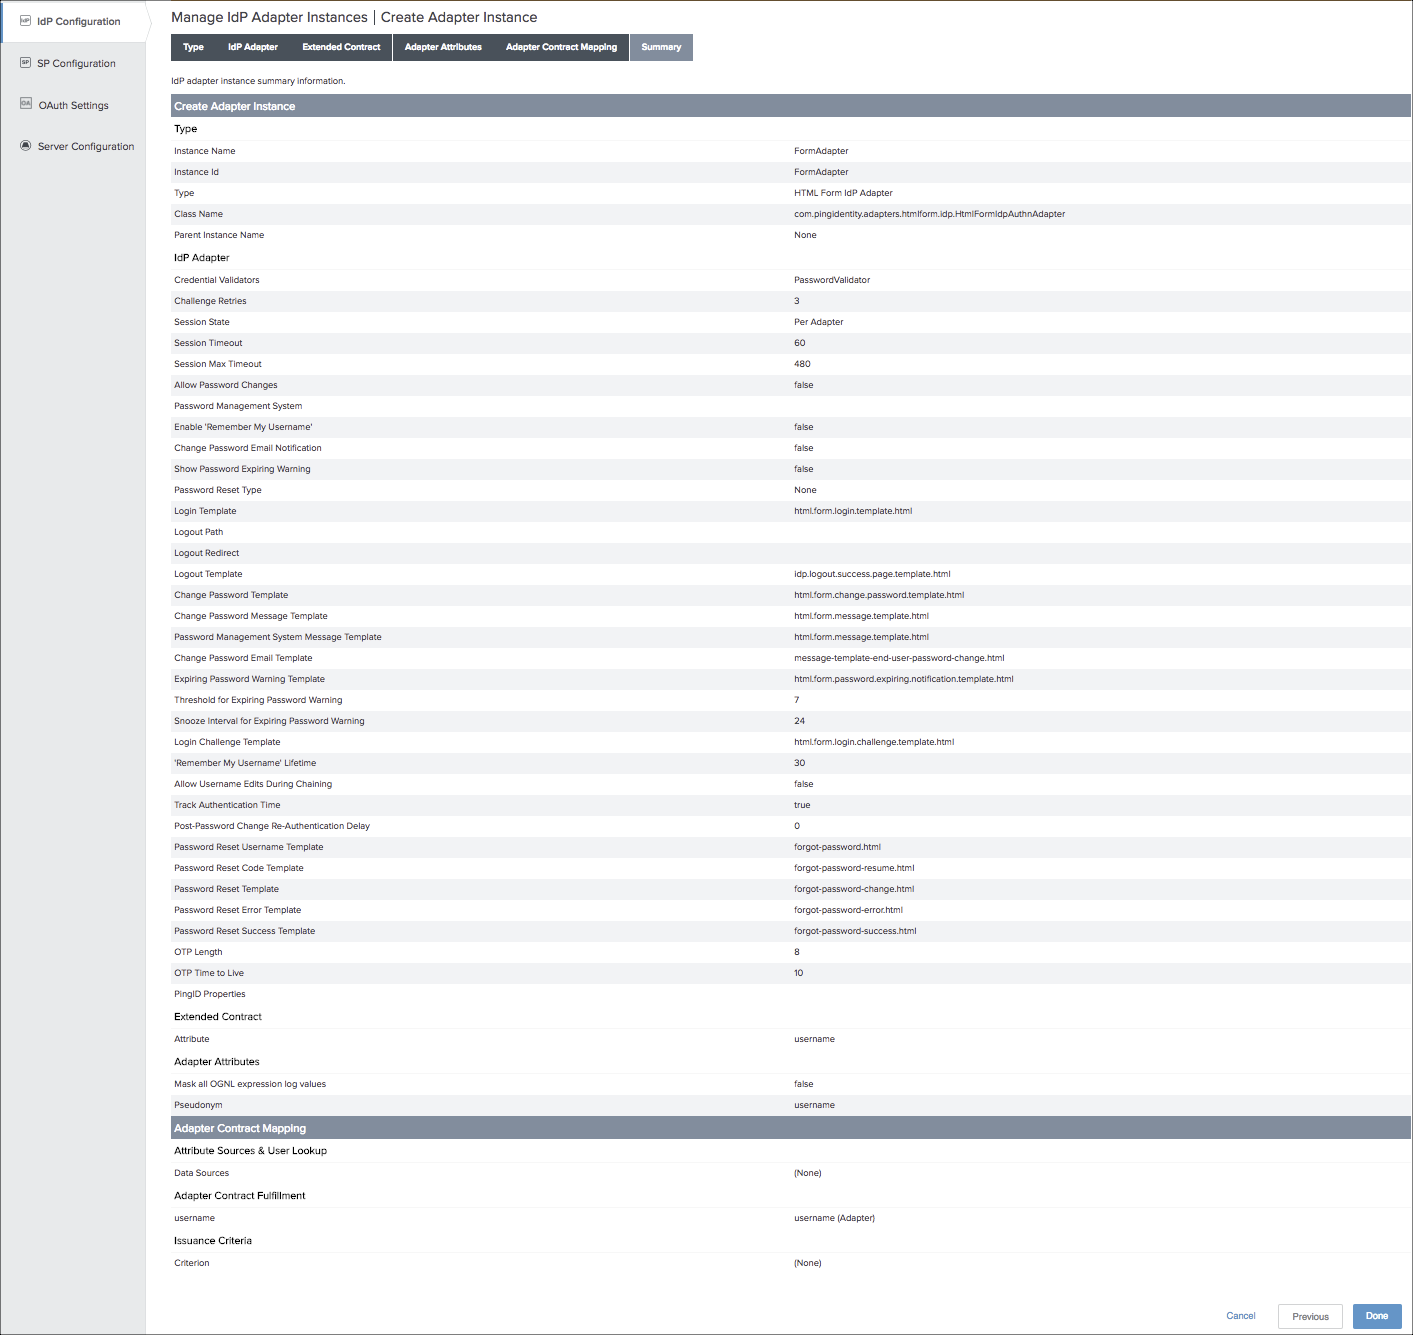
- Under IdP Configuration, add a new IdP Adapter instance named FormAdapter.

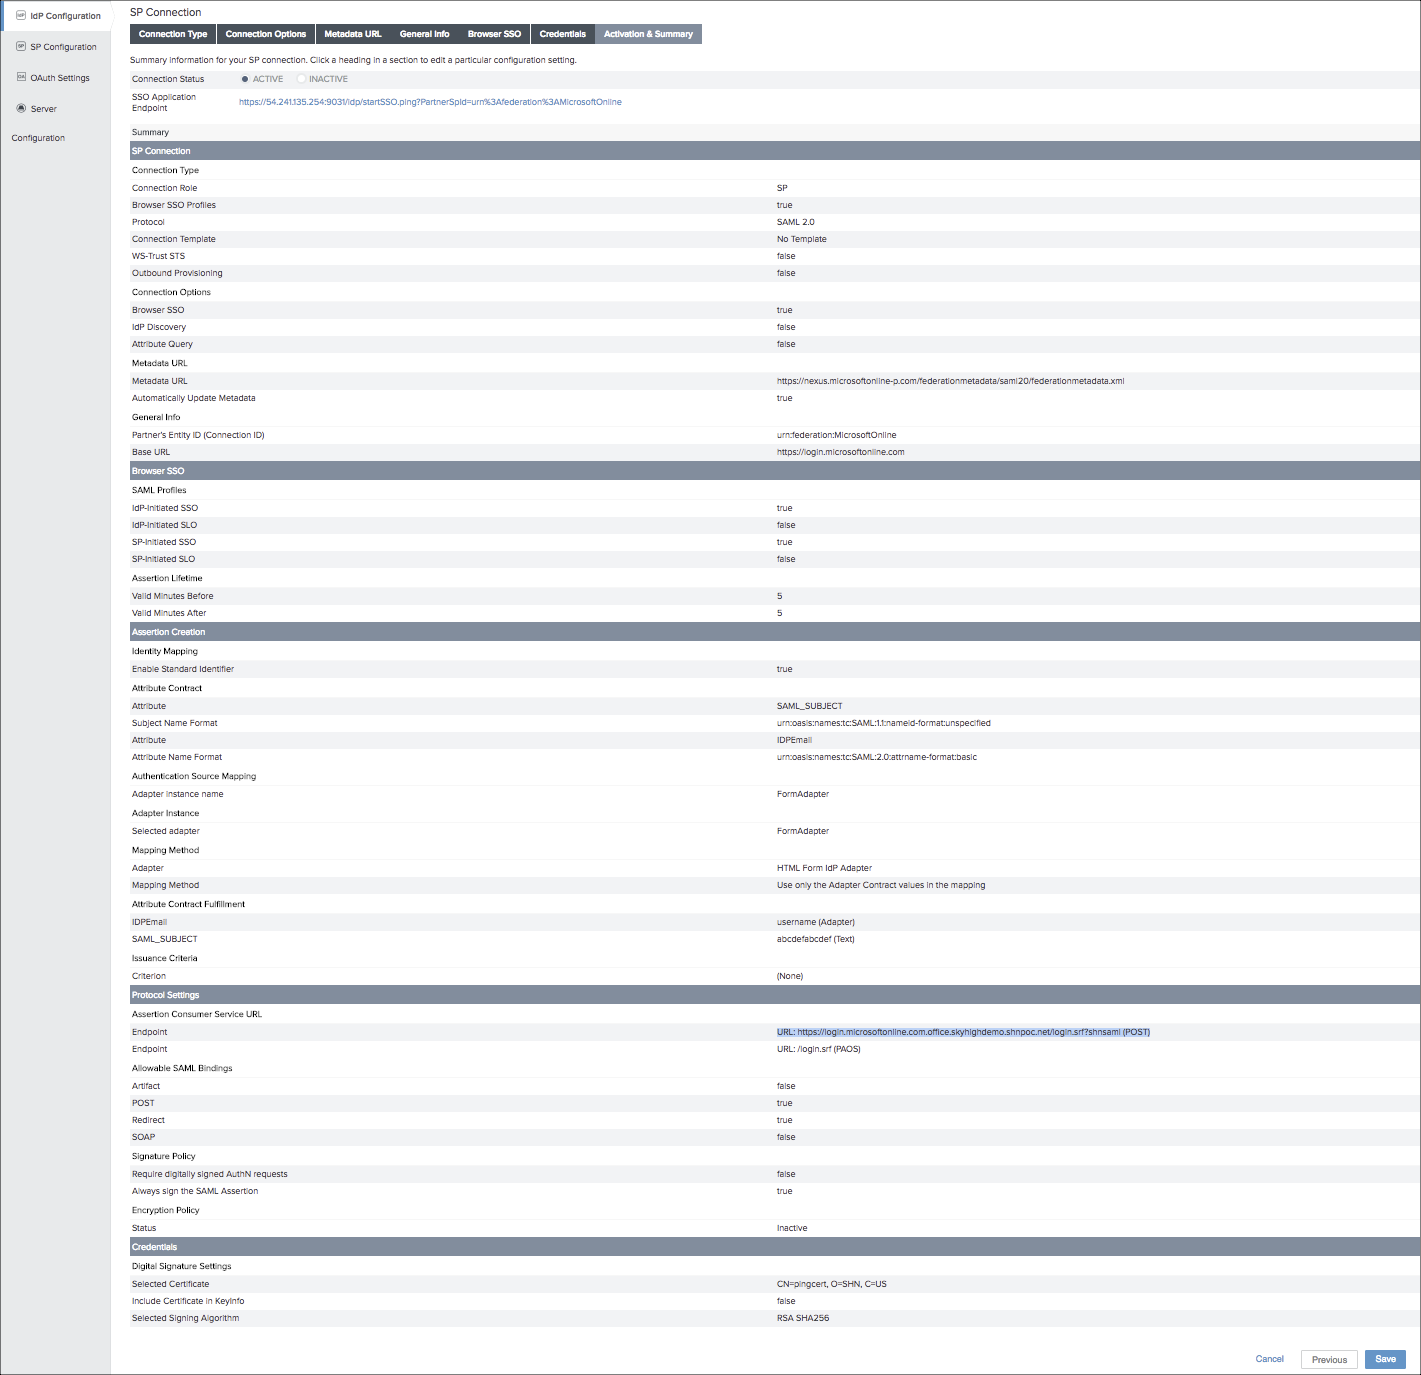
- Create a new SP connection, where:
- Entity ID. urn:federation:MicrosoftOnline.
- Metadata URL. https://nexus.microsoftonline-p.com/...onmetadata.xml
- Assertion Consumer Service URL Endpoint. URL: https://login.microsoftonline.com.<O365 RP URL>/login.srf?shnsaml (POST).
Example URL: https://login.microsoftonline.com.of...in.srf?shnsaml (POST).
NOTE: Change the URL to suit your O365 reverse proxy as required. - Base URL. https://login.microsoftonline.com
- Adapter Instance Name. FormAdapter
NOTE: Save the SSO Application Endpoint for future reference.

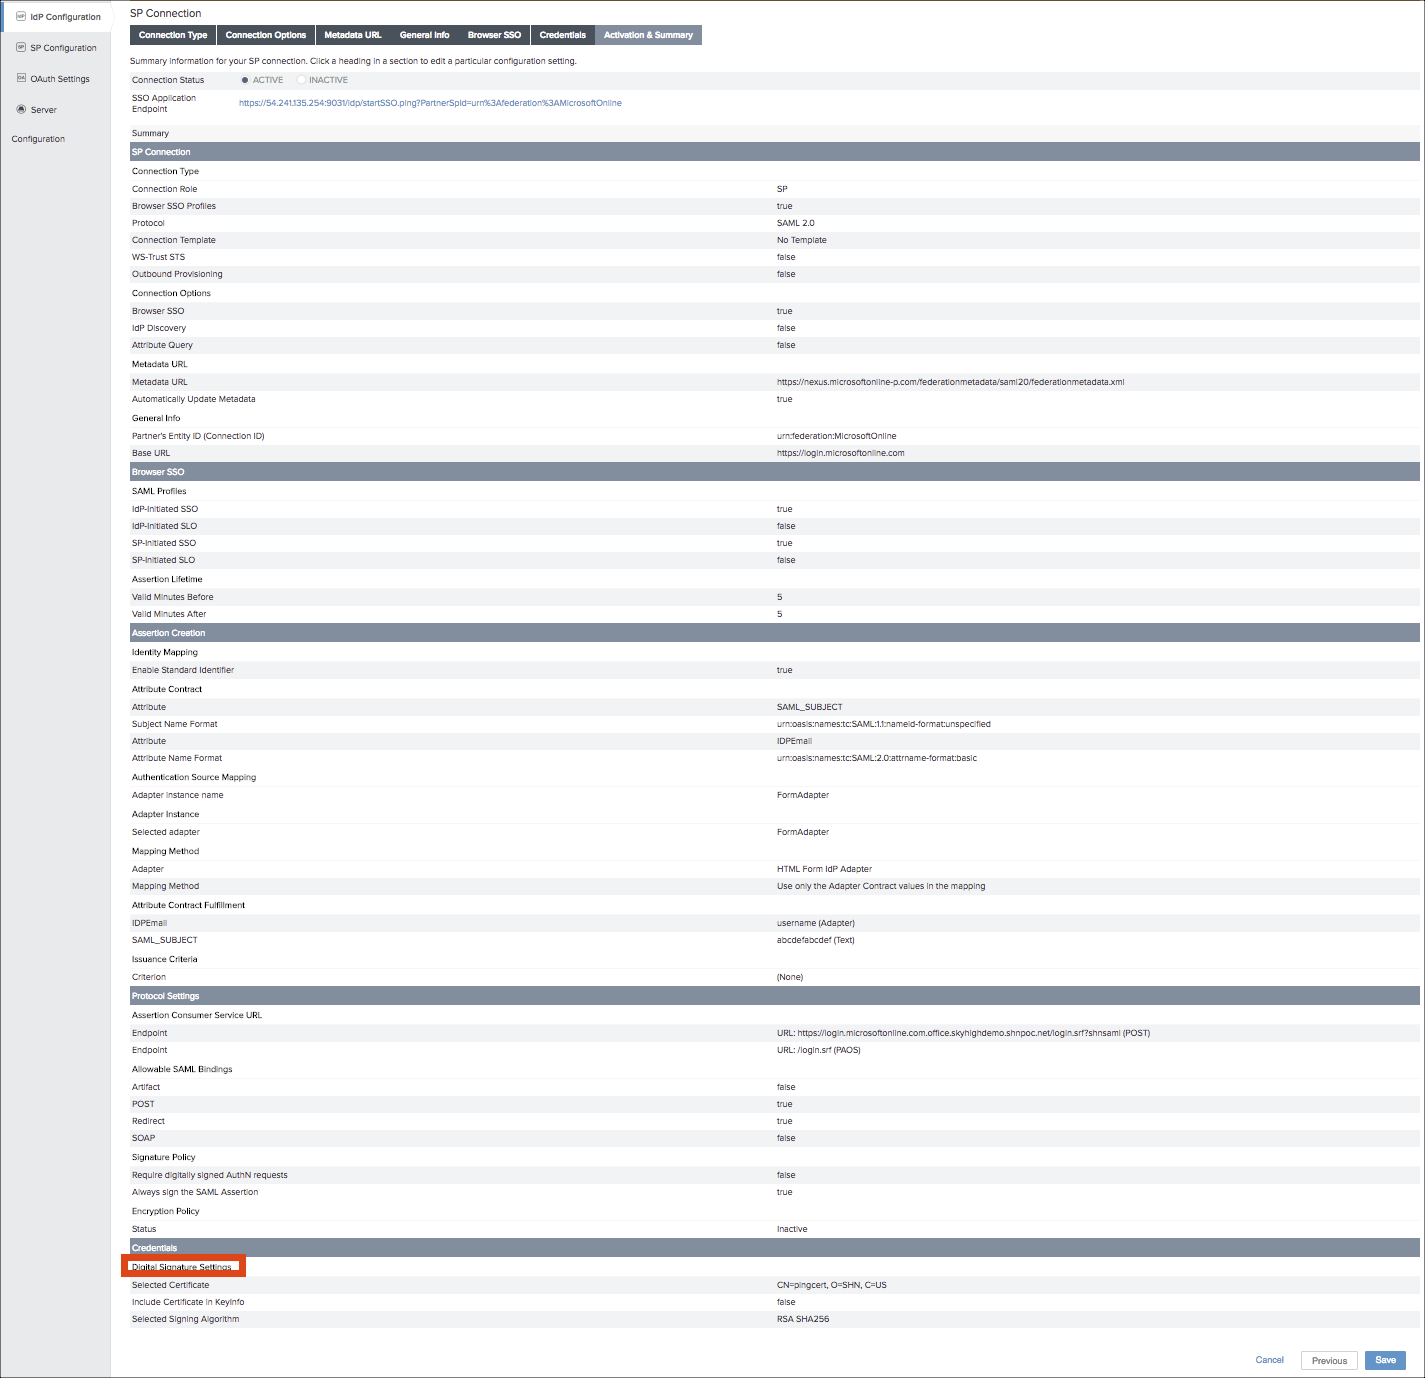
- Export the IdP certificate from IdP Configuration > SP Connections > urn:federation: MicrosoftOnline > Digital Signature Settings > Manage Settings > Export.


Configure Skyhigh CASB
- Go to Settings > Service Management and select your Microsoft Office 365 instance.
- On the Setup tab, under Proxy, click Continue.
- Click Configure SAML.
- Upload the certificate you exported from PingFederate.
- Save SAML Settings.
- Download the Powershell Script and export the script after entering the required domain name. For example, the Domain name is the federated domain such as skyhighdemoXX.net or shnpocdemo.com.
- Save the script to a Windows machine as SAMLScript.ps1.
- In a text editor, edit the script to add in the following variables:
- $federationBrandName = 'Ping'
- $preferredAuthenticationProtocol = 'Samlp'
- $issuerUri = 'localhost:default:entityId'
- $passiveUri = 'https://54.241.135.254:9031/idp/star...icrosoftOnline'
- $activeUri = 'https://54.241.135.254:9031/idp/star...icrosoftOnline'
- $metadataExchangeUri = 'https://54.241.135.254:9031'
- $logOffUri = 'https://portal.office.com'
- Open a PowerShell window and run the command: Set-ExecutionPolicy -Scope CurrentUser -ExecutionPolicy Unrestricted
- Run the script from the PowerShell window twice.
- First without the proxy to verify that PingFederate and O365 work together: .\SAMLScript.ps1 -federateWithoutProxy $True
- Then run the script with the proxy: .\SAMLScript.ps1

Test SSO with PingFederate for Office 365
- Log in to your Office 365 RP URL https://<office RP>.
- Enter the Office 365 credentials. The page should redirect to your PingFederate login.
- After entering the Ping credentials, you are redirected to your Office 365 RP page.
