Primary User - Manage Users
The Manage Users option provides a unified location for managing existing users and roles and adding new users and roles to your tenant. You can also enable multifactor authentication for all users in your tenant.
- Click Manage Users.

- The Users & Roles page provides the following information and actions:
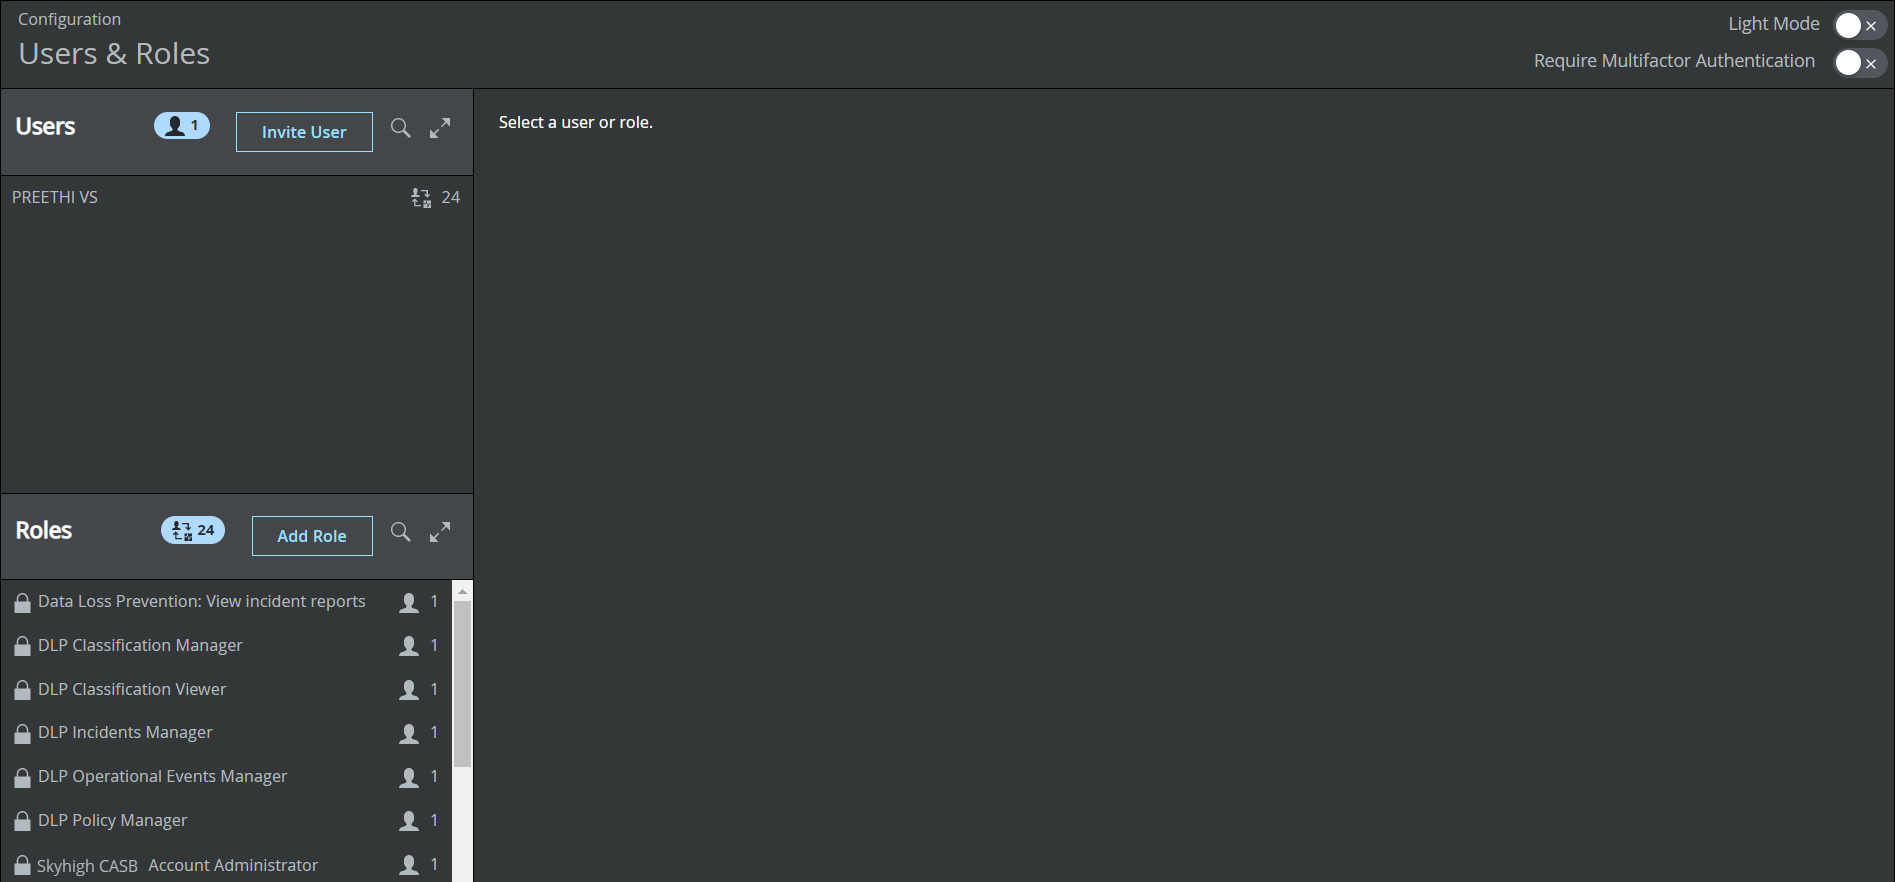
Users
To invite and add new users to your tenant:
- On the Users & Roles page, click Invite Users.
- On the Invite new user dialog, configure the following:
- First Name. Enter the first name of the user.
- Last Name. Enter the second name of the user.
- Email Address. Enter the email address of the user.
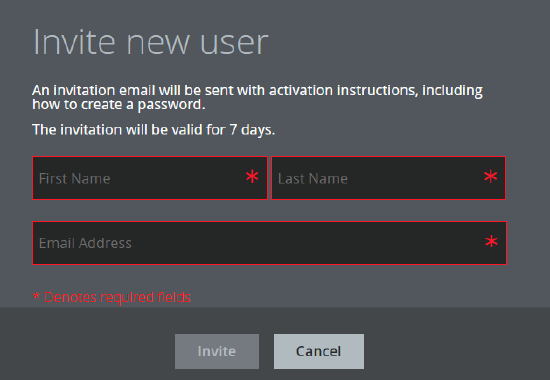
- Click Invite.
An invite email will be sent with activation instructions, including how to create a password. The invitation will be valid for 7 days.
The new user will be added to the Users section.
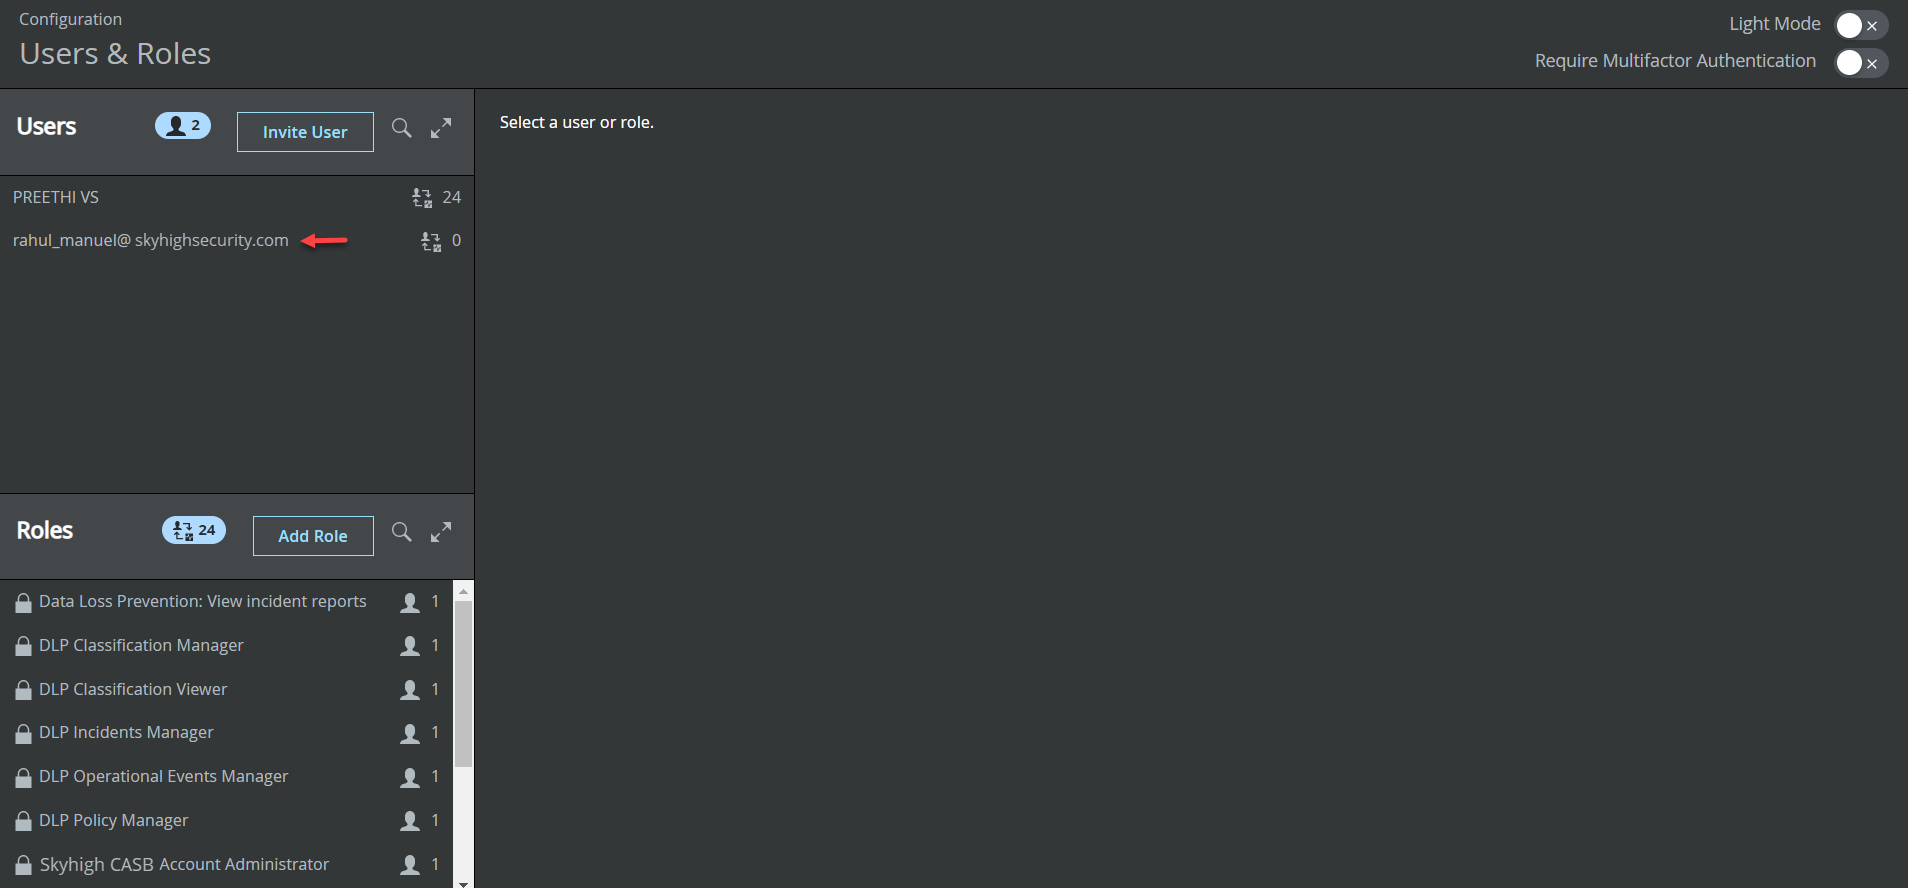
If you want to add the existing user from another tenant in the Skyhigh CASB dashboard, then the user's First Name, Last Name, and Email Address must match exactly, including capitalization. Otherwise, existing users will fail to add to your tenant. To view the existing user's details on the Skyhigh CASB dashboard, see Change Profile.
Roles
NOTE: You must have a Trellix Account Administrator role to configure SAML and SSO from the Trellix Identity Provider page.
You can add new roles and assign the existing roles to the users.
To assign role:
- Under the Users section, click the required user name for which you want to assign roles.
- Under Unassigned Roles, select the required roles.
- Under Assigned Roles, you can view the selected roles.
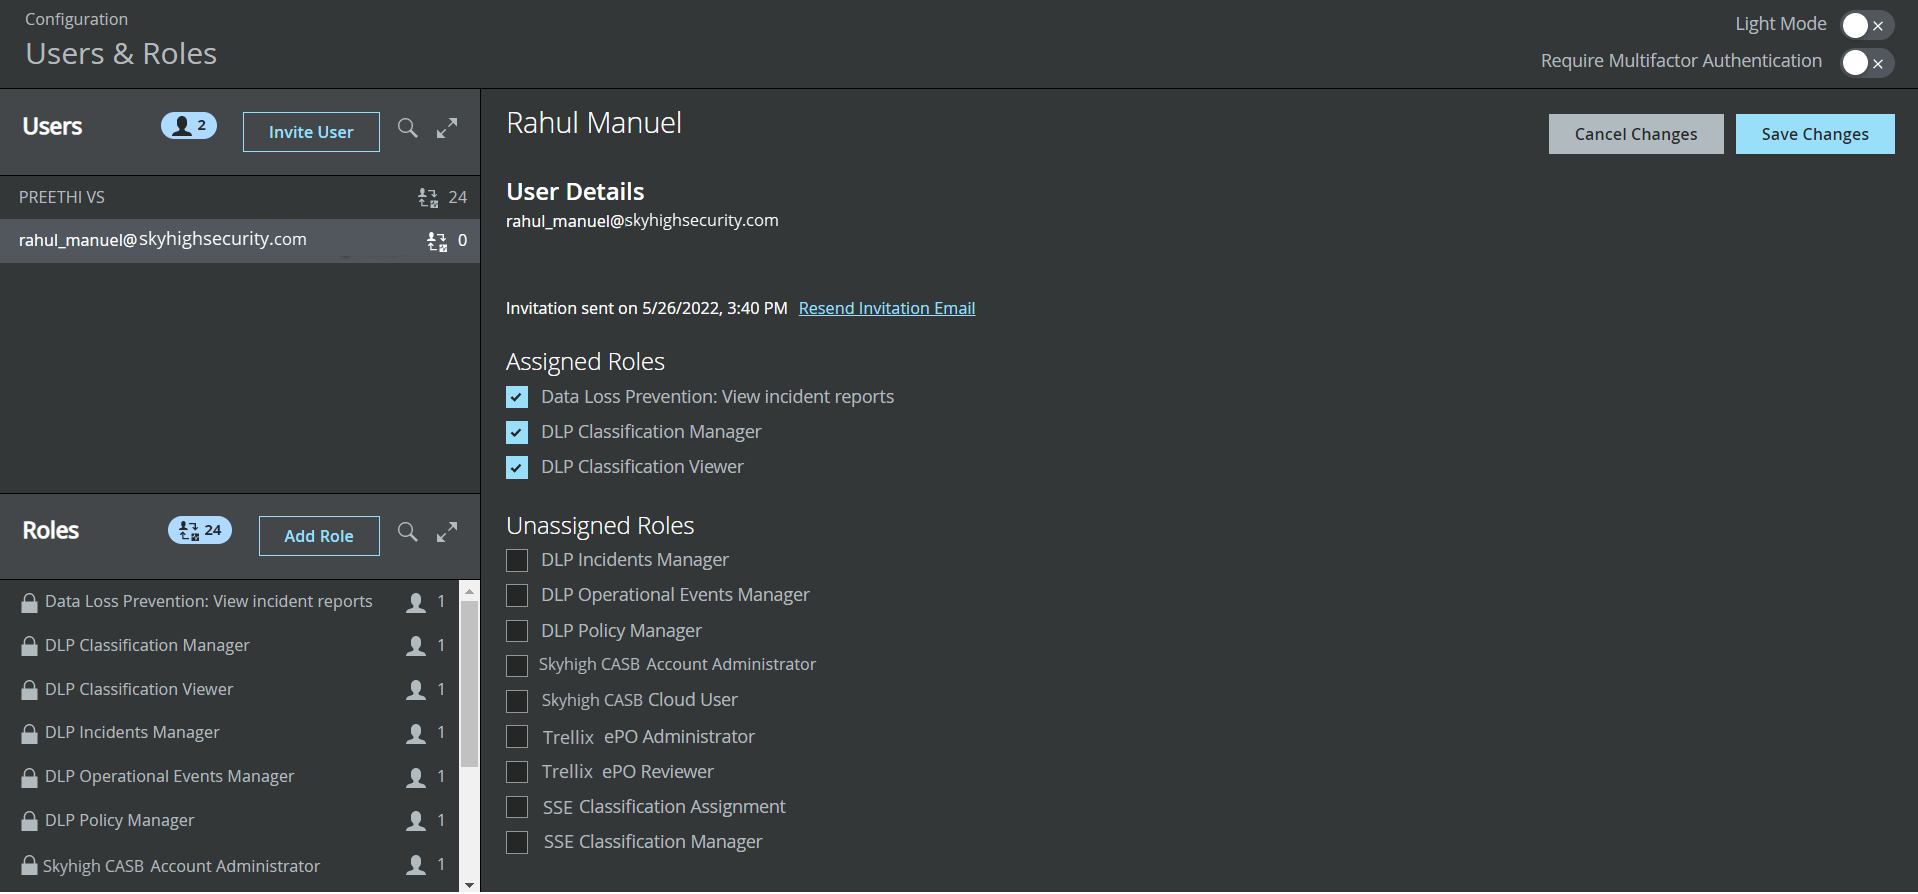
- Click Save Changes.
To add a new role:
- Click Add Role.
- Enter the Role name.
- Under Unassigned Permissions, select the required permission from the Data Loss Prevention, MVISION Cloud, MVISION ePolicy Orchestrator.
- Under the Assigned Permissions, you can view the selected permissions.
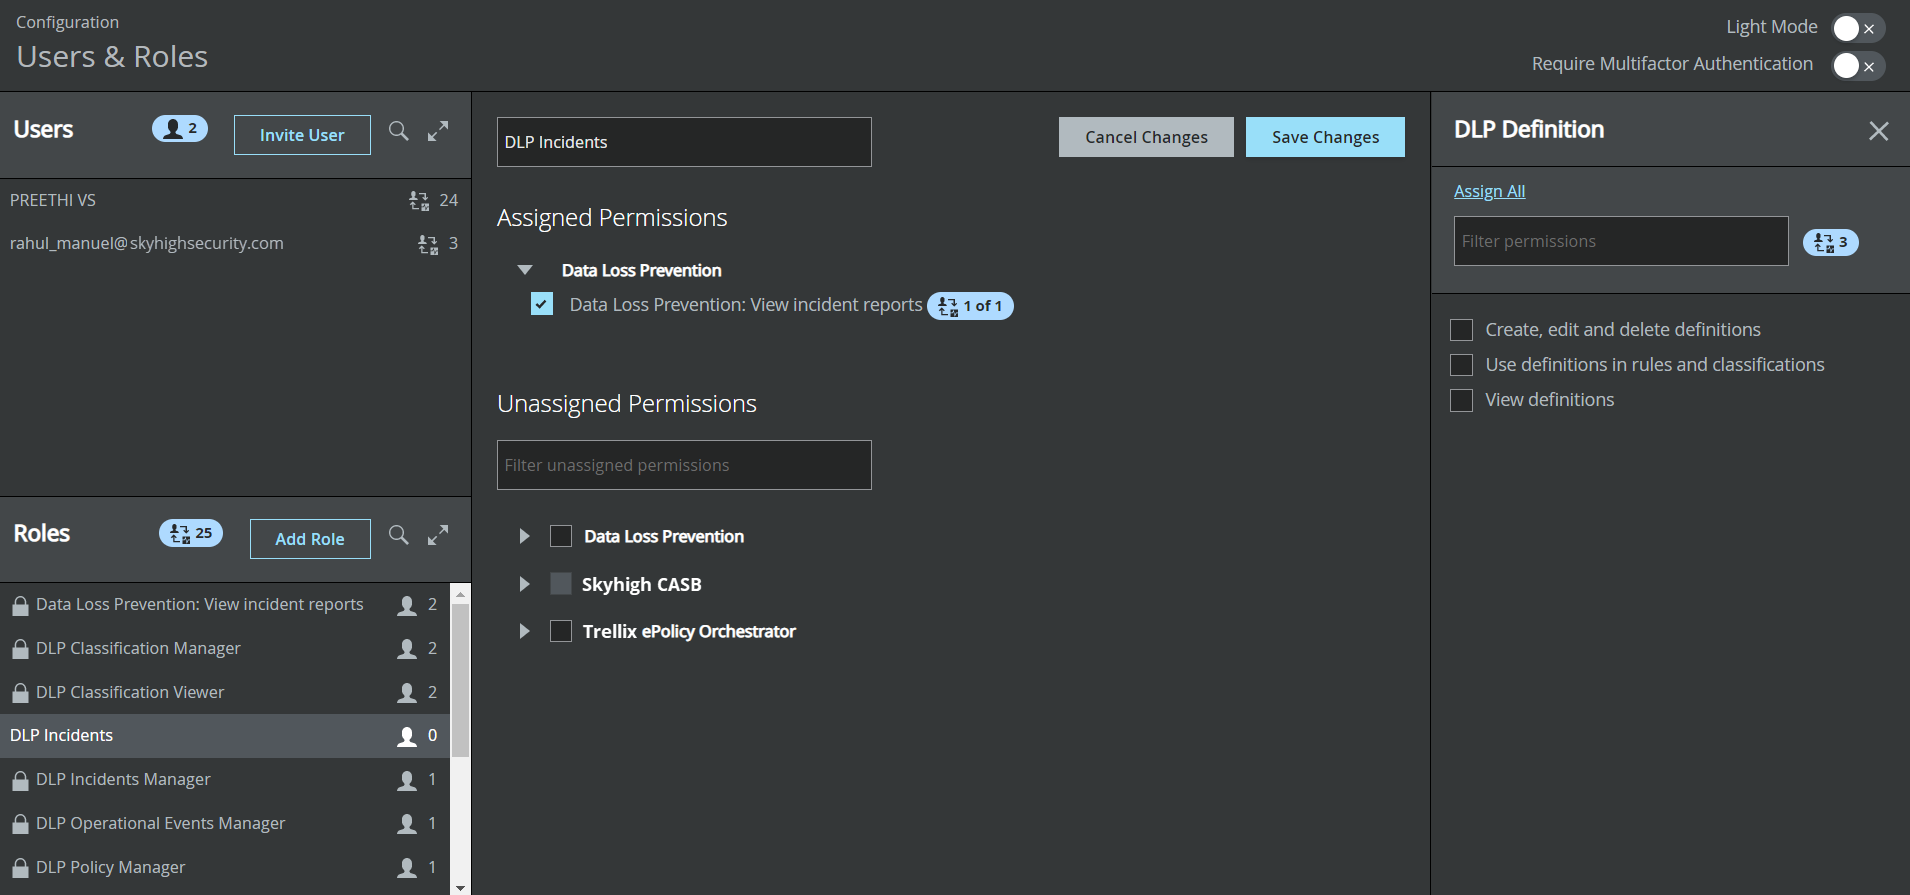
- Click Save Changes.
The new role will be added to the Roles section.
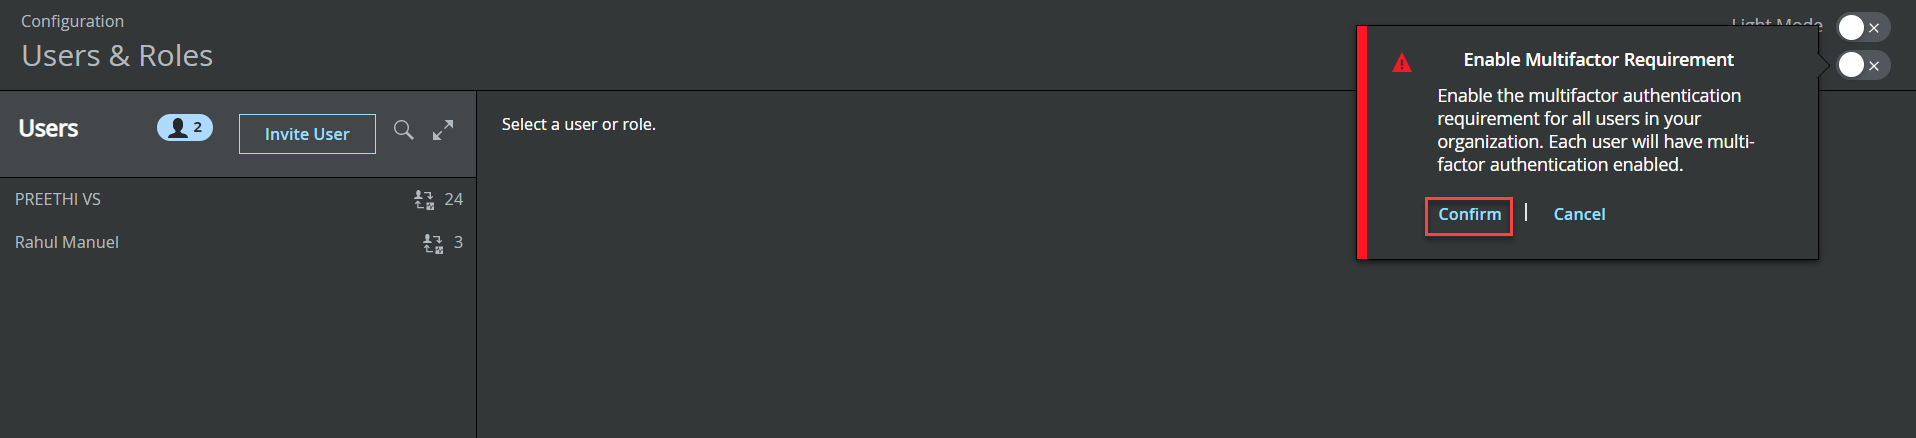
Require Multifactor Authentication
This feature is available only for the Primary Admin Users. You can enable or disable the multifactor authentication requirement for all users in your tenant. Each user will have multi-factor authentication enabled. An individual user can enable or disable multi-factor authentication based on their preference.
NOTE: Cloud Connector and APIs will not work with MFA-enabled accounts. Primary User(Admin) accounts should not be used for such integrations.
To enable Require Multifactor Authentication:
- Toggle on to enable Require Multifactor Authentication.

- Click Confirm.