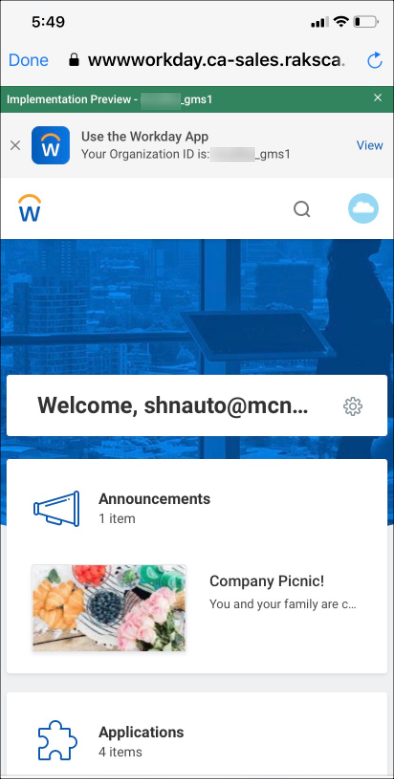
Integrate Workday SSO with Azure AD (IdP) via Proxy
Use this procedure to configure Azure AD, configure Workday, and integrate the proxy.
Prerequisites
Before you begin, you will need:
- Admin access to your Workday instance.
- Admin access to Azure AD IdP.
- Access to Skyhigh CASB and appropriate role/rights to manage the Workday service.
Configure Azure AD
Create the Workday Private Certificate
- Login to you Workday instance as admin and search for the task Create x509 Private Key Pair.

- Name the private certificate you want to create and click OK. For example, Workday-SP-Cert.
- Workday will show you the generated cert in the next screen. Copy the content FROM -----BEGIN CERTIFICATE----- TO -----END CERTIFICATE----- and save that into a file. For example, Workday-SP-Cert.cer. (Make sure that the copied content is clean, and there is nothing before BEGIN and after the END section.) This is your SP cert.
Add the Workday App to Azure
- Log in to Azure as an admin and go to Azure Active Directory > Enterprise Applications.
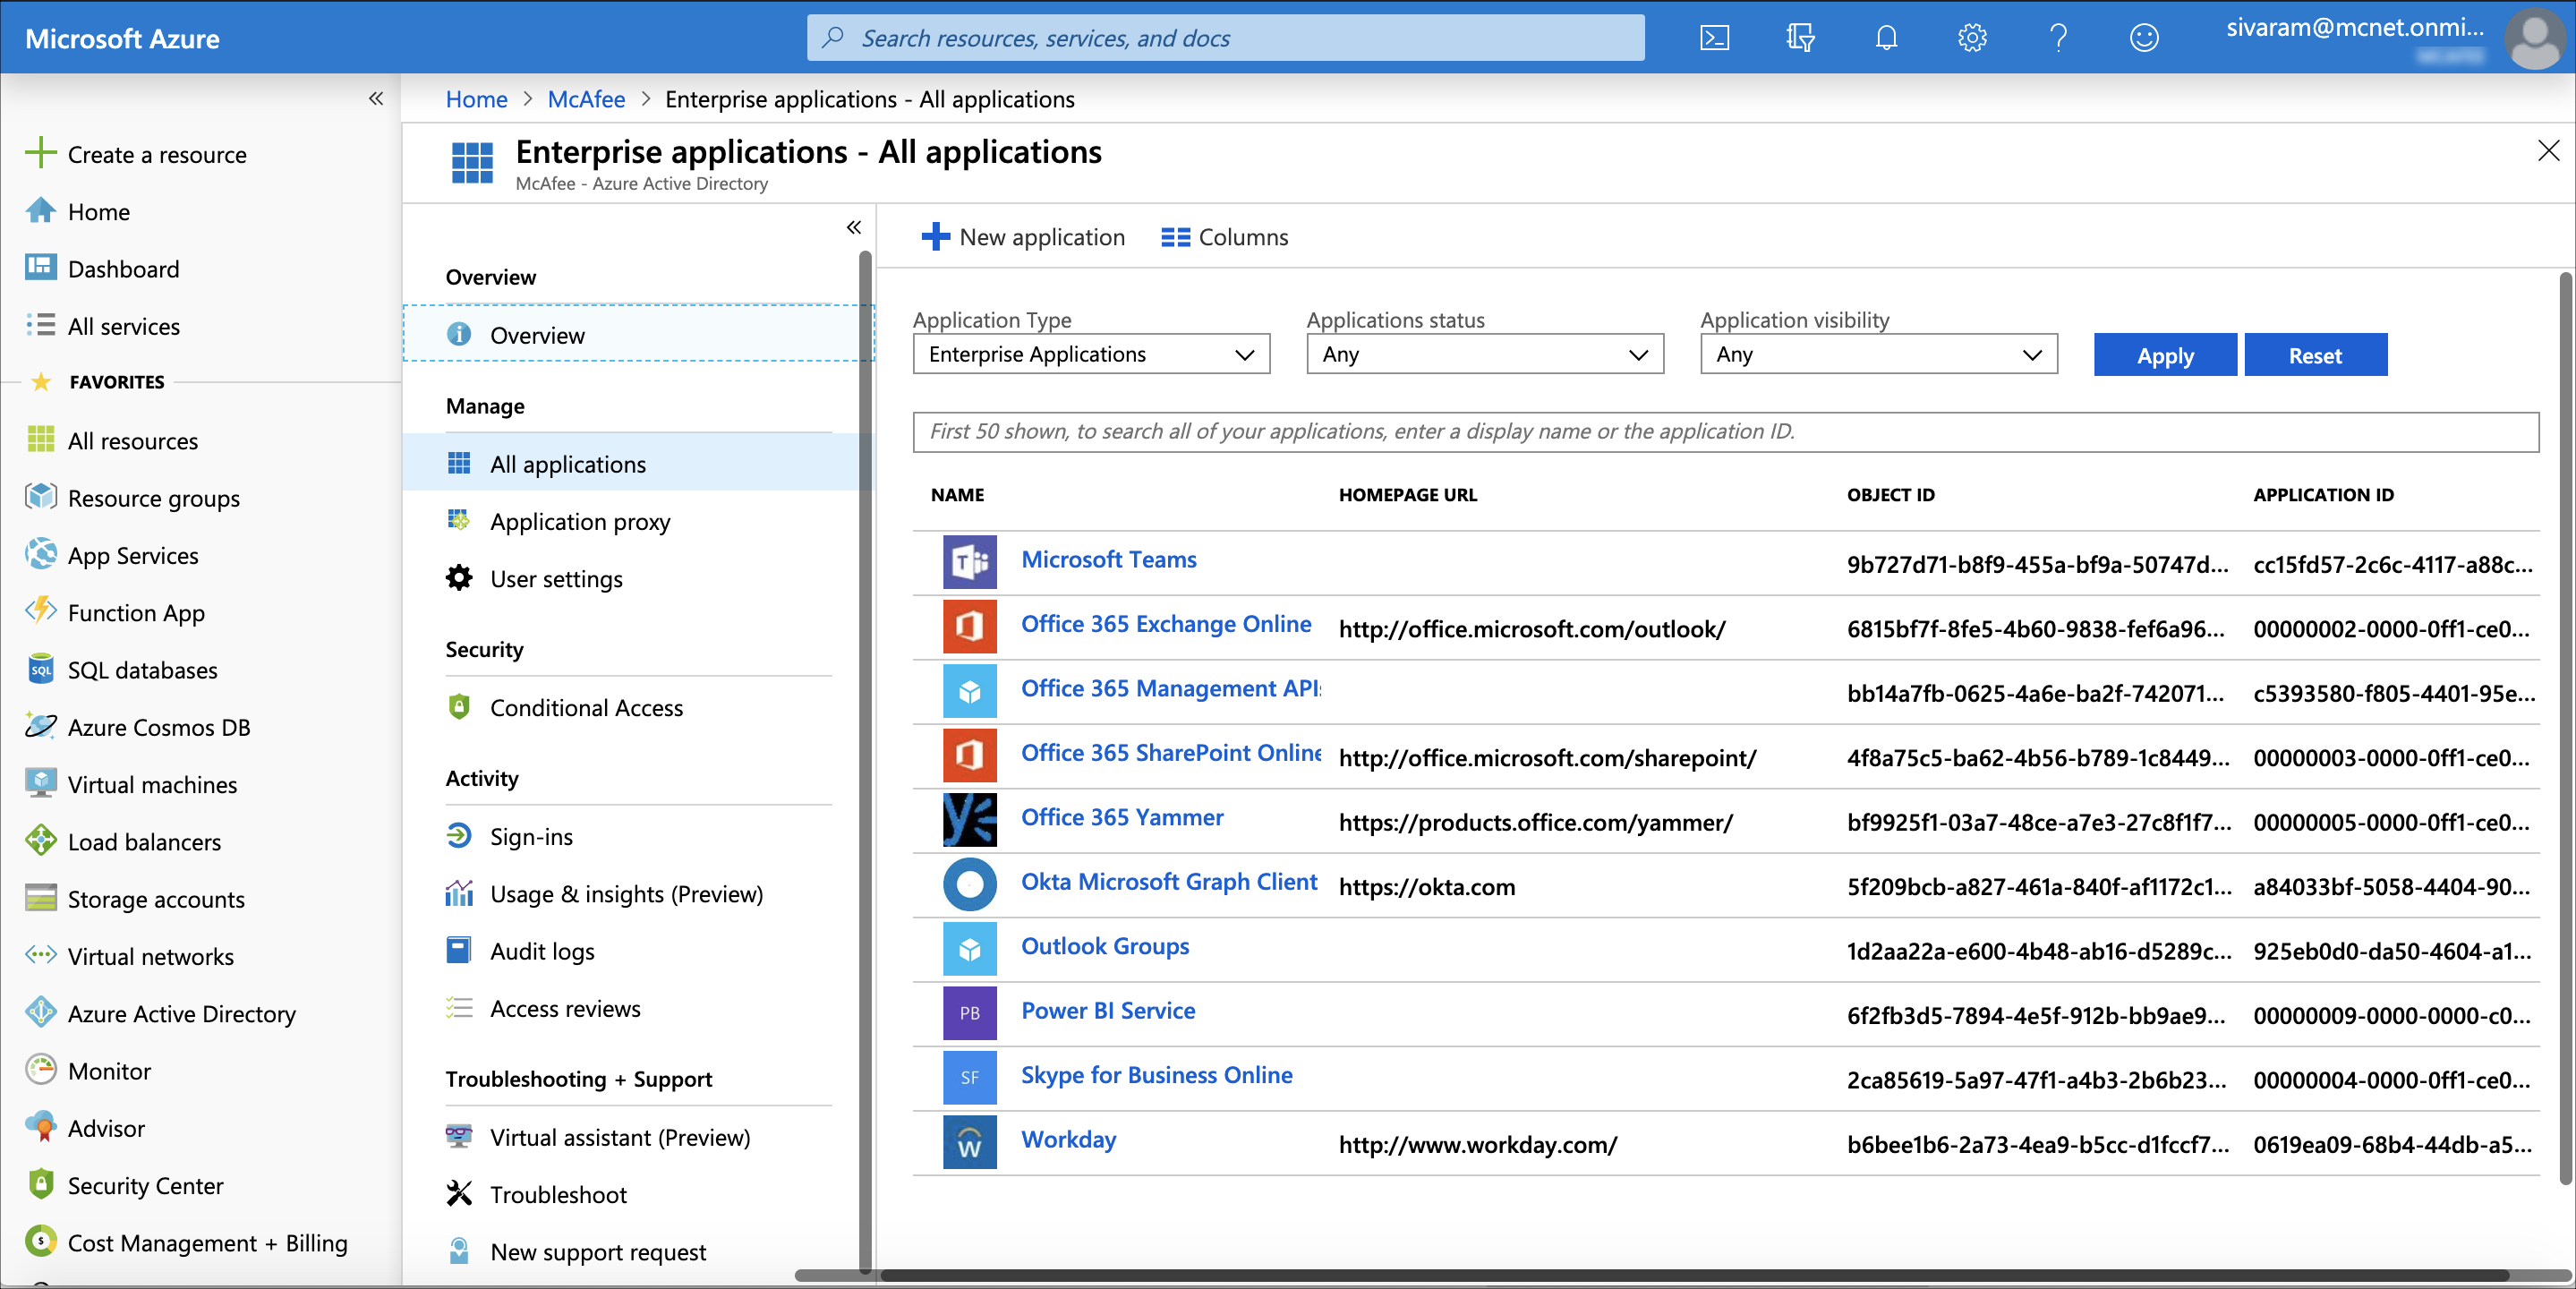
- Search for Workday and add it.
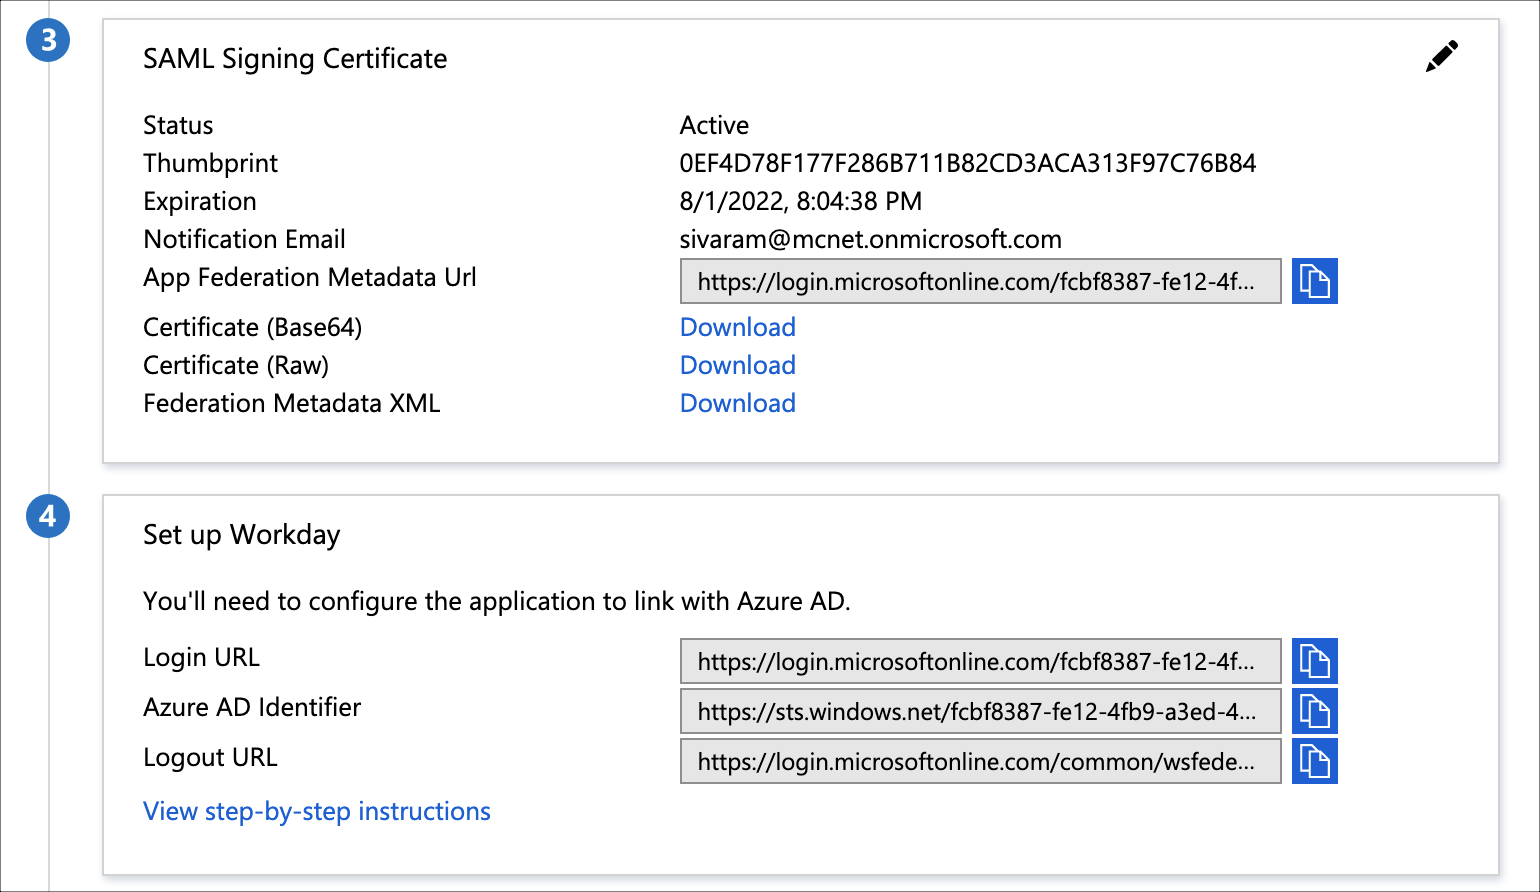
- Click the Workday app and select the Single Sign-On option to configure the SSO. Configure according to the following screens:
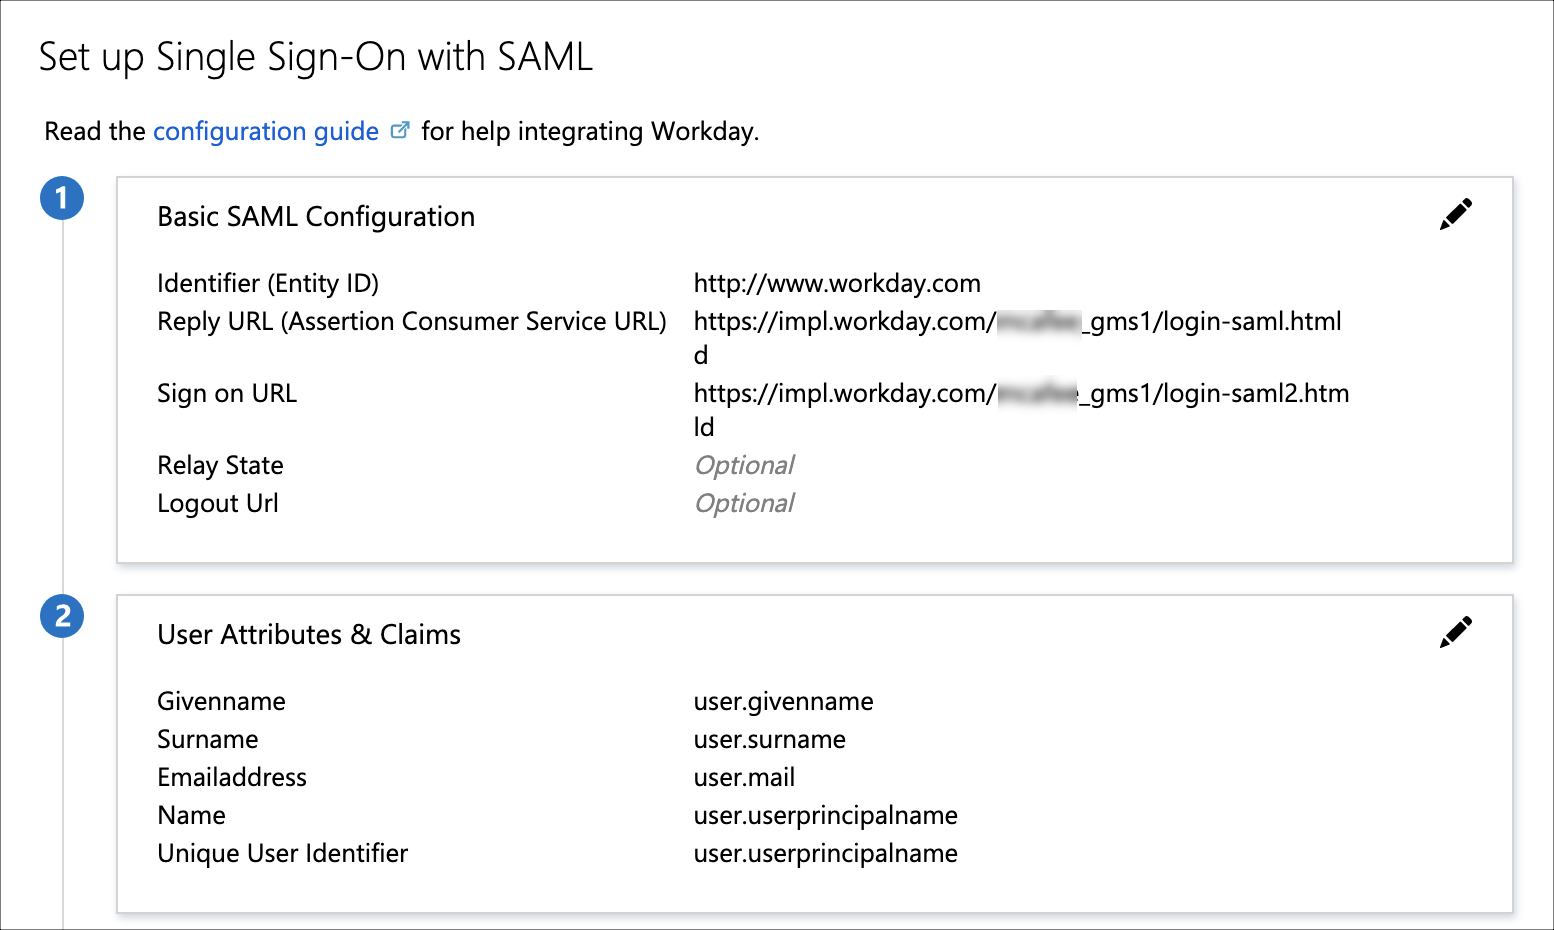
- In the SAML Signing Certificate section, select the signing option Sign SAML response and assertion as shown.
- Click Edit, choose the following options, and click Save.

- From the SAML Signing Certificate section, to download the IdP (Azure) certificate, click the Certificate (Base64) Download link.
- You will see the downloaded cert as Workday.cer. Rename this file as Azure-IDP-Cert-for-Workday.cer. This is your IdP Cert.
- From the Setup Workday section, make a note of the Login URL and Logout URL to be used on the Workday side.
Configure Workday
Configure Workday SSO
- Login to Workday as an admin and search for the task Edit Tenant Setup - Security.

- Go to Single Sign-On and under Redirection URLs, add a new Redirection URL. Configure as follows:
- Redirect Type. Single URL.
- Login Redirect URL. Enter the Login URL from Azure AD > SSO > Setup Workday.
- Mobile Redirect URL. Enter the Login URL from Azure AD > SSO > Setup Workday.
- Logout Redirect URL. Enter the Logout URL from Azure AD > SSO > Setup Workday.

- Go to SAML Setup Section to configure Identity Provider.
- Activate the checkbox Enable SAML Authentication.
- Click + to create a new Identity Provider and configure:

- Identity Provider Name. Enter a name. For example, AzureAD-IDP.
- Issuer. Enter Azure AD Identifier, as copied from Azure AD > SSO > Setup Workday.
- *x509 Certificate. Add the Azure AD (IdP) certificate you downloaded from Azure.
- Logout Response URL. Add the Logout URL from Azure AD > SSO > Setup Workday.
- Activate the checkbox SP Initiated.
- Service Provider ID. Enter http://www.workday.com.

- Activate the checkbox Sign SP-initiated Request.
- Activate the checkbox Do Not Deflate SP-initiated Request.
- Idp SSO Service URL. Enter the Login URL from Azure AD > SSO > Setup Workday.
- Used for Environments. Select Implementation type environment.
- Click OK to save.
- Configure the Identity Provider section as follows:
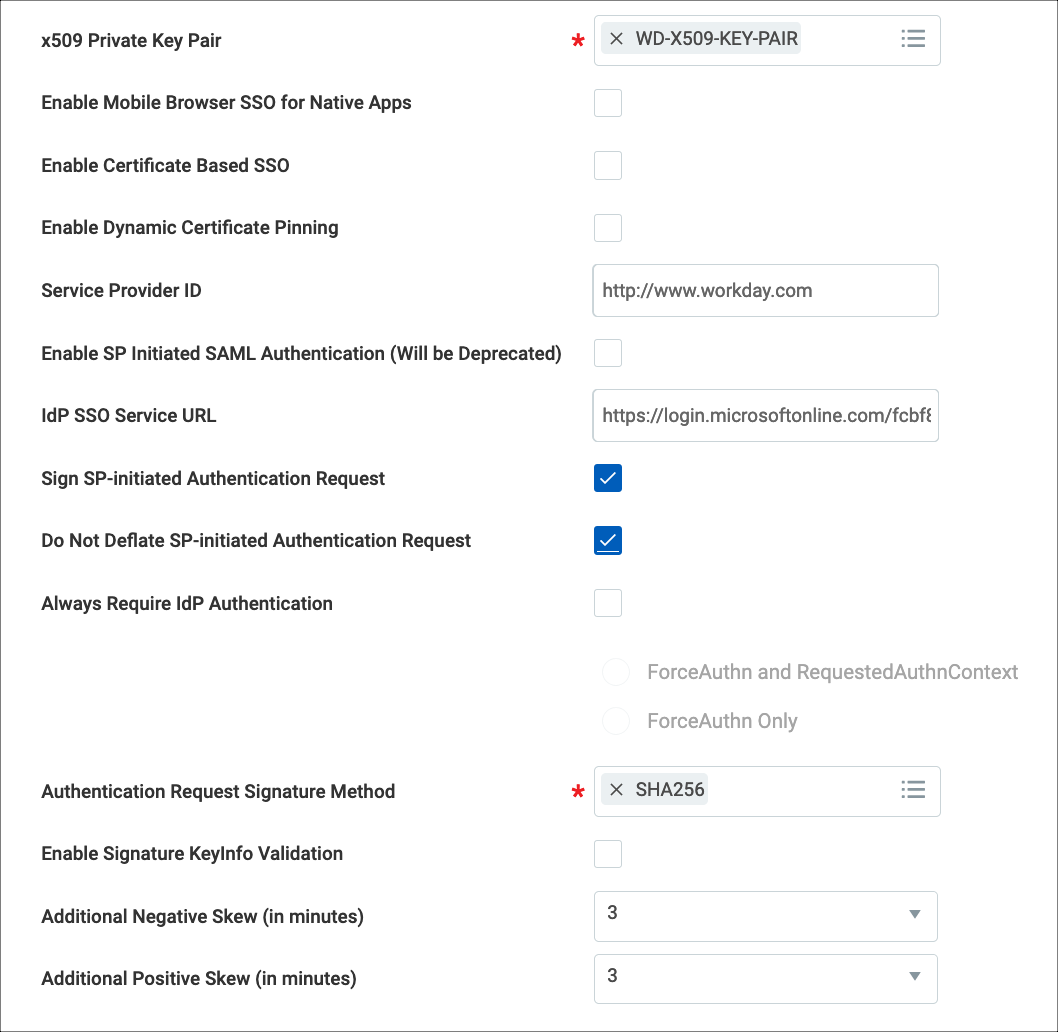
- x509 Private Key Pair. Select the Workday-SP-Cert that you created.
Verify the SSO Integration
Access the following:
- Workday login URL: https://impl.workday.com/<tenant-name>/login-saml2.htmld . (This is the SP-initiated login flow.)
- Login to the Azure portal (portal.azure.com) as a non-admin user and access the Workday app. (This is IdP-initiated login flow.)
The assumption is that the Azure non-admin user is present in Workday as well and activated.
Integrate the Proxy
Once you know the direct SSO configuration between AzureAD and Workday is working, now you must configure the Proxy in between.
Skyhigh CASB
- Login to Skyhigh CASB to manage Workday.
- Enable SSO Configuration and upload both IDP (Azure AD) and SP (Workday) certificates.
- Download the proxy cert and keep it handy.
- Add the service level property as remove.shnsaml.from.uri=true.
Azure AD IdP
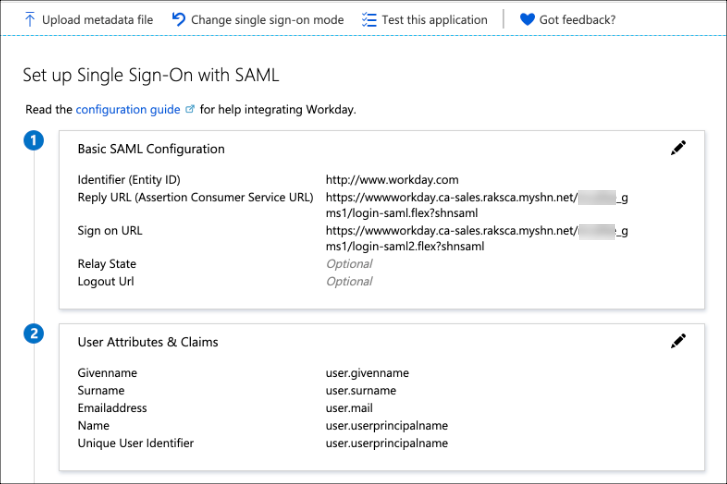
- Login to Azure AD as admin and access the Workday app Single Sign-On section.
- Edit the Basic SAML Configuration section and change the Reply URL and Sign on URL with the proxy version, then Save.
Workday SP
- Login to Workday as an admin search for the task Edit Tenant Setup - Security. Go to the SSO config section.
- Go to the SAML Identity Provider section.
- Under x509 Certificate, remove the existing IdP (Azure AD) certificate and add the Proxy certificate, that you previously downloaded.
- Click OK and save the configuration.

Validate the SSO Flow via Proxy
To validate the SSO flow via proxy, access the Workday SSO URL: https://impl.workday.com/<workday instance>/login-saml2.flex
Configure Workday Mobile App via Proxy
To configure the Workday Mobile App via proxy:
- Login to the Workday Mobile app.
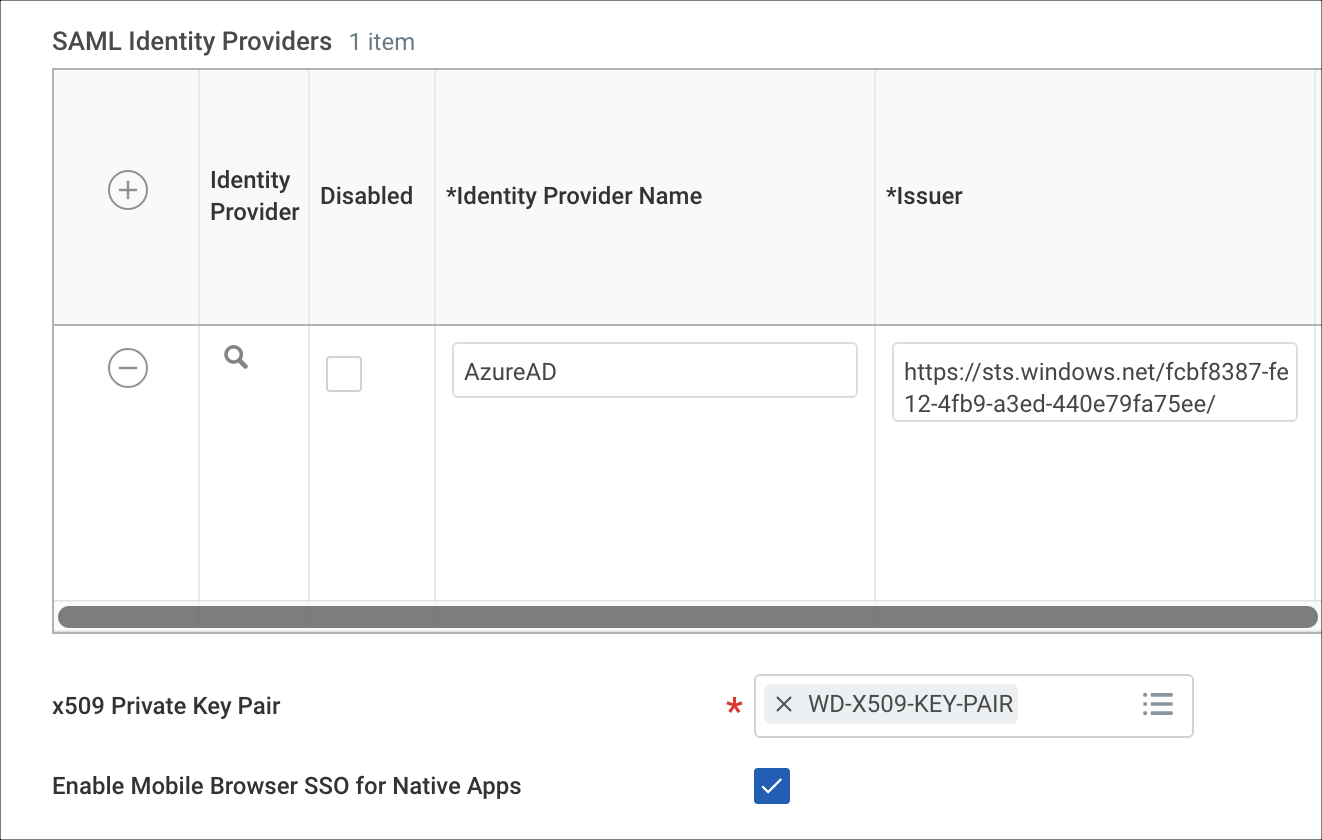
- Change the "Redirect URLs" section as shown.

- For Mobile App Login Redirect URL enter https://impl.workday.com/<tenant_name>.
- For Mobile Browser Login Redirect URL enter https://impl.workday.com/<tenant_name>/login-saml2.flex.
- Enable the checkbox Enable Mobile Browser SSO for Native Apps.
- Now open the Workday app on your mobile phone. Click the Settings icon to configure the URLs as the first step, and it should look like the following screenshots.
- Provide the Web Address and Tenant (name) values and click Save.
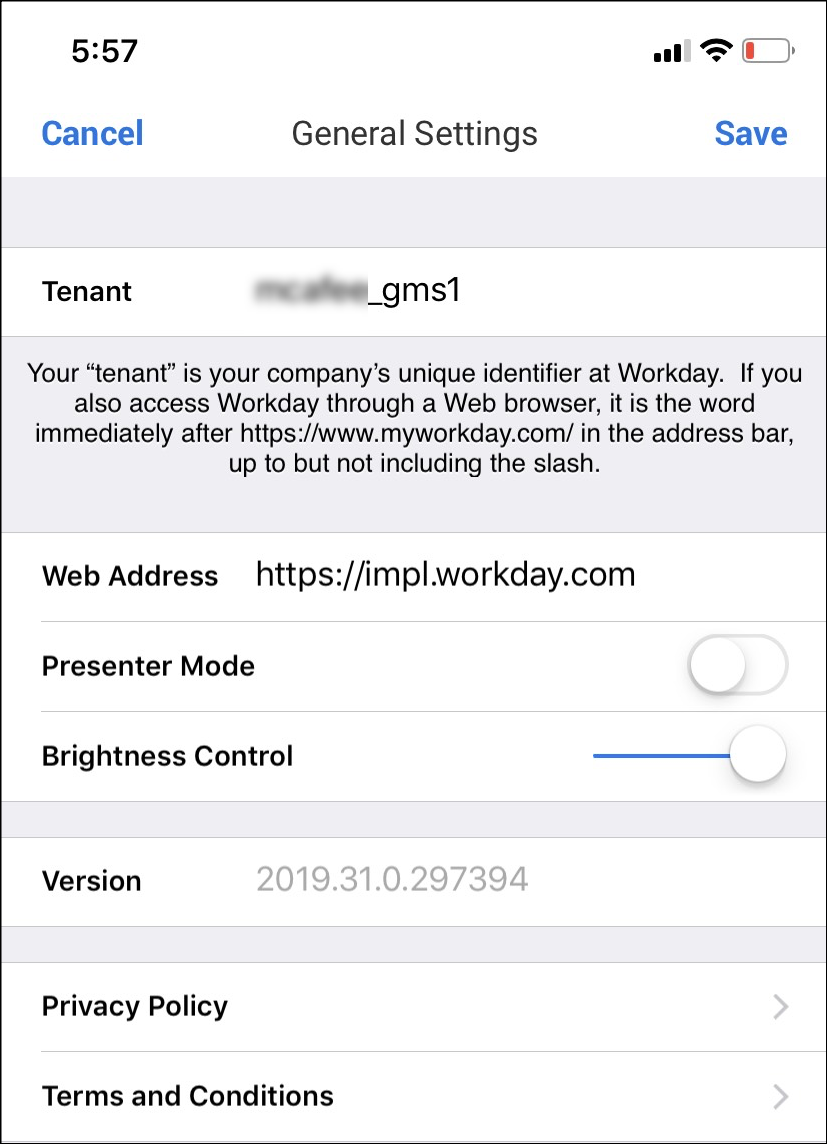
- Once saved, the login process starts and you will be redirected to the Azure AD login page. Upon successful authentication with your Azure AD non-admin user, you will be logged into the Workday app successfully.
