Configure Skyhigh CASB for Workday
Use this procedure to configure Skyhigh CASB for Workday, including creating an integration system user account, registering an API client, and enabling Workday in Skyhigh CASB via API.
For specific and up-to-date instructions on how to perform any tasks listed below, go to the Workday site and search the online Help. The Workday online Help site is located here: https://www.workday.com/en-us/signin.html
IMPORTANT: Steps can vary depending on the Workday release, and are intended to be high-level guidance, not literal steps.
Create an Integration System User Account
Before you begin, make sure to get the Workday Integration System User credentials with permissions to the System Auditing Domain.
To create an Integration System User account with the permissions:
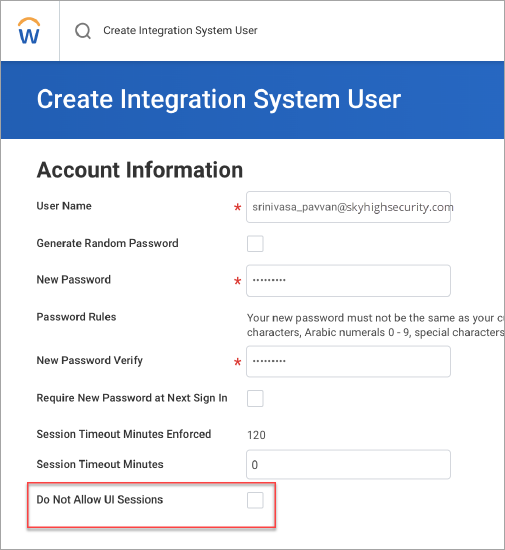
- Log in as a Workday Admin. Search for the Create Integration System User task in Workday, and open it.
- Enter the chosen User Name and Password. Leave other fields with default values.
- Uncheck the Do Not Allow UI Sessions checkbox. If you check this option, you are not allowed to enable API for the first time. You can enable checkbox after enabling API. Click OK.

- Search for the Maintain Password Rules task and open it. Add the integration system user to the System Users exempt from the password expiration field.
- In Edit Integration System User task page, select the previously created Integration System User in the Integration System User field. Click OK.
- Search for the View Domain task in Workday and open it. Search for and select the System Auditing domain and click OK.
- From Actions, choose Domain > Edit Security Policies.
- Add the previously created Security Group to the Report/Task permissions and check the View permissions. Also, add the Security Group to Integration Permissions and check the Get permissions.
- Search for the Activate Pending Security Policy Changes task in Workday and open it. Confirm and activate the changes you made.
Register an API Client
The following allows you to get the API Client details. The steps you perform in Workday might vary, depending on the release.
To register an API Client:
- Search for the Register API client task in Workday and open it. Enter the Client Name of choice, and select:
- Authorization Code Grant for Client Grant Type
- Yes for Enforce 60 Minute Access Token Expiry
- Bearer for Access Token Type
- Enter the redirect URI depending on Skyhigh CASB backend:
US Production: https://dashboard-us.ui.skyhigh.cloud/shndash/extensions/GenericOAuthController
EU Production: https://dashboard-eu.ui.skyhigh.cloud/shndash/extensions/GenericOAuthController
- Non-expiring refresh tokens.
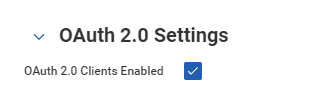
- If SSO setting is enabled, then select OAuth 2.0 Settings

- System for Scope (functional area).
- Click OK.
- On the next page, click Done.
- Note and save the values for the following items:
- Client ID
- Client Secret
- Workday REST API Endpoint
- Token Endpoint
- Authorization Endpoint
- Click Done.
Enable Workday in Skyhigh CASB via API
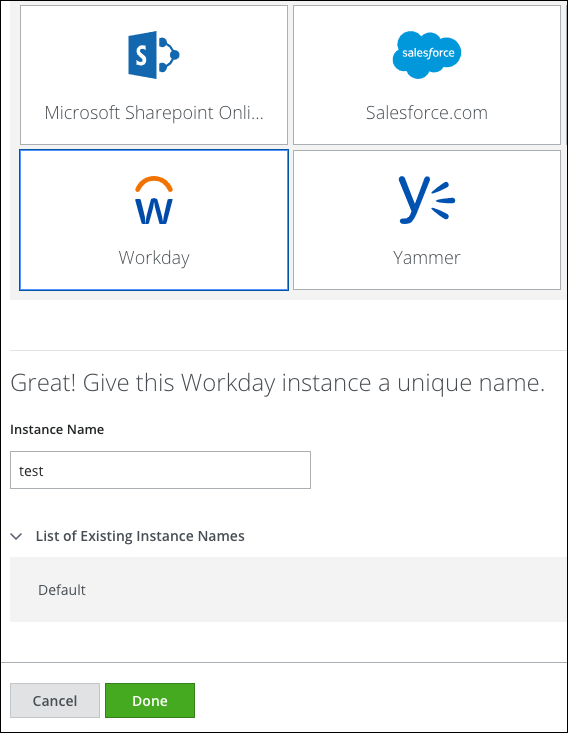
- Go to Settings > Service Management.
- Click Add Service Instance.
- Select Workday.

- Instance Name. Give your Workday instance a unique name.
- To begin the configuration, click Enable.

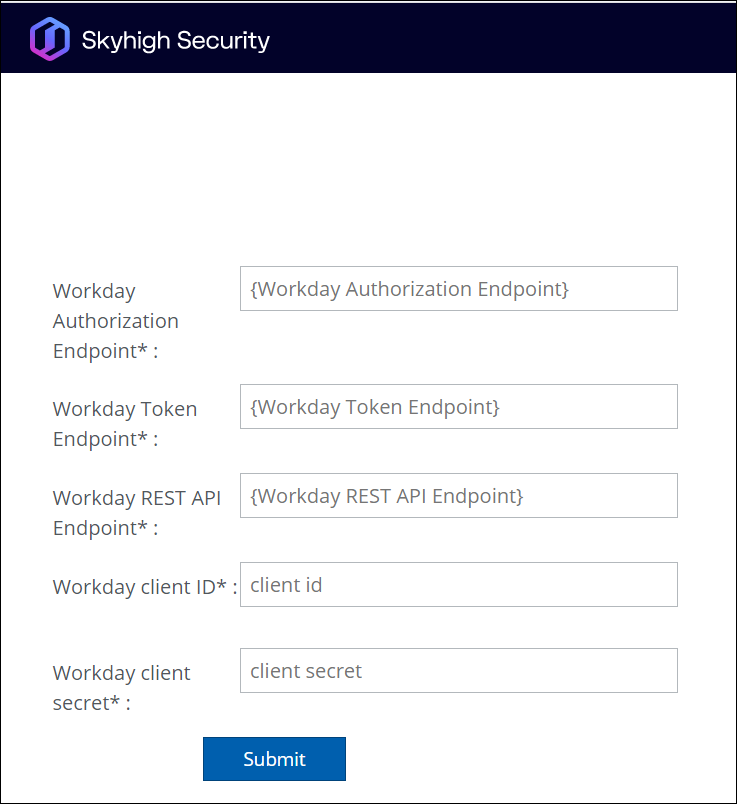
- Click Provide API Credentials.

- Enter the following details:
- Workday Authorization Endpoint (Note: If the Workday account is enabled with SAML SSO, then please append query string parameter 'redirect=n' to the authorization endpoint.
- If the authorization endpoint already has other query string parameters, then append '&redirect=n' to the end of authorization endpoint
- If the authorization endpoint doesn't have any query string parameters, then append '?redirect=n' to the end of authorization endpoint)
- Workday Authorization Endpoint (Note: If the Workday account is enabled with SAML SSO, then please append query string parameter 'redirect=n' to the authorization endpoint.
- Workday Token Endpoint
- Workday REST API Endpoint
- Workday Client ID
- Workday Client Secret
- Click Submit.
- When prompted, log in to Workday with the Integration System User credentials.
- Click Allow.
- Click Done.
