Integrate Azure Active Directory with IAM Enabled Skyhigh CASB
To integrate Azure Active Directory (AD) with IAM enabled Skyhigh CASB, you must add Skyhigh CASB from the Azure Gallery, configure SAML SSO in Skyhigh CASB, then reconfigure Azure AD SSO.
Prerequisites
Before you configure, make sure you have the following prerequisites:
- An Azure AD account with Azure AD Premium Subscription. Activate the subscription from the Azure free account.
- Access to Skyhigh CASB tenant with the provisioned user.
Step 1: Add Skyhigh CASB from the Gallery
To add Skyhigh CASB from the gallery, perform the following activities:
- Log in to the Azure portal.
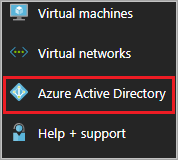
- On the left pane, click the Azure Active Directory icon.
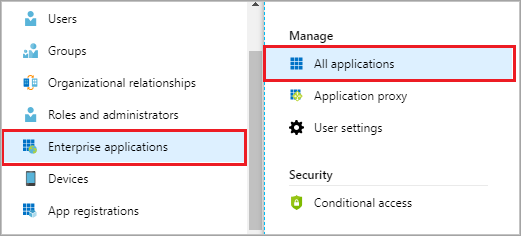
- Go to Enterprise applications and then select All applications.
- To add a new application, click New application.

- In the search box, enter Skyhigh CASB and select Skyhigh CASB Azure AD SSO Configuration from the result pane. To add the application, click Add.

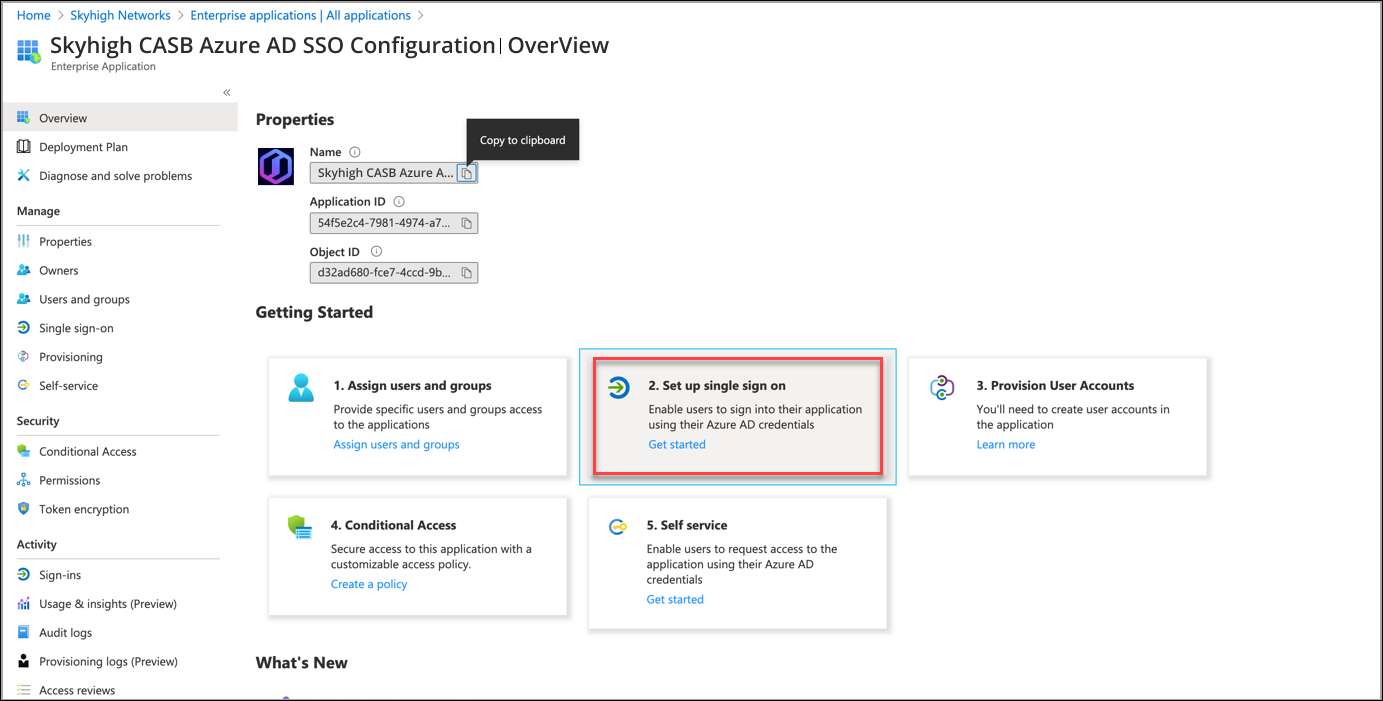
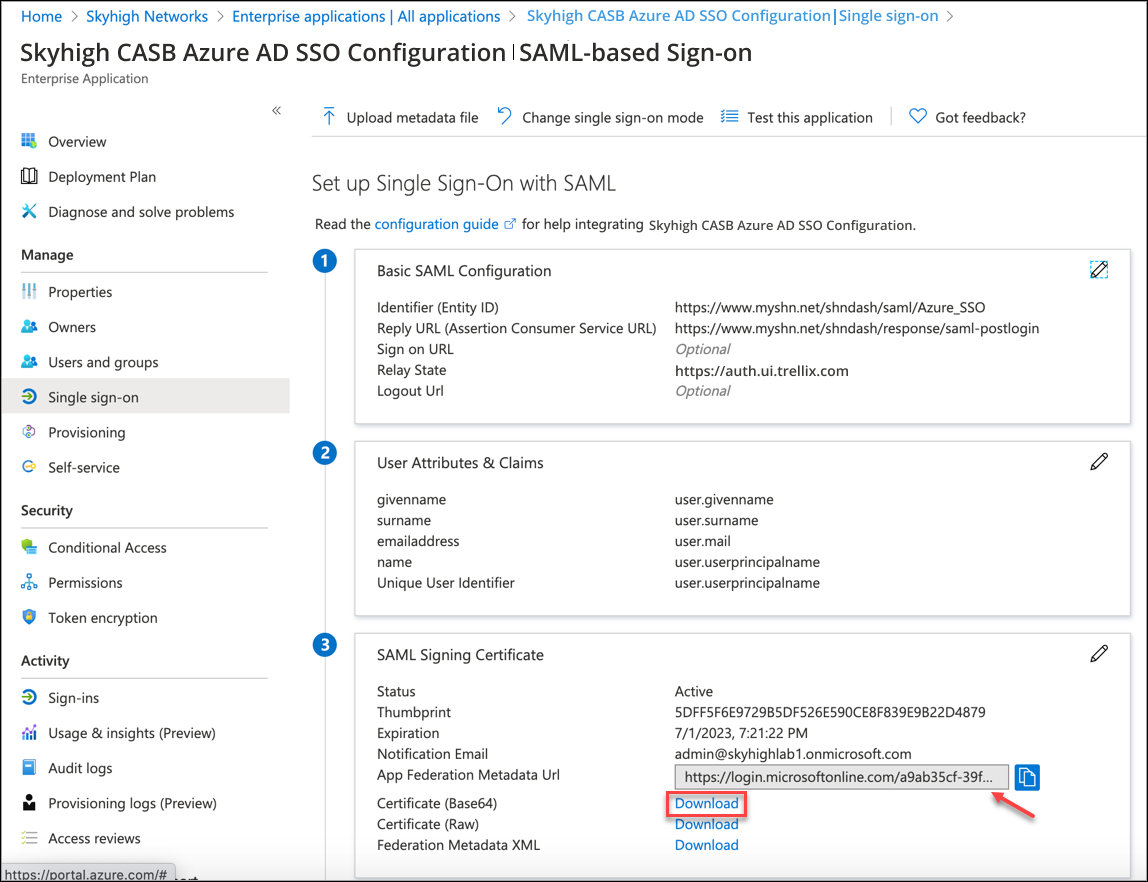
- Click the Skyhigh CASB Azure AD SSO Configuration application. Click Set up single sign on.
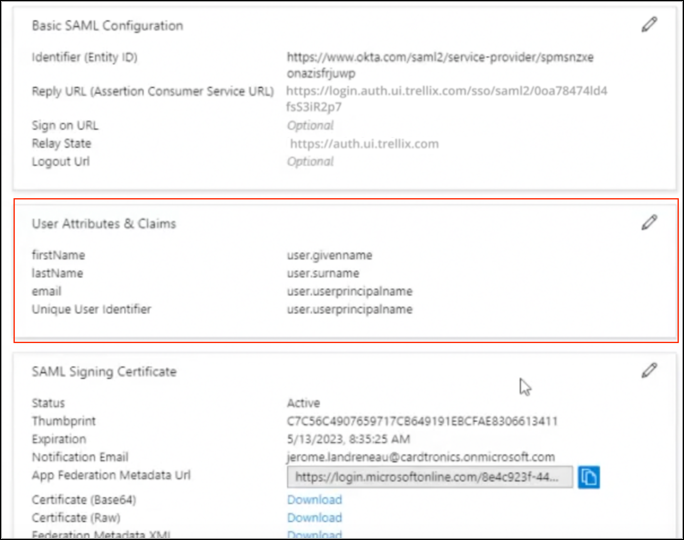
- Edit the Basic SAML Configuration and configure it with default values.
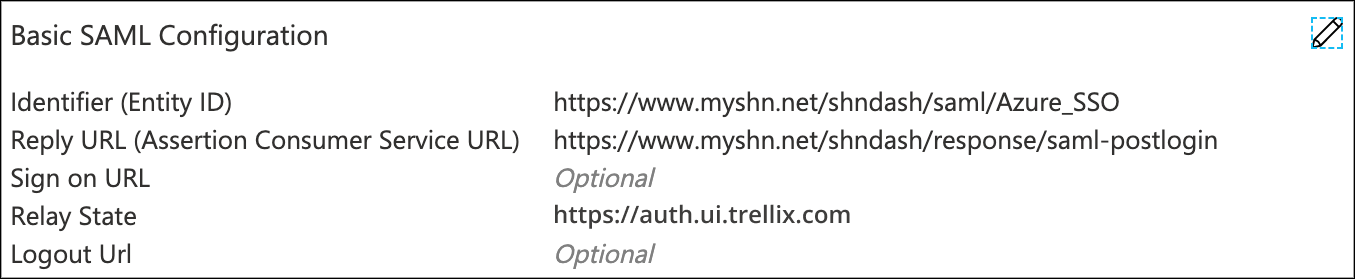
NOTE: The default generated values for the Azure AD SSO URL, Identifier, and Certificates are used in Skyhigh CASB SAML Configuration.
- Download the Certificate (Base64) and save the Login URL, Azure AD Identifier to use it in Skyhigh CASB.
NOTE: Do not close the session, as you need to reconfigure this page after the Skyhigh CASB configuration is completed.
Step 2: Configure SAML SSO in Skyhigh CASB
- Login to Skyhigh CASB .
- Go to Settings > User Management > SAML Configuration.
- Enter these details copied from Azure AD:
- Azure AD Issuer. Enter the copied URL.
- Login URL. Enter the App Federation Metadata Url copied from Azure AD.
- Upload the Azure AD certificate.
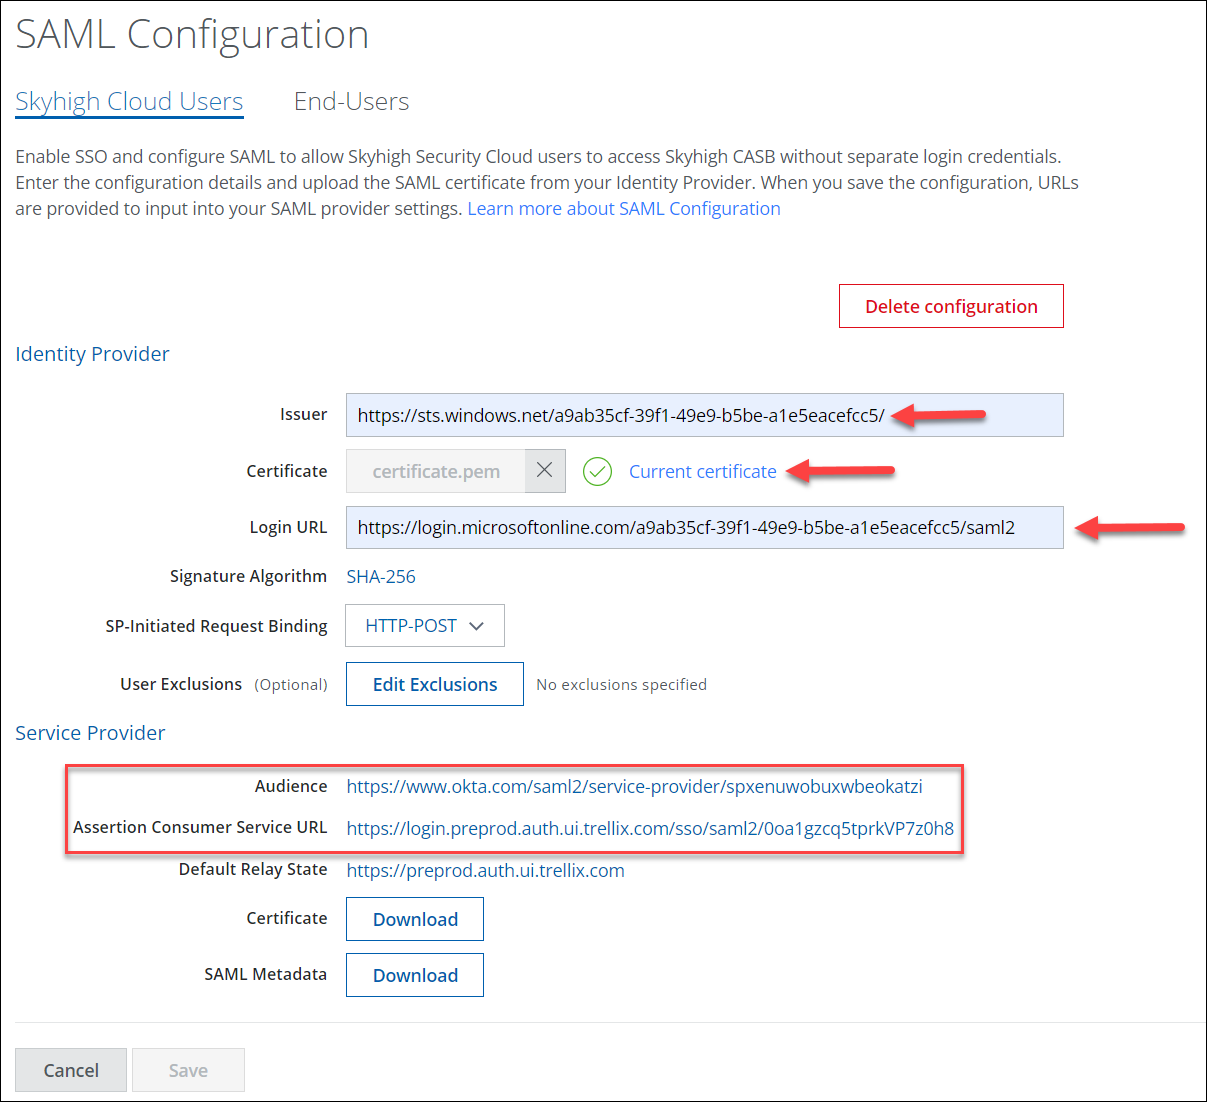
- Click Save.
Once the configuration is saved in Skyhigh CASB, the Audience and Assertion Consumer Service URL is displayed under Service Provider.
Step 3: Reconfigure Skyhigh CASB Azure AD SSO
- Go to the Azure AD Configuration and edit Basic SAML Configuration.
- Update Identifier and Reply URL (Assertion Consumer Service URL) and click Save.

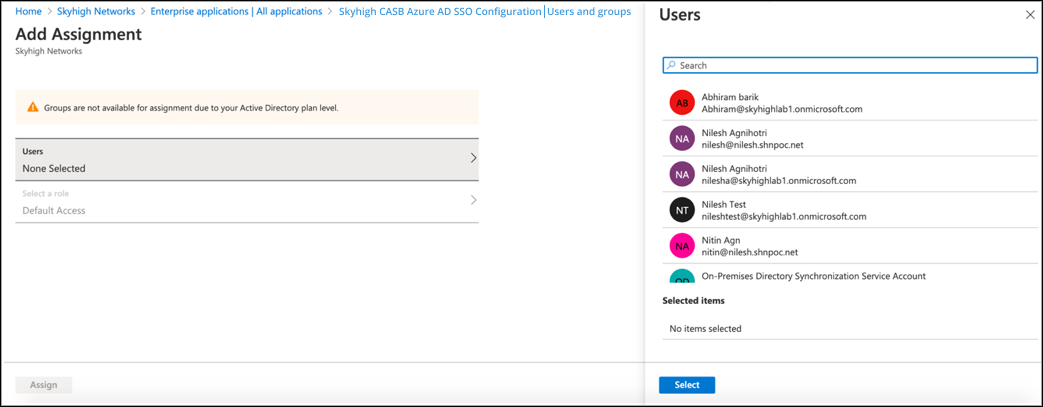
Assign the Application to Users
- Click Users and groups.
- Click Add User.
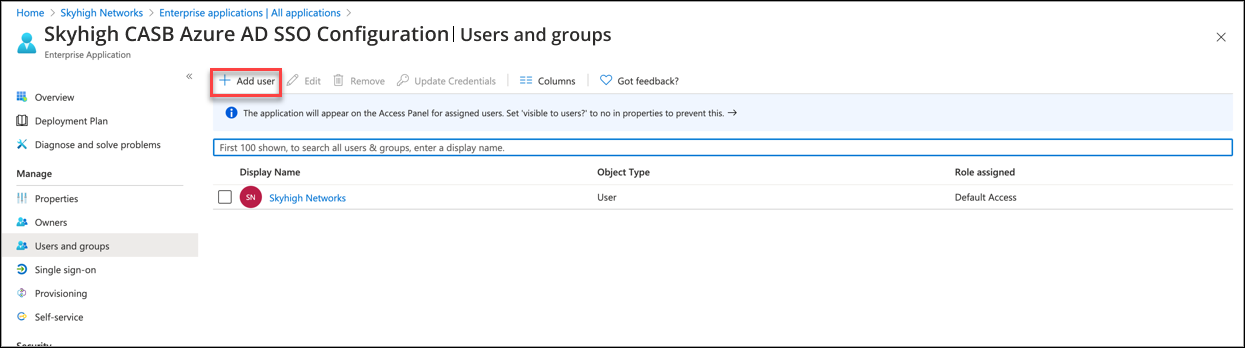
- Search the required users to provide access to Skyhigh CASB and select the Users and assign the application.
Step 4: Validate the Azure AD SSO
IDP Initiated Login
- Log In to https://myapps.microsoft.com/ with the user assigned Skyhigh CASB application.
- Click Skyhigh CASB application.
You are successfully login to IAM enabled Skyhigh CASB tenant.
Common Errors and Troubleshooting Steps
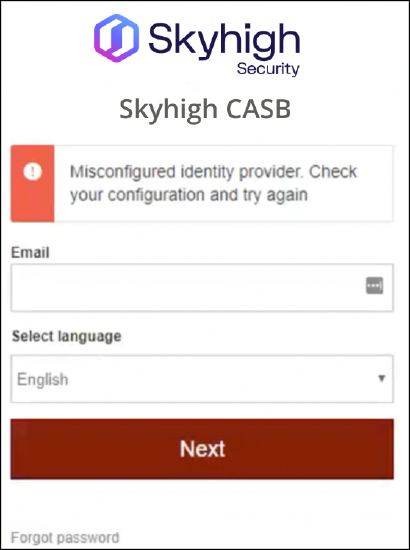
Azure SSO Errors
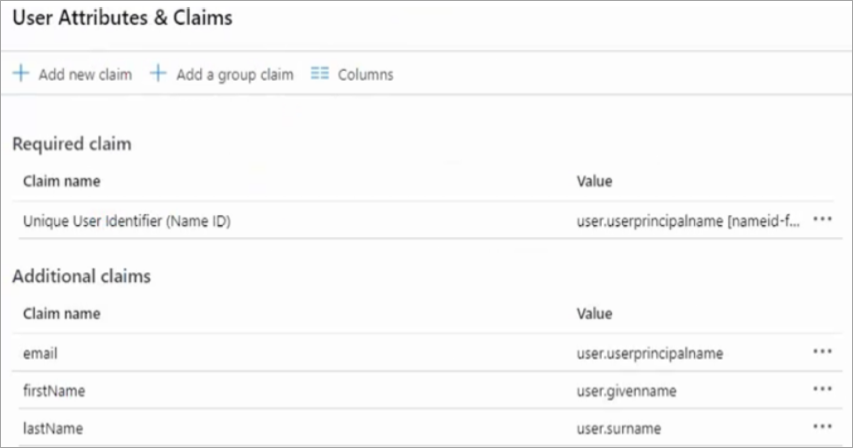
The error Misconfigured identity Provider. Check your configuration and try again occurs when you have User Attributes & Claims using the Namespace URL format.
Troubleshooting
To verify and resolve the above error, perform the following activities:
- Go to Skyhigh CASB application created in Azure AD.
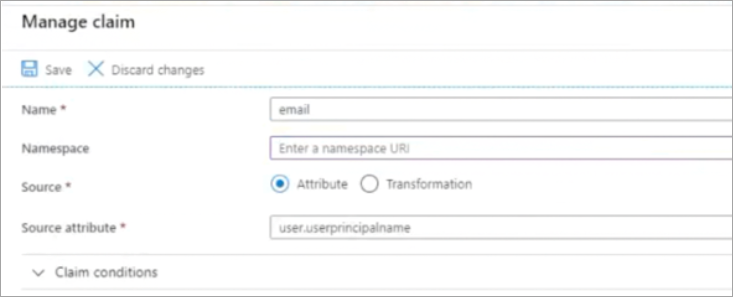
- Under User Attributes & Claims, edit and make sure that the following claims are configured accordingly:
- firstName = user.givenname
- lastName = usere.surname
- email = user.userprincipalname
- Under Additional claims, if you see URLs for Claim name, then those URLs need to be removed.
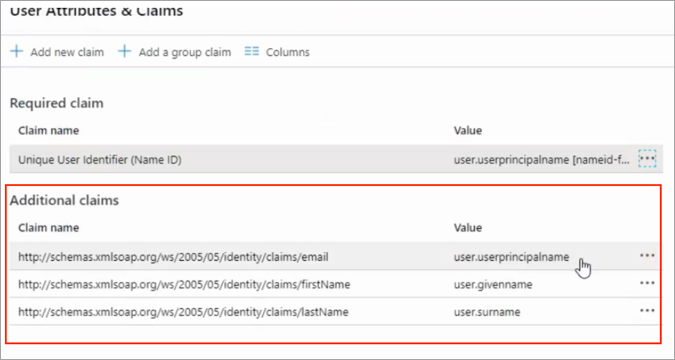
- Edit the respective Claim name and remove the URL from the Namespace and leave it blank.
- After removing the Claim name URLs, the attributes are displayed as shown below, and this resolves your error.