Integrate Skyhigh CASB for Salesforce with PingFederate SSO
You can redirect your SAML flow through the Skyhigh CASB proxy for Salesforce while using PingFederate SSO as the IdP or IAM provider.
Prerequisites
- In Skyhigh CASB, add a Salesforce instance.
- Configure SSO without the Skyhigh CASB proxy.
- Get the IdP and SP metadata files.
Extract SP and IdP Certificates
SP Certificate
- In a text editor, open the SP metadata XML file, SP.xml.
- Copy the .x509 certificate text.
- In a new text file, paste the text between the lines "-----BEGIN CERTIFICATE-----" and "-----END CERTIFICATE-----".
- Delete all new line characters. In other words, transform the certificate text into all one line, or the Skyhigh CASB tenant may not accept the certificate.
- Save the file as SP.crt.
IdP Certificate
- In a text editor, open the IdP metadata XML file, IDP.xml.
- Copy the .x509 certificate text.

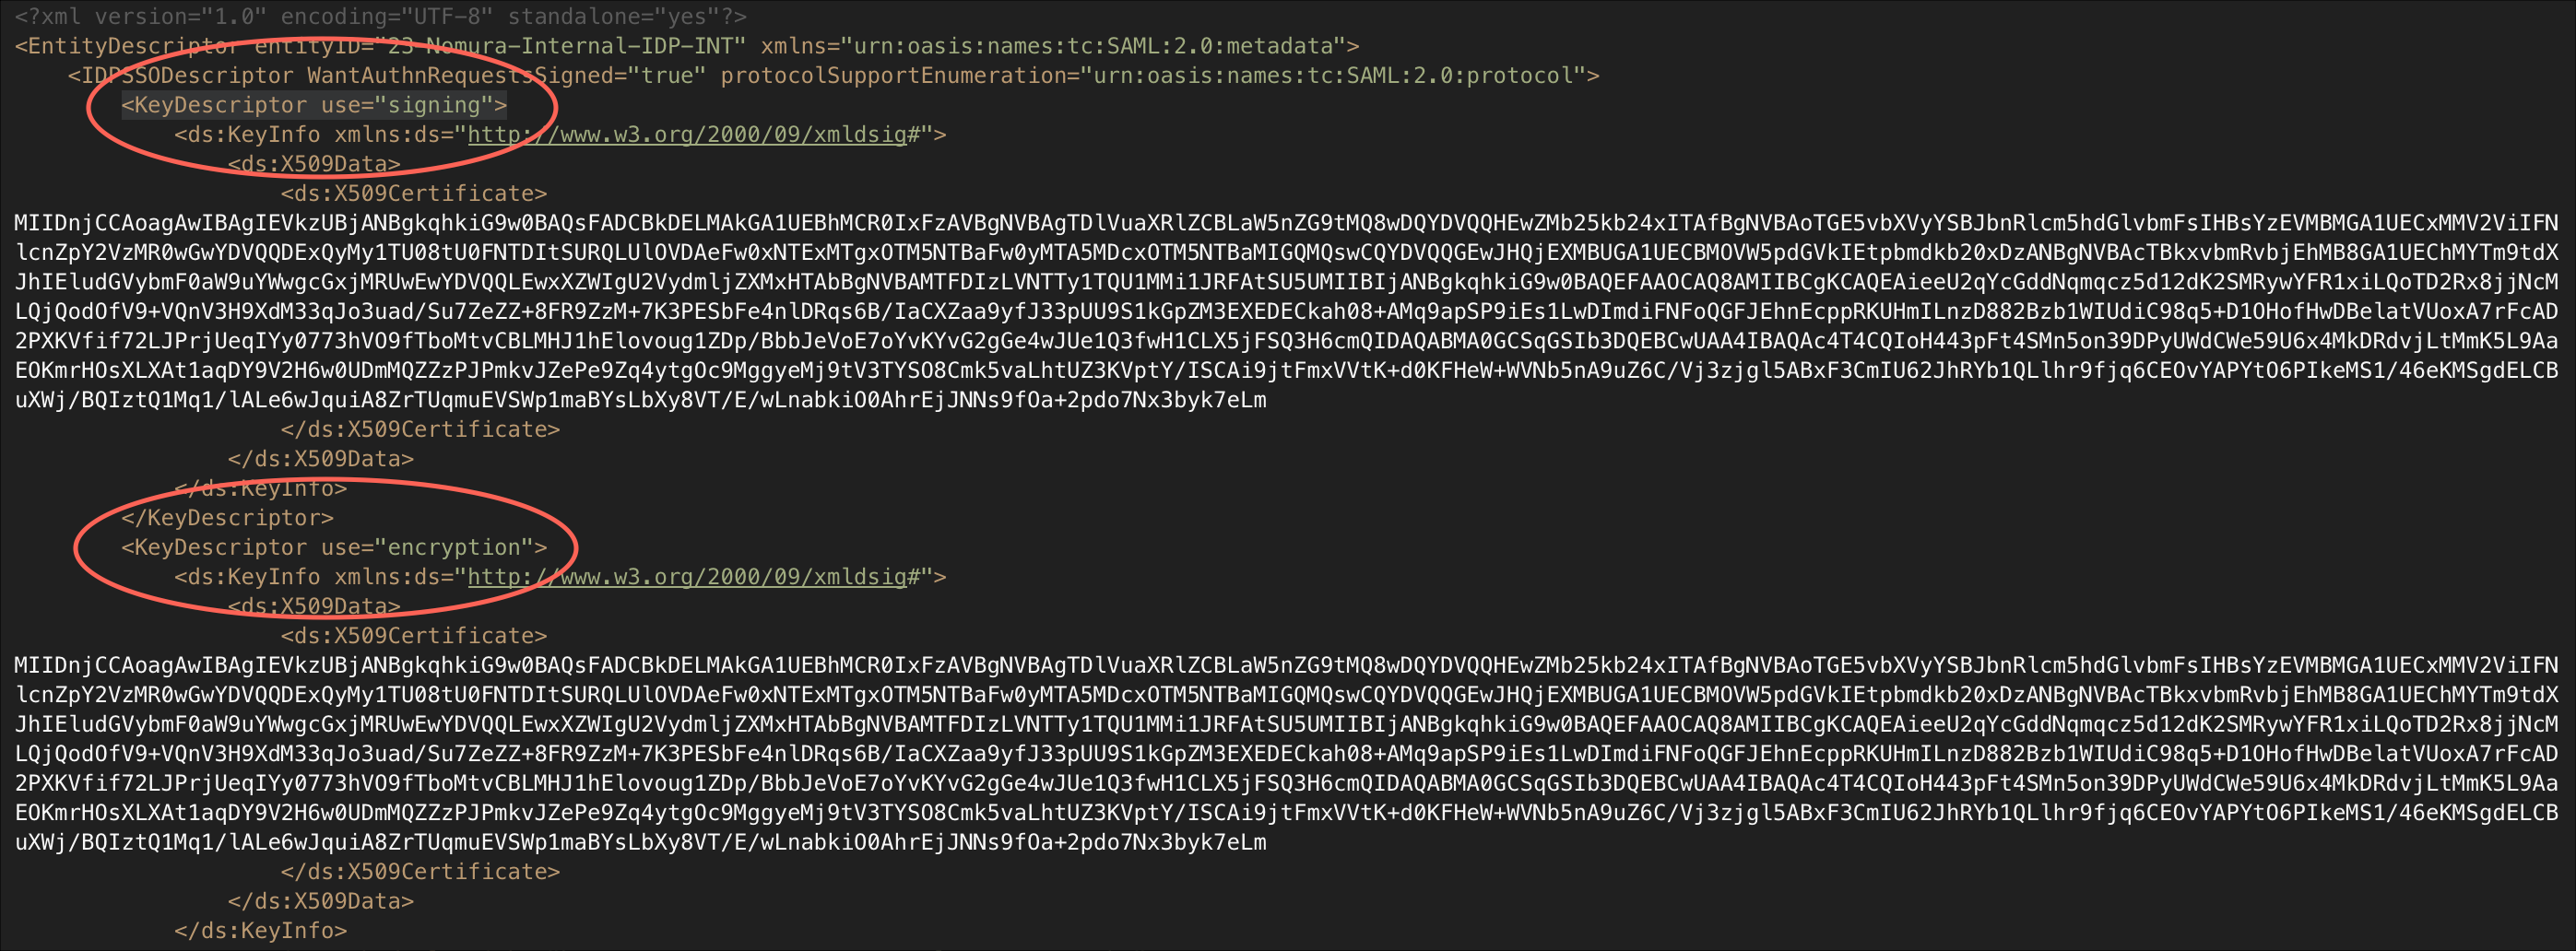
IMPORTANT: <KeyDescriptor use="signing"> & <KeyDescriptor use="encryption">. In the IdP metadata file, you may find two different nodes containing the same .x509 certificate text: one used for signing the certificate and the other for encrypting the assertion. For this procedure, you only need to re-sign the certificate. The encryption remains intact. Only use the signing certificate.
- In a new text file, paste the text between the lines "-----BEGIN CERTIFICATE-----" and "-----END CERTIFICATE-----".
- Save the file as IDP.crt.
Upload SP and IdP and SP Certificates to Skyhigh CASB
- Log in to Skyhigh CASB.
- Go to Service Management and find your instance of Salesforce.
- On the Setup tab, under Proxy, enable SAML
- Upload the SP and IdP certificates.
- Download the Proxy Server Certificate by clicking Export Proxy Server Certificate. For example, proxy.crt.
Add Custom URLs to Skyhigh CASB Properties
In the customer org, collect the corresponding URLs and replace the myDomain name and the Salesforce instance with it. (THIS IS NOT CLEAR??)
- In the following URLs, your myDomain name is customer and the Salesforce instance is cs20. Replace: (THIS IS NOT CLEAR??)
- customer–dev.cs20.my.salesforce.com
- customer--dev--c.cs20.content.force.com
- customer--dev--c.cs20.visual.force.com
- Go to Service Management and find your instance of Salesforce.
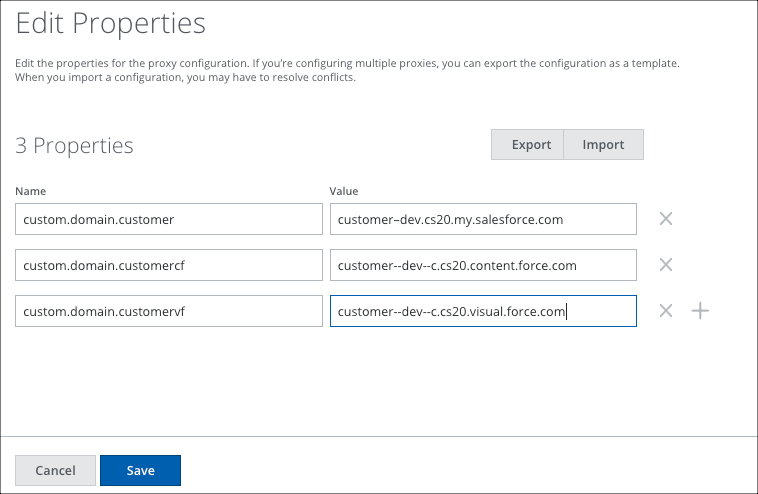
- Go to Actions > Add Properties.
- Add the following URLs as custom domains as shown. Make sure the MyDomain is in the same case as it is on Salesforce.

- Click Save.
Modify Salesforce SP Metadata
- In a text editor, open the SP Metadata XML file, SP.xml.
- If you want to enable SP-initiated login, required by some integrations like Salesforce for Outlook, modify the entityID. Replace the URL with the corresponding Skyhigh CASB proxy URL. For example, https://customercrm.customer.shnpoc.net.
- Replace the certificate:
- From the Skyhigh CASB Proxy Server Certificate, proxy.crt, copy the certificate text (excluding "-----BEGIN CERTIFICATE-----" and "-----END CERTIFICATE-----").
- Replace the .x509 certificate text with the Skyhigh CASB proxy certificate text.
- Modify your Location URL. Look for the <md:AssertionConsumerService> node, then modify the Location URL to the one through proxy, and add the shnsaml parameter to it.
https://customer–dev.cs20.my.salesforce.com?so=00Dm00000008dtx -->
https://<Corresponding SHN URL>?so=00Dm00000008dtx&shnsaml
e.g.
https://customer–dev.cs20.my.salesforce.com?so=00Dm00000008dtx -->
https://customercrmdev.customer.shnpoc.net?so=00Dm00000008dtx&shnsaml
-
Save the file as SP_SHN_modified.xml.
Configure Salesforce
Create the IdP Login URL
- In a text editor, open the IdP Metadata XML file, IDP.xml.
- Look for the node md:SingleSignOnService Binding="urn:oasis:names:tc:SAML:2.0:bindings:HTTP-POST" .
- Copy the Location URL.
- Go to http://www.url-encode-decode.com/, paste the Location URL, and encode it. For example:
URL encoding
https://entidpext-stg.customer.com/idp/SSO.saml2 --> https%3A%2F%2Fentidpext-stg.customer.com%2Fidp%2FSSO.saml2
- Create the IdP Login URL. Append the IdP URL (in Step 4) as a shnsaml-request URL parameter to the proxy URL. For example, for the Skyhigh CASB proxy URL https://customercrmdev.customer.shnpoc.net, the IDP login URL would be:
https://customercrmdev.customer.shnpoc.net?shnsaml-request=https%3A%2F%2Fentidpext-stg.customer.com%2Fidp%2FSSO.saml2
Modify the IdP Login URL in Salesforce
- Log in into Salesforce and navigate to the Single Sign-On app that you are configuring for.
- Edit the app and replace the Identity Provider Login URL with the one in the previous Step 5.
- Make sure that the Entity ID matches the exact case of the Salesforce My Domain that has been set as a configuration property in Skyhigh CASB in Step 1 of Add Custom URLs to Skyhigh CASB Properties.
- Save the configuration.
Configure PingFederate
- Upload the modified Salesforce metadata XML file, SP_SHN_modified.xml into the PingFederate configuration.
- Upload the Skyhigh CASB proxy.cert and Salesforce SP.crt certificate files into PingFederate and mark them as Primary and Secondary verification certificates, respectively.
Test
Finally, test both SP and IdP initiated logins.

