Skyhigh Client Proxy Support Tool - Collecting Network Traces
Overview
From Skyhigh Client Proxy version 4.9.3 onwards, installing Wireshark is no longer required to capture network traces using the SCP SupportTool. This is now achieved by utilizing the built-in netsh trace utility in Windows. The SupportTool will collect the necessary packets and save them into a .etl file named netsh-trace.etl. To convert the .etl file into a Wireshark-readable format, the Microsoft Network Monitor tool must be used.
Steps to capture traces
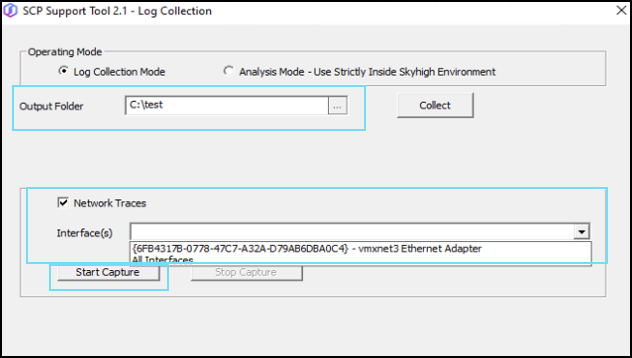
- Select Output Folder.
- Enable the Network Traces checkbox
- Select an Interface to capture.
- Click Start Capture.
- Reproduce the issue and Click Stop Capture.
6. The output file will be saved to support_tool_work_dir under the name netsh-trace.etl along with the vscore logs
7. Once all the logs are collected, share the support_tool_work_dir after the initial analysis.

Converting the etl file to Wireshark readable cap file
To convert the captured ETL file, use the Microsoft Network Monitor tool. This can be done on the support or development machine to verify the captured packets.
- Download and install the tool.
- Run the Network Monitor tool
- Open the
netsh-trace.etlfile by following the path - File > Open > Capture. - Save the file as
a .capfile by following the path File > Save As
Sample ETL file opened in Network Monitor

Save the opened .etl file to .cap to view from Wireshark

Converted sample
