Modify a Default Template and Use It to Configure an End User Notification Page for a Block Action
You can configure an End User Notification Page for a block action that suits your requirements using a default template and feature configuration as starting points. To configure a page in this way, you need to complete these high-level activities:
-
Clone a default template and modify the cloned template
-
Clone a default feature configuration and configure the cloned configuration to use your modified template
- Select this configuration as setting for the action of a block rule
The individual steps needed to complete these activities are as follows:
- Clone a default template and modify it.
-
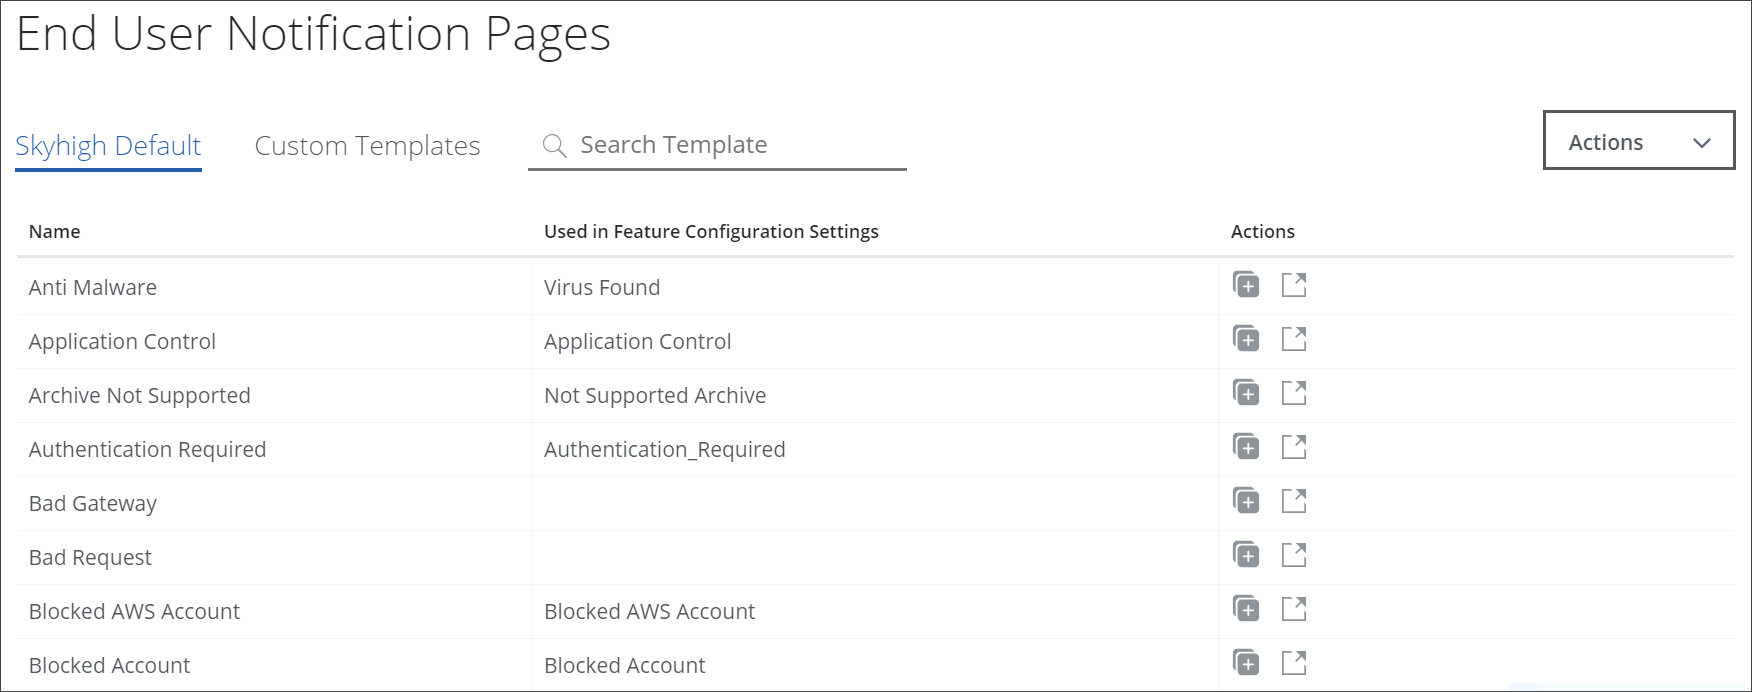
On the user interface for Secure Web Gateway, select Policy > Web Policy > End User Notification Pages.
The End User Notification Pages page appears. Under Skyhigh Default on the left, it provides a list of default templates.
-
Click the + icon in the line of the default template you want to clone, for example, URL Blocked.

-
In the window that opens, click Clone.
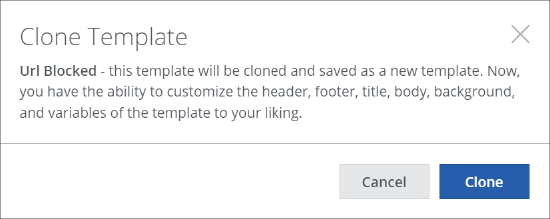
A cloned instance of the template appears, which you can modify using the element options that are provided.
-
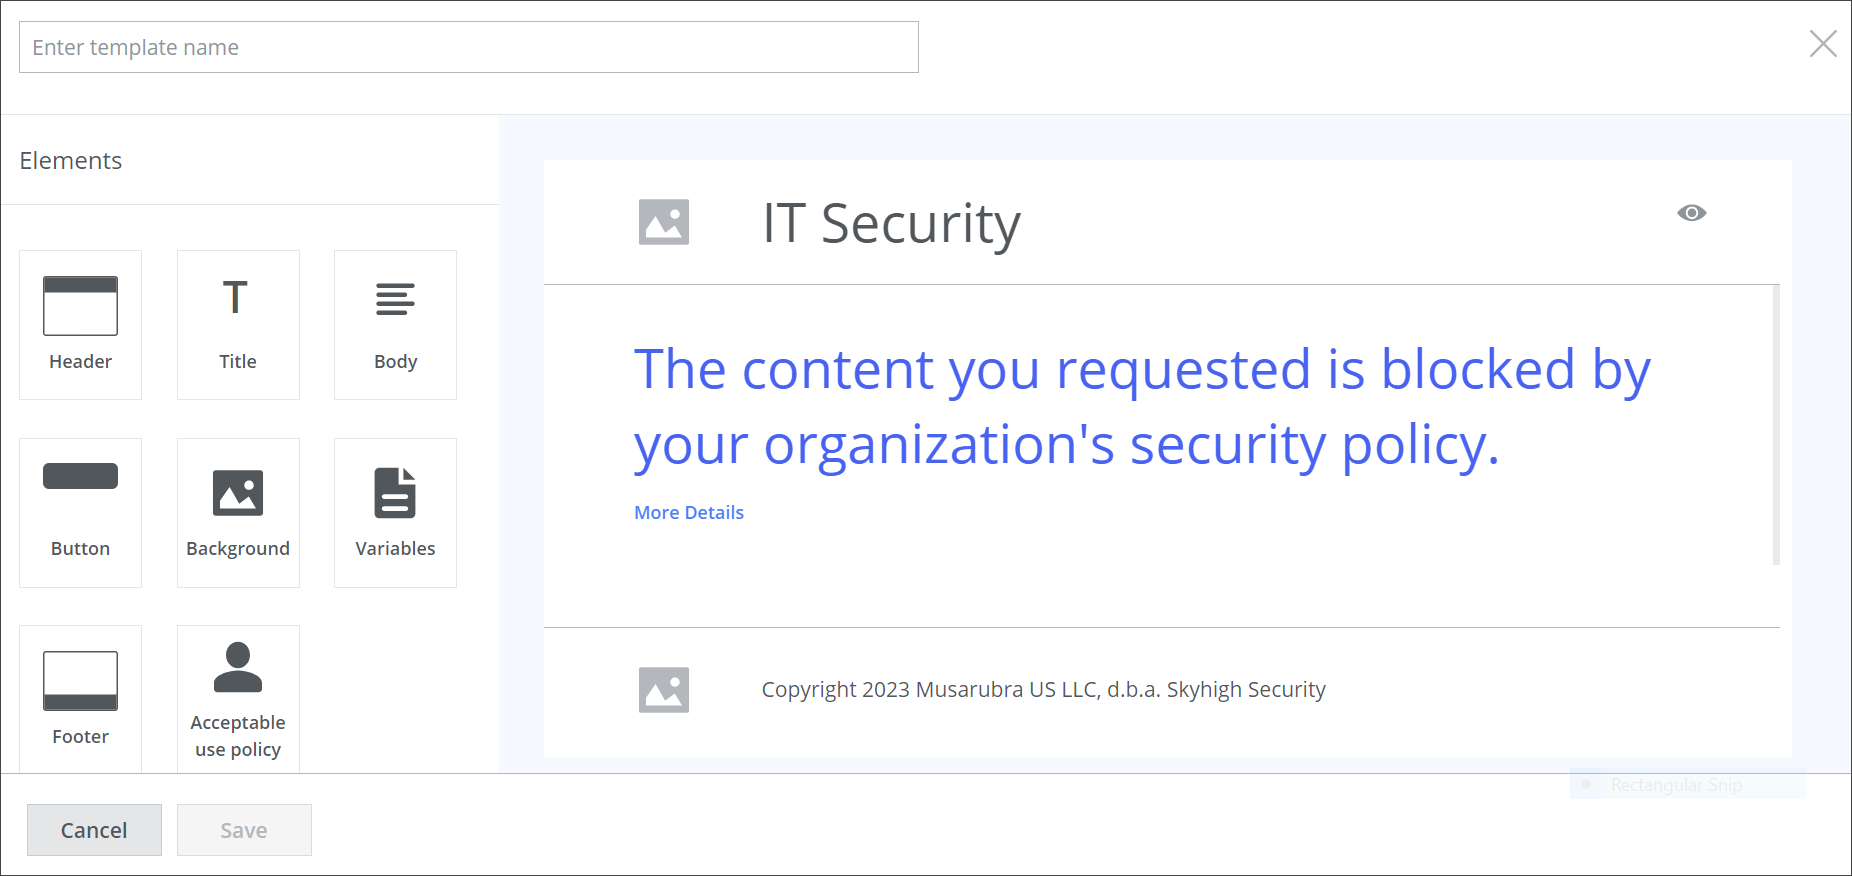
In the name field at the top, enter a name for the modified template, for example, My URL Blocked Template.
-
For this sample procedure, modify the text of the template title. Change the wording blocked by your organization's security policy to blocked by our organization's security policy. Proceed as follows:
-
Under Elements on the left, click Title.
-
Then, under Text, edit the text.
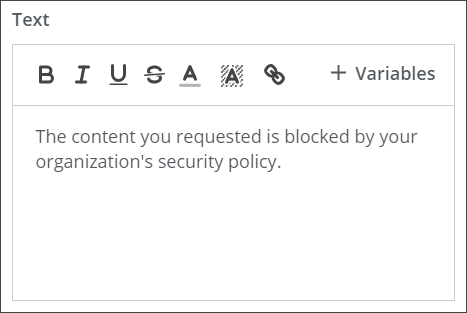
Delete the letter y before the our in your.
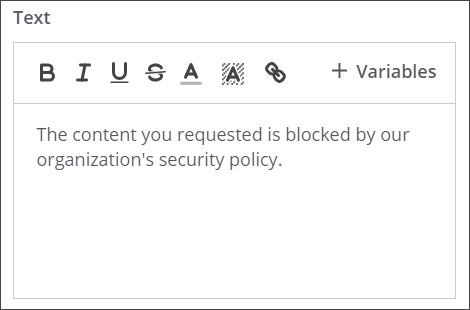
What you edit here will immediately appear within the title field in the middle of the template.

-
-
Click Save.
Your modified template is shown with the name you specified for it under Custom Templates on the End User Notification Pages page.

-
- Clone a default feature configuration and configure it to use your modified template.
-
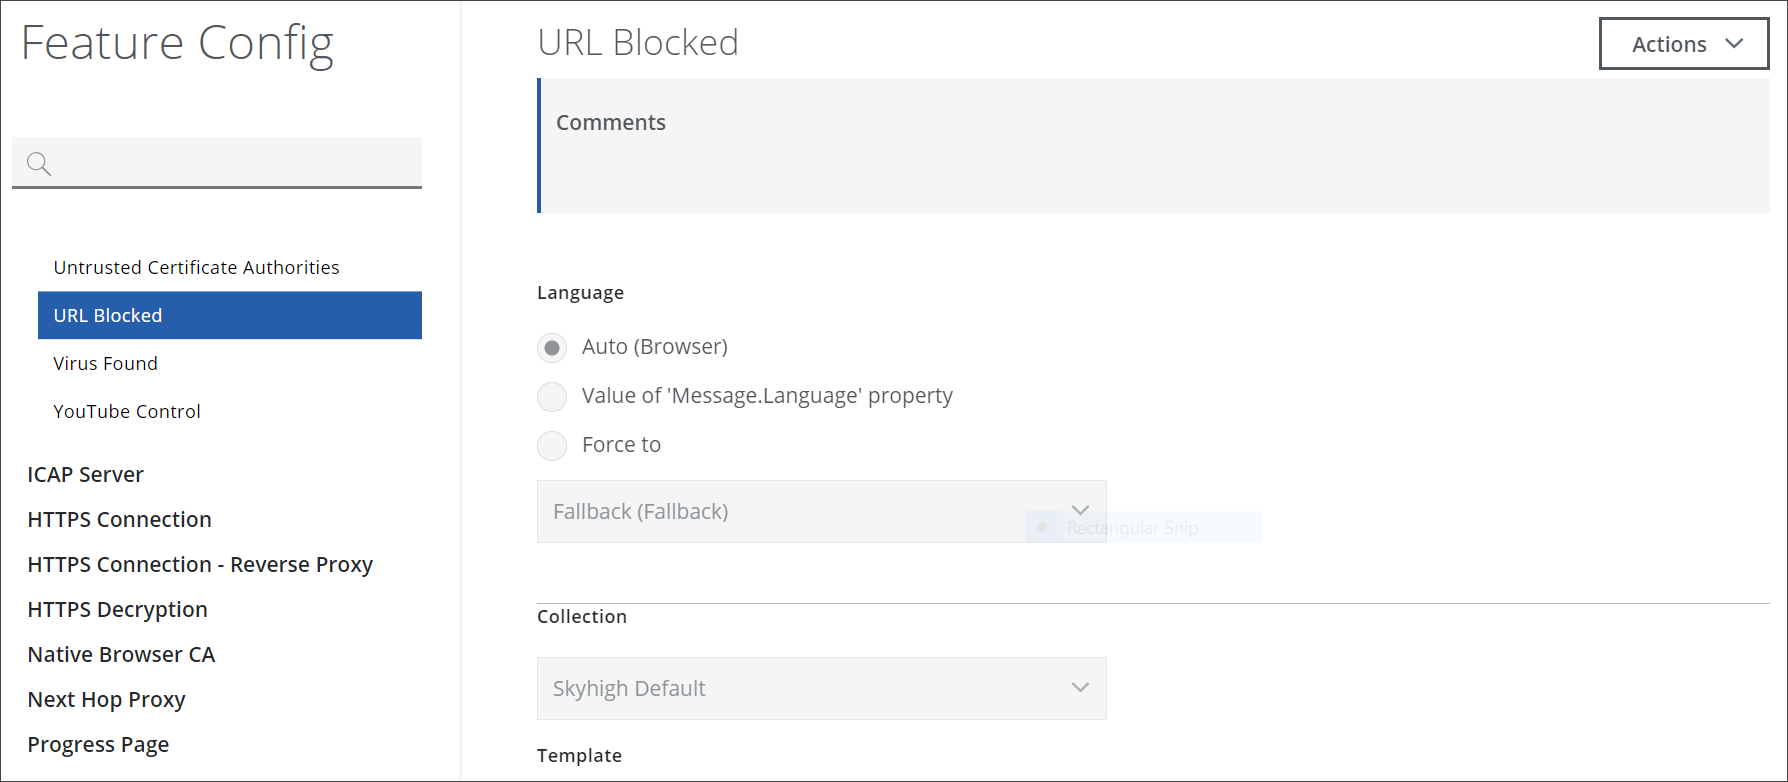
Select Policy > Web Policy > Feature Configurations.
-
On the Feature Config page, scroll down the list of feature configurations on the left. When you see End User Notification Settings, expand it.

-
Scroll down to URL Blocked and select it.
The configuration area for the default URL Blocked feature configuration appears.
-
In the top right corner of this configuration area, click Actions, and then Clone and Edit.
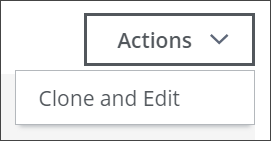
A cloned instance of the feature configuration appears, which you can modify.
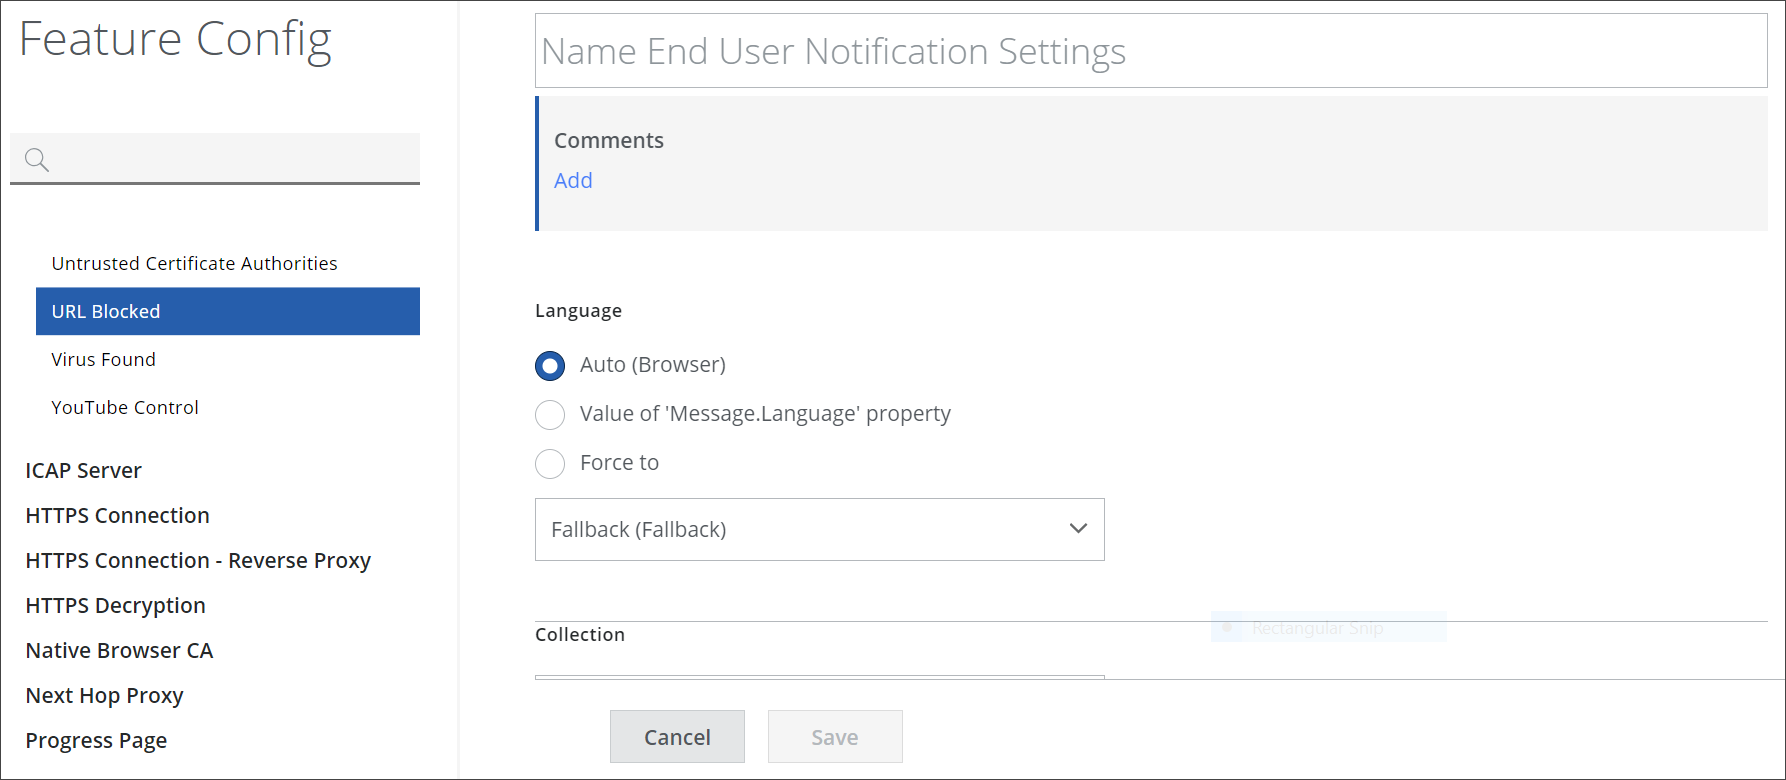
-
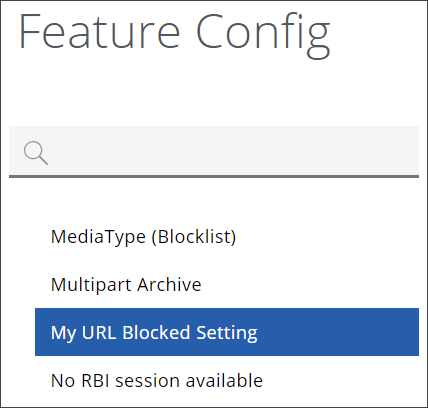
In the name field at the top, enter a name for the modified feature configuration, for example, My URL Blocked Setting.
-
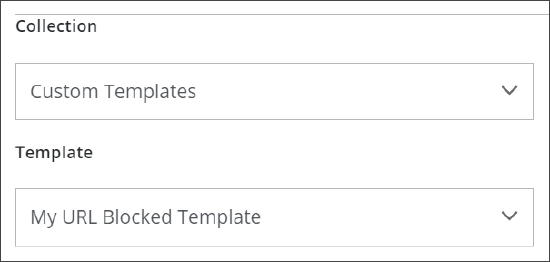
Under Collection, select Custom Templates. Then, under Template, make sure My URL Blocked Template is selected.
-
Click Save.
Your modified feature configuration is shown with the name you specified for it under End User Notification Settings in the list on the Feature Config page.
-
- Select your modified feature configuration as setting for the action in a block rule.
-
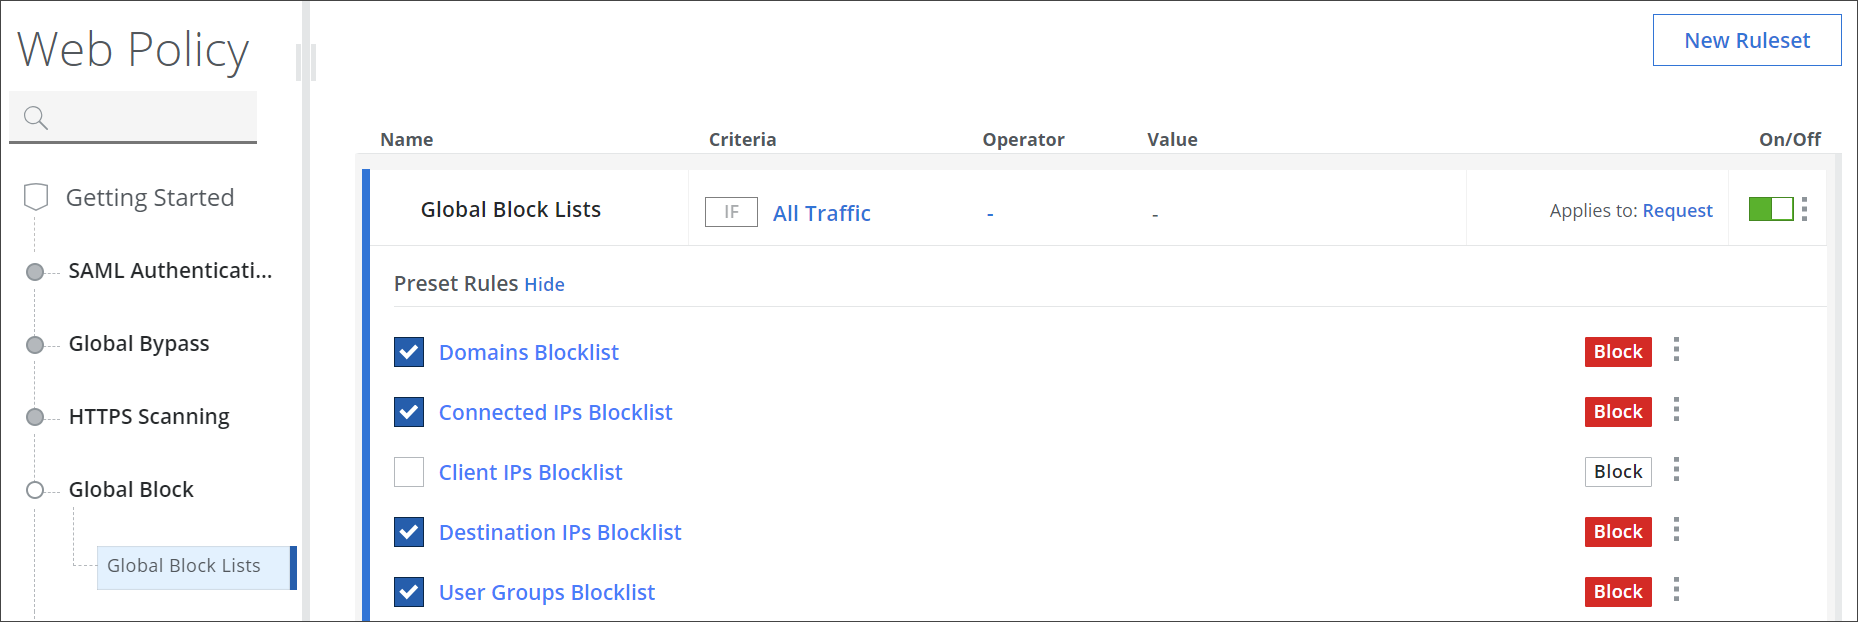
Select Policy > Web Policy > Policy.
-
On the Web Policy page, select the rule set with the rule where you want to select a setting for a block action.
Select this rule set from the policy tree in the navigation panel on the left. For example, expand Global Block and select Global Block List.
-
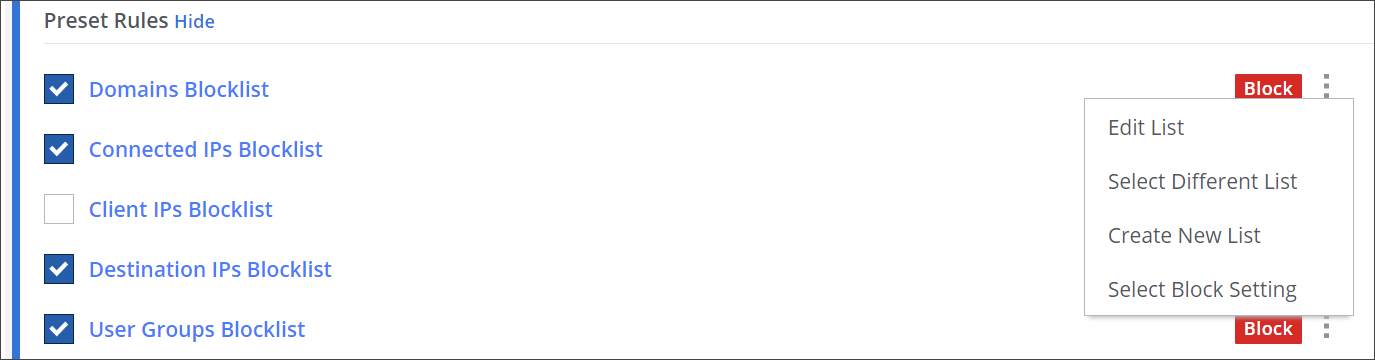
Under Preset Rules, click the three dots, for example, in the line of the Domains Blocklist rule.
This rule blocks access to websites based on the domain names in the URLs that are submitted with a request for access. The domain names are listed in a block list here.

-
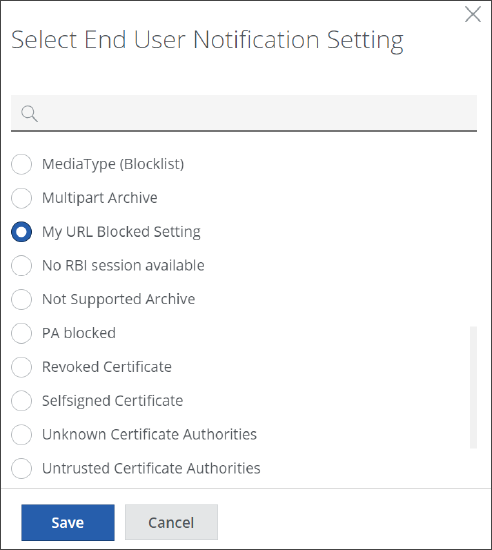
From the menu that appears, select Select Block Setting.
-
From the list on the panel that is inserted on the right, select My URL Blocked Setting.
-
Click Save.
-
You have now modified a default template and configured it for use by a modified feature configuration. Then you have selected this configuration as setting for the block action of a rule.
When a user requests access to a domain that is on a global block list, the request is blocked and an End User Notification Page is sent to the user's browser.
This page will use the wording that you edited when modifying the template for the page.