Silently Installing SCP 4.8+ with Cloud Firewall in macOS using MDM (Jamf)
To install SCP 4.6.x and above, without any Cloud Firewall policy, refer to Silently Installing SCP 4.6+ using MDM (macOS) to learn about the installation of SCP using MDM (Jamf) in macOS.
If you're using Cloud Firewall policy to install SCP 4.8.x and above, follow the steps mentioned below, along with Silently Installing SCP 4.6+ using MDM (macOS).
User consent is required to load any third-party system extensions (for products using network extensions on macOS Big Sur 11.1.x and later). As SCP 4.8.0 (with Firewall policy pushed via SSE) uses a couple of Network System Extension for network events, prior approval of the following is required:
- Network Extension Transparent Proxy
- Content Filter configurations
Jamf is a third-party MDM tool used for endpoint management. You can install SCP via Jamf.
Enroll a Device to Jamf
You can enroll a device into a Jamf using the URL and an administrator login.
- After the application deployment is set up, you can enroll a device by invoking a URL on the device and logging in as an administrator.
- You must turn on the user-initiated enrollment for iOS devices in the Jamf console. The enrollment URL is the following website: https://xyz.jamfcloud.com/enroll/ where xyz is the URL portion provided by Jamf.
NOTE: Make sure the URL link has the “https” prefix or the URL may not load in a browser.
Follow the below steps to enroll a device to Jamf
- Go to URL https://mfepsdev.jamfcloud.com/enroll/.
- In the Assign to user field, enter Jamf login credentials.
- Skip over the Select the site to use for enrolling this computer or mobile device.
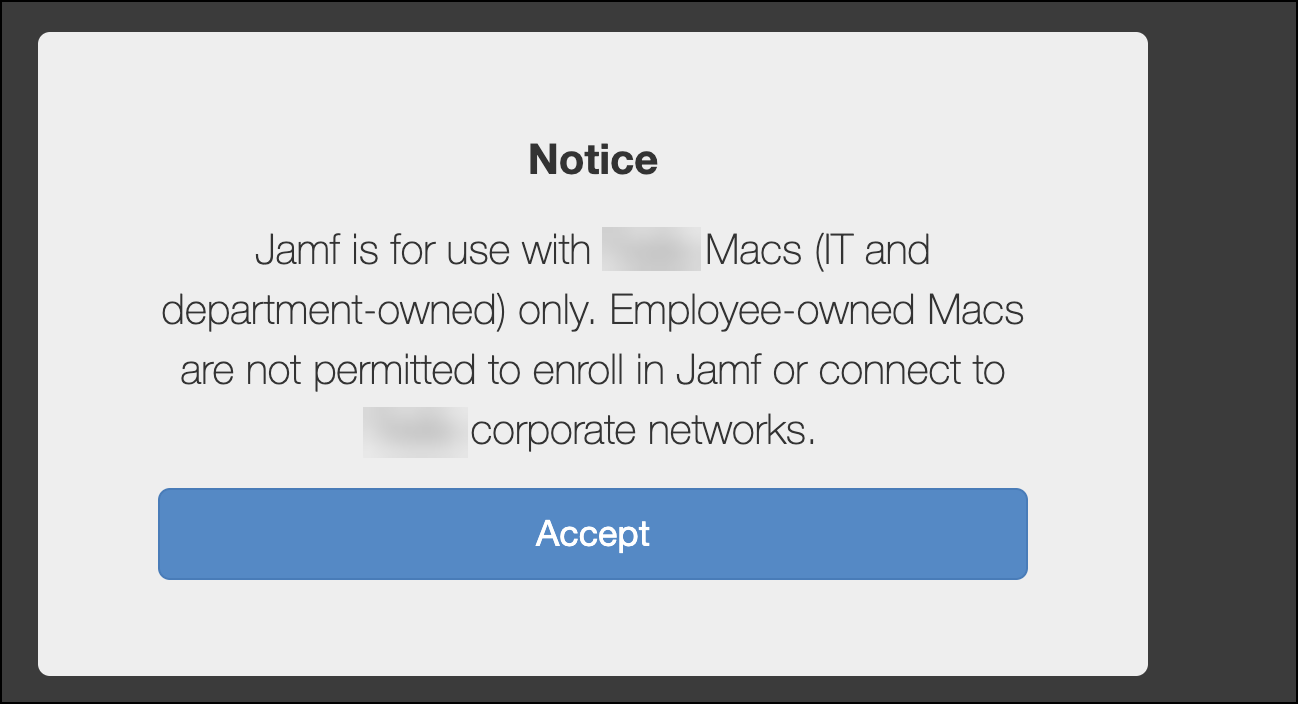
- Click Enroll. Notice window appears, click Accept to continue.
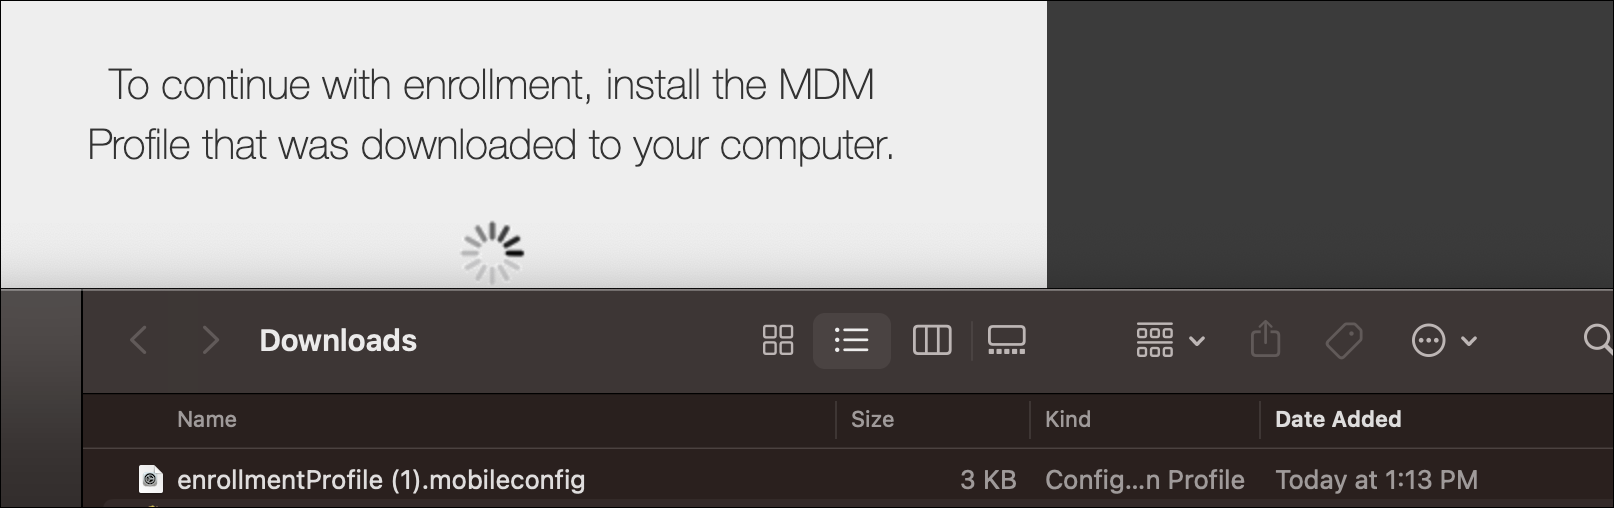
- Click Continue to Install CA certificates. Click Download
- You need an MDM profile for your organization for enrollment. Click Continue.
- Go to Privacy & Security > Profiles >MDM Profile. Click Install to install the downloaded configurations.
- Profiles are installed.
- From the main menu, In the Jamf dashboard, go to Computers. A list of all the managed accounts via the Jamf accounts is displayed.
Create Profiles
To install Client Proxy, create a profile for System Extension, Content Filter, and App Proxy Filter and push these packages to the selected endpoints.
- Go to the Jamf dashboard.
- In Content Management click on Configuration Profiles.
- Click New to create a new profile.
- In the Option go to the General tab, and enter the Name for the profile.
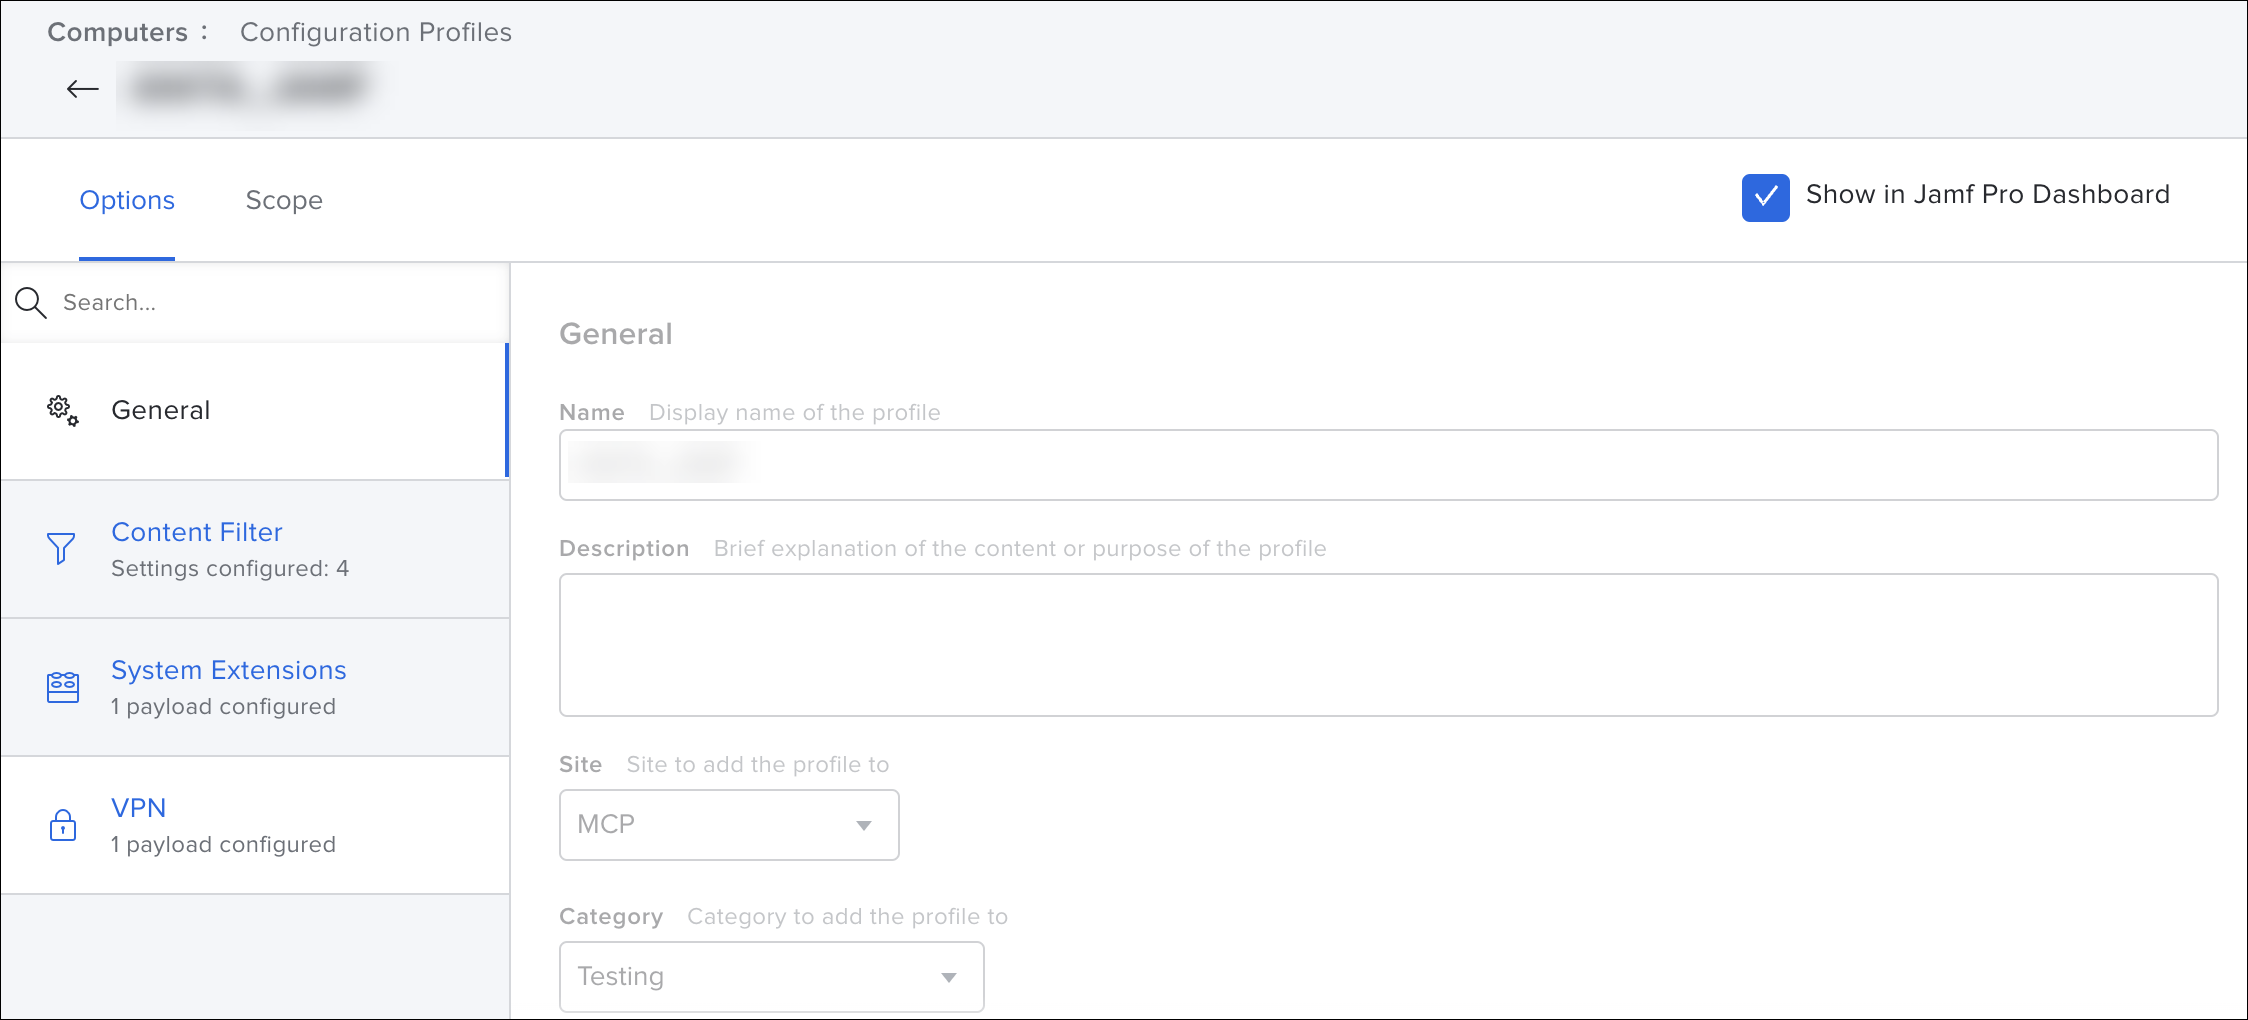
- Enter the purpose of the profile in the Description.
- Use the respective Site from the drop down. Choose the required Category.
Install the Client Proxy
To install the Client Proxy, create profiles for System Extension Payloads, Content Filter Payload and App Proxy Filter Profiles and push these packages to the selected endpoints.
- Create Profiles.
- Update the following profiles:
- System Extension Profile
- Content Filter Profile
- App Proxy Filter (VPN) profile
- Install SCP using the following Profile settings:
- In Options go to System Extension to configure system extensions.
|
Profile |
Settings |
||||||||||||||||||||||||
|---|---|---|---|---|---|---|---|---|---|---|---|---|---|---|---|---|---|---|---|---|---|---|---|---|---|
|
System Extensions Profile |
|
- Click Configure. The system Extensions window appears.
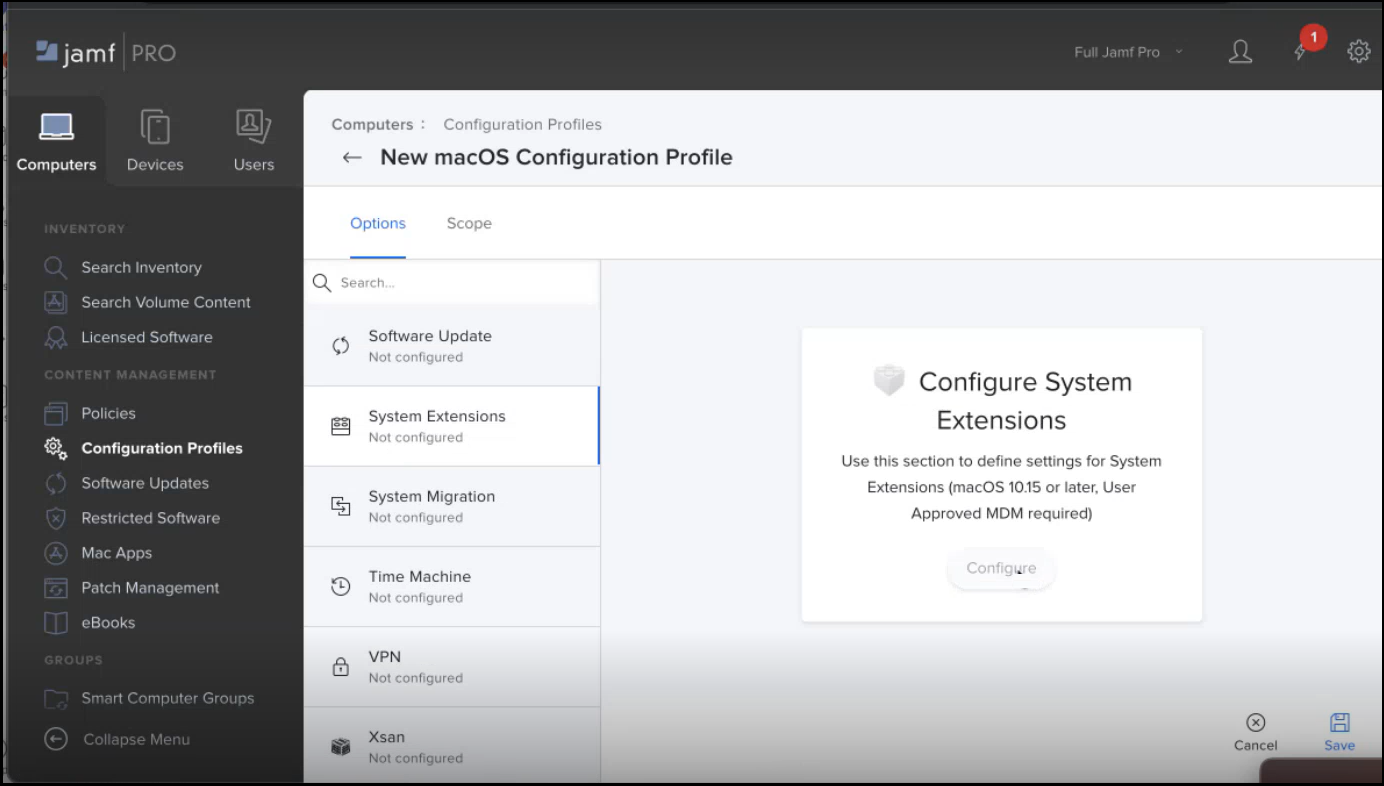
- Choose System Extension Types from the dropdown, and Enter Team Identifier. Choose System Extension Types.
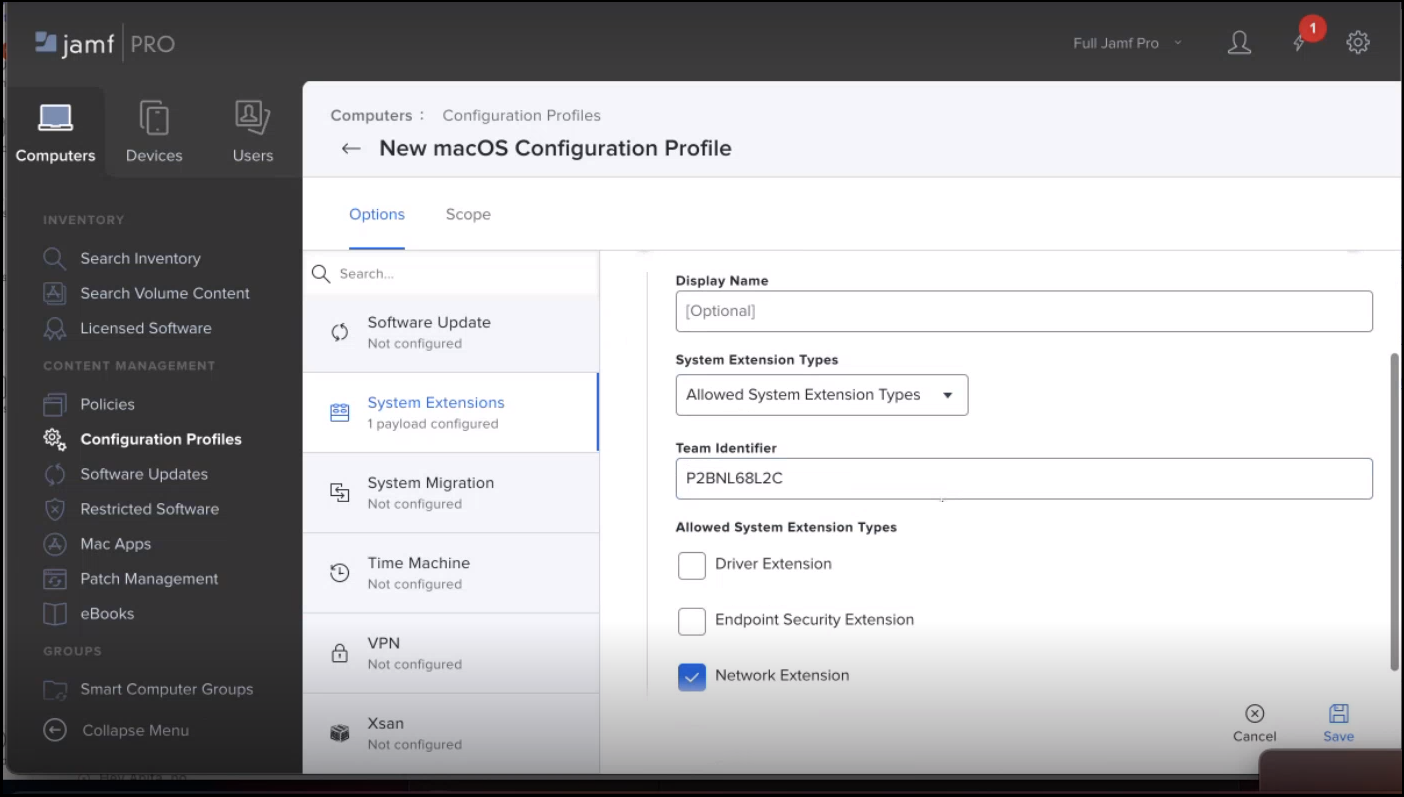
- Click Save.
- Choose Payload details from the table below and fill in the fields.
|
Content Filter Profile |
|
- To create content filter details, go to Content Filter in the options.
- Enter the Filter name and Identifier.
- Enter details from the Content Filter Payload.
- Click Save
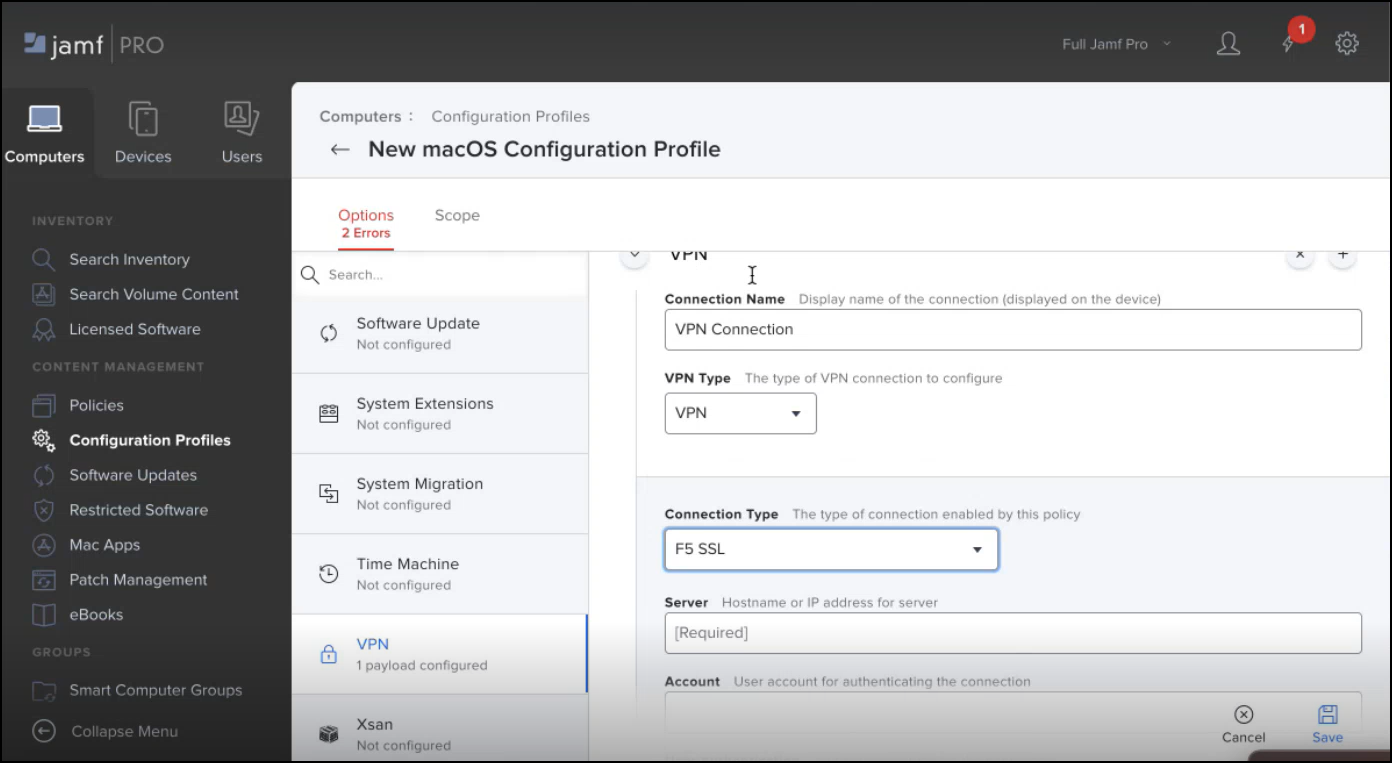
- Configure the VPN package.
|
App Proxy Filter Payload |
You can use the following Proxy payload for the approval of the extension Proxy components (VPN Payload):
|
- Go to the Scope tab to specify the target user. Choose Specific Computers and Specific Users.
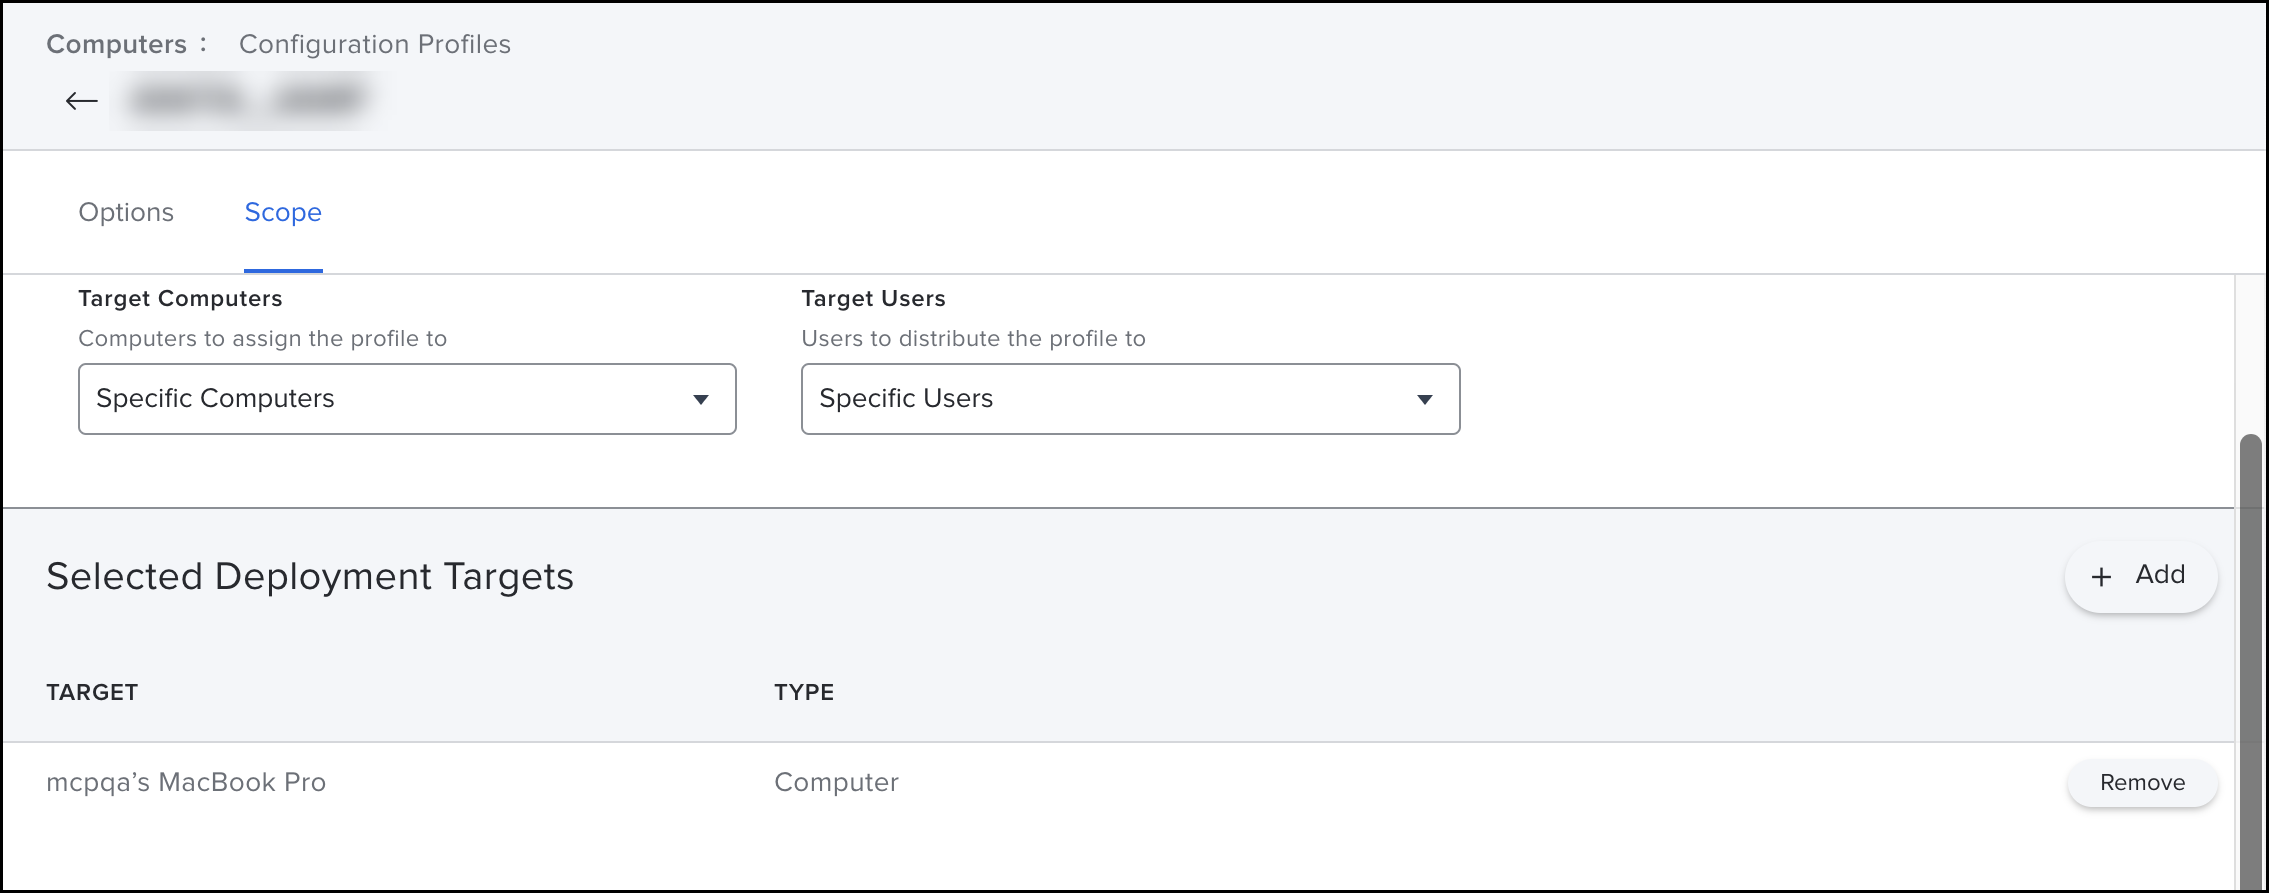
- Click Save, Profile is saved to your managed device.
- Deploy Client Proxy using self service.
Deploy SCP using Self Service
-
Go to the Jamf server at https://mfepsdev.jamfcloud.com, then select Full jamf pro from the dropdown to get all the features.
-
Navigate to Content Management > Policies> New > General. Use the respective Site from the drop down. Choose the required Category.
- Go to the Options tab, and click on Packages. Add the Client Proxy package you wish to install.
- In Actions, choose Install.
- Go to the scope tab, select target computer and target users.
- Add the machine you want the Client Proxy to be installed,
- Make sure to add the below configuration to get it reflected in the Self Service portal (in the above policy).
- Go to the client machine and open Self Service from Application, choose to install the configured package.

NOTE: On VPN Status modifications, the system settings pop-up window might show VPN is trying to modify your system settings. Upon cancelling the pop-up will not affect any of the functionalities.
Uninstall SCP
A prompt appears for entering the administrator credentials to uninstall the system extension for both SCP standalone and managed with Trellix ePO. If no credentials are entered or incorrect credentials are entered, the SCP removal does not continue. Provide correct credentials for successfully uninstalling SCP. For an MDM-managed system, no administrator credentials are required. Jamf has provided a configuration profile through which Client Proxy can be silently uninstalled from the endpoint without the user's intervention.