Deploy and Monitor the Status of the Skyhigh Client Proxy (SCP) in macOS using Intune
This topic provides step-by-step instructions for deploying the Skyhigh Client Proxy (SCP) on macOS devices using Microsoft Intune. It also explains how to monitor the SCP status, which ensures the client is functioning seamlessly across managed devices.
Steps for Validating SCP Deployment and Monitoring the Status of the Skyhigh Client Proxy
- Enroll the Device
- Create SCP Profiles
- Deploy SCP and SCP Policy
- Create an SCP Compliance Script to Monitor SCP Status
Enroll the Device
Enrolling the device in Microsoft Intune helps you in enabling centralized management, enforcing policies, and remotely deploying the SCP.
Download the Company Portal App
- Open App Store on your Mac device.
- Search Company Portal.
- Download and install Company Portal app.
Sign In to Company Portal
Open Company Portal app, and sign in with login credentials.
Start Enrollment
Click Start to initiate the process.
Install Management Profile
- Click Install Management Profile on your Mac.
This profile allows Intune to manage your device. - You are directed to System Preferences > Profiles.
- Click Install on the profile page to allow the profile installation.
- Follow on-screen instructions and grant permission to install the profile.
Complete Enrollment
Once the profile is installed, the Company Portal confirms that you have successfully enrolled in Intune. Restart the device to finalize the enrollment.
Access Work Resources
Once enrolled, you should be able to access work apps, email, and resources as required.
Create SCP Profiles
In this section, you can create profiles to configure the SCP client: the System Extensions Profile, Content Filter Profile, and App Proxy Filter (VPN) Profile. This ensures effective security and traffic filtering on managed devices.
- Create the following profiles:
- System Extensions Profile
- Content Filter Profile
- App Proxy Filter (VPN) Profile
- Push profiles to the endpoint.
Create System Extensions Profile
- Navigate to Devices > macOS > Configuration > Create > New Policy.
- Create a profile panel opens. By default, macOS is selected as the platform.
- In the Create a profile panel, select Settings catalog as profile type.
- Click Create.

The Create profile window opens.
Complete the Basics, Configuration settings, Scope tags, Assignments, and Review + create tabs:
Basics
- In the Basics tab, enter the following details:
- Name - Enter a name for the policy.
- Description - Enter a description for the policy.
- By default, MacOS is selected as the platform.
- Click Next.
_1.png?revision=1)
Configuration settings
- Click Add settings.
- In the Settings picker field, search for System Extension.
- From the search result, select System Configuration > System Extensions.
- Under Setting name selection, select the Allowed System Extensions and Allowed Team Identifiers checkbox.

- Under the System Extensions section, toggle Allow User Overrides to True.
- Under the Allowed System Extensions section, click + Edit instance to configure settings.
The configure instance panel appears. - Under the System Extensions settings, add the following extensions. For more details about these extensions, see SCP Extension Details.
com.trellix.CMF.networkextensioncom.trellix.endpointsecurity
- In the Team Identifier field, enter P2BNL68L2C as the team identifier.
- Click Save.
- Click Next.

Scope tags
- Default is selected under scope tags.
- Click Next.
_1.png?revision=1)
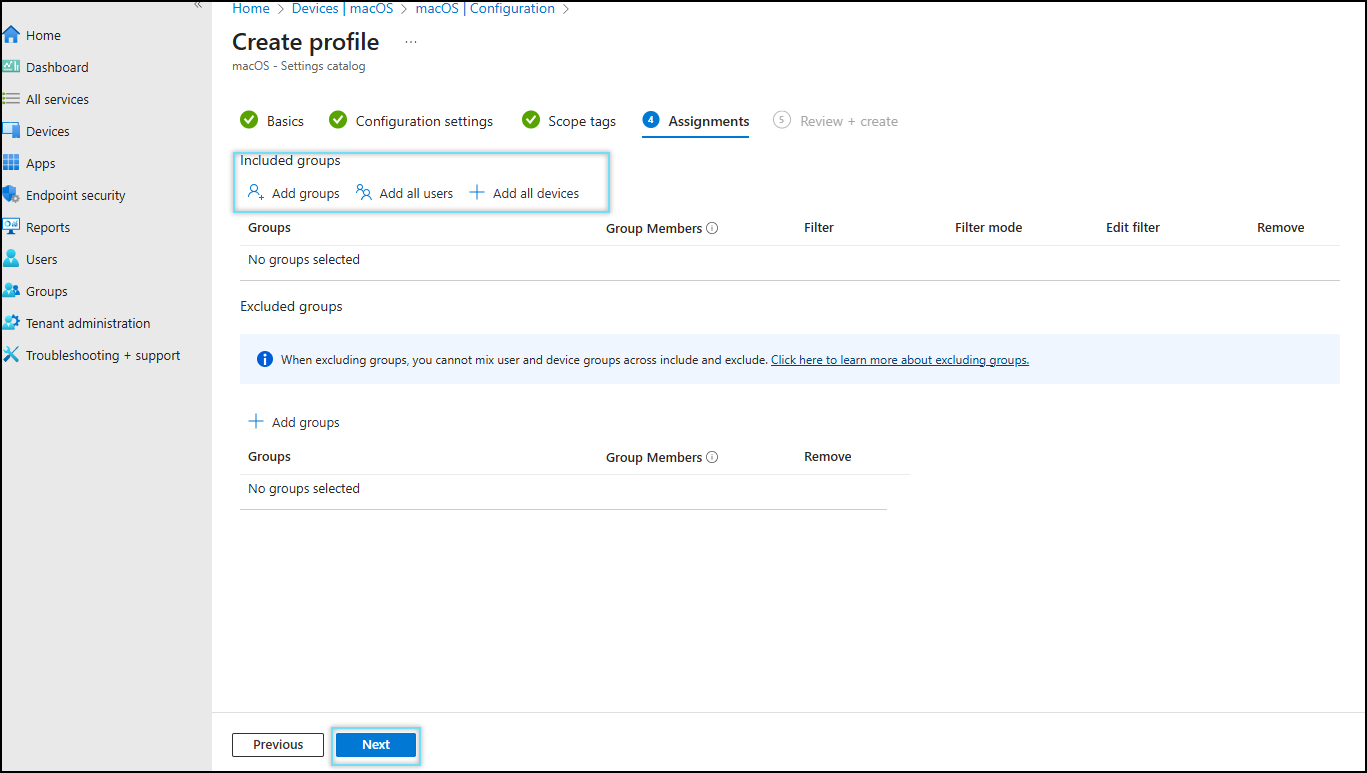
Assignments
- In the Assignments tab, select Add groups, Add all users, and Add all devices.
- Click Next.
Review + create
Review the system extensions profile and click Create.
_(1)_11.png?revision=1)
Create Content Filter Profile
- Navigate to Devices > macOS > Configuration > Create > New Policy.
- Create a profile panel opens. By default, macOS is selected as the platform.
- In the Create a profile panel, select Settings catalog as profile type.
- Click Create.
The Create profile window opens.
Complete the Basics, Configuration settings, Scope tags, Assignments, and Review + create tabs:
Basics
- In the Basics tab, enter the following details:
- Name - Enter a name for the policy.
- Description - Enter a description for the policy.
- By default, MacOS is selected as the platform.
- Click Next.
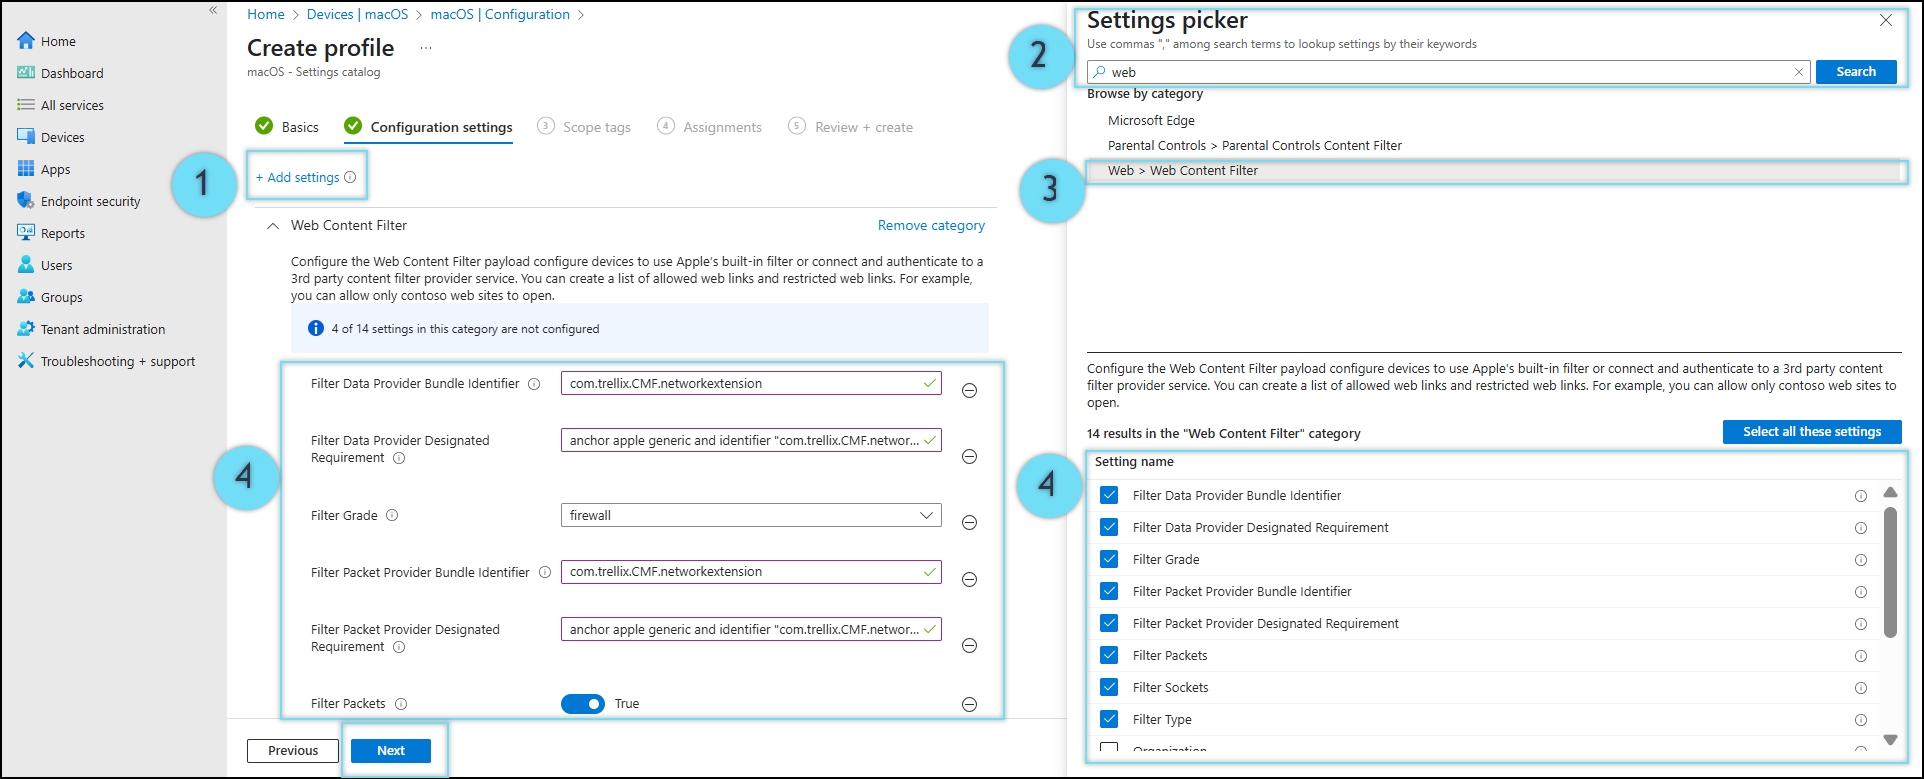
Configuration settings
- Click Add settings.
- In the Settings picker field, search for Web.
- From the search result, select Web > Web Content Filter.
- Under the Setting name section, select the following settings and enter the values:
| Setting name | Values |
|---|---|
| Filter Data Provider Bundle Identifier | com.trellix.CMF.networkextension |
| Filter Data Provider Designated Requirement | anchor apple generic and identifier "com.trellix.CMF.networkextension" and (certificate leaf[field. 1.2.840.113635.100.6.1.9] /* exists */ or certificate 1[field.1.2.840.113635.100.6.2.6] /* exists */ and certificate leaf[field.1.2.840.113635.100.6.1.13] /* exists */ and certificate leaf[subject.OU] = P2BNL68L 2C) |
| Filter Packet Provider Bundle Identifier | com.trellix.CMF.networkextension |
| Filter Packet Provider Designated Requirement | anchor apple generic and identifier "com.trellix.CMF.networkextension" and (certificate leaf[field. 1.2.840.113635.100.6.1.9] /* exists */ or certificate 1[field.1.2.840.113635.100.6.2.6] /* exists */ and certificate leaf[field.1.2.840.113635.100.6.1.13] /* exists */ and certificate leaf[subject.OU] = P2BNL68L 2C) |
| Filter Packets | True |
| Filter Sockets | True |
| Filter Type | Plug-in |
| Plugin Bundle ID | com.trellix.containerapp |
| User Defined Name | TrellixSystemExtensions |
- Click Next.
_(1)_11.png?revision=1)
Scope tags
- Default is selected under scope tags.
- Click Next.
Assignments
- In the Assignments tab, select Add groups, Add all users, and Add all devices.
- Click Next.
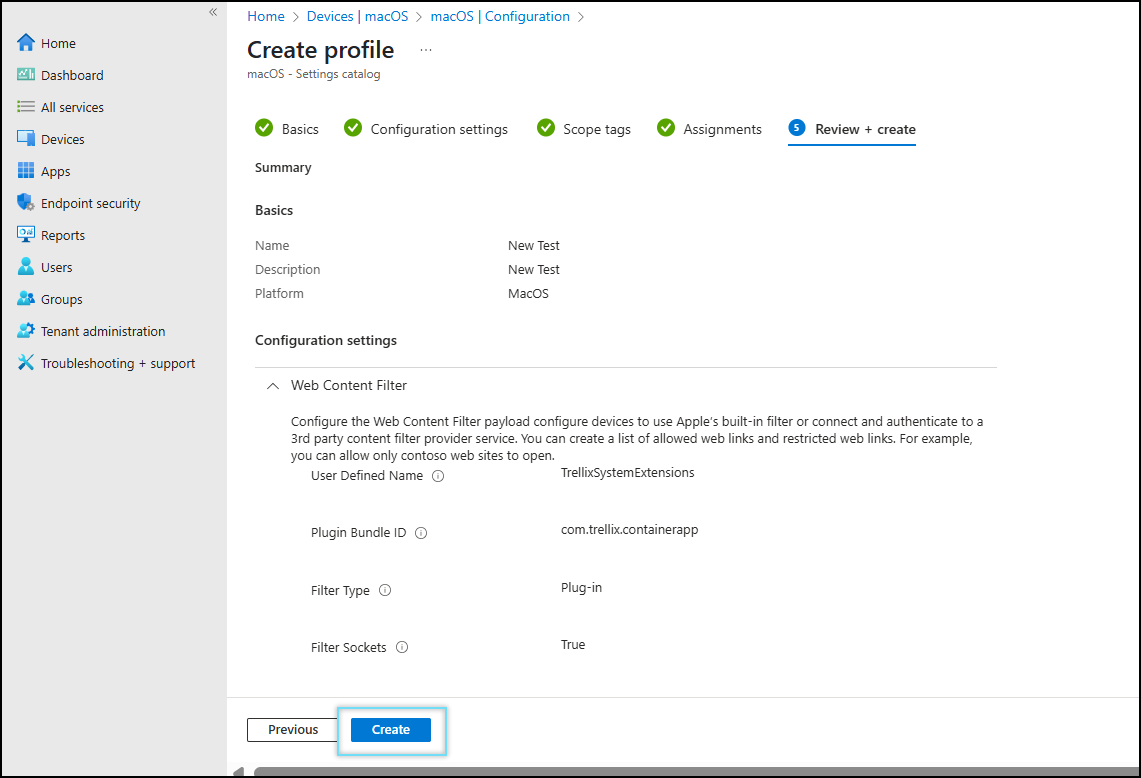
Review + create
Review the content filter profile and click Create.
_11.png?revision=1)
Create a VPN Profile for App Proxy Filter
- Navigate to Devices > macOS > Configuration > Create > New Policy.
- Create a profile panel opens. By default, macOS is selected as the platform.
- Select Templates as profile type.
- Search and select VPN as the template name.
- Click Create.

The VPN profile window opens.
Complete the Basics, Configuration settings, Scope tags, Assignments, and Review + create tabs:
Basics
- In the Basics tab, enter the following details:
- Name - Enter a name for the policy.
- Description - Enter a description for the policy.
- By default, macOS and VPN are selected as the platform and profile type.
- Click Next.

Configurations settings
Configure base VPN and Custom VPN settings as follows:
Base VPN
| Key | Value |
|---|---|
| Deployment Channel | User channel |
| Connection name | vpn_profile_ |
| VPN server address | localhost |
| Authentication method | Username and password |
| Connection type | Custom VPN |
| VPN identifier | com.trellix.containerapp |
Custom VPN
Enter key and value pairs for the custom VPN attributes:
| key | Value |
|---|---|
| VPN Type | VPN |
| Provider Bundle Identifier | com.trellix.CMF.networkextension |
| Provider Type | App-Proxy |
| Include All Networks | False |
| Exclude Local Networks | False |
| Provider Designated Requirement | anchor apple generic and identifier "com.trellix.CMF.networkextension" and (certificate 0.113635.100.6.2.6] /* exists */ and certificaleaf[field.1.2.840.113635.100.6.1.9] /* exists */ or certificate 1[field.1.2.84te leaf[field.1.2.840.113635.100.6.1.13] /* exists */ and certificate leaf[subject.OU] = P2BNL68L2C) |
| Identity Certificate | None |

Click Next.
Scope tags
- Default is selected under scope tags.
- Click Next.
Assignment
- In the Assignments tab, select Add groups, Add all users, and Add all devices.
- Click Next.
Review + create
Review the VPN profile for app proxy filter and click Create.

Deploy SCP and Apply SCP Policy
Deploying the SCP and applying the policies on managed devices ensures consistent security enforcement and effective traffic control.
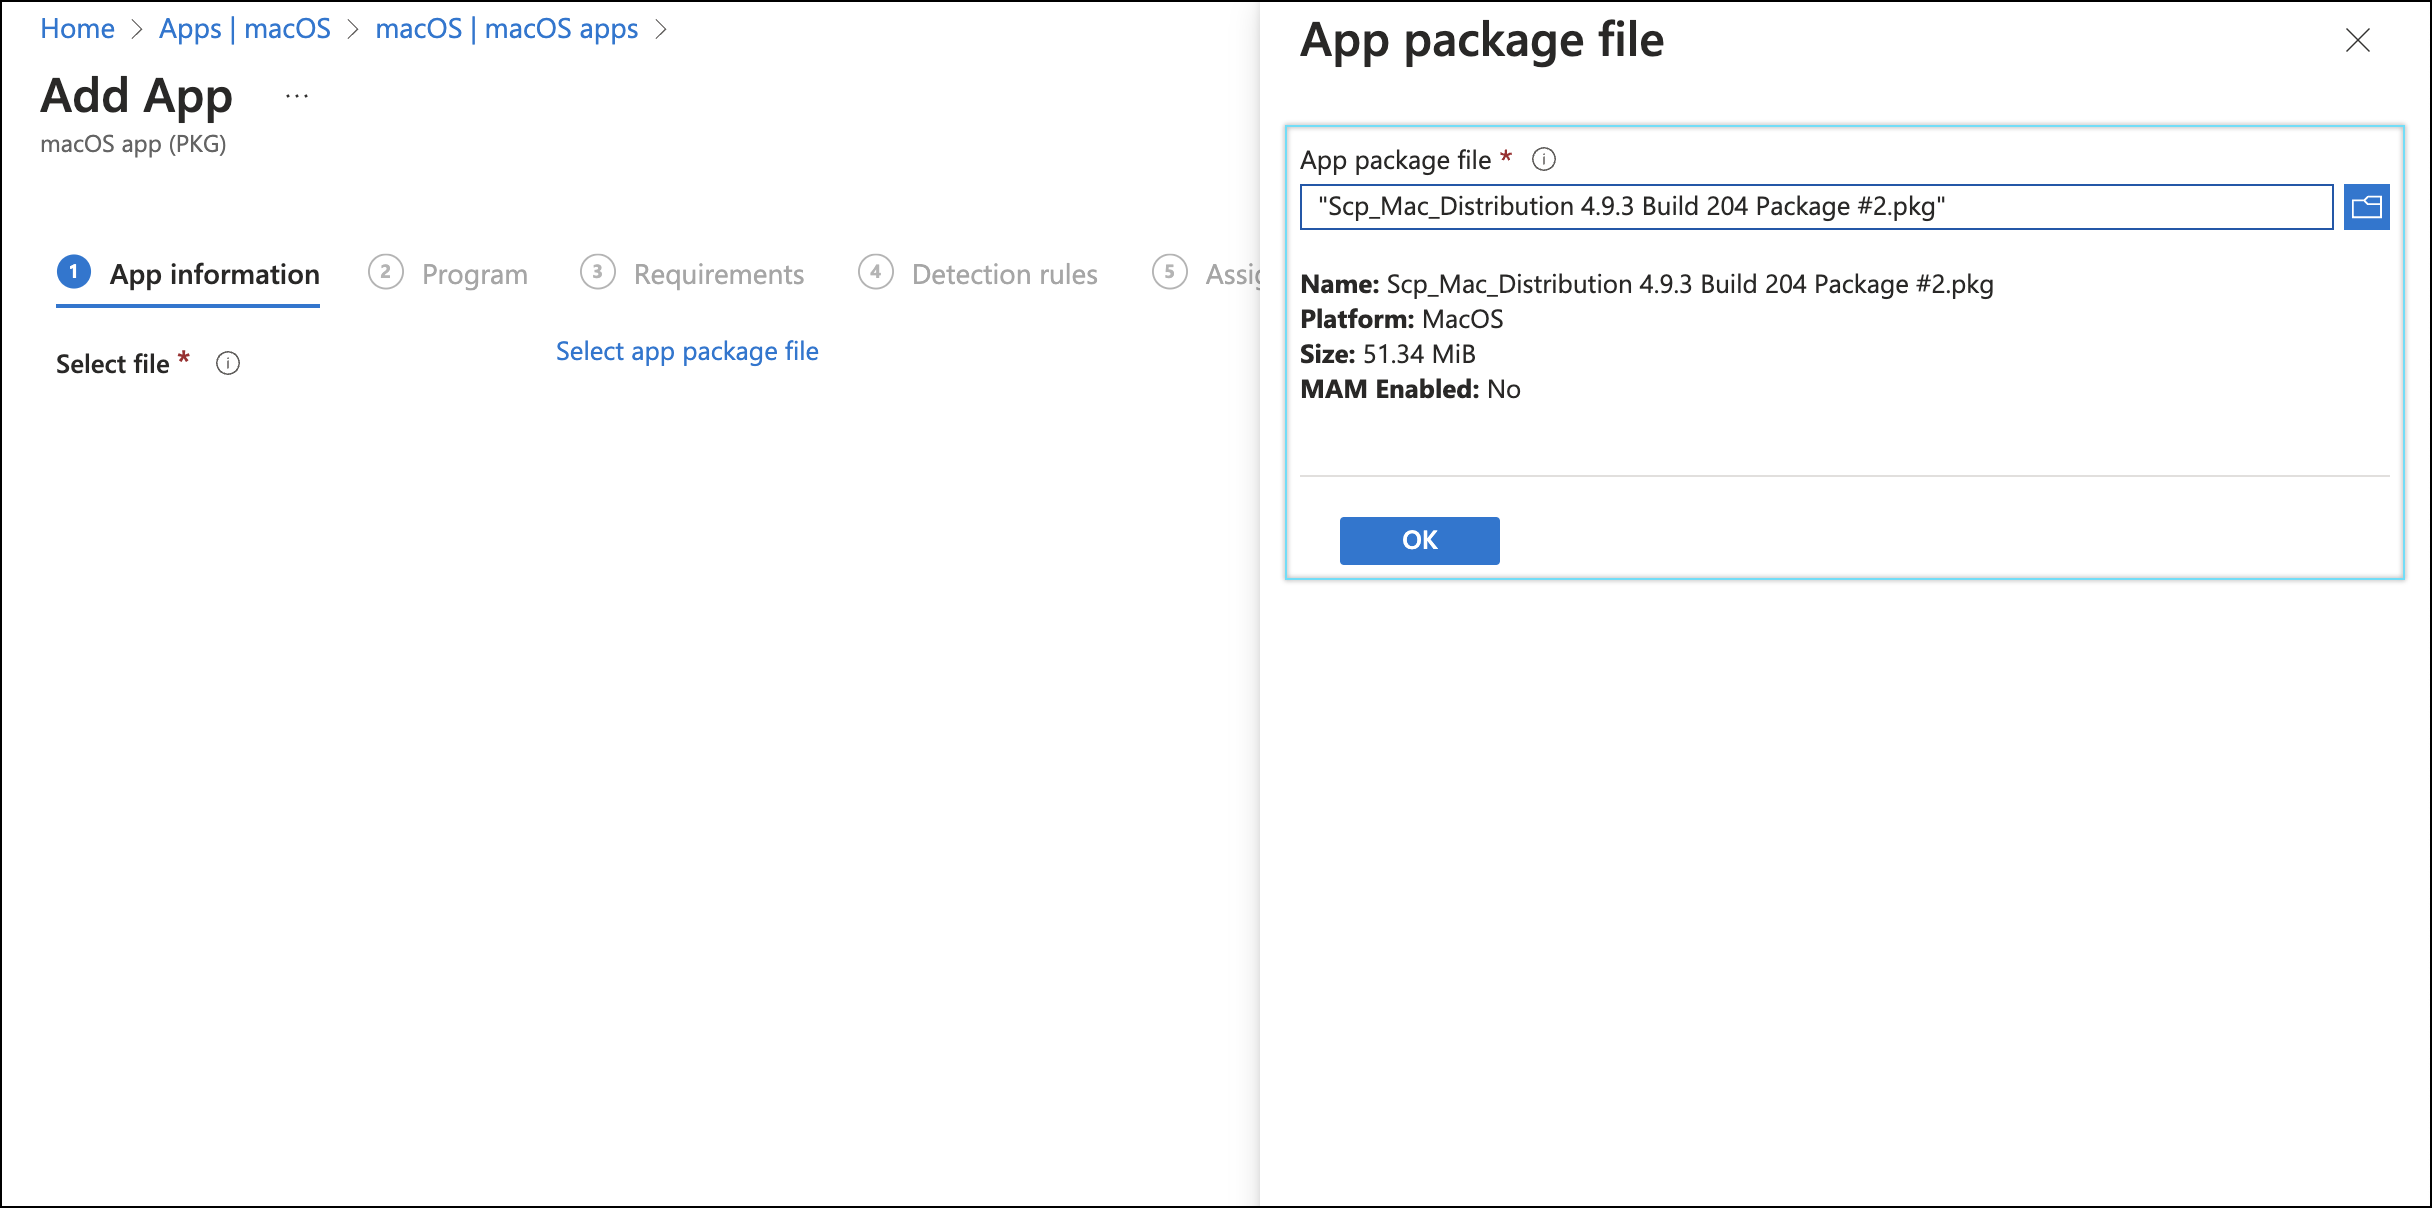
- Navigate to Apps > Platform > macOS apps > Create.

- Select macOS app (PKG) for app type.

- Browse and select the SCP package (.pkg) file.
- Click Ok.
- Enter the following settings:
- Name = Skyhigh Security
- Description = Skyhigh Client Proxy
- Publisher = Skyhigh Security
- Ignore app version = Yes
- Category = Other app
- Show this as a featured app in the Company Portal = Yes
- Developer= Skyhigh Security
- Owner = Skyhigh Security
- Logo = Select the Skyhigh Security Logo

- Click Next.
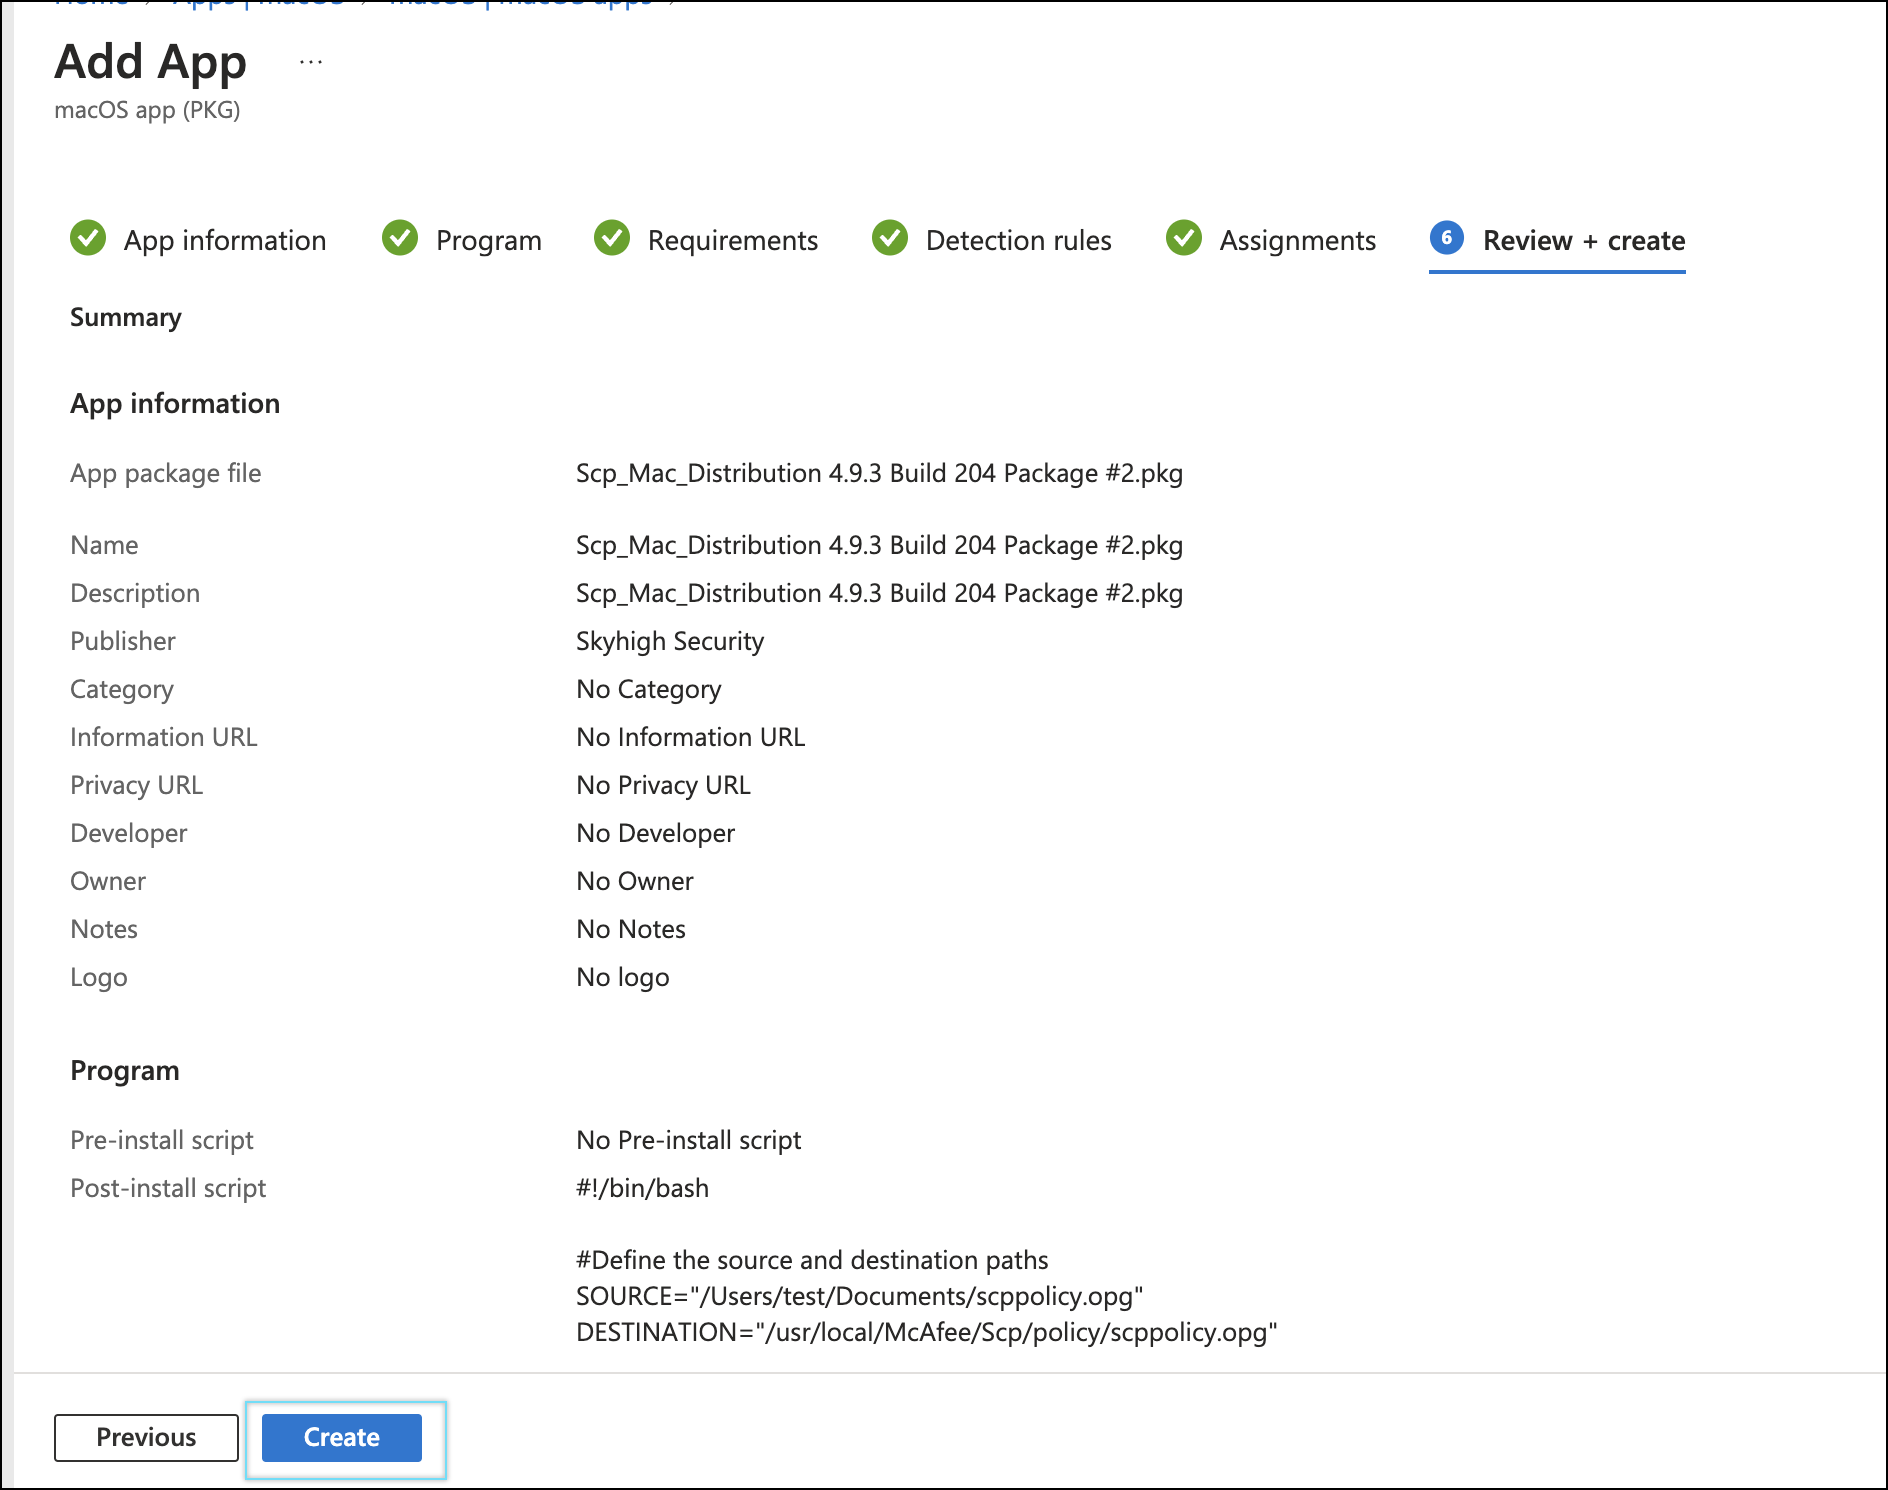
- In the Program tab, under the post-install script, run the script to place
scppolicy.opgunderusr/local/McAfee/SCP/policy.
#!/bin/bash
#Define the source and destination paths
SOURCE="/Users/test/Documents/scppolicy.opg"
DESTINATION="/usr/local/McAfee/Scp/policy/scppolicy.opg"
# Define the permissions mode (e.g., 755 for read/write/execute for owner, read/execute for others)
PERMISSION_MODE="755"
cp -f "$SOURCE" "$DESTINATION" # Copy the file with sudo
#chmod "$PERMISSION_MODE" "$DESTINATION" # Set the file permissions
exit 0

- Click Next.
- In the Requirements tab, select macOS Monterey 12.0 as the minimum operating system.

- Click Next.
- In the Detection rules tab, enter the following details:
- Ignore app version > Yes
- Add the Bundel ID’S:
| App Bundle ID (CF BlunderIdentifier) | App version (CFBundleShortVersionString) |
|---|---|
| com.mcafee.Menulet | 10.7.10 |
| com.trellix.agentMonitor.helperApplication | 10.7.10 |
| com.mcafee.maStatusMonitorHelper | 10.7.10 |
| com.mcafee.console | 10.7.10 |
| com.trellix.containerapp | 10.7.10 |
| com.skyhighsecurity.epclient | 4.9.3 |

- In the Assignments tab, select Add group, Add all users, and Add all devices.
- Click Next.

- Review the Add App and click Create.
NOTE: To upgrade SCP, deploy the latest SCP build along with the updated policy. Create a new application in Intune and assign it to the appropriate group or to all users/devices as needed.
Create an SCP Compliance Script to Monitor SCP Status
Create a script that monitors the SCP status on managed devices. This script ensures that the client is installed, running, and functioning properly.
- Navigate to Devices > Platform > macOS > Scripts > Add.

The Add script window opens.
- In the Basics tab, enter the following details:
Name - Enter a name for the script.
Description - Enter a description for the script.
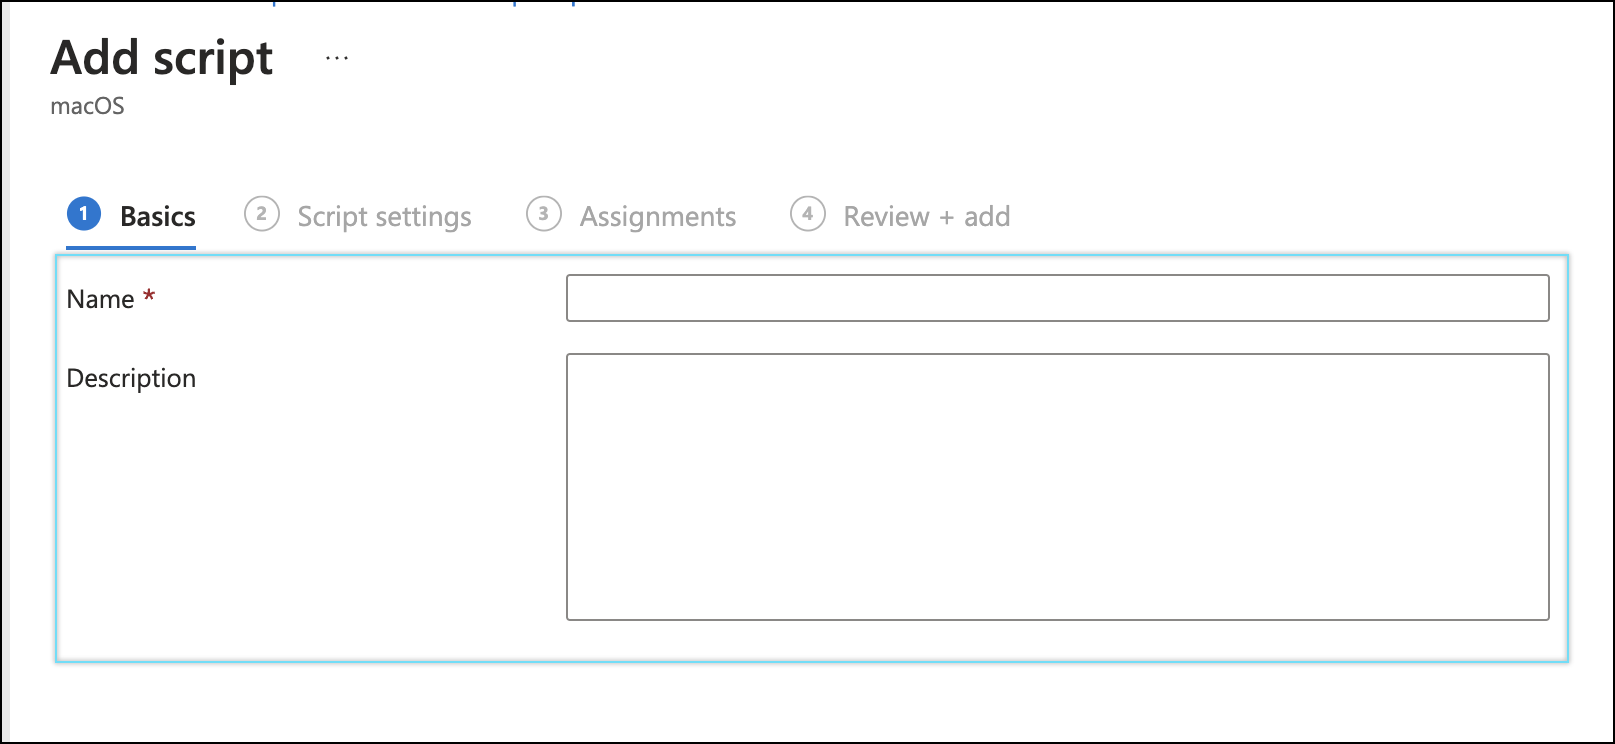
- Click Next.
- In the Script settings tab:
- Upload the script file.
- Toggle Run script as signed-in user to No.
- Hide script notifications on devices to Not Configured.
- Script frequency to Not Configured.
- Max number of times to retry if script fails to Not Configured.

- Click Next.
- In the Assignments tab, select Add groups, Add all users, and Add all devices.
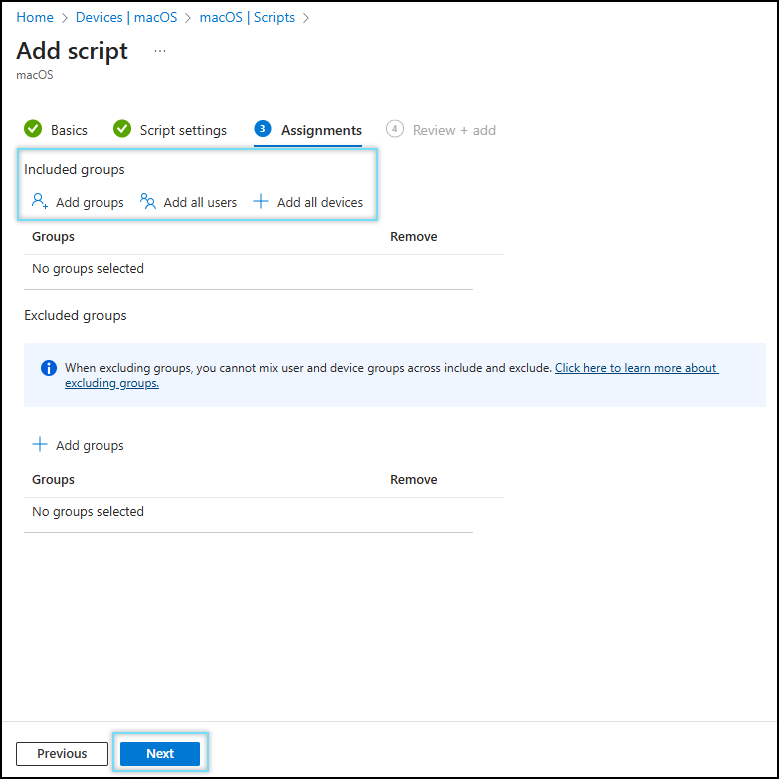
- Click Next.
- Review the SCP compliance script and click Add.

NOTE:
- To uninstall SCP, see Uninstall SCP from Managed Devices using Intune
- To remove SCP extensions, see Remove SCP Extensions from Managed Devices