Create an IDM (Enhanced) Fingerprint
Create an Unstructured Data Fingerprint for files in one or more folders. These fingerprints are evaluated per DLP policy to match against sensitive content in the cloud.
- Go to Policy > DLP Policies > Fingerprints.
- Go to Create Fingerprint > Unstructured Fingerprint and select the type of fingerprint you wish to create:

NOTE: Only one Enhanced Fingerprint can be created, and the option is disabled when one already exists.
Create Fingerprint (Legacy)
You can only use Legacy Fingerprints with Skyhigh CASB.
- Go to Policy > DLP Policies > Fingerprints.
- On the Fingerprints page, go to Create Fingerprint > Unstructured Fingerprint > Create Fingerprint.
- On the Create an Unstructured Fingerprint page, configure the following:
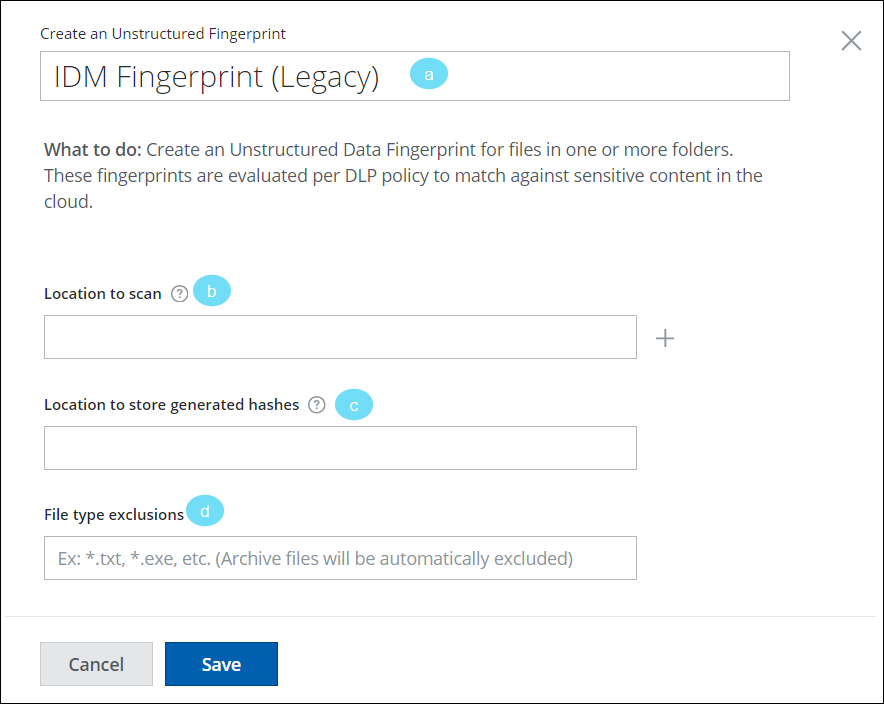
- Fingerprint Name. Enter a name for the Unstructured Fingerprint.
- Location to scan. Enter the path to the computer that holds the files you want to fingerprint. Click + to add more paths, if necessary. For example:
- Unix. file://localhost/etc/folderA
- Unix. file:///etc/folderB
- Windows. file:///c:/WINDOWS/file.doc
- Windows. file:///WINDOWS/file.doc
- Windows. file://localhost/WINDOWS/file.doc
- Location to store generated hashes. Enter the path to the folder where your locally generated hashed files are stored. Space allocated for this should be about 10–20% of the size of input paths/folders. For example:
- Unix. file://localhost/etc/folderA
- Unix. file:///etc/folderB
- Windows. file:///c:/WINDOWS/file.doc
- Windows. file:///WINDOWS/file.doc
- Windows. file://localhost/WINDOWS/file.doc
- File type exclusions. Enter any file types to be excluded. (Archive files such as ZIP files are automatically excluded.)
- Click Save.
Create Enhanced Unstructured Fingerprint
Create an Unstructured Data Fingerprint for files in one or more folders. These fingerprints are evaluated per DLP policy to match against sensitive content in the cloud.
- Go to Policy > DLP Policies > Fingerprints.
- On the Fingerprints page, go to Create Fingerprint > Unstructured Fingerprint > Create Enhanced Fingerprint.
- The Create an Enhanced Unstructured Fingerprint page provides the following tabs:
- Fingerprint Name. Enter a name for the Enhanced Fingerprint
- Under the Configure Fingerprint tab, configure the following information:
- Location to scan. Enter the path of your system where you want to store the fingerprint files. Click + to add more paths, if necessary. For example:
- Unix. file:///etc/folderB
- Unix. /etc/folderB
- Unix. file:///etc/folderA/file.txt
- Unix. /etc/folderA/file.txt
- Windows. file:///c:/folderB/file.doc
- Windows. c:\folderB\file.doc
- Windows. file:///c:/folderC/folderA
- Windows. c:\folderC\folderA
- Windows. \\Server1\Share\folderB
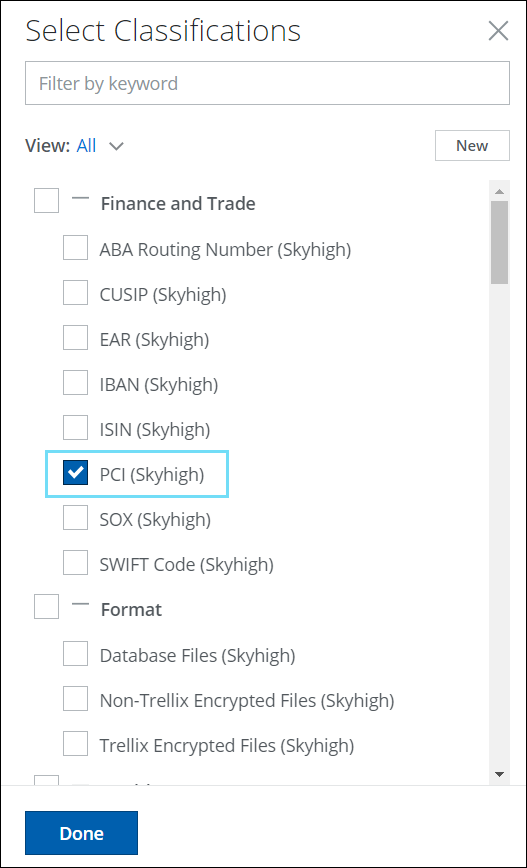
- Classification. You can define classification criteria for the document or file you want to fingerprint. Select the classifications you want to assign to your fingerprints from the Select Classifications cloud card.
- Location to scan. Enter the path of your system where you want to store the fingerprint files. Click + to add more paths, if necessary. For example:
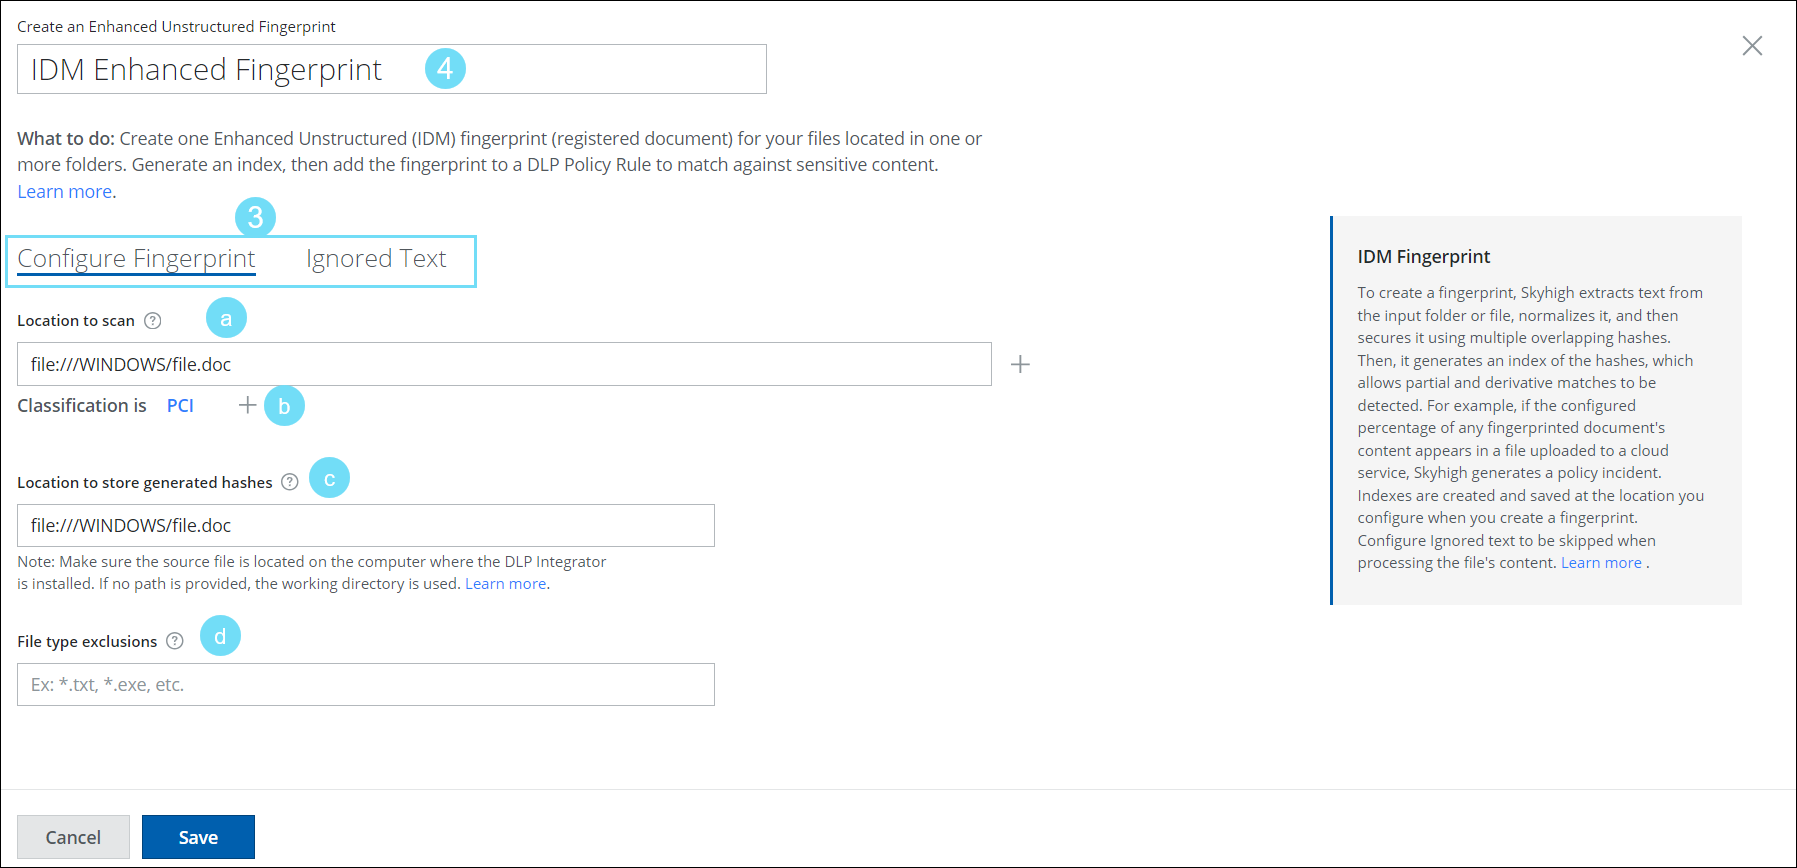
- Location to store generated hashes. Enter the path to the folder where your locally generated hashed files are stored. Space allocated for this should be about 10–20% of the size of input paths/folders. For example:
- Unix. file:///etc/folderB
- Unix. /etc/folderB
- Windows. file:///c:/folderC/folderA
- Windows. c:\folderC\folderA
- Windows. \\Server1\Share\folderB
- File type exclusions. Enter any file types to be excluded. (Archive files such as ZIP files are not automatically excluded.)
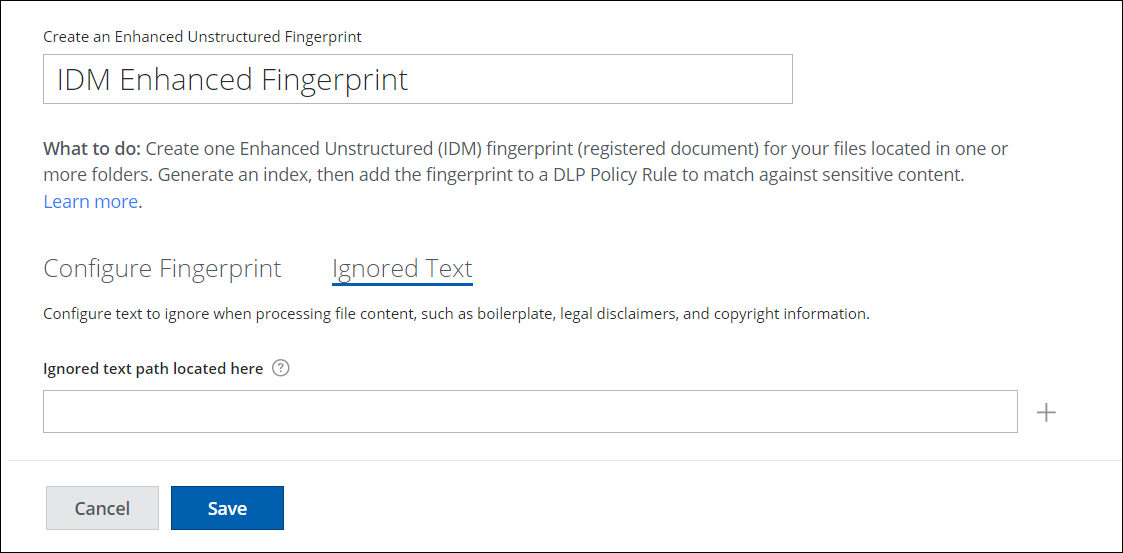
- Under the Ignored Text tab, configure the text to ignore when processing file content, such as boilerplate, legal disclaimers, and copyright information.
- Ignored text path located here. Enter the path to the file that includes the Ignored Text to skip during the file processing.
- Ignored text path located here. Enter the path to the file that includes the Ignored Text to skip during the file processing.
For both Legacy and Enhanced Fingerprint, the new Unstructured Fingerprint is created and appears on the Fingerprint page. You must now generate an index of the fingerprint to use it in a DLP Policy.
Generate an Index