Cloud-to-On-Premise Evidence Synchronization
When a DLP Policy is triggered, a copy of the item that caused the trigger can be saved as evidence and synchronized to Trellix ePO. To manage the amount of evidence data synchronized, you can use the "Save Evidence" response in DLP Policy. Using this option enables you to select which policies synchronize evidence and can help reduce the amount of unwanted data saved to ePO.
Before You Begin
To synchronize evidence files to Trellix ePO, make sure to follow the below steps in order:
- On the Policy > Policy Settings > Enterprise DLP > Security Service Edge DLP tab, enable Send evidence files to Trellix ePO toggle button. To configure these options on the Enterprise DLP page, see Configure Enterprise DLP.
NOTE: If the Send evidence files to Trellix ePO toggle button is disabled, the Save Evidence response action will not be visible on the DLP Policies page.
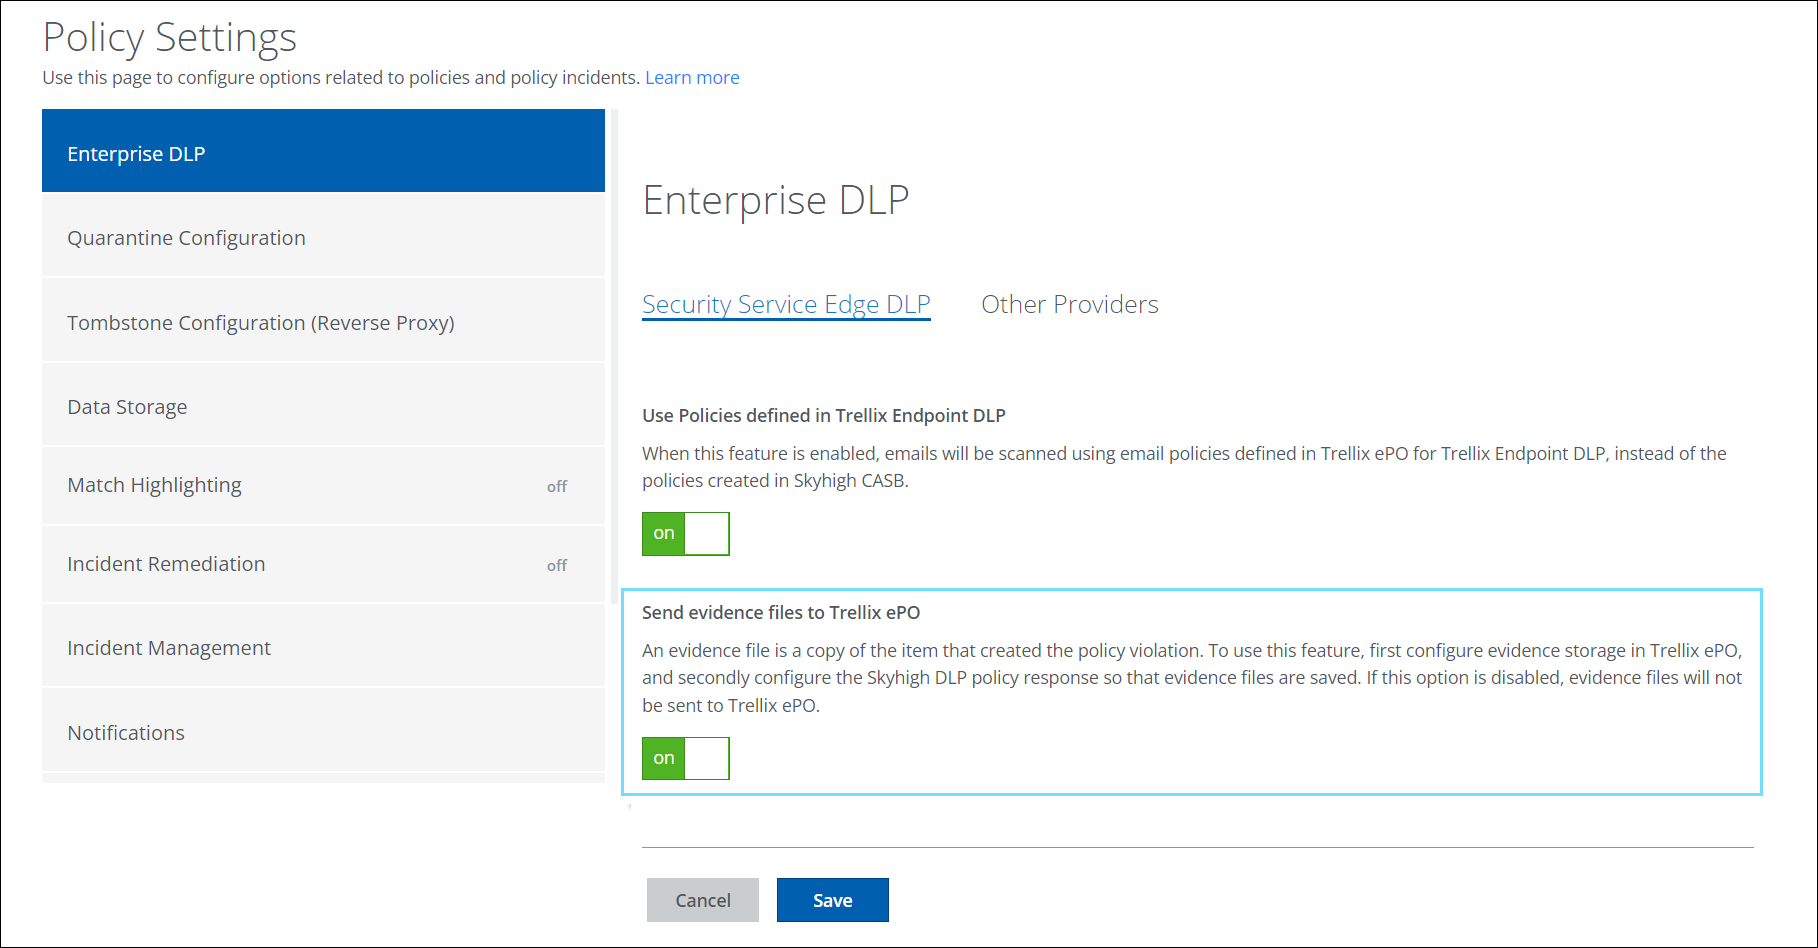
- To store your evidence files, configure evidence storage in Trellix ePO.
- To save your evidence files in Skyhigh CASB, configure the Skyhigh DLP policy response action. For details, see Configure Save Evidence.
Configure Save Evidence in Skyhigh Sanctioned DLP Policy
To configure the Save Evidence response in Skyhigh Sanctioned DLP Policy, perform the following steps:
- Go to Policy > DLP Policies > DLP Policies.
- Select Actions > Sanctioned Policy > Create New Policy.
- On the Create a DLP Policy page, configure the following:
- Name. Enter a descriptive name to help identify the policy.
- Description. (Optional) Enter a description for your DLP Policy.
- Services. Select the required Service. For example, Microsoft Office 365 and OneDrive.
- Deployment Type. Save Evidence response action is available for all the Deployment Types: API, Lightning Link, and Reverse Proxy. Select an integration method from the menu.
- Users. Click Edit to select one of the options for Users to Include in the policy and click Save.
- Add Exclusions. Select any Users to Exclude from the policy and click Save.
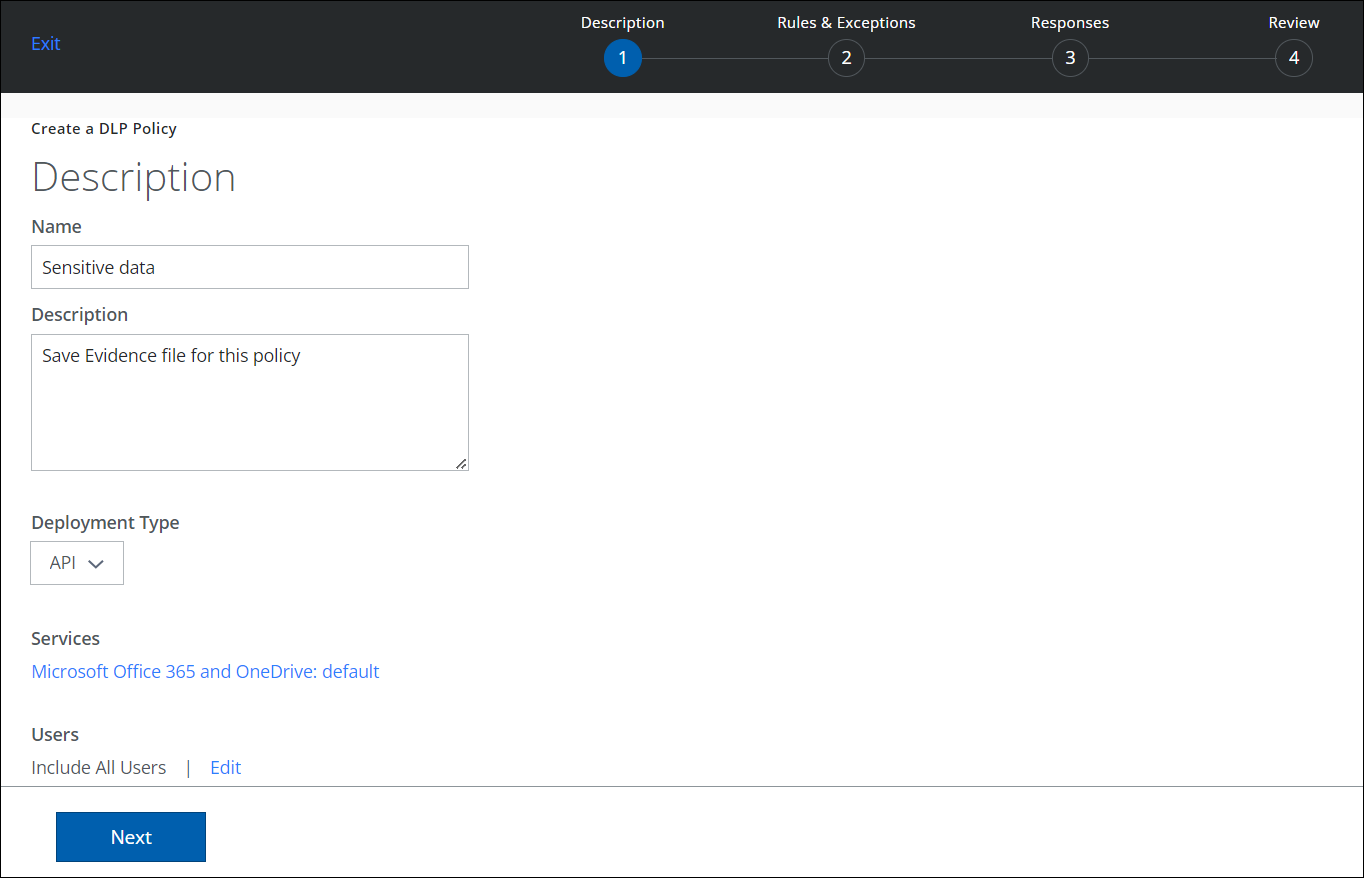
- Click Next.
- On the Rules & Exceptions page, enter the following information:
IMPORTANT: Save Evidence response action works only for Classification rule match.
- Select the rule as Classification.
- Click AND to add another rule, if needed.
- Click THEN to add a severity: Critical, Major, Minor, Warning, or Info.
- Click Next.
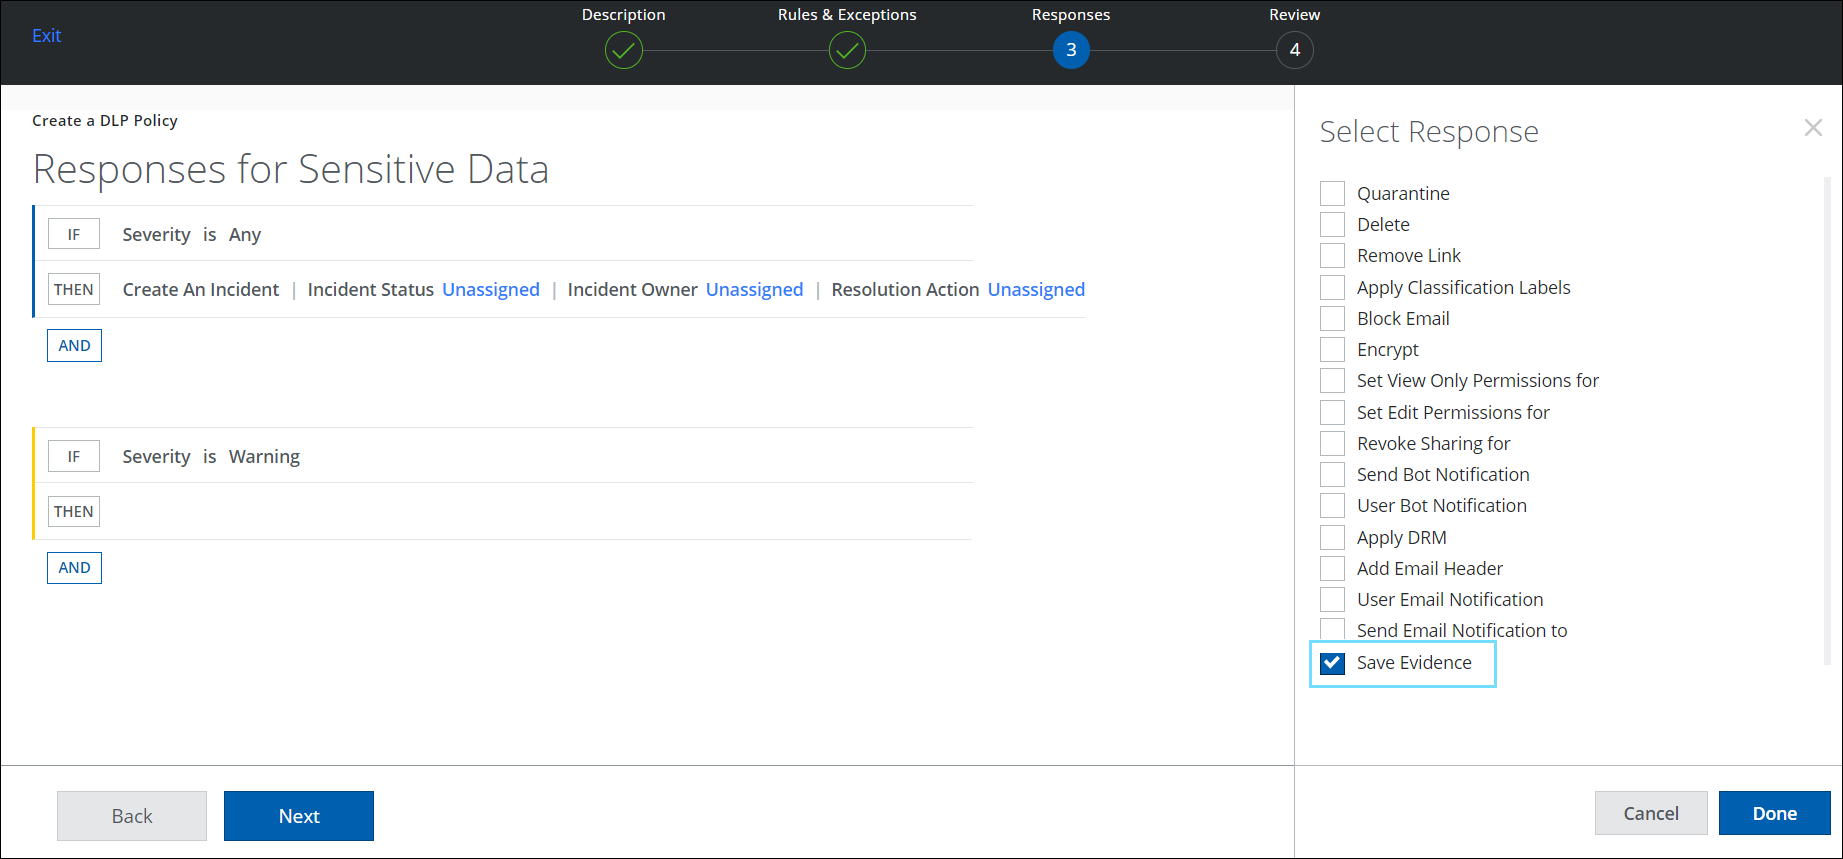
- On the Responses page, click THEN to view the Save Evidence response from the list. Save Evidence response action triggers when the policy rules are matched.
- To save the evidence files for synchronization to Trellix ePO, activate the Save Evidence checkbox.
- To exclude the evidence files from being saved, deactivate the Save Evidence checkbox.
- To save the response action, click Done.
- Click Next.
- On the Review page, review all the changes made to the DLP Policy configuration and click Save.
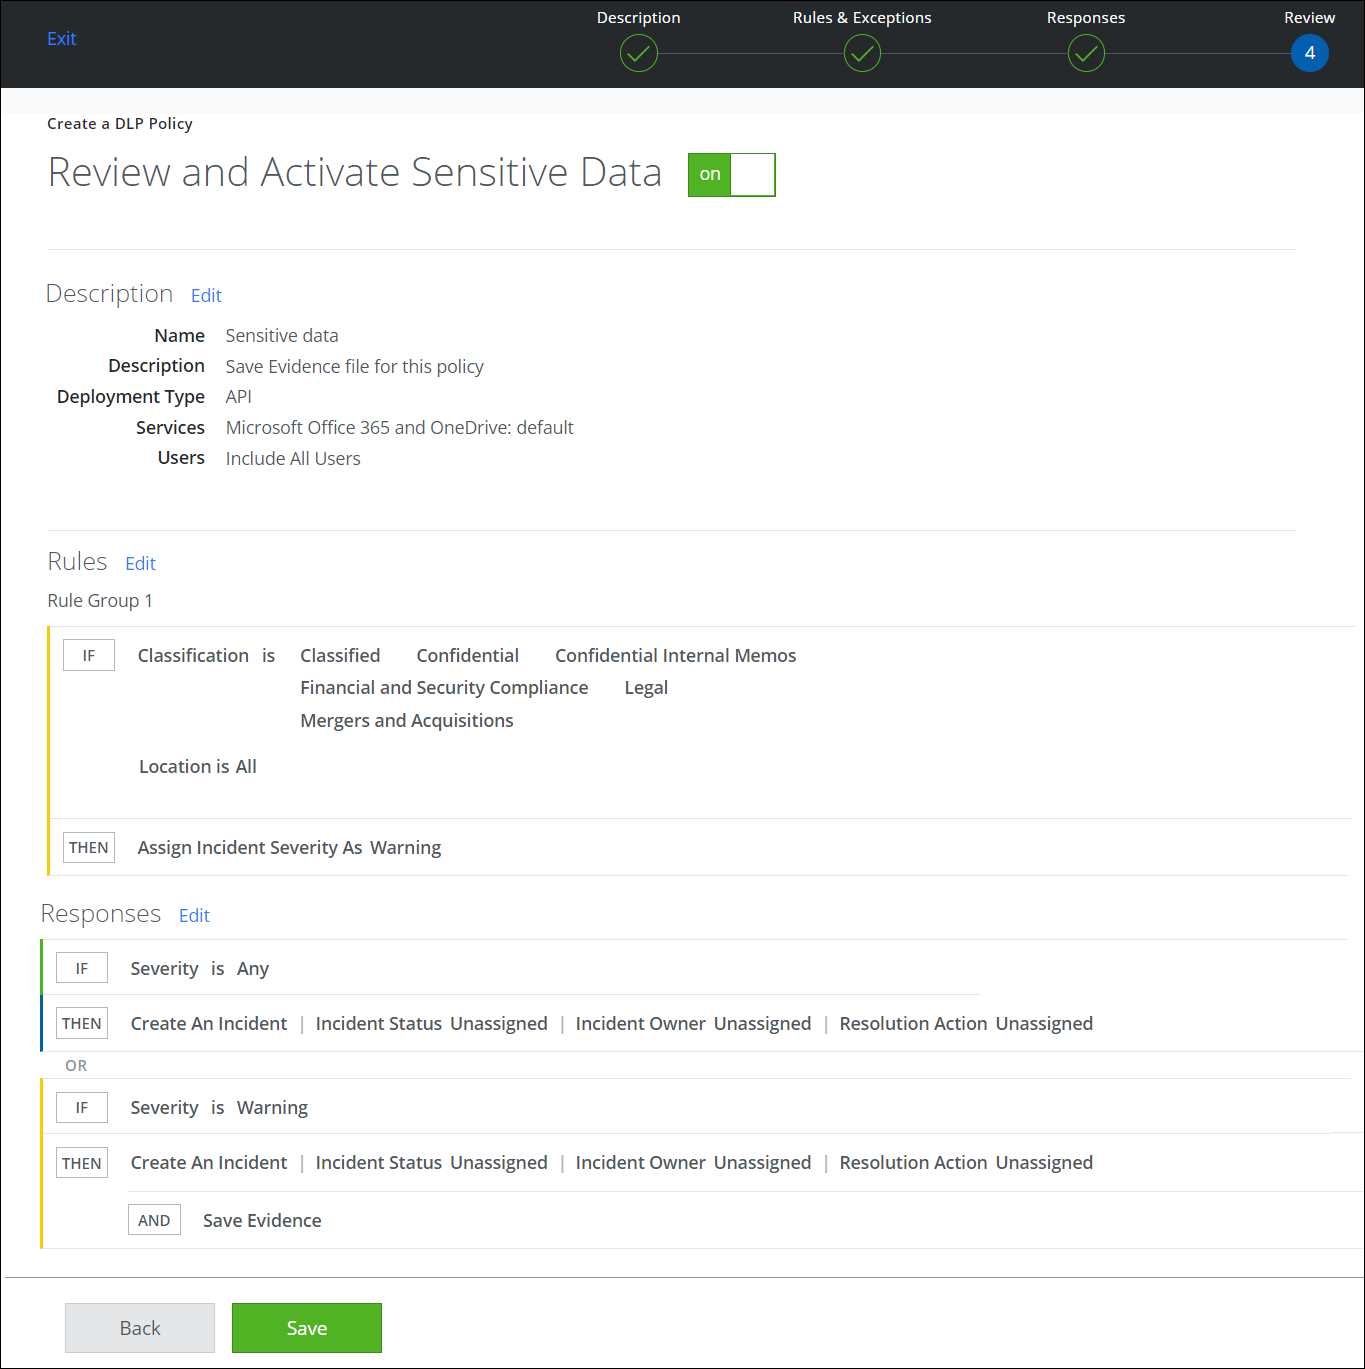
A new DLP Policy has been created and saved on the DLP Policies page. When the DLP Policy is evaluated and its rules are matched, policy incidents are triggered and evidence files from Skyhigh CASB will be saved and made available for synchronization to Trellix ePO. Evidence will be copied when the ePO server incident and evidence tasks are run.