Create an On-Demand Scan for Salesforce
With On-Demand Scans for Salesforce, you can scan objects that contain sensitive data that require DLP security. Supported objects include:
- Fields
- Custom Fields
- Files
- Attachments
- Chatter posts
- Attachments in Chatter
- Personal libraries of non-admin users in Salesforce ('Files' tab)
Skyhigh CASB automatically detects fields in your Salesforce deployment; you will simply select the field names or objects you would like to include in a scan.
Prerequisites
Note the following before setting up an On-Demand Scan for Salesforce:
- On-Demand Scan for Salesforce is only supported for Salesforce deployments configured via API to Skyhigh CASB.
- Verify the objects in Salesforce, including Custom Objects, you want to secure before setting up the On-Demand Scan. You can select only objects already known by Skyhigh CASB when setting up a scan.
- If you have multiple tenants with Salesforce enabled, verify which Salesforce instance that contains the data you want to secure. Only the fields or objects associated with a selected tenant are scanned.
- Review policies, or set up new policies, to secure Salesforce data.
- On-Demand Scan for Personal libraries of non-admin users in Salesforce following permissions needs to be enabled.
Configure Salesforce
To enable Salesforce permissions:
The Salesforce Service Account User who Enable API access in Skyhigh CASB, the same user should have the following access enabled in Salesforce.
- In Salesforce, go to Setup > Users > Permission sets > App Permissions.
- Select Query All Files.
- Go to Setup > Manage Users > Permission sets > System Permissions. Select View All Data.
- Next, go to Setup > Manage Users > Permission sets (For key_manager) > App Permissions. Click Select Query All Files.
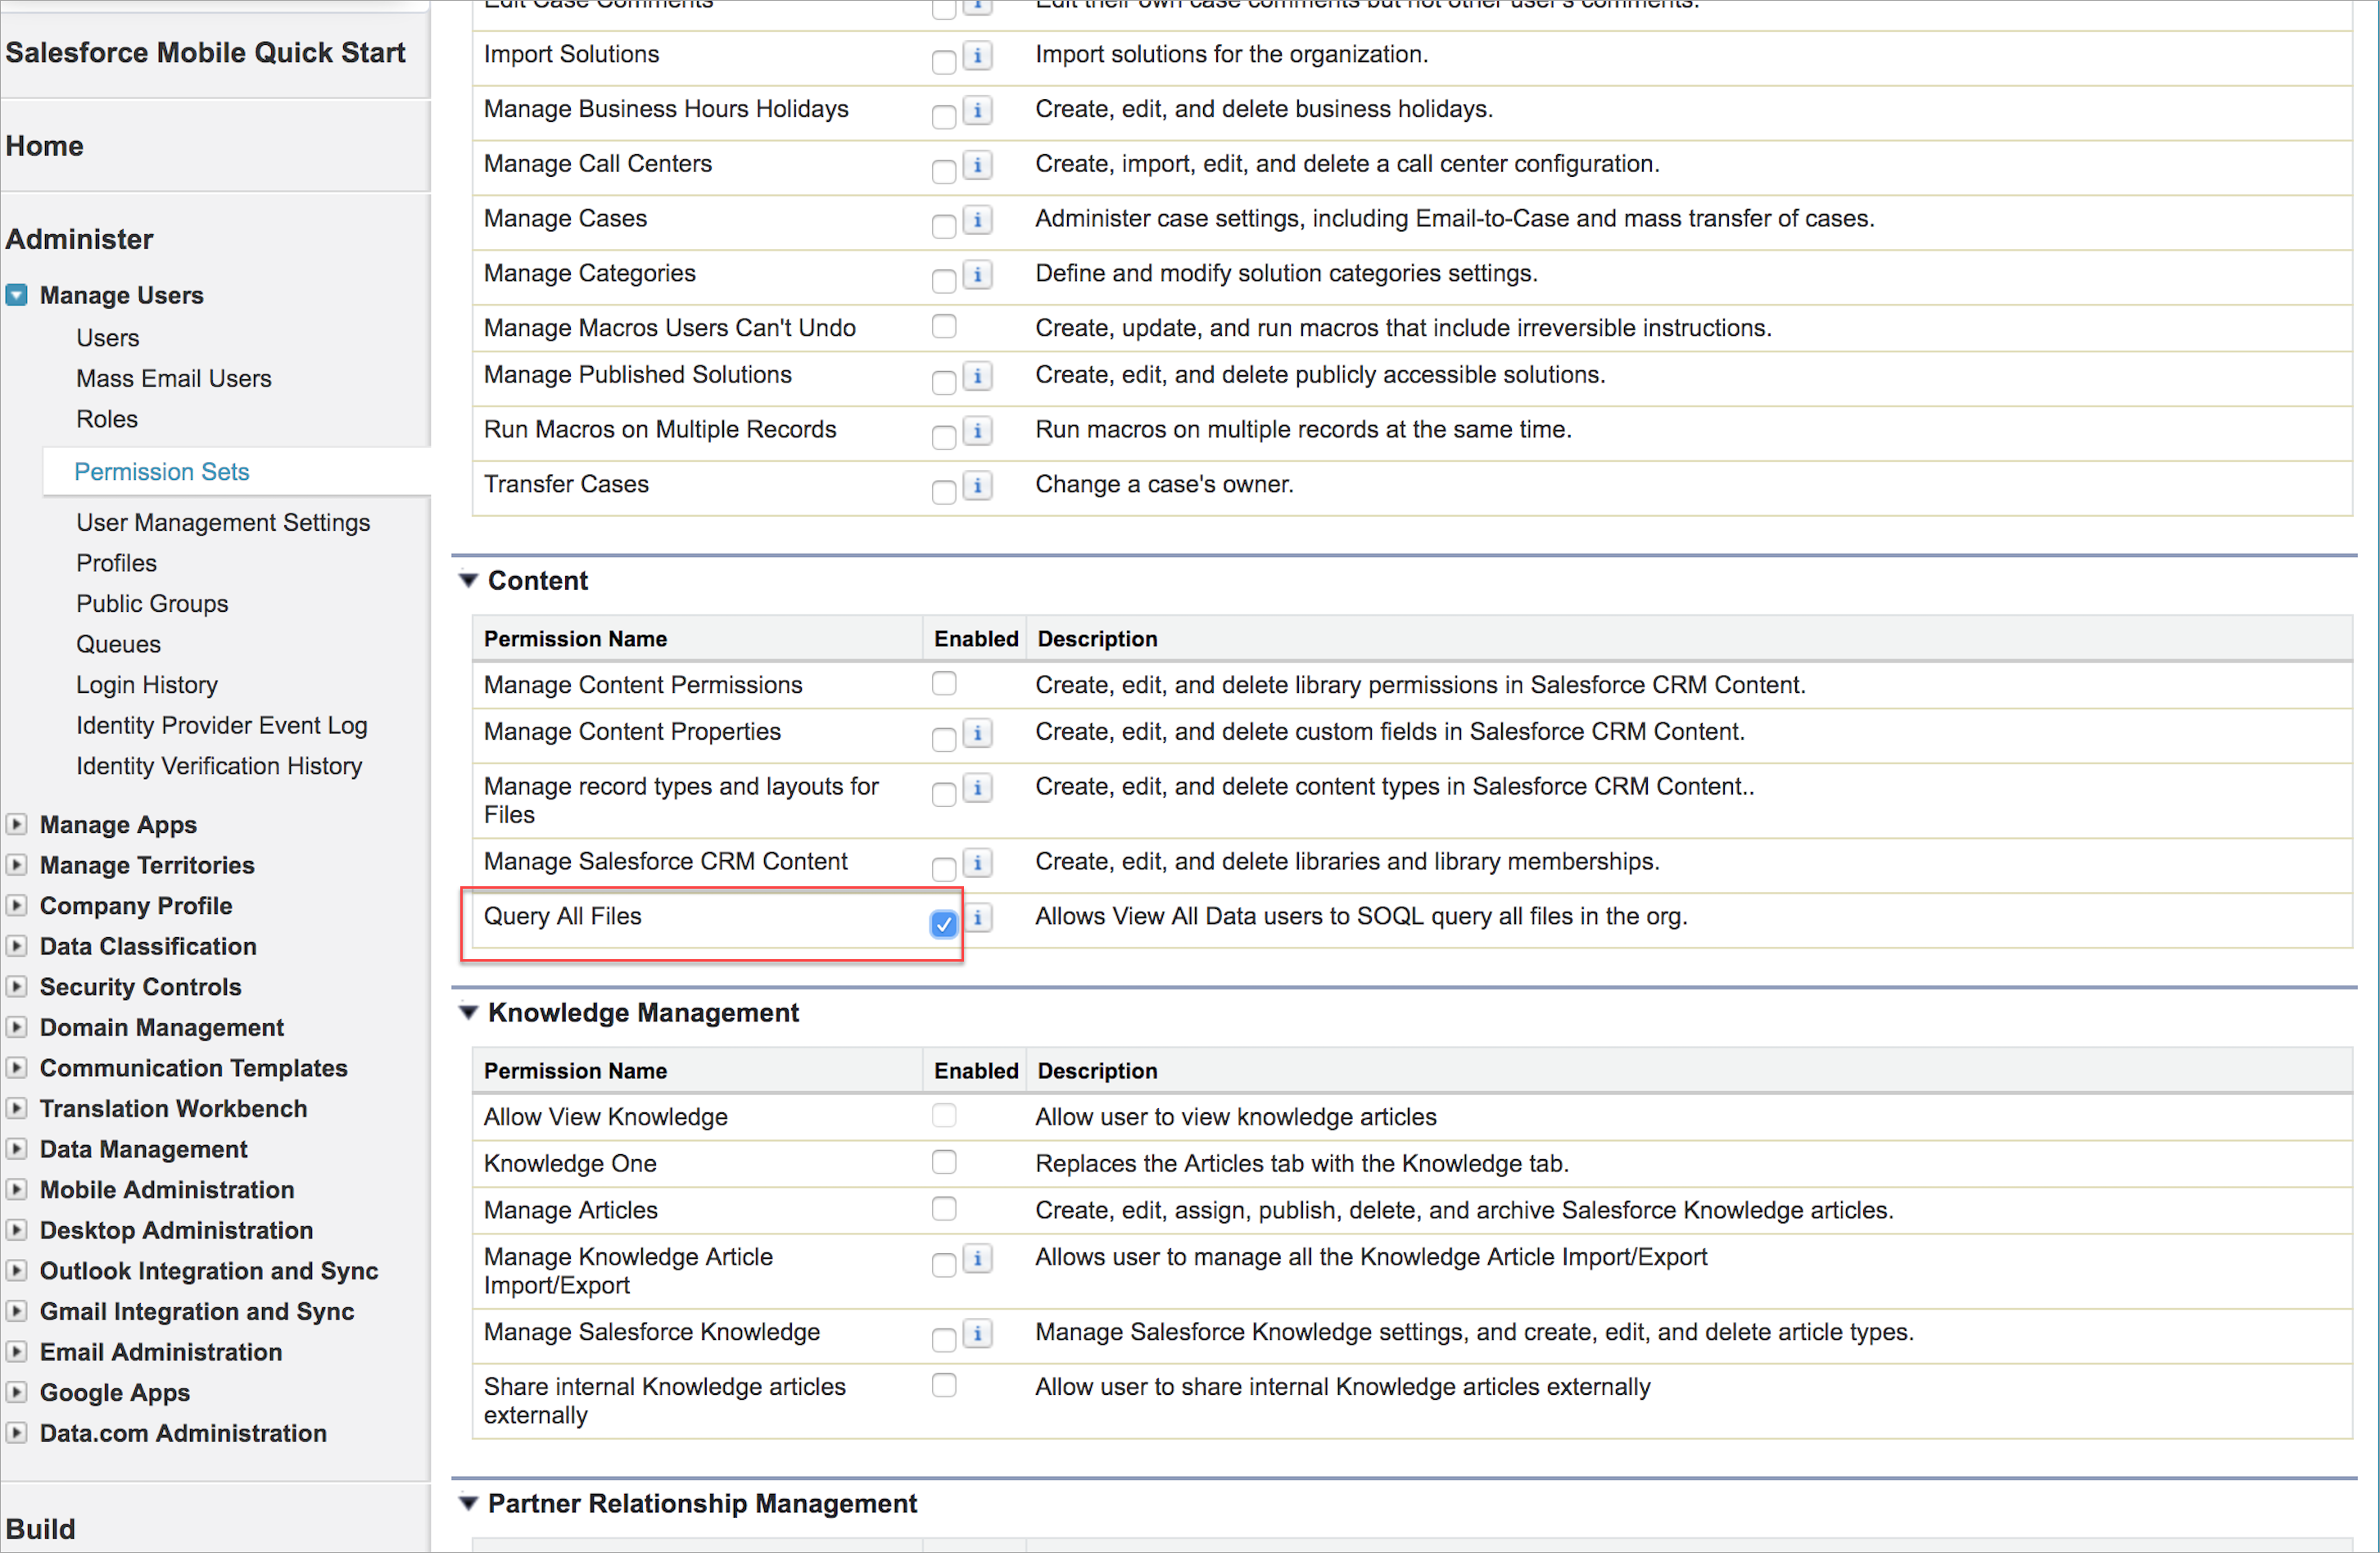
- Go to Setup > Manage Users > Permission sets > System Permissions. Select View All Data.
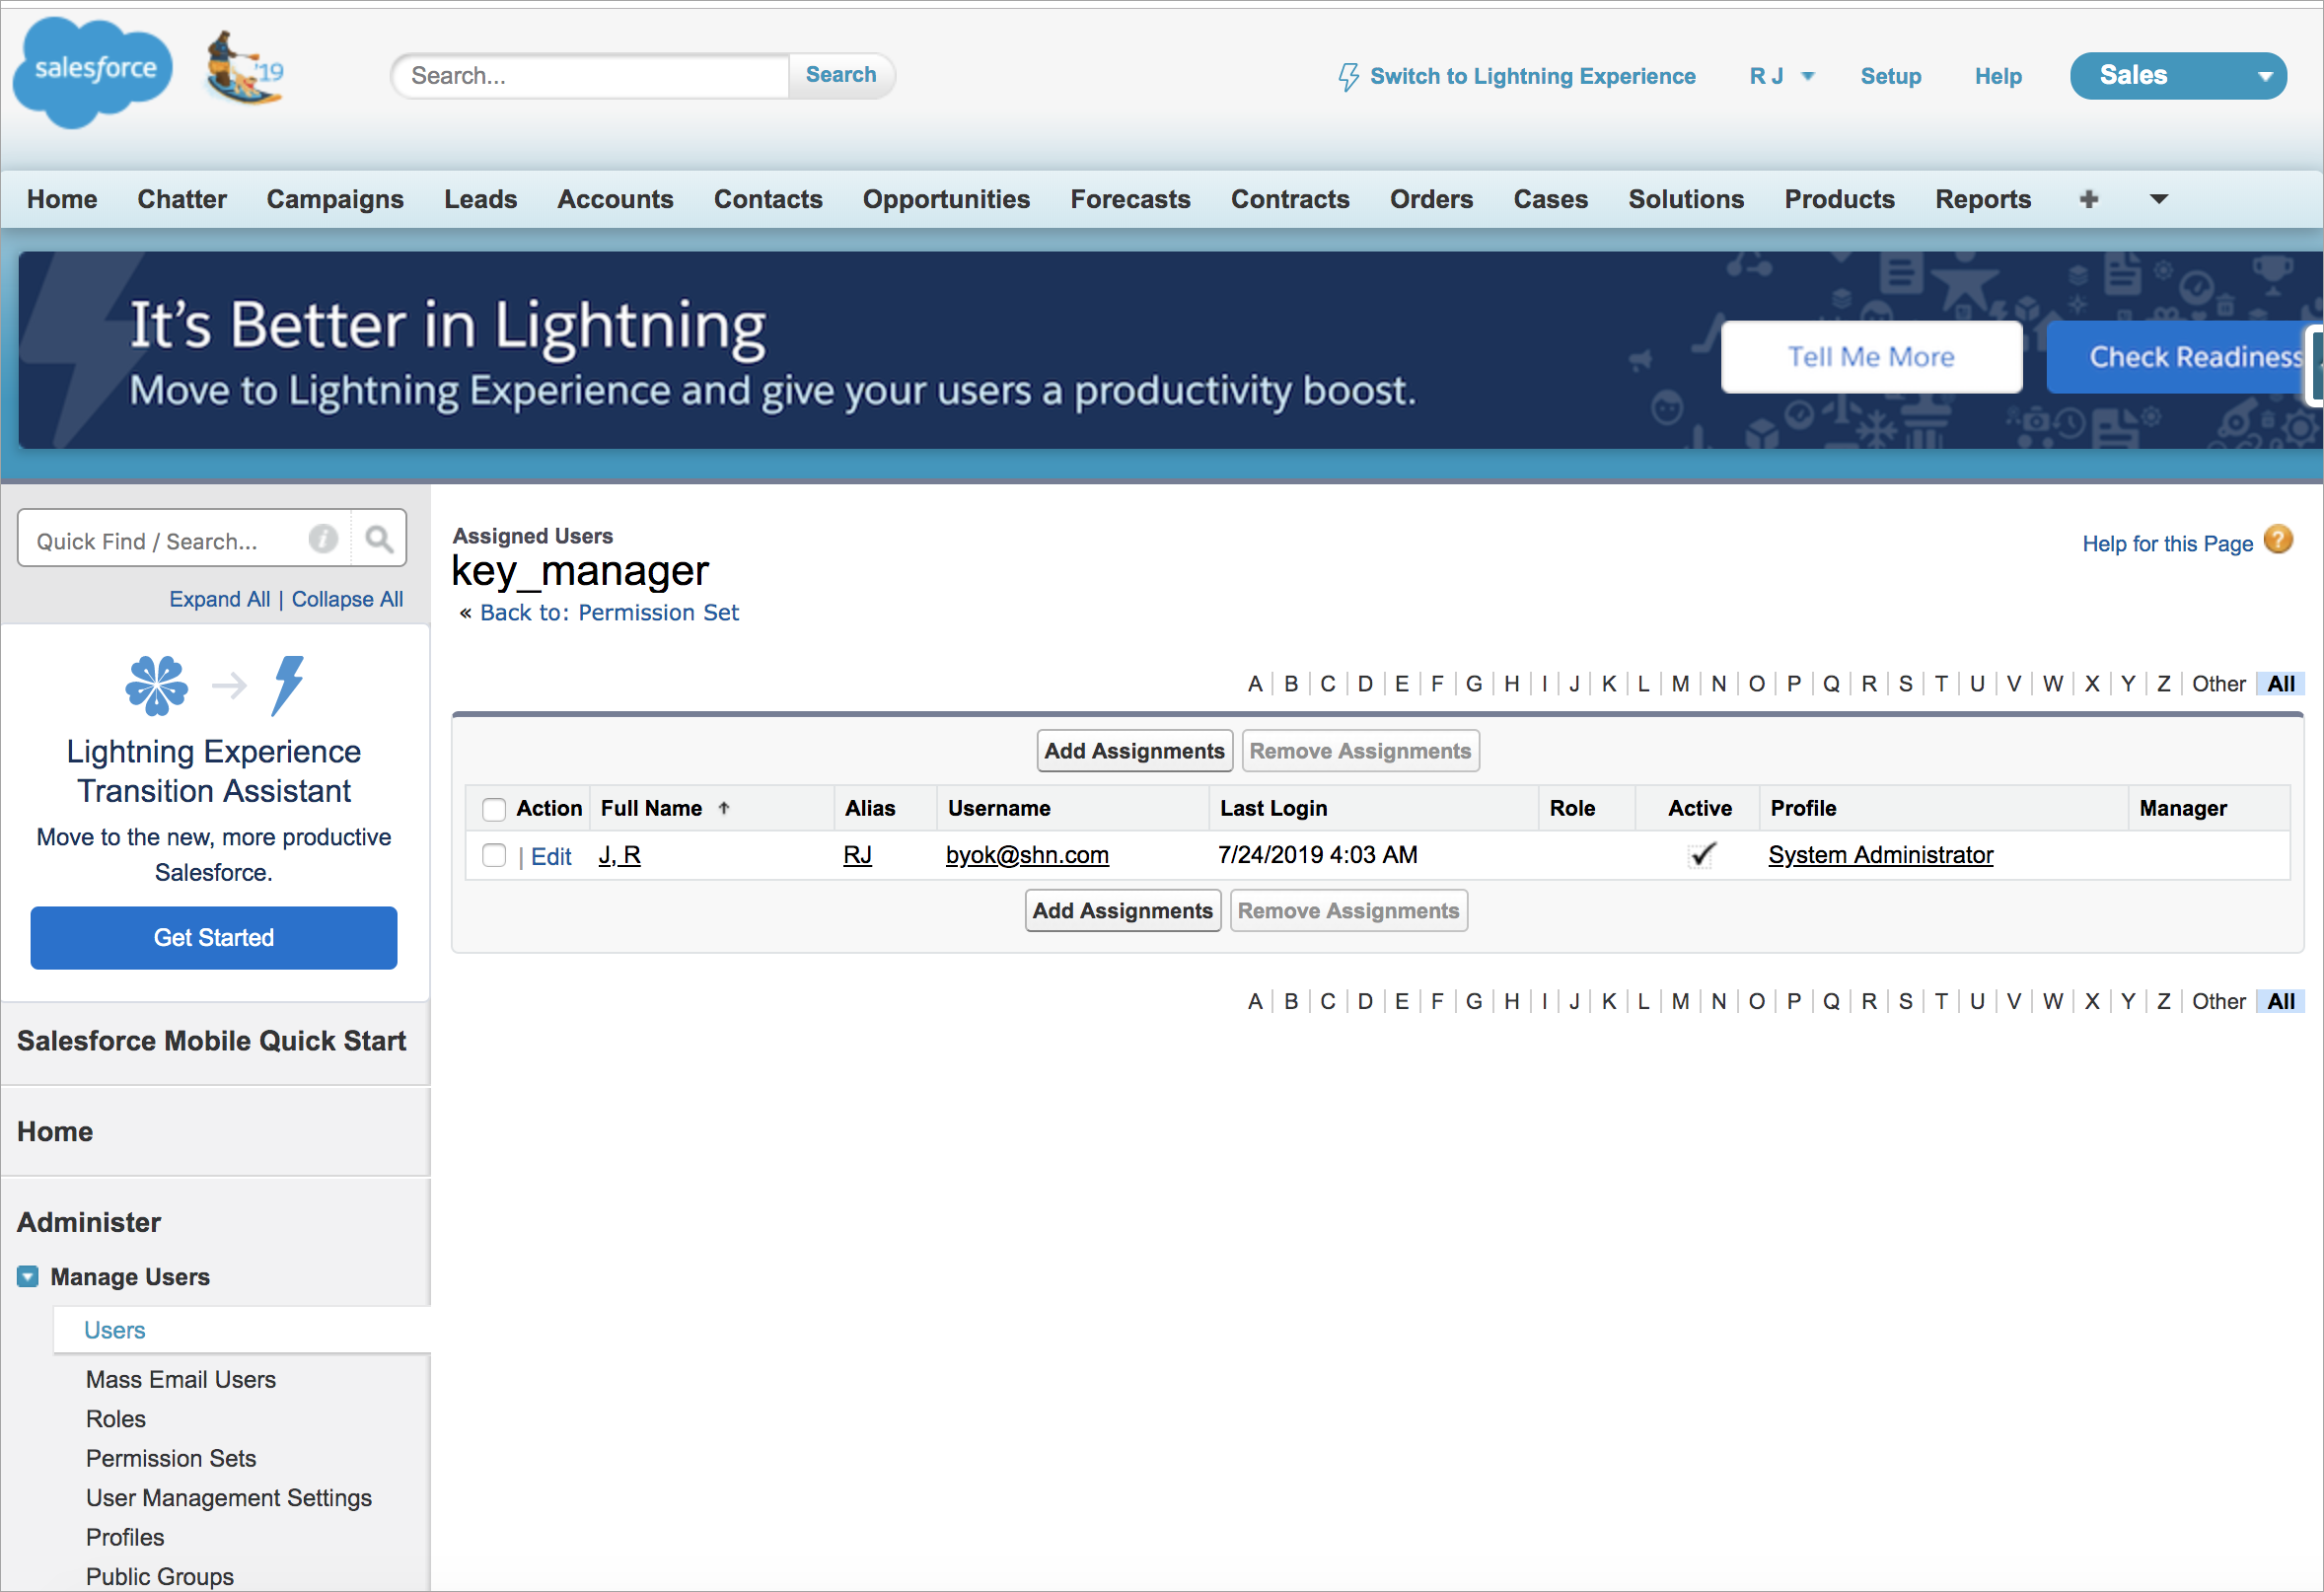
- In Permission sets, go to Manage Assignments > Assign the user byok@shn.com. This is the same user of Skyhigh CASB for Salesforce who has access to enable the API.
- Log in to Skyhigh CASB. Go to the Salesforce Service Instance where you want to run an ODS scan. Enable the API (For the user byok@shn.com).
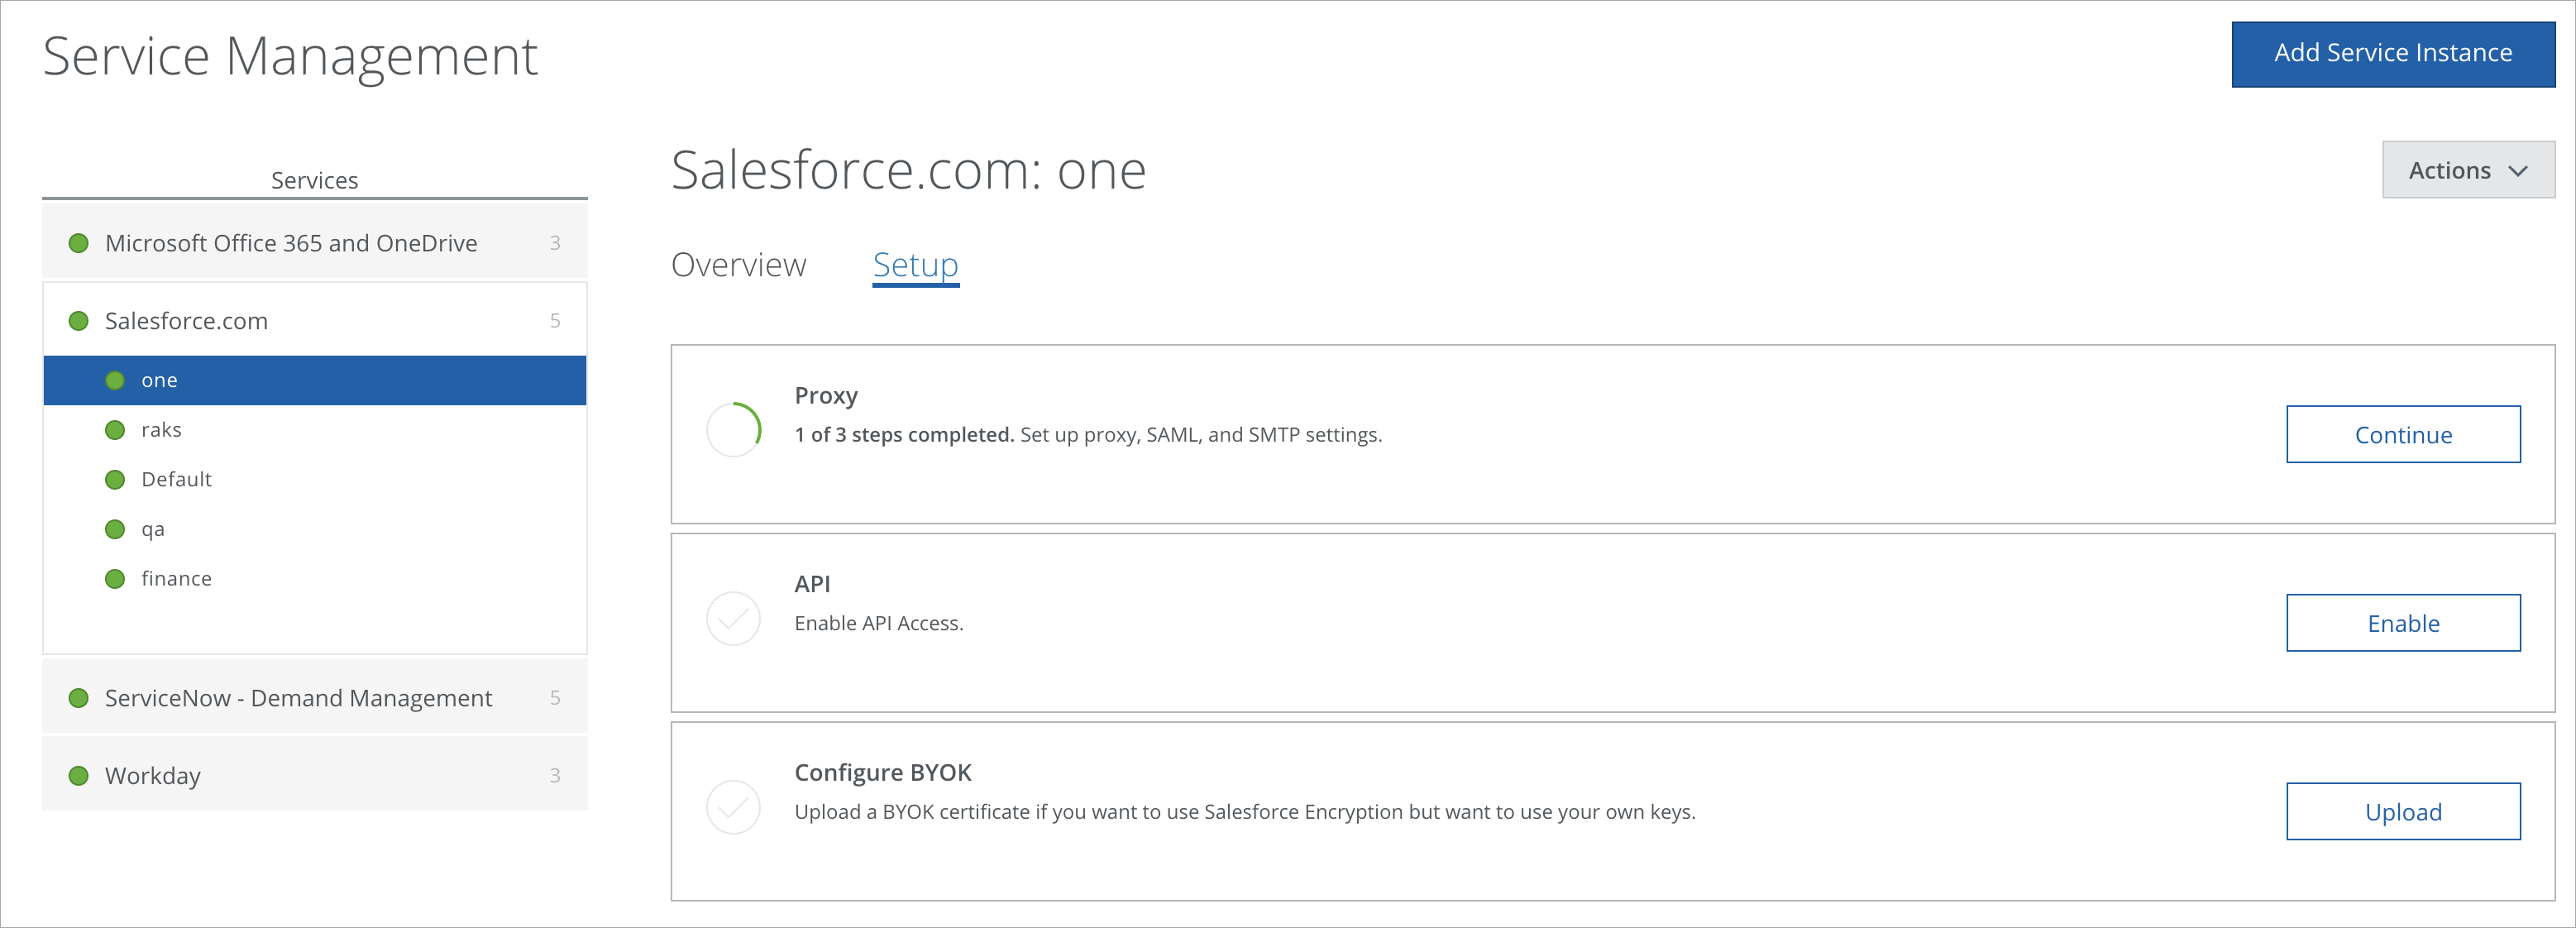
- Follow the instructions to complete the configuration.
Run an On-Demand Scan in Salesforce
To set up an On-Demand Scan for Salesforce:
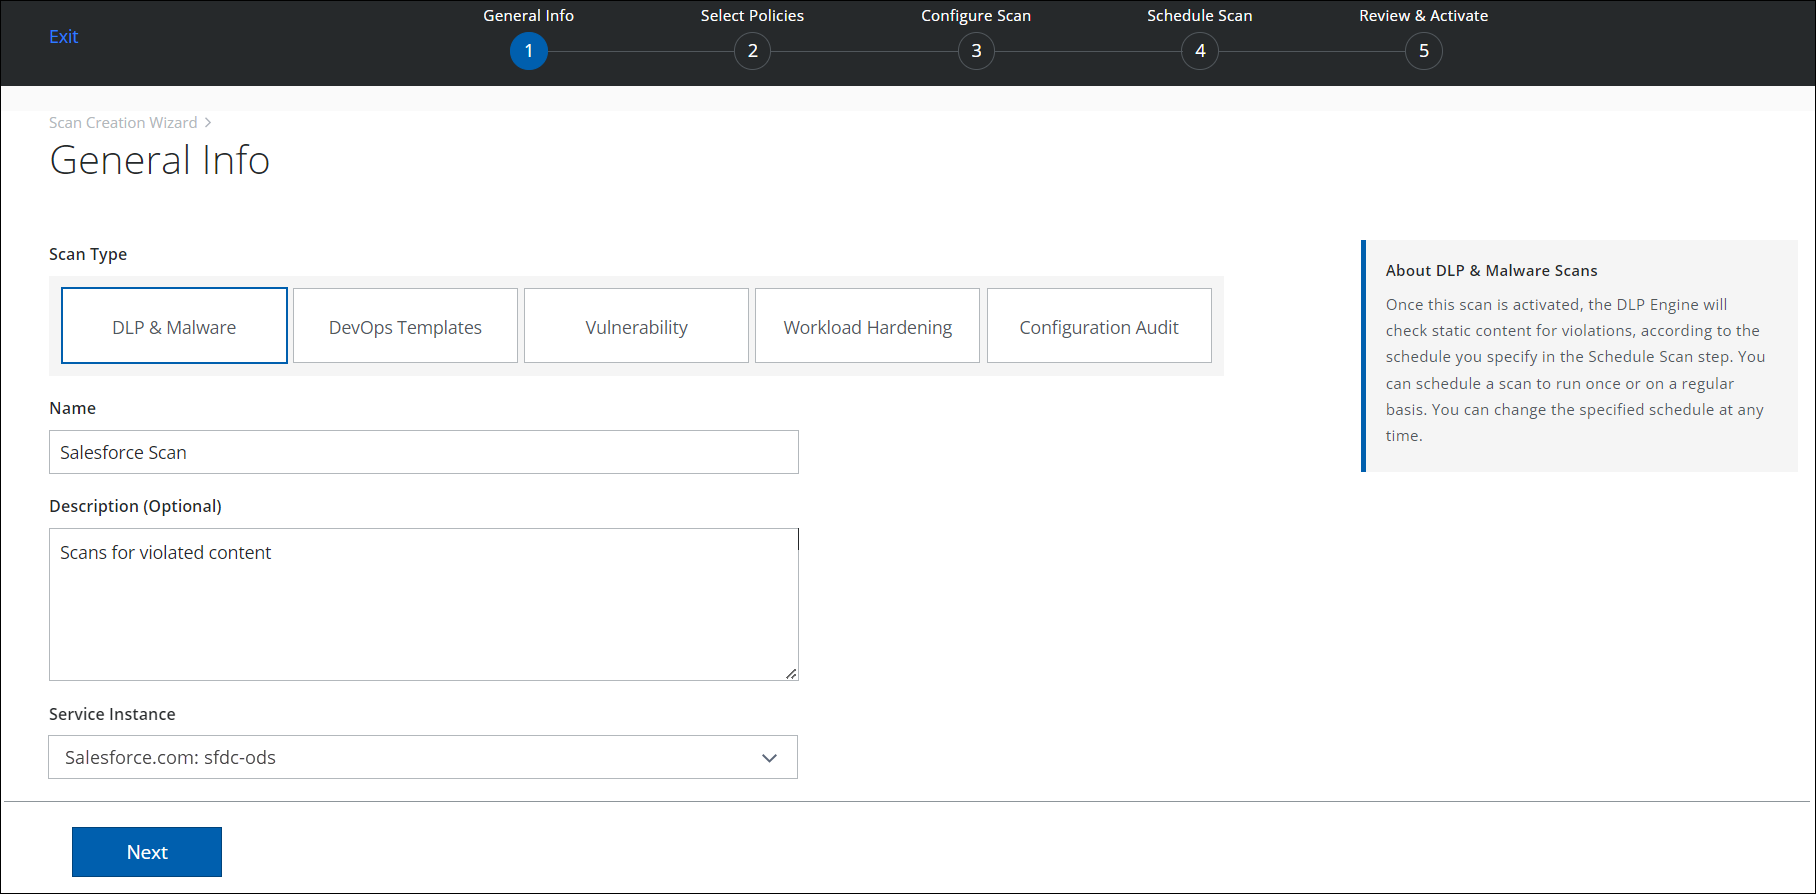
- Go to Policy > On-Demand Scan.
- Click Actions > Create a Scan. The Scan Creation Wizard displays.
- For Scan Type, click Data Loss Prevention. Add a name for your scan, and a description.
- Select a Salesforce Service Instance. Then click Next.
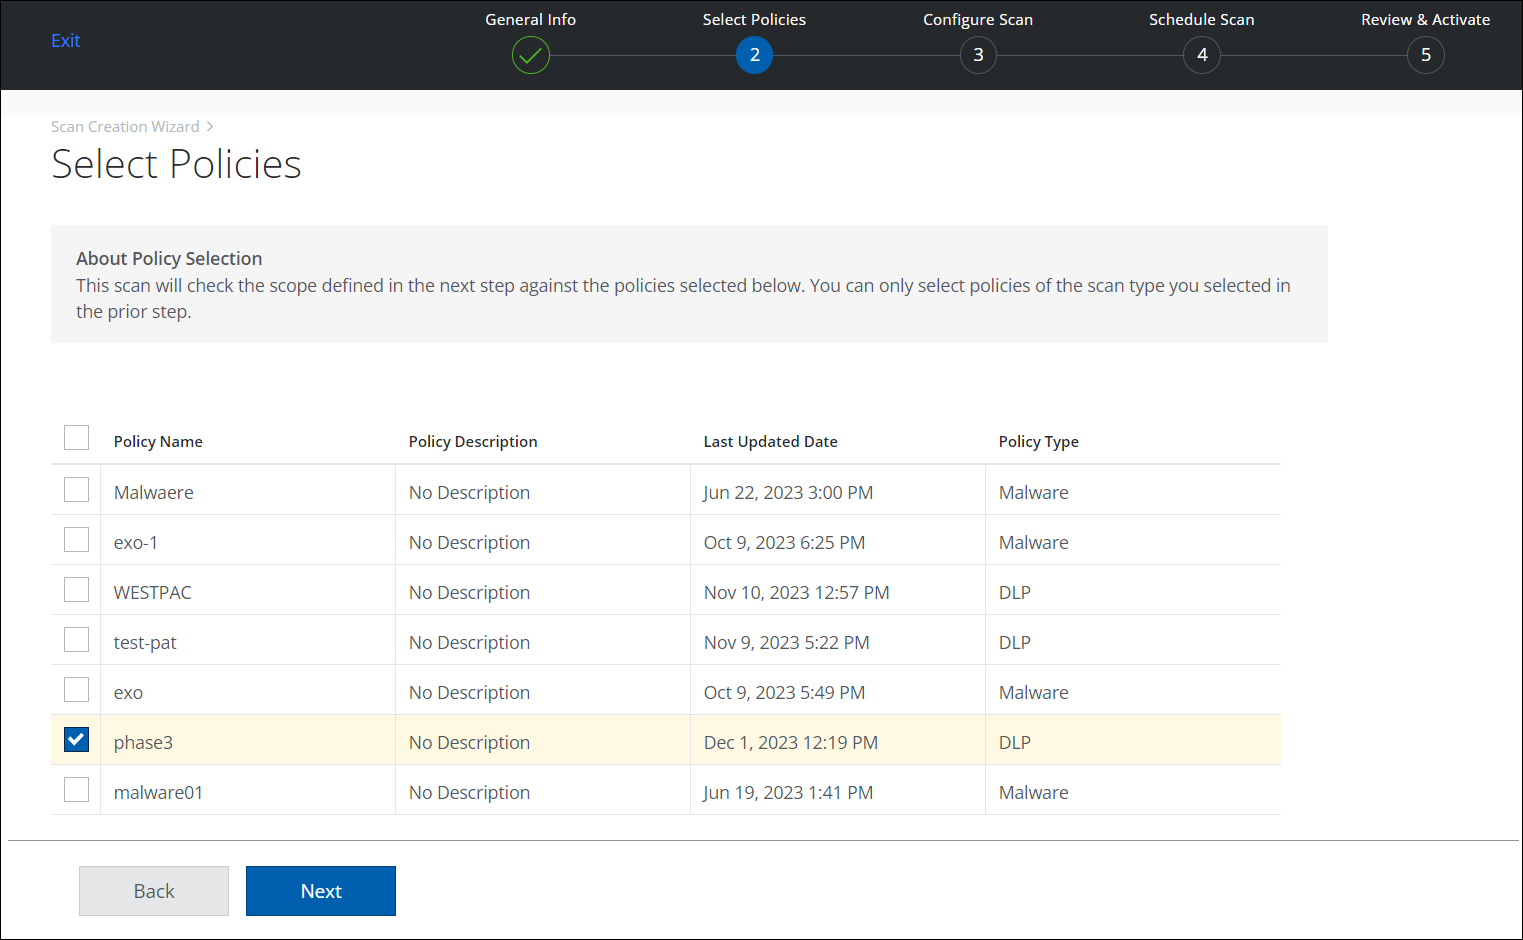
- On the Select Policies page, choose the policy you would like to use for the scan. This policy is applied to selected data to find violations of that policy and click Next.
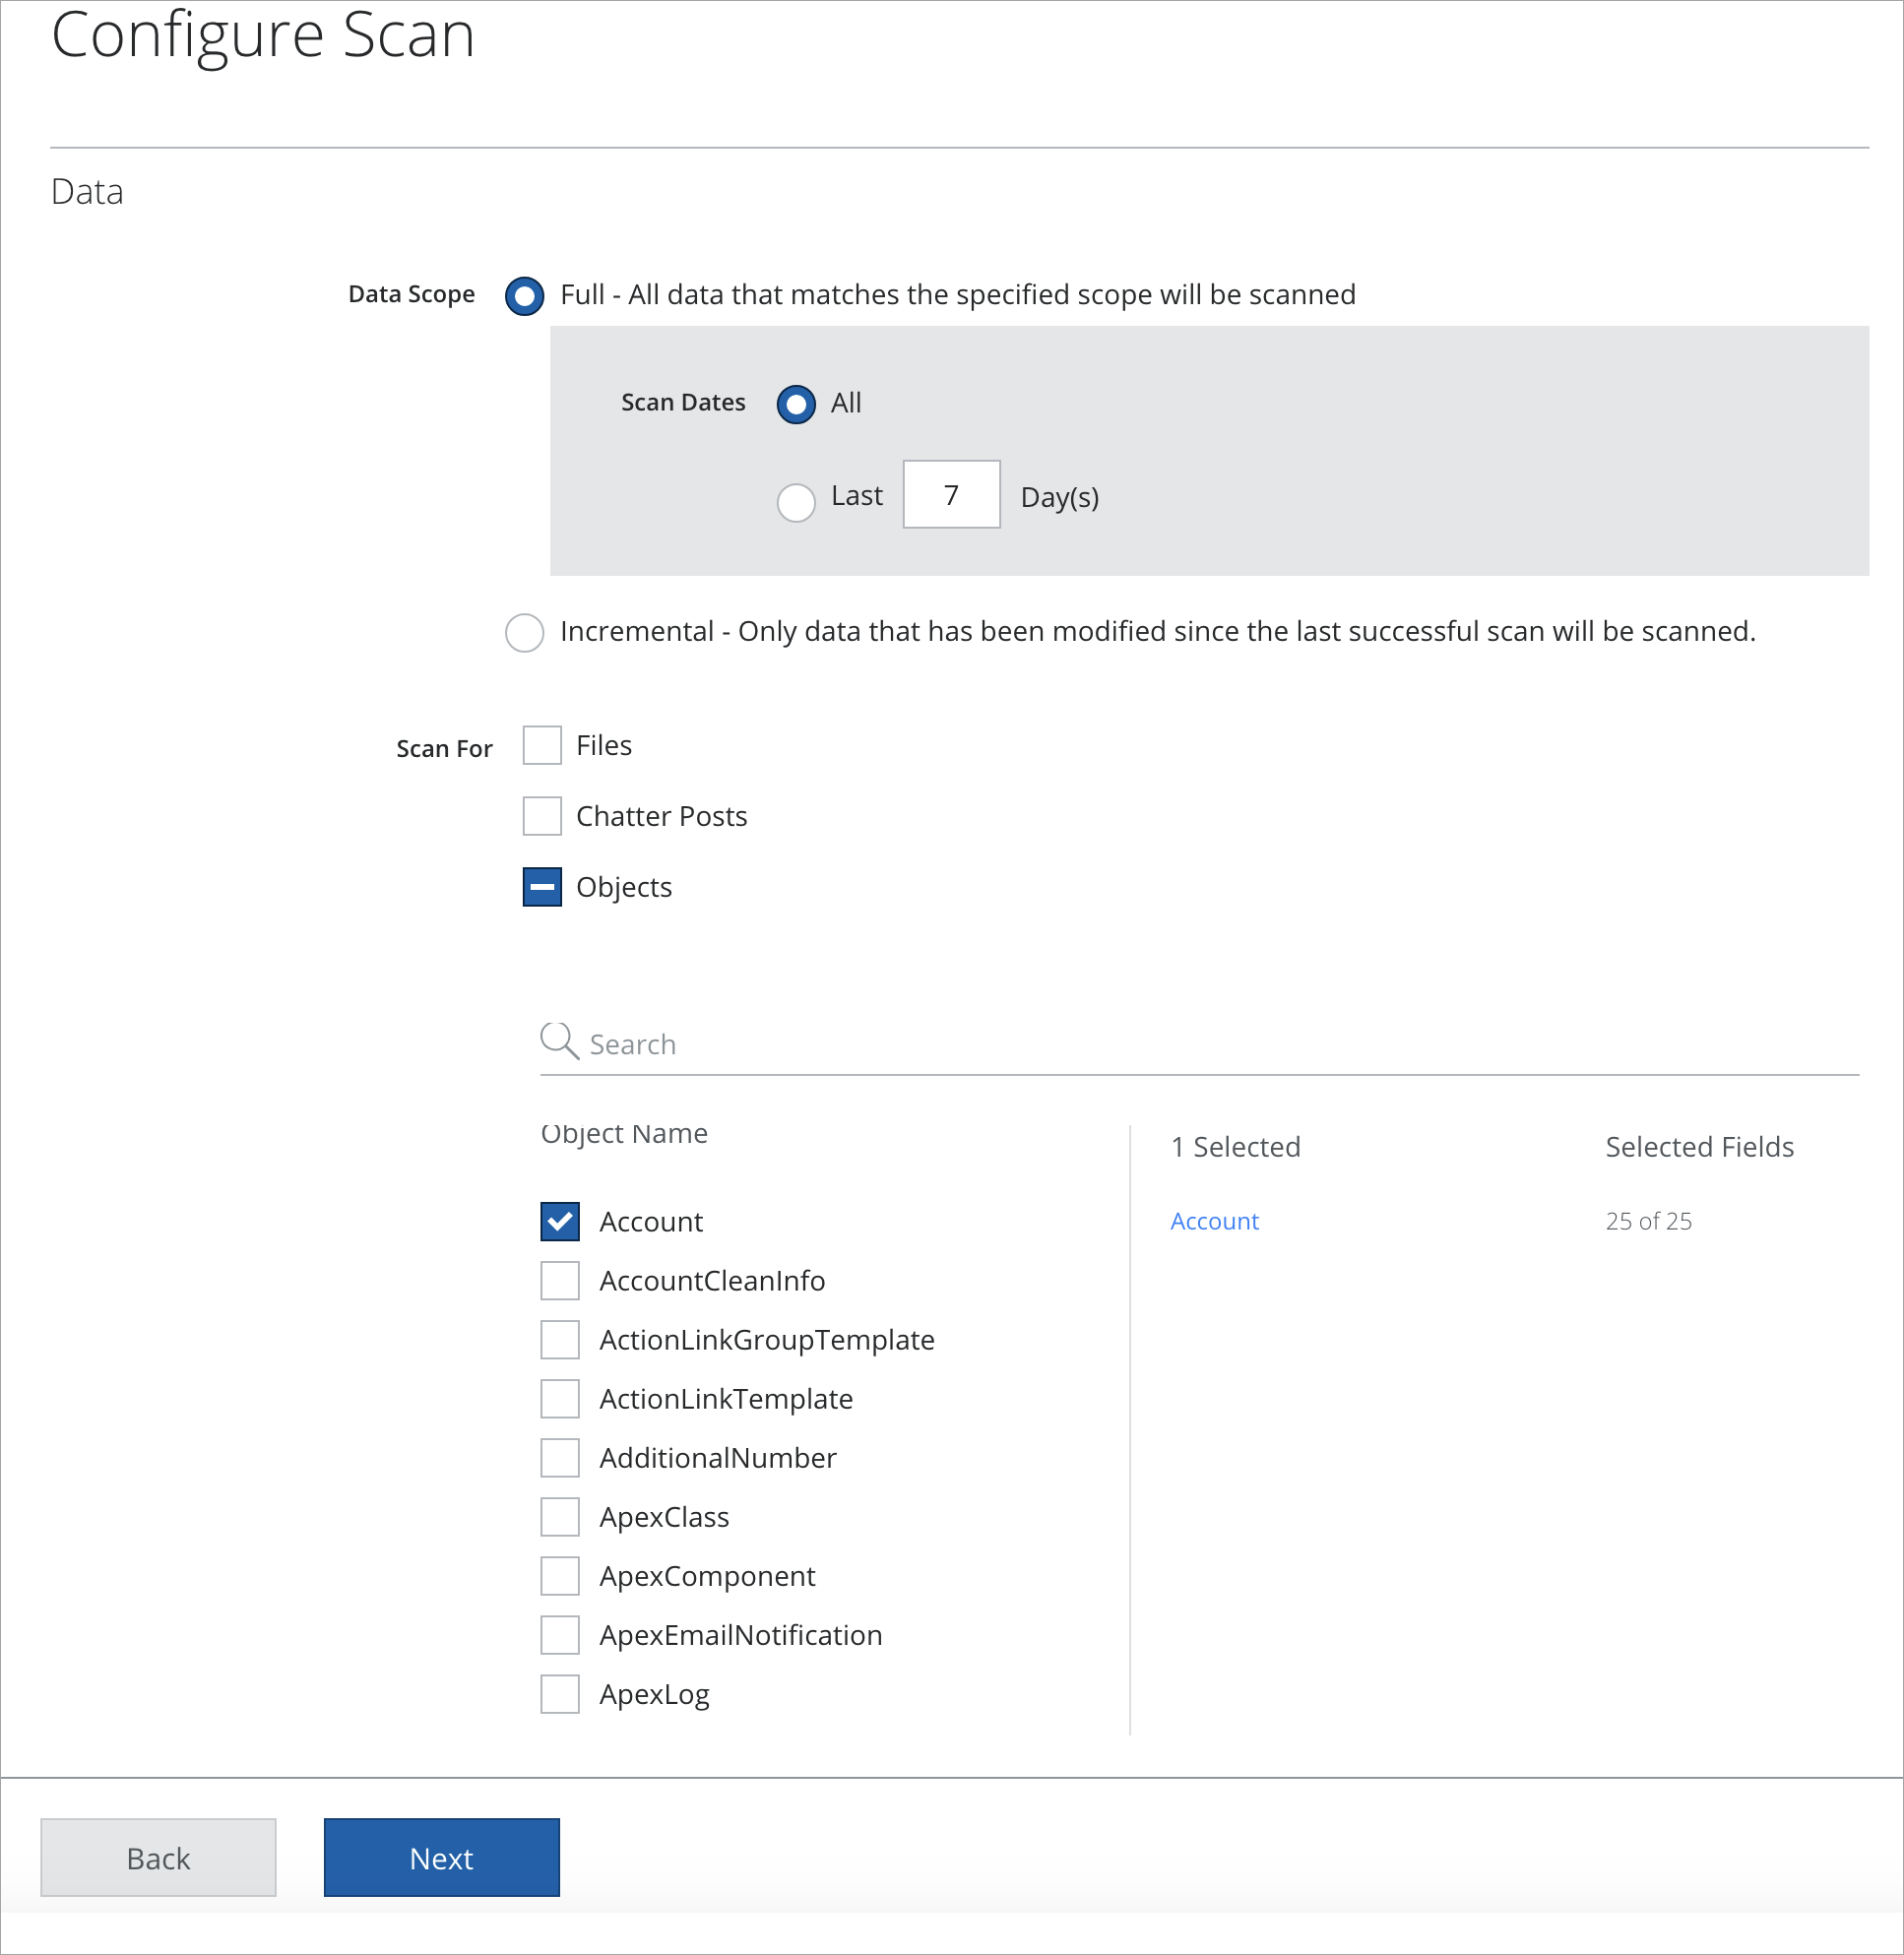
- On the Configure Scan page, under Data Scope, select Full if you would like to scan all data each time you run the scan, or select Incremental to scan data generated since the last scan.
- Under Scan Dates, select the required option.
- All. For the first time scan, all the objects are scanned in the selected Salesforce instance. From the subsequent runs, scans only new data/records that are created after the previous scan completion date.
- Last 7 Days. Scans past 7 days of data/records in the selected service instance.
- The Scan For section allows you to select Files, Chatter Posts, and Objects in Salesforce. Select the required options to scan the data types. For example, under Scan For, Objects is selected. Now, select options from Object Name. By default, Account is selected as Object Name and it is a standard object in Salesforce.
- Under Scan Dates, select the required option.
NOTE: File objects scans the file content and not the fields in the file object.
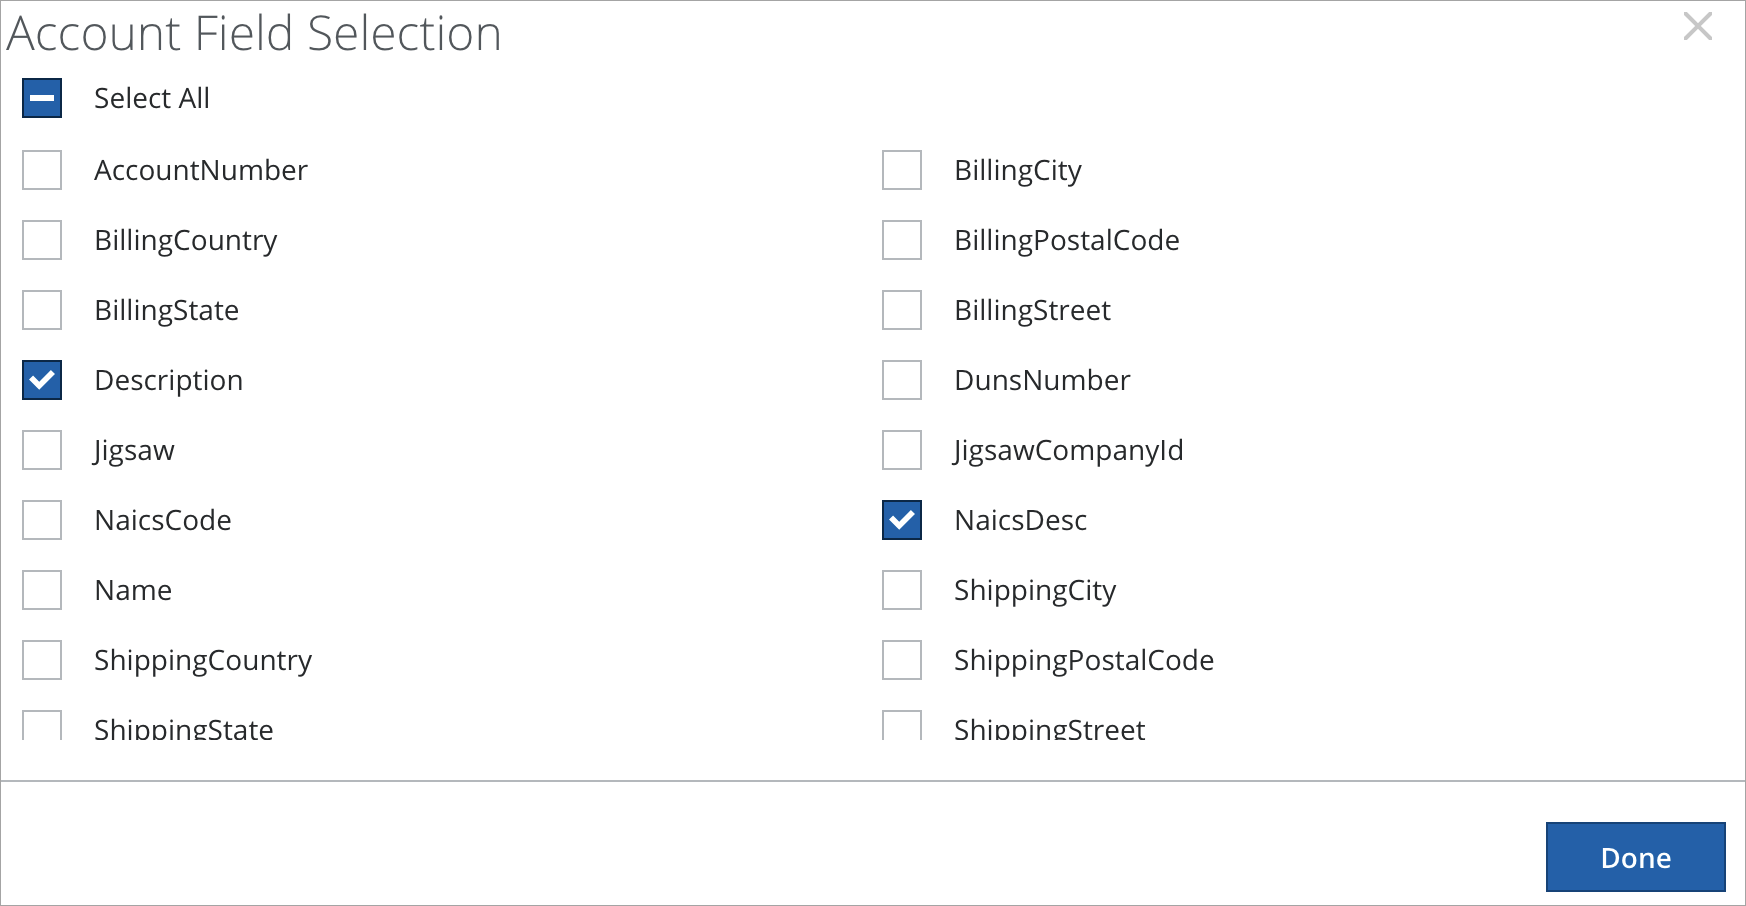
- The existing fields associated with the Account object are also selected for scan. Click Account link to select specific fields of an object and click Done.
NOTE: Skyhigh CASB recommends the following best practices to follow while configuring the ODS Scan:
- Do not select all the Objects/Fields instead select the required Objects/Fields which can have sensitive data to reduce the massive data scan and increase performance.
- Do not select all three options simultaneously: Files, Chatter Posts and Objects. Select either Files + Chatter Posts or Objects to scan the sensitive data.
- You can select either Chatter Posts or Files to create an individual scan.
- For Chatter Posts, select ContentVersion as Object Name.
- You can also select the other Objects and the associated fields. Once the objects/fields are selected, click Next.
- On the Schedule Scan page, choose to run the scan immediately, or pick a schedule option. Click Next.
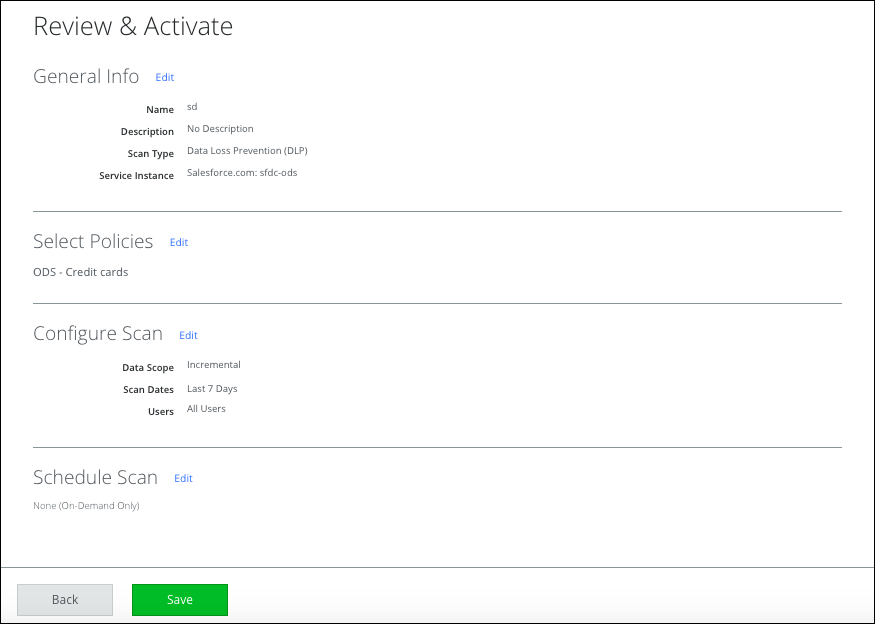
- On the Review & Activate page, make sure the configuration is correct, and then click Save. If you choose to run the scan immediately, the scan is done right away.
Download On-Demand Scan Files from Skyhigh CASB Incidents in Salesforce
When your object in On-Demand Scan is violating policy, then an incident is created in the Skyhigh CASB Incidents. If you cannot view On-Demand Scan files in Skyhigh CASB Incidents, then contact Skyhigh Security Support to activate the download link of ODS Scan file.
FAQs
- ► We are in the Insurance business and our Salesforce Organization consists of huge case records (70% of the total data), what is the best way to capture sensitive data from ODS?
-
Create One Full Scan type for case object and select the objects /fields where you see there is a chance for the sensitive data to slip in. Then, create one more Full Scan to cover all other objects of your choice.
After Full Scan, you may select incremental scan at the desired interval. Full scan is used to double-check if any objects are not covered during incremental scans.
- ► We do process thousands of loan applications (in .pdf format) in our Salesforce Organization every day, we don't want to scan for any other records in the system, what's the best practice here?
-
Create an Incremental Scan to scan the Files (don't select Chatter Posts or Objects as part of your scan configuration), assuming that the loan application file may not get modified once it's uploaded and a new .pdf should be uploaded with any changes in the file. Otherwise, you can configure a full scan for files.
- ► Can I scan system objects?
-
Yes, but we recommend not to, because you may not find any sensitive content as part of system objects (like a User object or a Profile/Permission Set).
- ► Can I do a blanket selection of all the objects and their fields for a Scan?
-
Yes, but we strictly recommend not to do so. It leads to unnecessary API bandwidth consumption with no additional benefits (we scan system objects, install app-related objects as a result it may lead to no trace of sensitive data). Also, some system objects may fail scanning due to permission issues, or they do not have created/modified date.
- ► How to check the API usage and batches created in Salesforce?
-
To check the API usage in Salesforce, go to Setup page and search for System Overview. Under System Overview, you can find the API usage for the last 24 hours. To check the batches created in Salesforce, go to Setup page and under Jobs, select Bulk Data Load Job.
