Data Storage for Microsoft Azure
The Policy Settings Data Storage tab allows you to configure data storage settings for Match Highlighting, Connected Apps Notes, Incident Notes, End-User Remediation, and Web Evidence.
To store your data, you can use Microsoft Azure, IBM Cloud, Amazon Web Services (AWS), or Skyhigh.
NOTE: If you need to update parameters after saving them, Skyhigh CASB Support can enable this.
Configure Microsoft Azure
NOTE: To save the cloud storage configuration for any tenant, it is necessary that versioning should be enabled on the bucket. For details, see Microsoft Azure.
Provide Azure Blob Storage Access to Skyhigh CASB
- Log in to the Azure Portal and create a Storage Container.
- Select the Storage Container and create an Access Policy. It should provide the following permissions on the container: Read, Write, Delete, and List (Allowed permissions).
- Configure a start time and end time that is bounded.
- Go to Storage Accounts and select the Storage Account where the Match Highlights container was created.
- Click Storage Explorer, right-click the Storage Container for Match highlights, and click Get Shared Access Signature.
- Select the access policy you created, and create the Shared Access Signature.
- Copy the complete URL and provide it to Skyhigh CASB in the following section.
Get the SAS URL
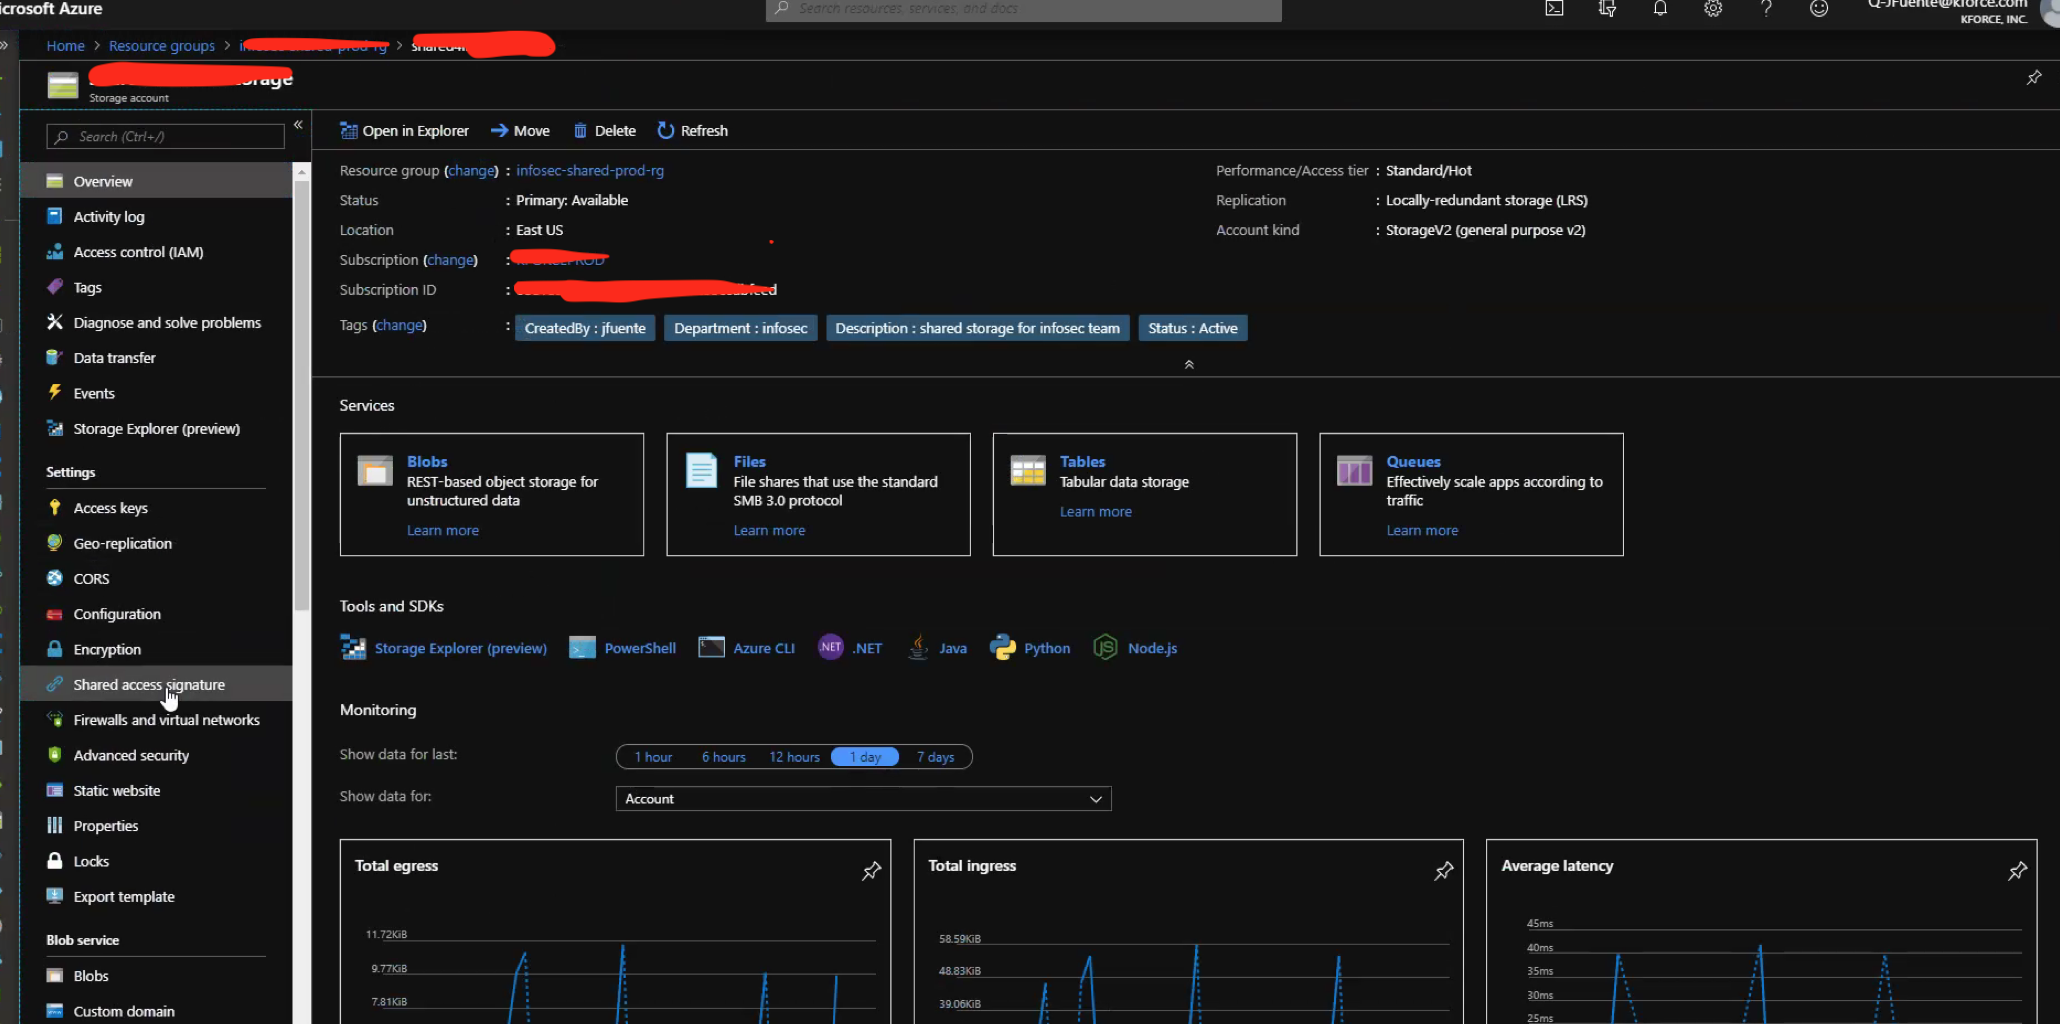
- Create or access a Storage Account in Azure.
- Go to that Storage Account.
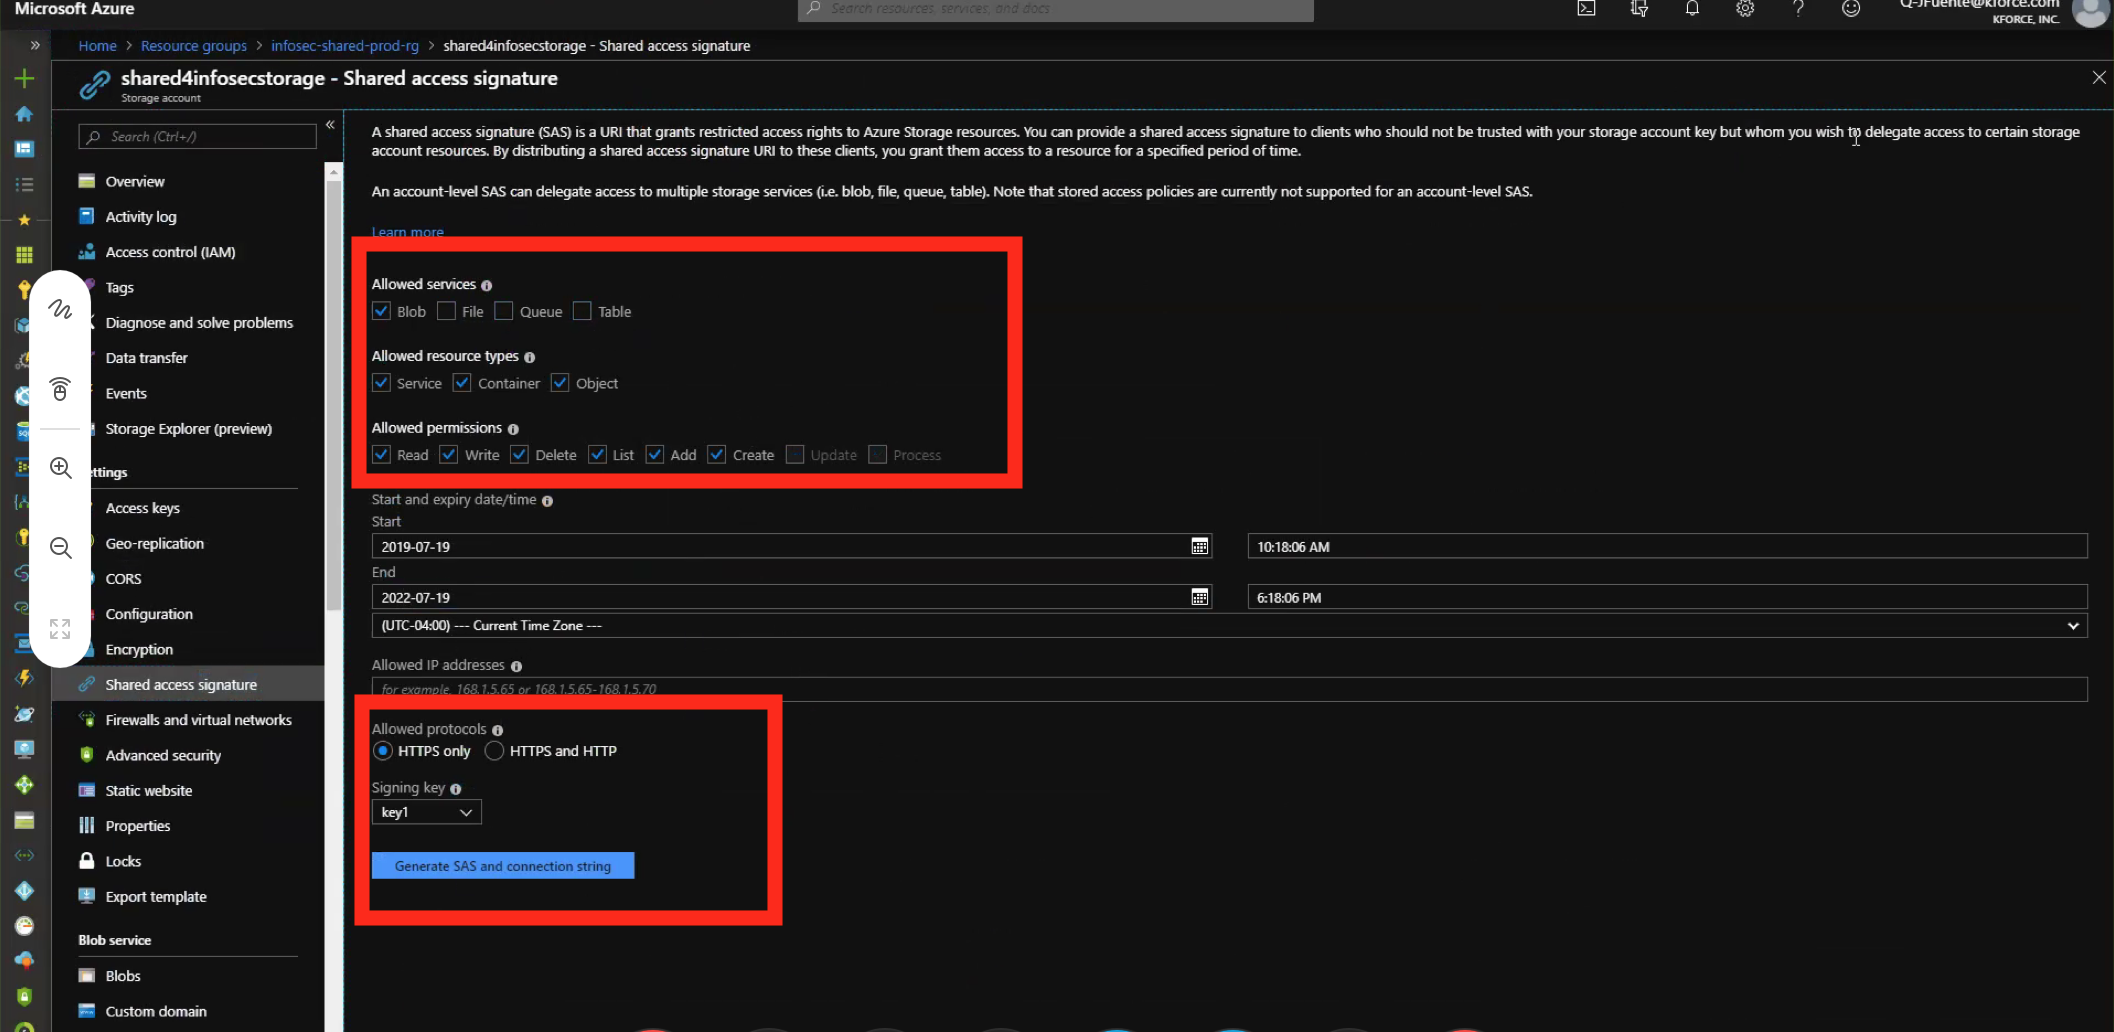
- On the left panel, find the Shared Access Signature. Make sure the following checkboxes are enabled:

- Allowed services > Blob
- Allowed resource types > Service, Container, Object
- Allowed permissions > Read, Write, Delete, List, Add, Create
- Make sure the expiration date is far into the future. By default, it is 12 hours.
- Generate the SAS and connection string.
- Copy the BLOB SAS URL, which looks something like this example:
https://patrickstorage.blob.core.win...3XxUBI%2BNo%3D

- Paste the SAS URL in the Azure Storage Service SAS URL field. The Storage Account name is a part of the SAS URL. In the previous example, it is patrickstorage.
Enable Soft Delete
From Skyhigh CASB, capture the configured Storage Account details.
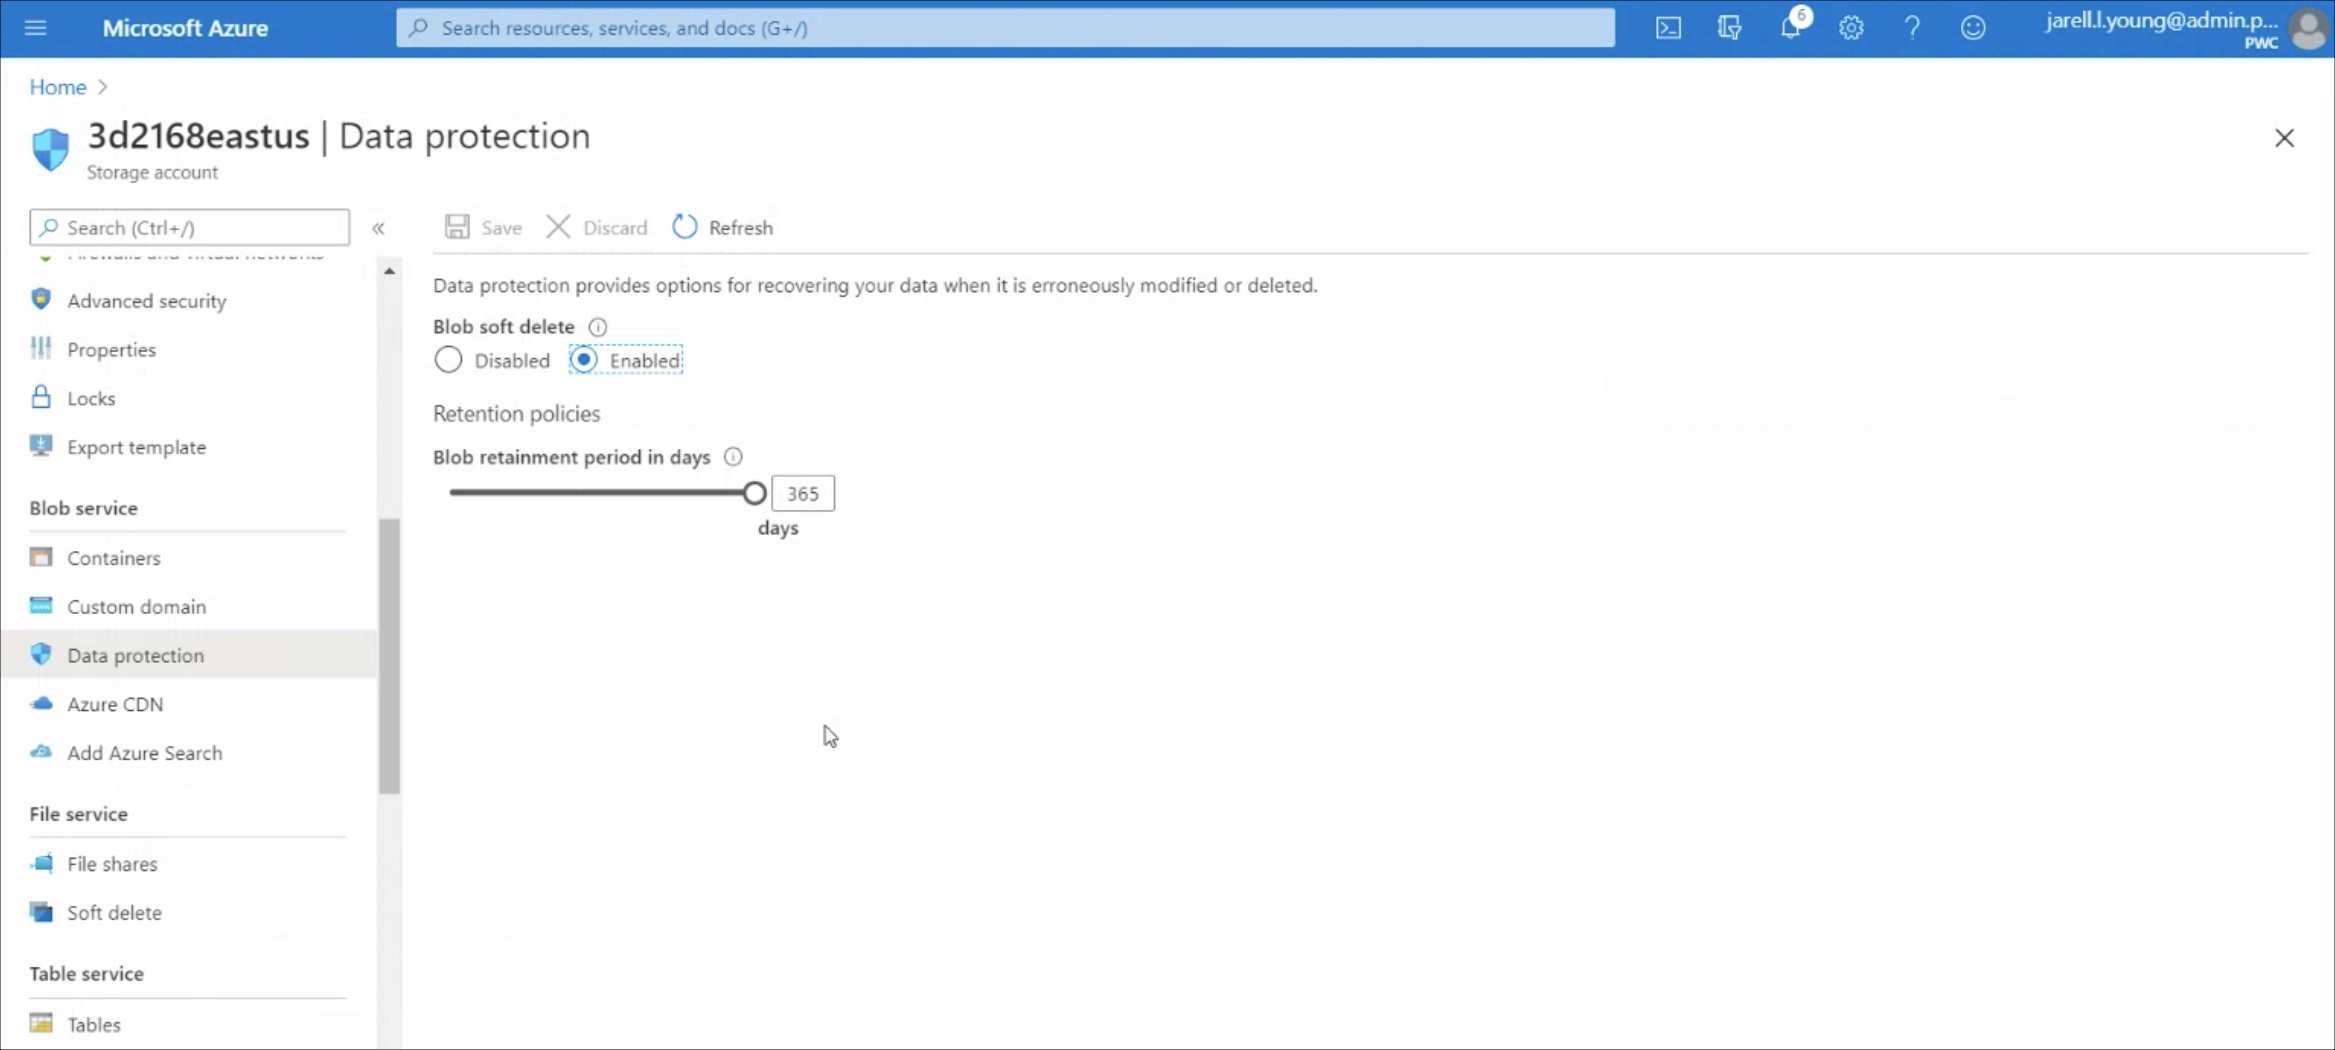
- Log in to the Azure portal and go to the Storage Account.

- Go to Data protection > Blob soft delete.
- Select Enabled.
- Set Retention policies for 365 days.
Configure Skyhigh CASB
To configure data storage for Microsoft Azure:
- Go to Policy > Policy Settings.
- Select the Data Storage tab.

- Under Data Store, select Your Own.
NOTE: Web Evidence files can only be stored if you select Your Own storage. For details on how to save your web evidence files, see Save Web Evidence.
- From Data Store Provider, select Microsoft Azure.
- For Azure Storage Account Name, enter the name of the Storage Container.
- Enter the Azure Storage Service SAS URL. Enter the name of the Blob SAS URL. For more information, see Microsoft Azure documentation, Using Shared Access Signatures (SAS).
- Click Test Connection.
- Click Save.
NOTE: If the Test Connection fails, first verify that all parameters are correct. If it still fails, then contact Skyhigh CASB Support, and provide the error message from the failure. If you need to update parameters after saving them, Skyhigh CASB Support can enable this.
