Create an On-Demand Scan for Microsoft Exchange Online
NOTE: On-Demand Scans are only available with API-based deployments. Proxy-based deployments are not compatible with On-Demand Scans.
Create an On-Demand DLP Scan to scan your Microsoft Exchange Online resources.
To configure an On-Demand DLP Scan:
- Go to Policy > On-Demand Scan.
- Click Actions > Create a Scan.
- The Scan Creation Wizard is displayed. On the General Info page, enter the following:
- Scan Type. Select DLP & Malware.
- Name. Enter a unique identifier so that you can rerun the scan later.
- Description. Enter an optional description for the scan.
- Service Instance. Select the cloud service instance you want to scan.
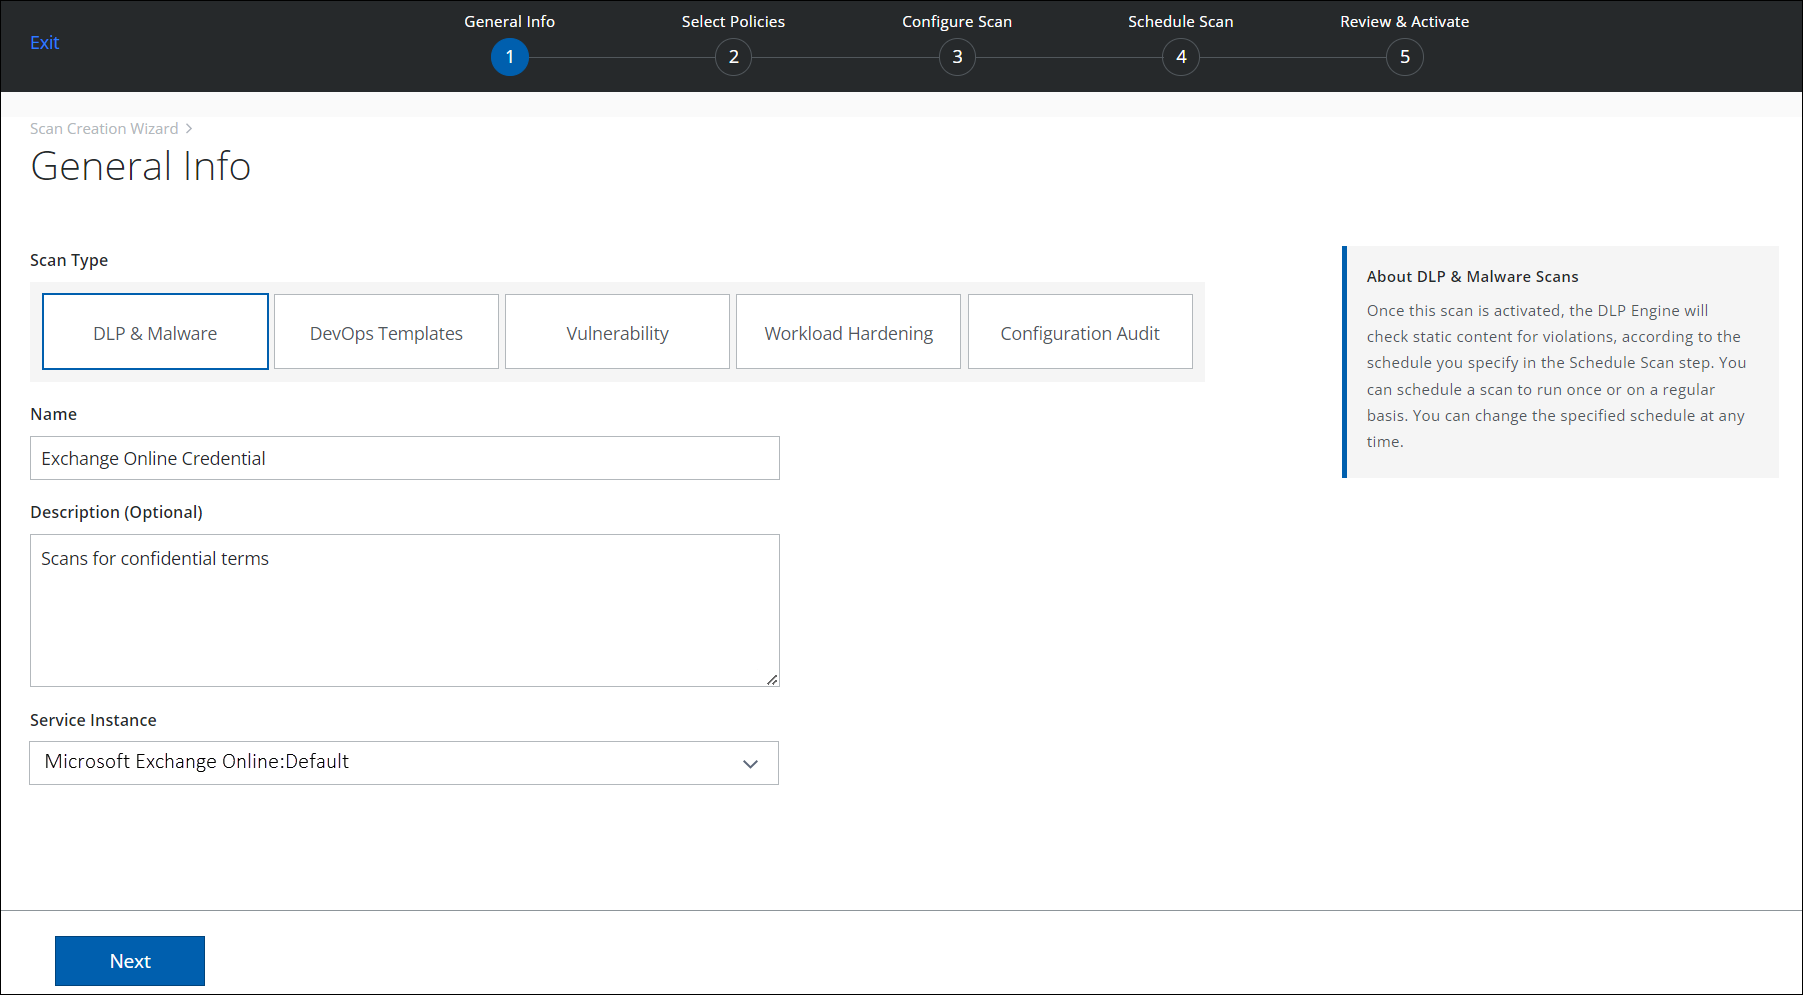
- Click Next.
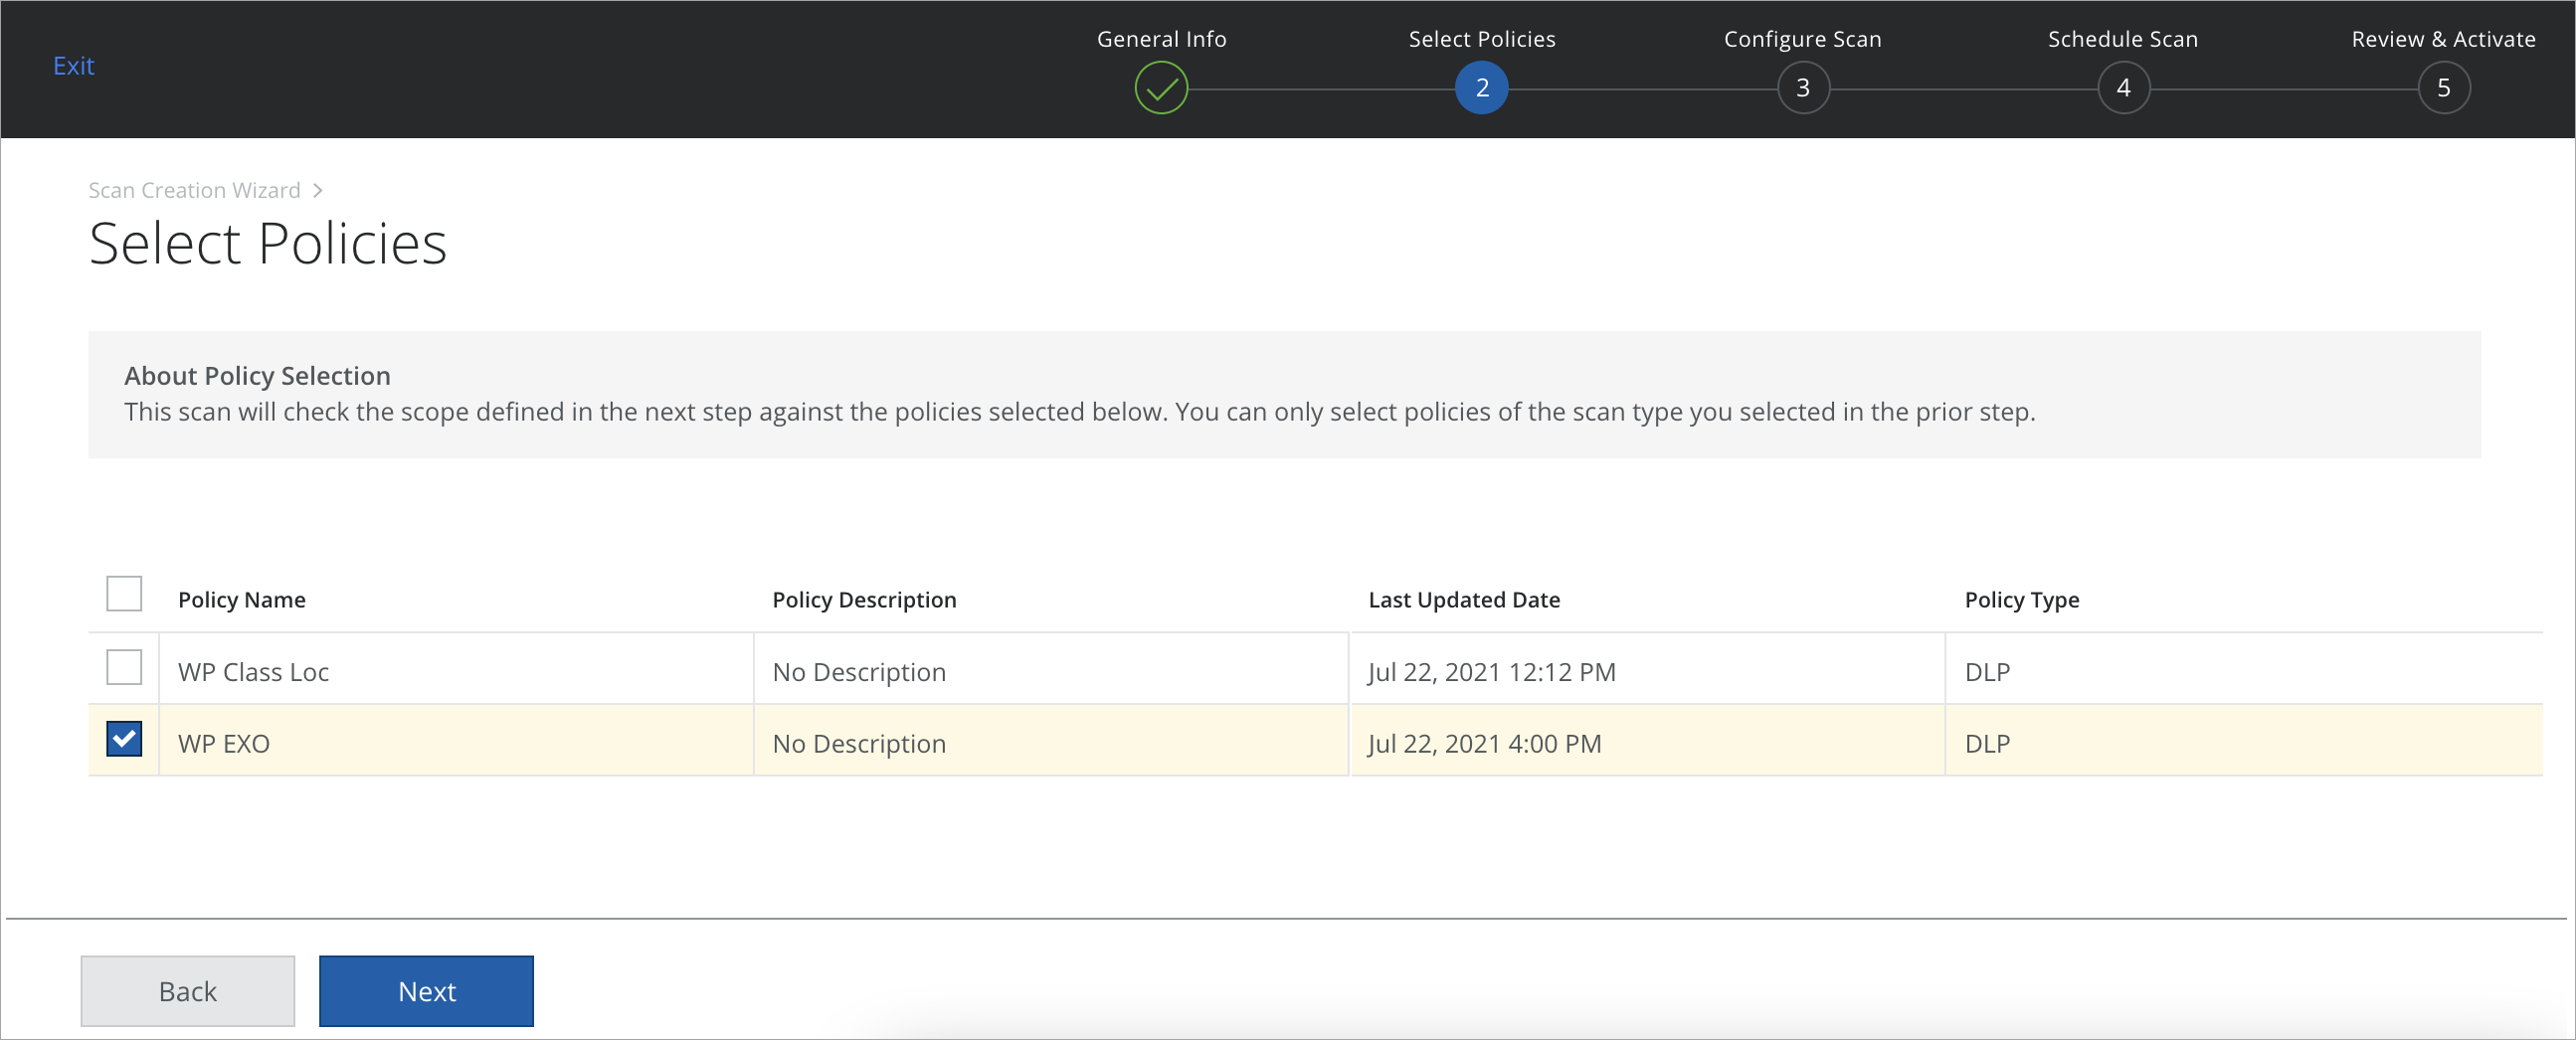
- On the Select Policies page, select the available policies to use for your scan type.
- Click Next.
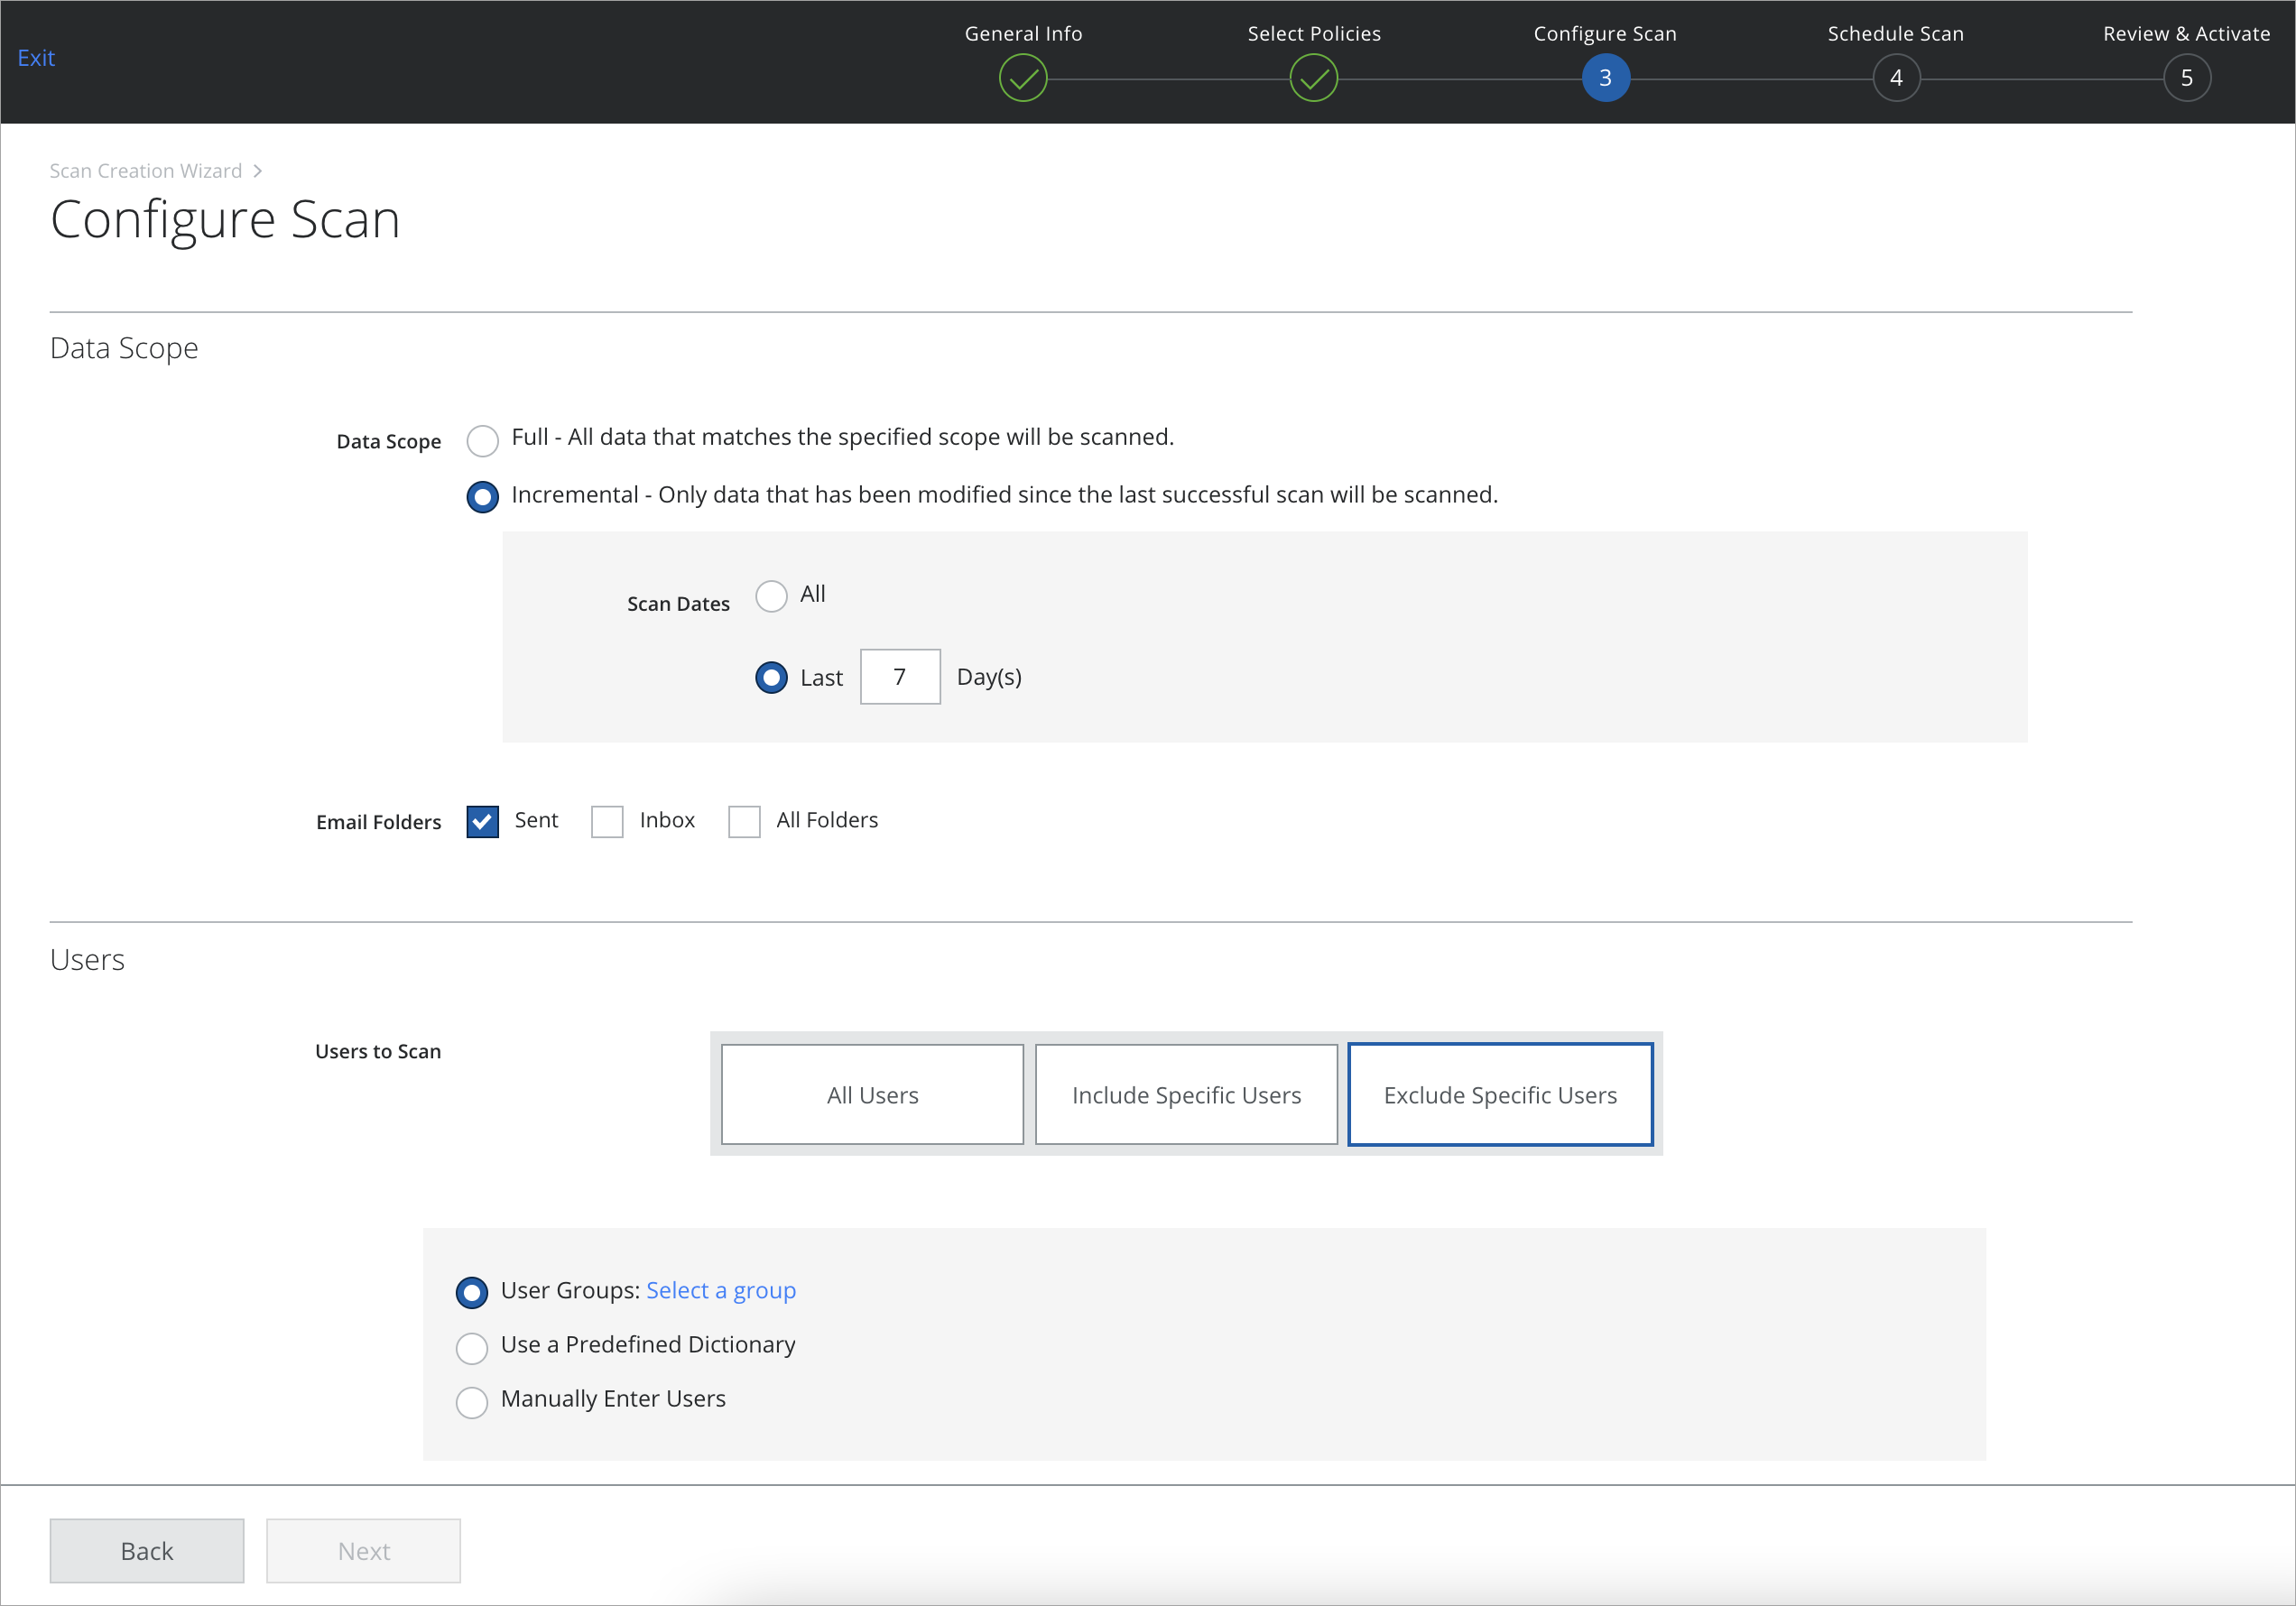
- On the Configure Scan page, configure the scope and users for your scan.
- Data Scope.
- Full. Scans all content every time the scan is run. The first time you run a scan, you must use Full mode.
- Incremental. Scan only content that has changed since the last successful scan. For details about Incremental mode, see About On-Demand Scans.
- Scan Dates. Select All, to scan all data. Or select Last X Days to limit the scan to the specified time period.
- Email Folders. Select the required folders to scan for violating content in the email.
- Users.
- All Users. Scan all users.
- Include Specific Users. To include only specific users, select User Groups, a Predefined Dictionary, or enter users manually in a comma-separated list.
- Exclude Specific Users. To exclude only specific users, select User Groups, a Predefined Dictionary, or enter users manually in a comma-separated list.
- Data Scope.
- Click Next.
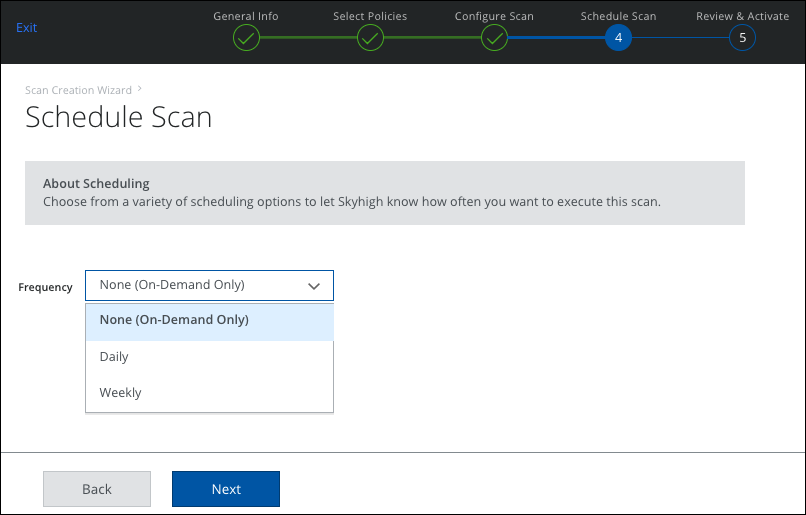
- On the Schedule Scan page, select the schedule for your scan to run:
- None (On-Demand Only). Run the scan once now.
- Daily. Run the scan once a day. Configure the time and time zone.
- Weekly. Run the scan once a week. Configure the day, time, and time zone.
- Click Next.
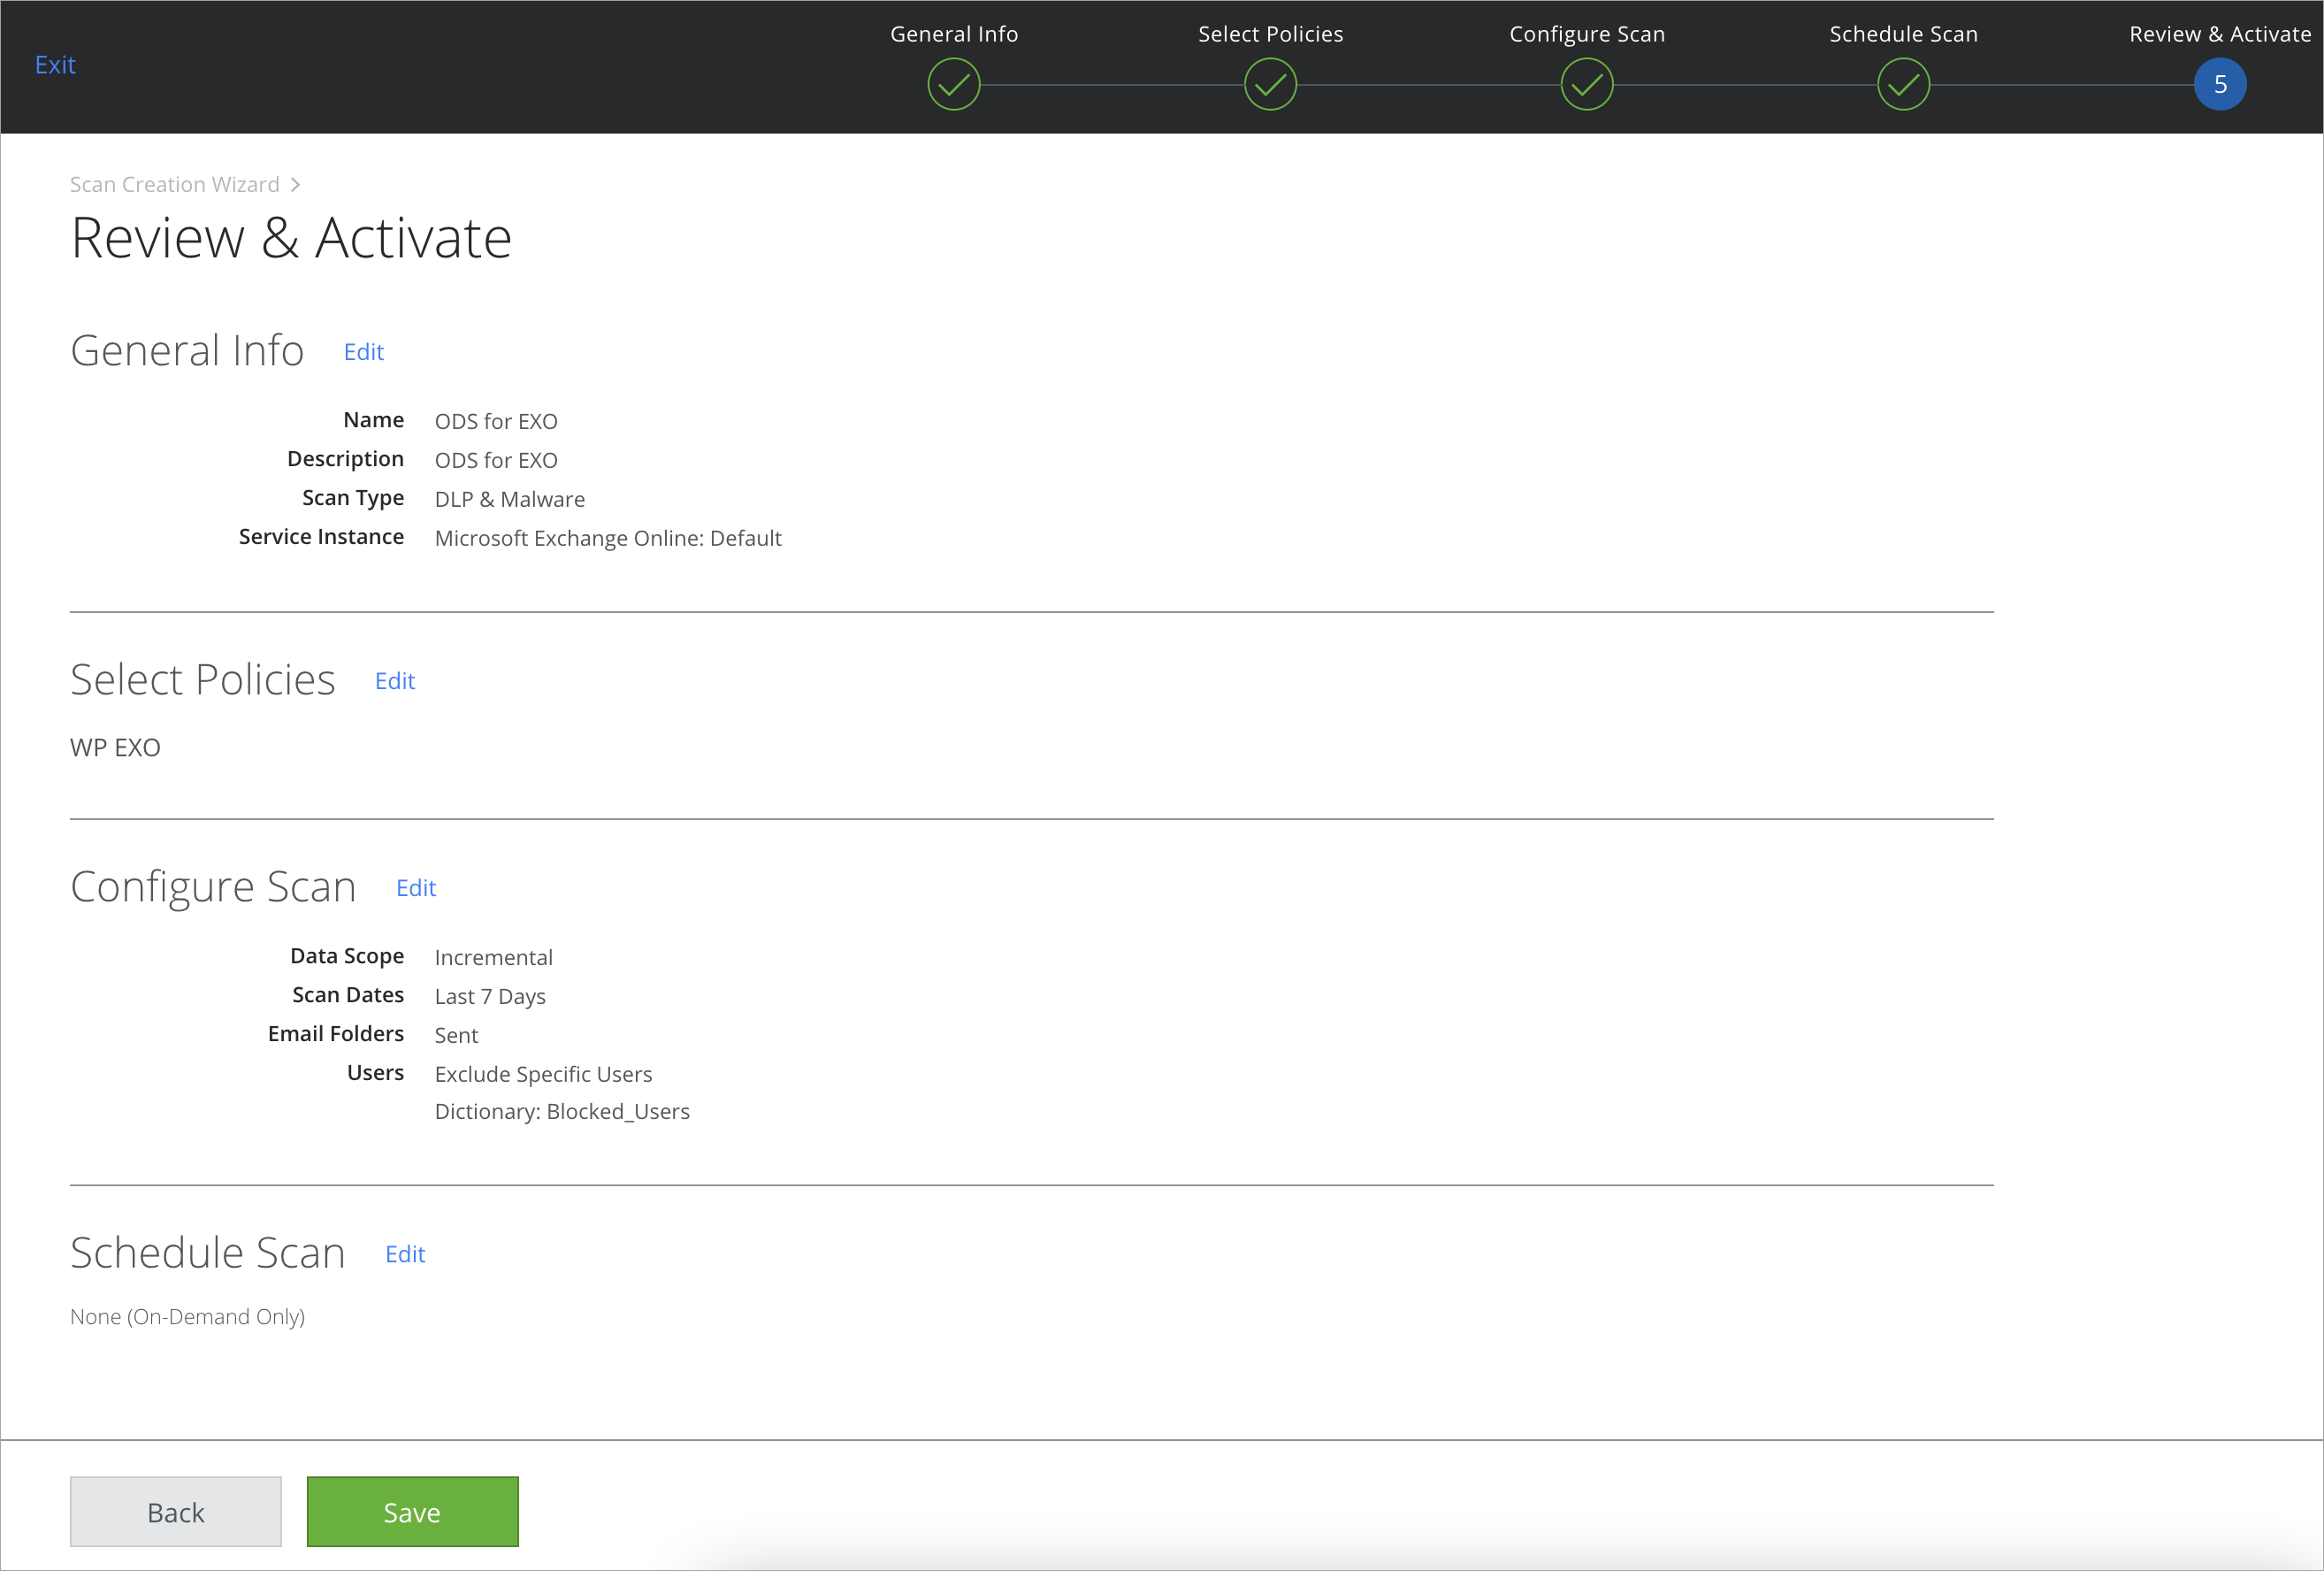
- On the Review & Activate page, review your settings for the On-Demand Scan, and click Save. Or click Back to make changes.
Once a scan is completed, you can view the results, or rerun the scan anytime on the Policy > On-Demand Scan page.
View policy incident violations on the Policy Incidents page.
Limitation
When you run On-Demand Scan on disabled mailbox accounts, we can't fetch details from mailboxes that are disabled. So we do not support ODS for disabled mailbox accounts in Exchange Online.
NOTE: ODS will not support the Quarantine action for emails sent to external recipients. In these cases, the incident will be created with a Quarantine Failed response.
More Information
For Malware and S3 Bucket scans, see:
