Data Storage for Amazon Web Services
| Save Evidence: Save Evidence is an advanced DLP feature that requires entitlement to a separate add-on SKU. Contact Skyhigh Support or your account manager for assistance. |
The Policy Settings Data Storage tab allows you to configure data storage settings for Match Highlighting, Connected Apps Notes, Incident Notes, End-User Remediation, and Web Evidence.
To store your data, you can use Microsoft Azure, IBM Cloud, Amazon Web Services (AWS), or Skyhigh.
Configure Data Storage in Skyhigh CASB
To configure data storage for AWS:
- Go to Policy > Policy Settings.
- Select the Data Storage tab.
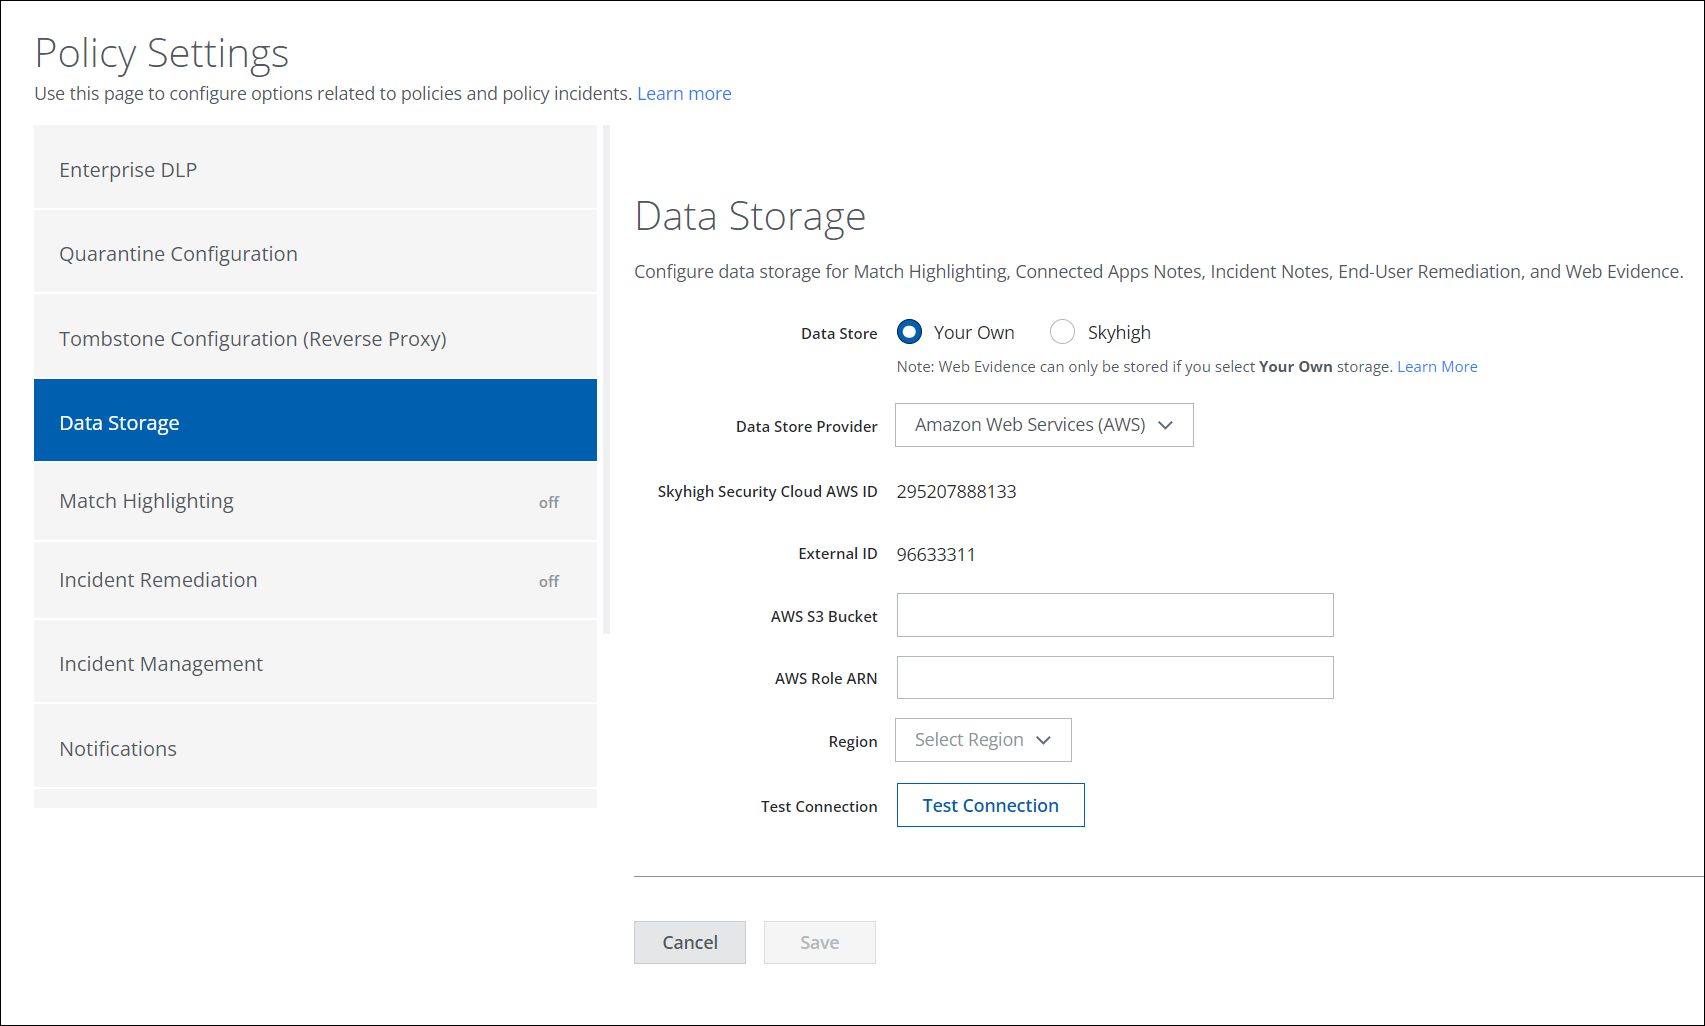
- Under Data Store, select Your Own.
NOTE: Web Evidence files can only be stored if you select Your Own storage. Currently, you can store your web evidence files only on AWS. For details on how to save your web evidence files, see Save DLP Evidence.
- From Data Store Provider, select Amazon Web Services (AWS).
- Take note of the Skyhigh Security Cloud AWS ID and External ID. You will need these to enter this information in AWS.
- In AWS, create a new S3 Bucket.
NOTE: To save the cloud storage configuration for any tenant, it is necessary that versioning should be enabled on the bucket. For details, see AWS S3.
- Create a new IAM policy and give it the following permissions. Make sure to replace "bucket-name" with the bucket name you created.
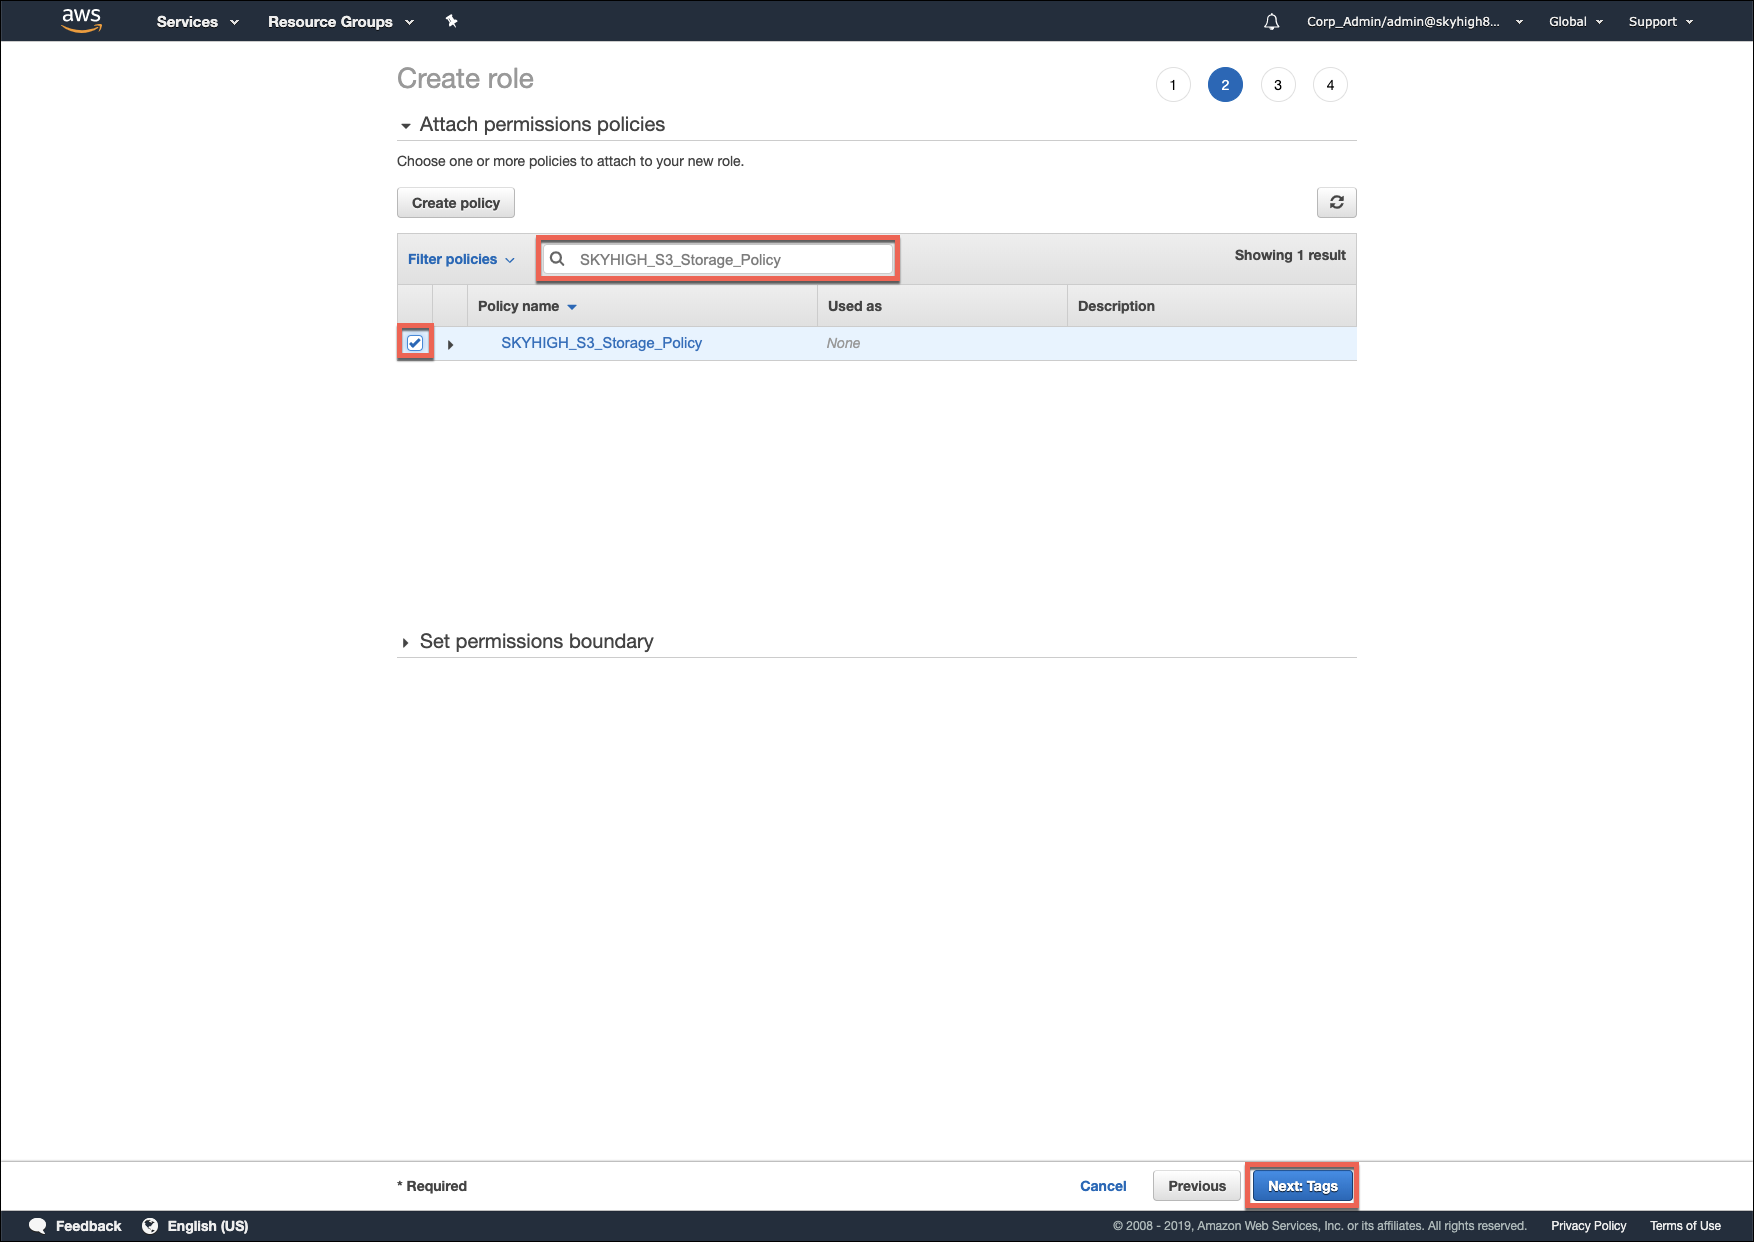
{ "Statement": [{ "Action": [ "s3:ListBucket", "s3:GetBucketLocation", "s3:ListBucketMultipartUploads", "s3:ListBucketVersions", "s3:GetBucketVersioning" ], "Effect": "Allow", "Resource": [ "arn:aws:s3:::bucket-name" ] }, { "Action": [ "s3:GetObject", "s3:PutObject", "s3:DeleteObject", "s3:AbortMultipartUpload", "s3:ListMultipartUploadParts", "s3:DeleteObjectVersion" ], "Effect": "Allow", "Resource": [ "arn:aws:s3:::bucket-name/*" ] } ], "Version": "2012-10-17" } - Name the policy SKYHIGH_S3_Storage_Policy.
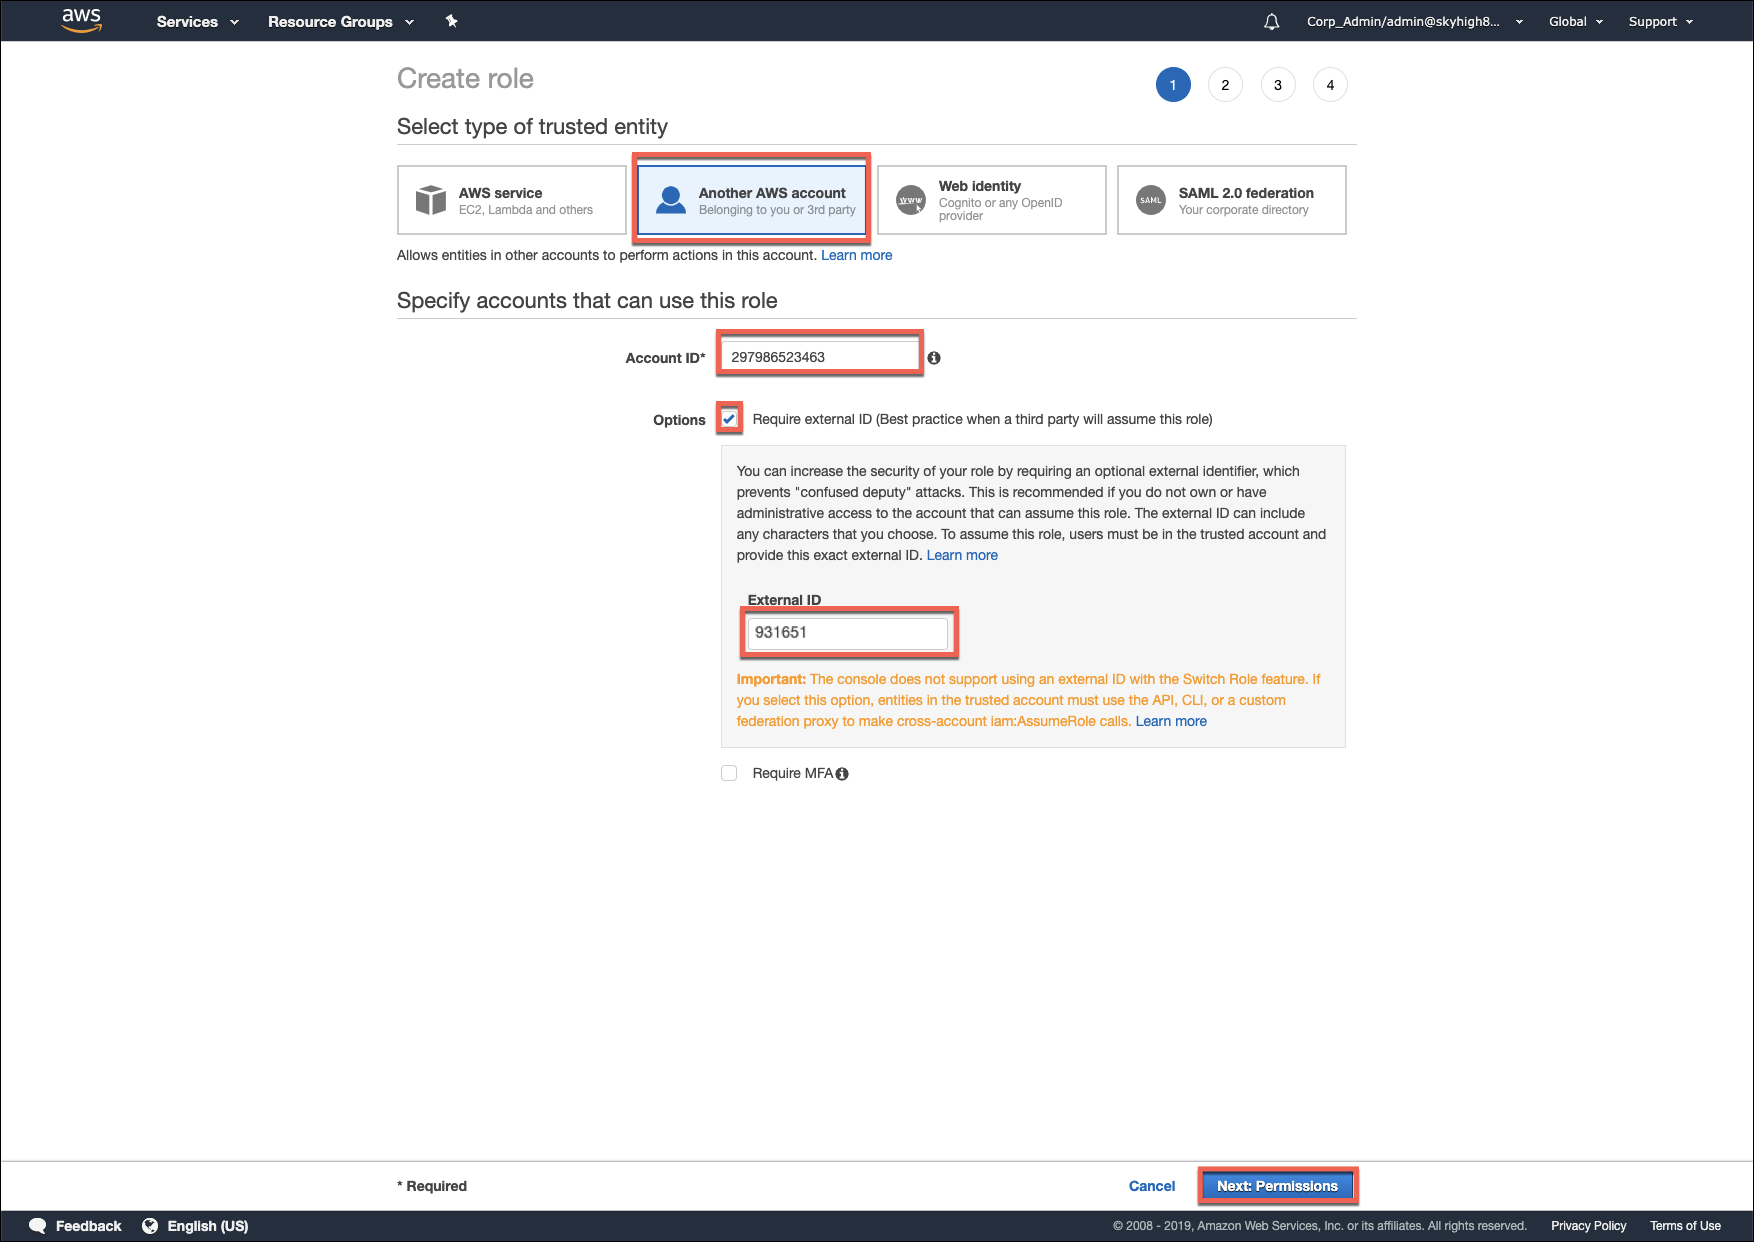
- Create a new IAM Role using type Another AWS account.
- For Account ID and External ID, use the information from the Skyhigh CASB Data Storage tab, then click Next: Permissions.
- Attach the SKYHIGH_S3_Storage_Policy policy to this new IAM role.
- Click Next. Skip the Tabs page.
- Enter the role name SKYHIGH_S3_Storage_Role.
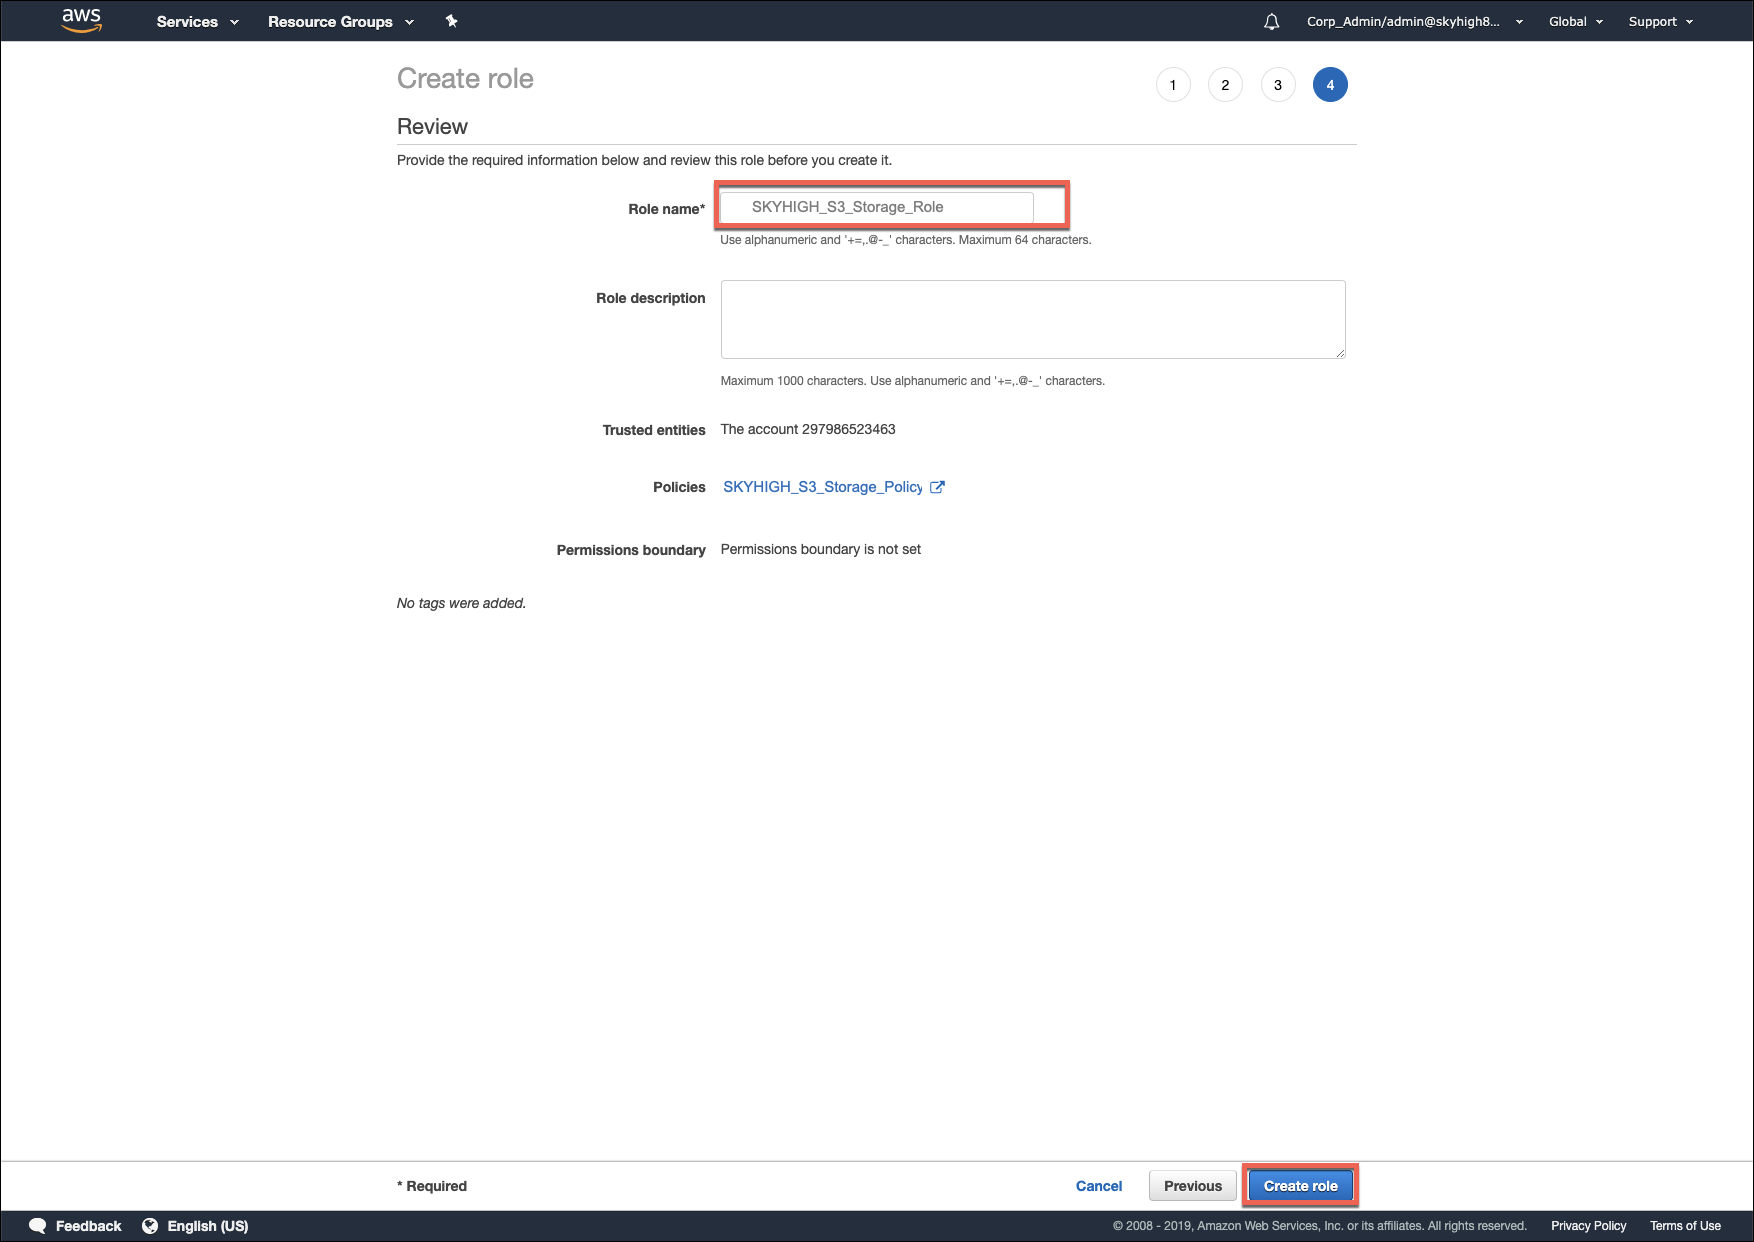
- Click Create role.
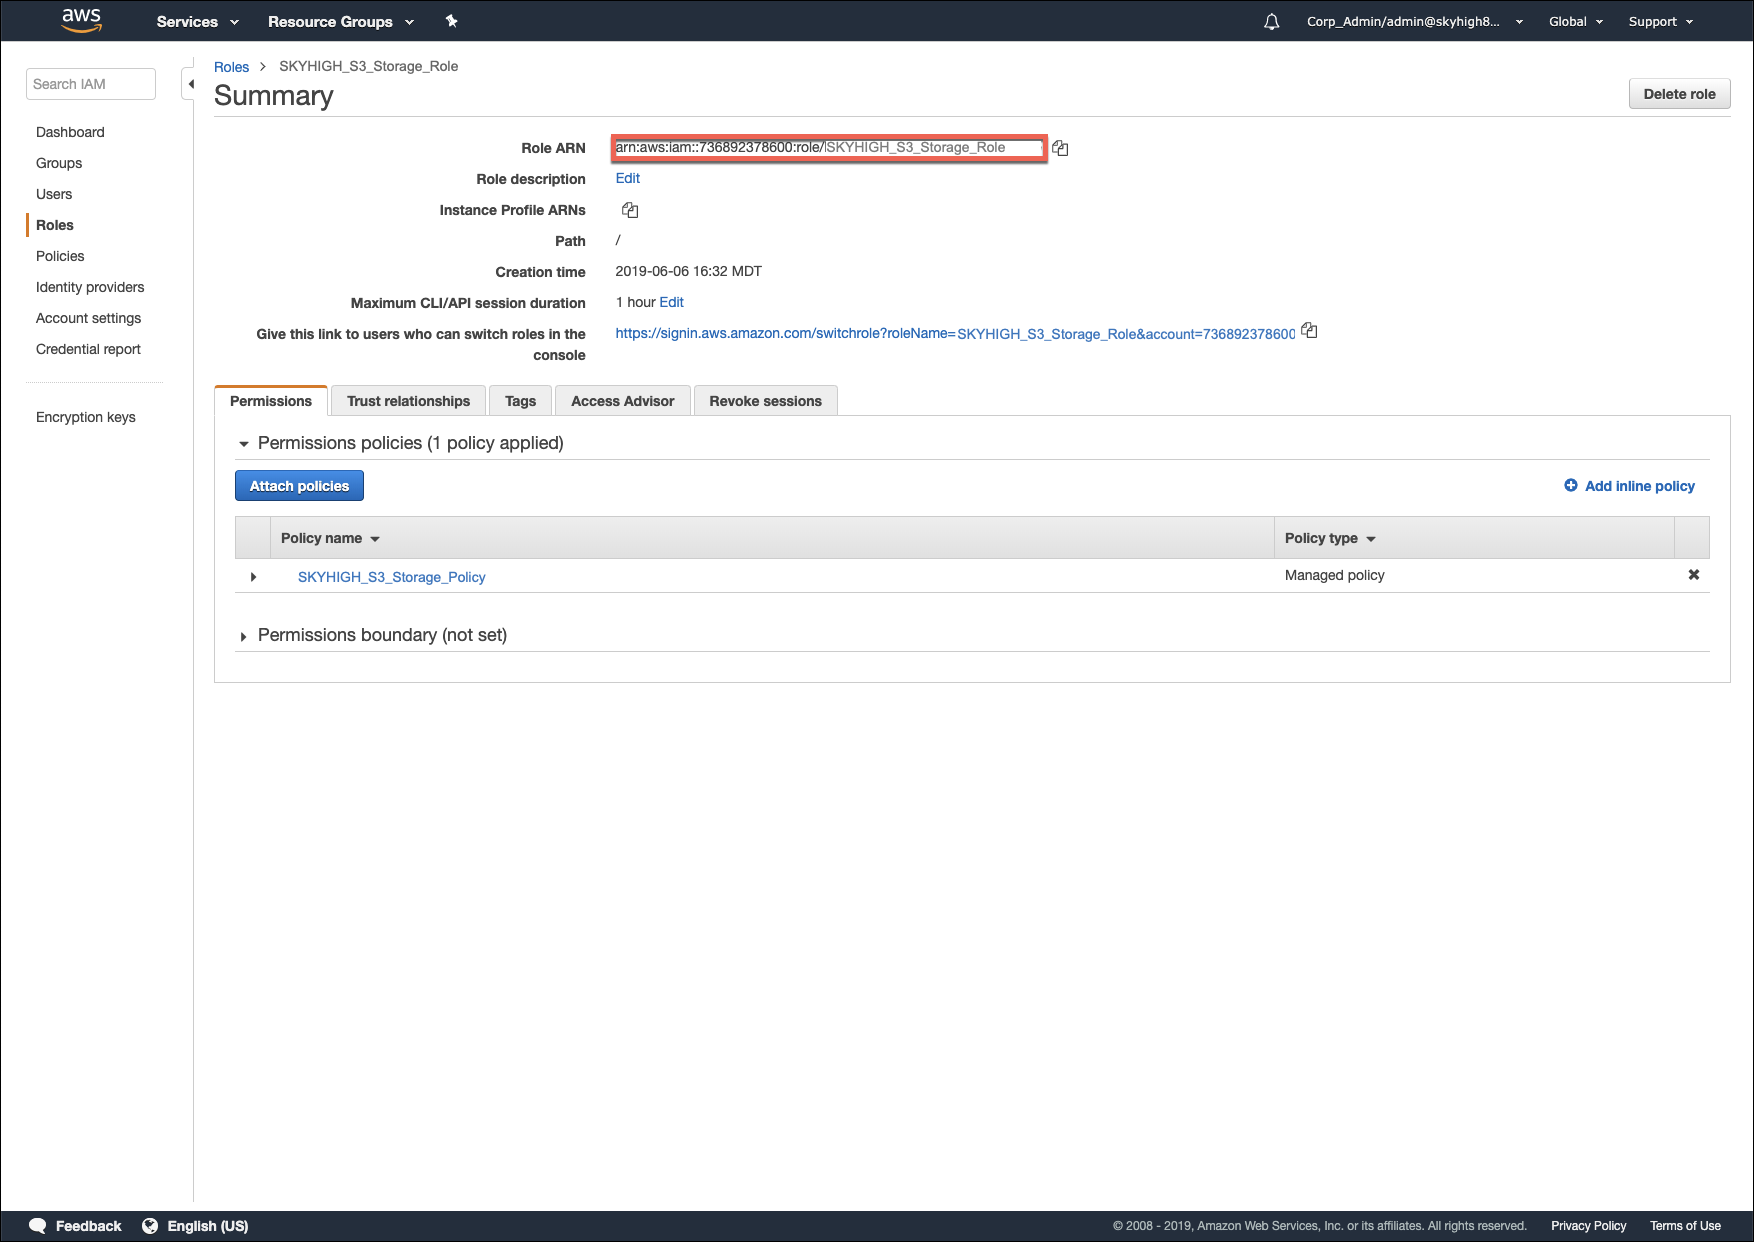
- From the AWS Roles page, select SKYHIGH_S3_Storage_Role.
- Copy the Role ARN to the clipboard.
- In Skyhigh CASB on the Policy Settings > Data Storage tab, enter the AWS S3 Bucket name.
- Enter the AWS Role ARN.
- Select the Region from the menu where the S3 bucket was created.
- Click Test Connection, and look for the success notification.
IMPORTANT: If the test fails, DO NOT PROCEED. Make sure that the AWS Account ID and External ID are entered correctly in the IAM Role. Also, make sure the AWS Region is correct. For help, contact Skyhigh Support .
- When the test is successful, click Save.