Upgrade to Content Security Reporter 2.9.1
To upgrade to Content Security Reporter 2.9.1, first, make sure you are on Trellix ePO CU14 or CU15.
Then use the Upgrade Helper batch file, available at https://www.trellix.com/en-us/downloads/my-products.html
Prerequisites
If you are on ePO CU13 or Earlier
|
First, upgrade Trellix ePO to CU14 or CU15. CSR 2.9.0 and earlier does not support ePO CU14 or CU15. NOTE: If you upgrade to Content Security Reporter 2.9.1 before you upgrade ePO, you will be notified that CSR 2.9.1 is an unsupported product. |
- Go to Report Server Settings > Log sources > select all log sources and disable.
- Go to Report Server Settings > System Backup > Actions > Backup Now.
- Delete the Reporter from Registered Server.
- From the extension, remove Reporting, Common Catalog Plugin (Extensions > Shared Components)
- Also remove Analytics (Extensions > Shared Components).
If you are on ePO CU14 or Later
If you have already upgraded to Trellix ePO CU14 or later, your installed CSR will take an automatic backup every day. Continue to Upgrade to CSR 2.9.1.
You can skip the prerequisite steps if you are unable to perform them.
Issues You May Find During Upgrade
Extension Install
You may have a message saying "Unable to install extension. java.lang.IllegalStateException: A web app is already deployed at context /mesa".
How to Fix:
Navigate to Extensions > Shared Components > Delete Common Catalog Plugin and Analytics and then try to install CSR 2.9.1 extension.
Report Server Settings not available after upgrade to CSR 2.9.1
This issue arrives when you have not used CSR_Upgrade_Helper.bat file or it batch file was executed without administrator mode, it fails to copy required keystores back to the folder Content Security Reporter\reporter\jboss\standalone\configuration.
How to Fix:
- Navigate to Content Security Reporter\reporter\jboss\standalone\configuration.
- If you have already upgraded from 2.7/2.8/2.9 version then you should see csr.keystore and csr.keystore.old file.
- If you have already upgraded from 2.6 or earlier version then you should see csr.keystore and keystore.jks file.
- If it is not there then, you can copy it manually from oldCSR_config_backup folder (only if you have used CSR_Upgrade_Helper.bat for upgrade).
- Delete all files in Content Security Reporter\reporter\conf\backup\ and copy backup.xml from oldCSR_config_backup folder to here.
- After copying key store and backup.xml, restart the CSR service.
- In ePO™ Console, navigate to Registered Servers > Report Server > Actions > Edit > Details > , test settings.
- If is successful then you should be able to access Report Server Settings page.
If You Already Upgraded to 2.9.1 and you want to Upgrade ePO to CU14 or CU15 , it will show incompatible for CSR 2.9.1
How to Fix:
- In ePO™ Console navigate to Registered Servers > Select Report Server > Actions > Delete.
- Navigate to Extensions > Remove > Reporting.
- In Shared Components, remove Analytics.
- Upgrade ePO to CU14 or CU15.
- Install CSR 2.9.1 extension.
- Register CSR server.
Upgrade to CSR 2.9.1
With Batch File
| IMPORTANT: When you run the CSR_Upgrade_helper.bat file, right-click and run as Administrator. |
- On the system where CSR is currently installed, create a folder named CSR291.
- Download these three files into this folder:
- CSR_291_Win64.exe
- CSR_291_With_Help.zip
- CSRUpgrade_helper.bat
- Open the Trellix ePO console and keep it open.
- IMPORTANT: Right-click the CSR_Upgrade_helper.bat file and run as Administrator.
- The script will create the folder oldCSR_config_backup in the current directory (CSR291).

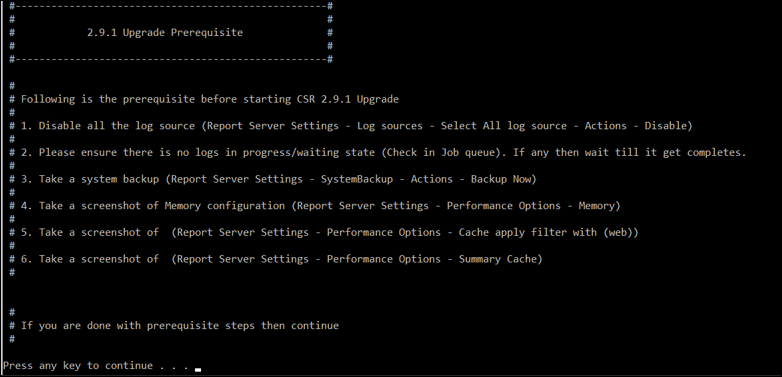
- Perform the steps in the following prerequisite section before you proceed to the next step. If you skip this step, you could lose incoming, processing, and waiting jobs.
- Disable all log sources.
- Make sure that no logs are in progress/waiting.
- Take a system backup.
- Take a screenshot of the Memory configuration.
- Take a screenshot of Cache apply filter with (web).
- Take a screenshot of Summary Cache.
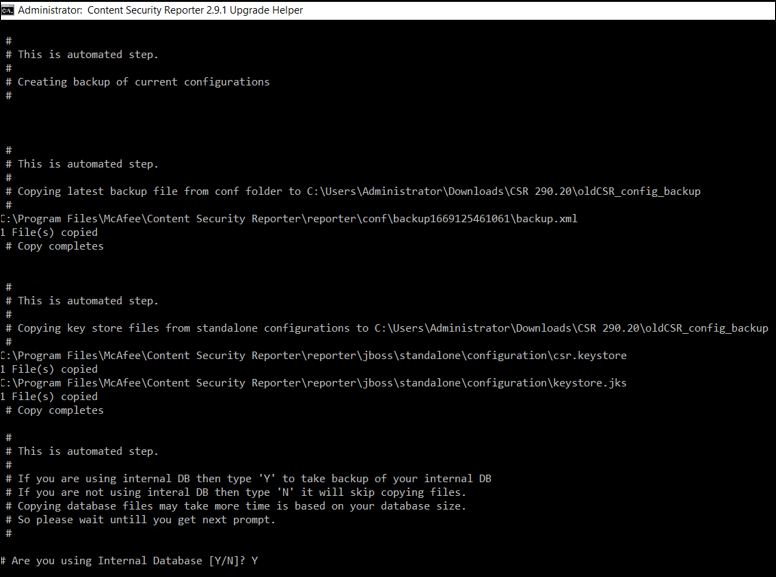
- The following steps are automated as the script runs. It will copy the latest backup.xml and required keystores from the CSR directory to the backup folder. Manual intervention is not required until you see thed question, "Are you using Internal Database [Y/N]?"
- If you are using an internal database, enter Y. The script will make a backup of your internal database.
- If not, enter N.

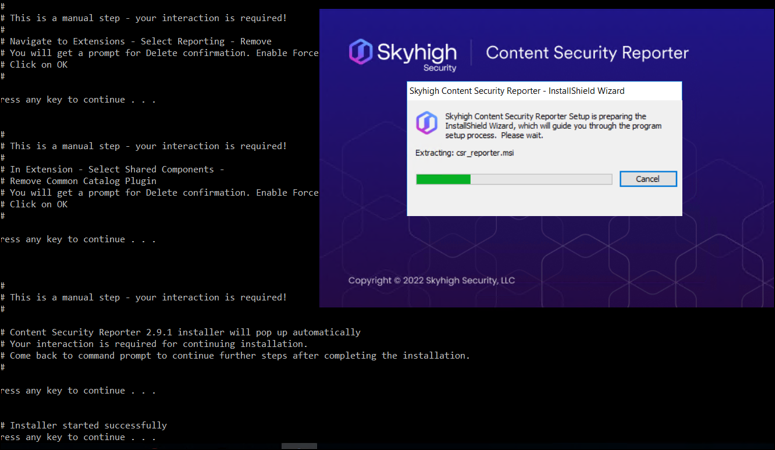
- Next, manually delete the Report Server from Registered Servers.

- Then navigate to Extensions, select Reporting (from the right-hand side), and click Remove.

- The CSR 2.9.1 installer will start.

- The installer will load.
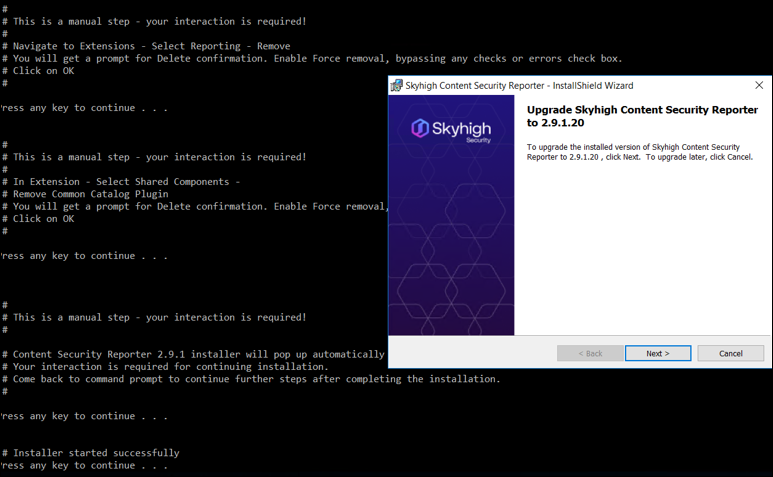
- Click Next to upgrade Content Security Reporter.
- Wait until the installation is complete. Click Finish. Then click Enter to continue.
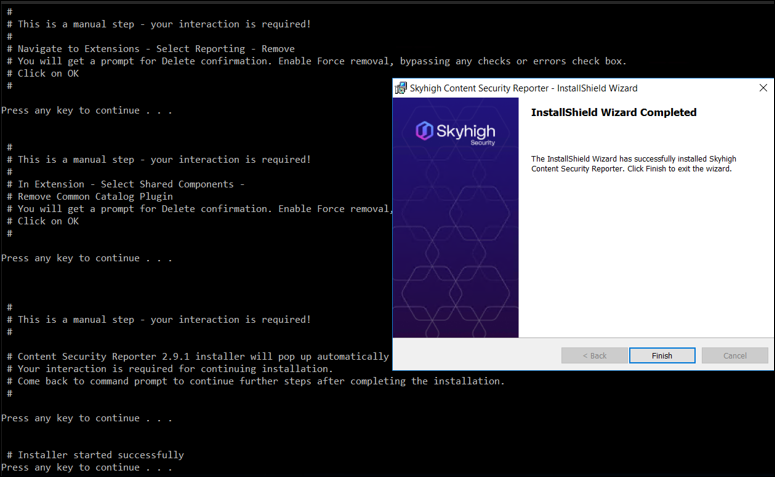
- Wait for the confirmation verification before proceeding to the next step.

- This automated step stops and starts the Content Security Reporter default database.
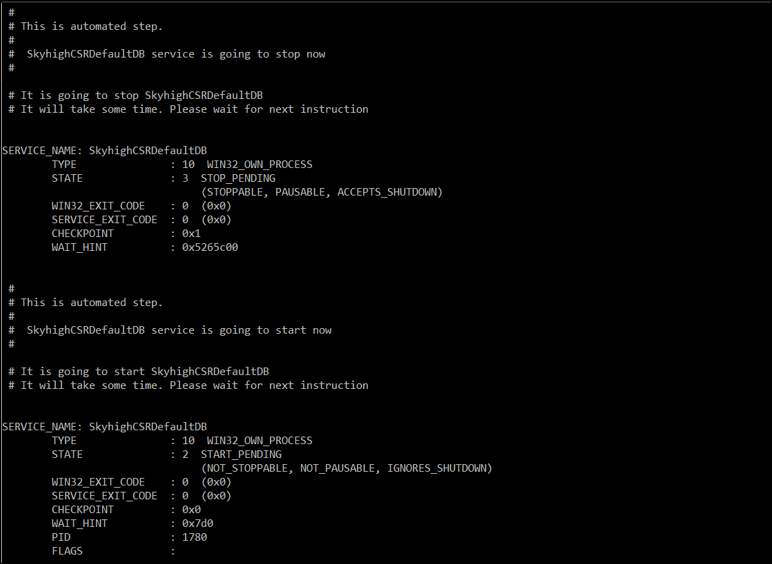
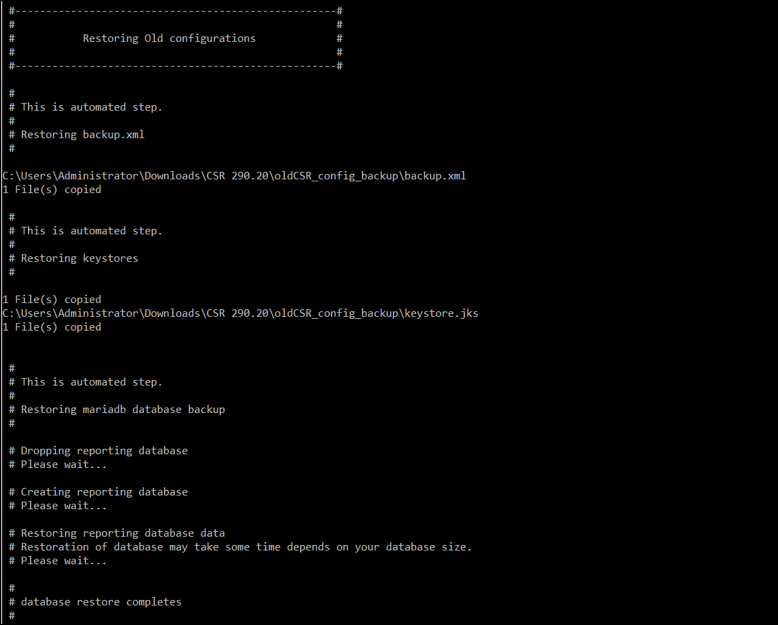
- When Content Security Reporter restarts, the backup configuration restore starts.
First it copies backup.xml into ..\conf\backup folder.
Next it copies the keystore files into ..\configuration folder.
Finally, it performs the internal database restoration, if you entered Y for internal DB. It deletes the database, creates the database, and then restores the data into it. This step may take some time depending on your database size. Wait until you see the next instruction. If you interrupt the process, it may cause database corruption.
NOTE:
- For CSR 2.6 or earlier, you will see only keystore.jks file.
- For CSR 2.7 and later, you will see keystore.jks and csr.keystore.old file.
- Once the DB data is restored, both services are stopped and started.
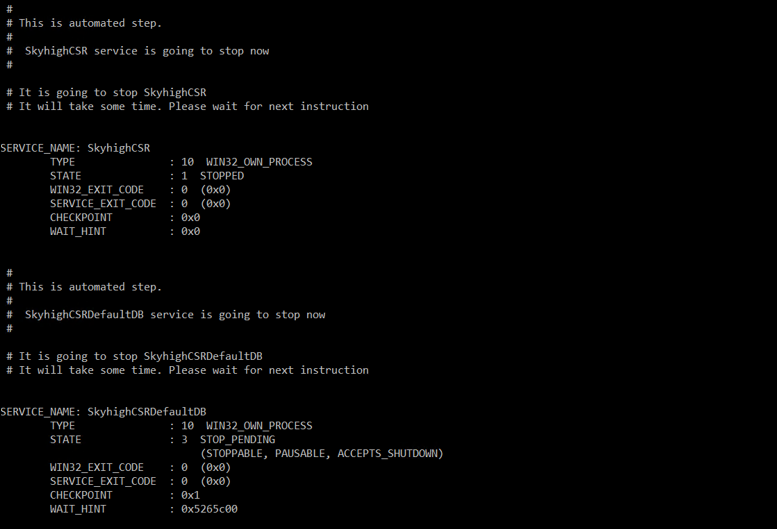
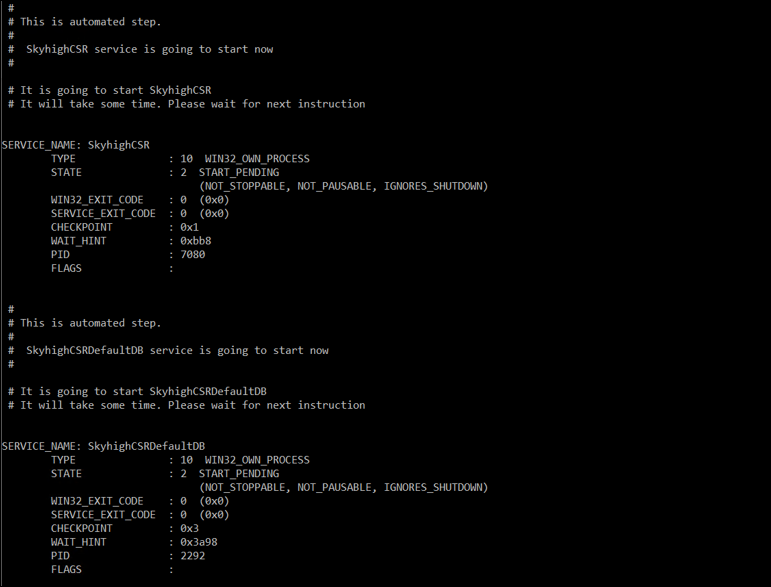
- Now you need to perform a few manual post-installation configurations. Install the latest Extension.

- Then register the Report Server.
If you need to reset the CSR passkey, see Reset the CSR Passkey.

- Once the backup restore is complete, go to the Report Server Settings > Log sources > Select all log sources > Actions > Enable.

Without Batch File
Below are the steps you need to follow to Upgrade to CSR 2.9.1 manually and without Batch File.
- Open ePO console navigate to Report Server Settings > Log sources > select all log source > Actions > Disable.
Wait till all the jobs inside Log sources > Job queue status is set to successful
- Navigate to System Backup > Actions > Backup now.
- Copy latest backup.xml from ..\reporter\conf\ (latest backup timestamp folder) to safe location.
- Copy csr.keystore from ..\reporter\jboss\standalone\configuration\ to safe location.
- In ePO console navigate to Registered Servers > Select Report Server > Actions > Delete.
- Navigate to Extensions > Select Reporting > Remove.
- In Extensions, navigate to Shared Components > Remove (following components in the same order):
- Common Catalog Plugin.
- Analytics.
- If you are using internal database then please take SQL backup with following steps, If not jump to step 9:
- Open command prompt and navigate to ..\Content Security Reporter\reporter\mariadb\bin\.
- Execute.
-
mysqldump.exe -udba -pdba --port=9129 reporting > reporting.sql
which will create reporting.sql in bin folder in case of space issue in current location then just specify the other location as below
mysqldump.exe -udba -pdba --port=9129 reporting > E:\reporting.sql
-
-
Do not interrupt let it complete the running process.
-
Once is completed, open file explorer navigate to ..\Content Security Reporter\reporter\mariadb\bin\ copy reporting.sql to safe location.
-
Uninstall CSR, verify no folders/files related to old CSR is available in installed drive.
-
Install CSR 2.9.1, which will ask for install location, passkey (provide your old passkey in case if you have forgotten old passkey then provide any and follow Reset the CSR passkey ).
-
Once the installation is complete, in file explorer navigate to ..\reporter\conf\ create a backup folder.
-
Copy backup.xml into ..\reporter\conf\backup\ folder.
-
Copy csr.keystore.old into ..\reporter\jboss\standalone\configuration\ folder.
-
In case if you are using internal DB follow the below process:
-
Open command prompt and navigate to ..\Content Security Reporter\reporter\mariadb\bin\.
-
Execute following statements one after the other:
-
mysql.exe -udba -pdba --port=9129 -e "DROP DATABASE reporting;"
- mysql.exe -udba -pdba --port=9129 -e "CREATE DATABASE reporting;"
-
mysql.exe -udba -pdba --port=9129 reporting < "folder_path>\reporting.sql"
replace <folder_path> in following statement with reporting.sql backup folder path.
Note: this will take time based on your database size so please wait until it complete.
-
-
Restart SkyhighCSR service.
-
-
In ePO console navigate to Extensions, click on Extensions > install CSR 2.9.1 extension.
- Navigate to Registered Servers > New Server > Select Report Server > Provide any name > click on Next > Provide CSR IP and enter passkey, click on Test settings if it returns successful click on Save.
- Now you can access Report Server Settings page. Navigate to Database page, verify database status it should be in connected state. Then navigate to Log sources, select all log source > Actions > enable. After enabling it should start receiving/collecting logs from respective appliances.
