Access Private Applications from iOS Device
Skyhigh Private Access allows you to extend protection to mobile devices using the Skyhigh Web Security Gateway Service (WGCS), based on Cloud Application Control policies. After you set up mobile devices, the device redirects HTTP/HTTPS traffic to WGCS for filtering. Settings that WGCS uses to filter HTTP/HTTPS traffic are configured in Cloud Application Control policies.
The manual setup for the iOS app will redirect all traffic, both internet and private applications to the Cloud. To support a split VPN and redirect only private app traffic to the SSE cloud, see Step 6
You can create a VPN on iOS devices in the following ways:
- MDM solution: Create a VPN profile and push it directly to the iOS devices using MDM. Supports two configurations:
- mobile.skyhigh.cloud: This redirects all traffic (Internet traffic and Private traffic) from the device to the cloud.
- pa-mobile.skyhigh.cloud: This redirects only Private app traffic to the cloud. The isolate feature is not supported with this config.
- Manual Setup: Upload user identity(.p12) file in the app which creates VPN. This redirects all traffic from the device to the cloud.
- Skyhigh Client app supports both iPhone and iPad (Minimum supported version is iOS 13.0)
- Non-standard HTTP/HTTPS port support is available only for Private apps.
-
Internet traffic and Private traffic supports for HTTP and HTTPS protocols only.
- Make sure you uninstall the older version of the app. Install the latest version and reconfigure all settings.
- DNS resolution is always done by SSE DNS server in the cloud for both mobile.skyhigh.cloud and pa-mobile skyhigh.cloud configuration.
Set Up iOS Device to Access Private Applications
You will need to complete the following steps to set up iOS devices to access private applications:
- Step 1: Generate Certificate Authority(CA) and User Identity(.p12) certificates
-
Create a self-signed CA file and use the same file to generate the User Identity files and sign those.
NOTE: You can create one user identity file per user or device.
- ▼ Generate Certificates using XCA tool
-
You can generate the certificate using the XCA tool.
- Download and install the XCA 2.4.0 tool.
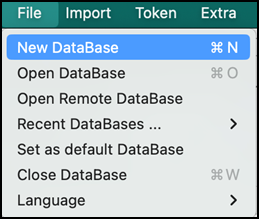
- Create a New Database, go to File > New Database, and enter the password to save it.
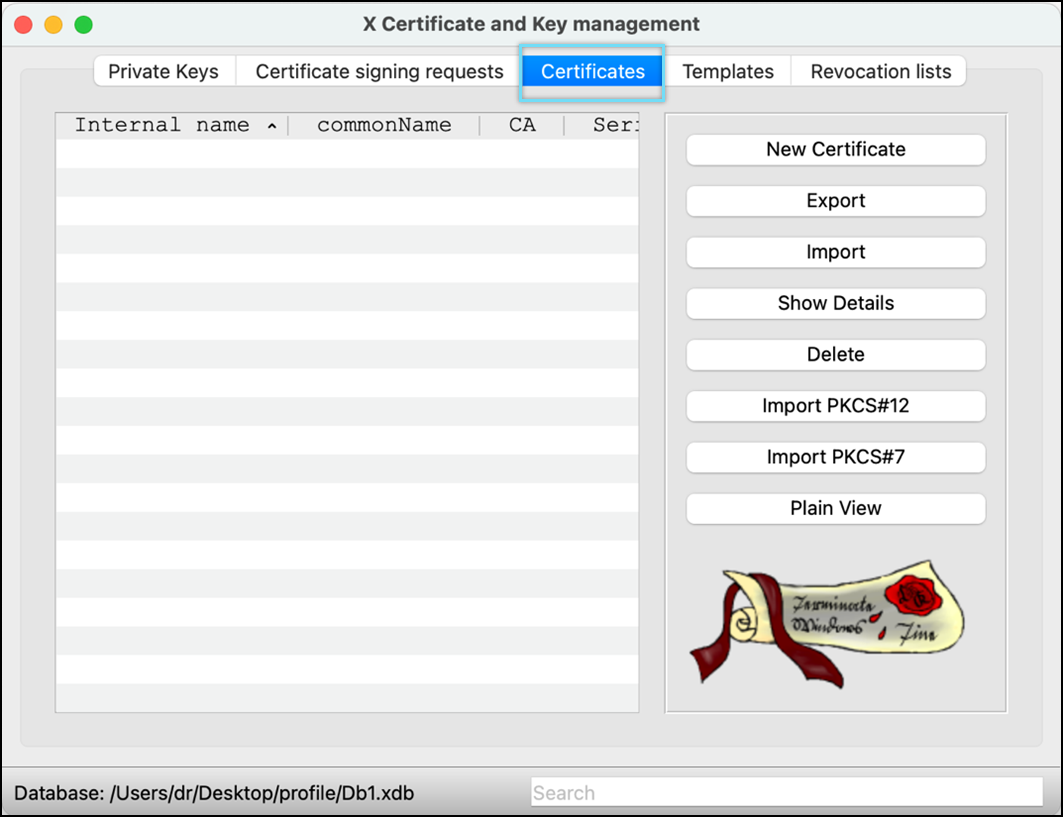
- Click the Certificates tab.
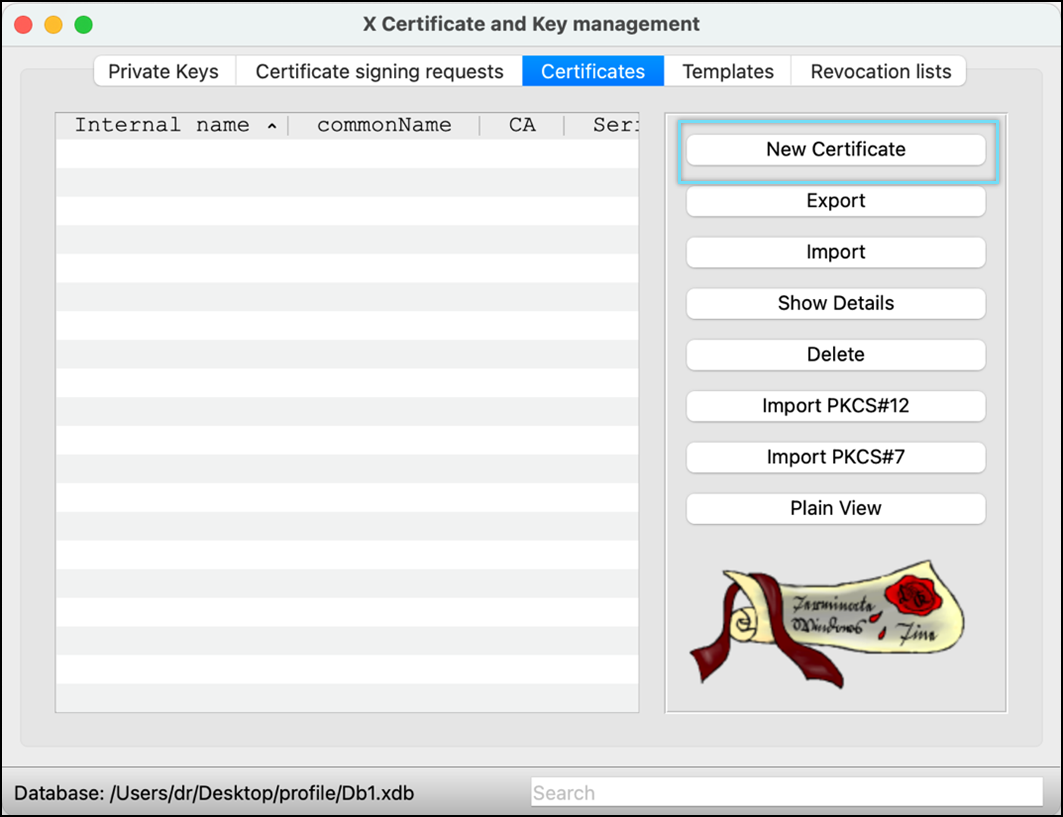
- Click New Certificate.
- Select Create a self signed certificate as the signing option.
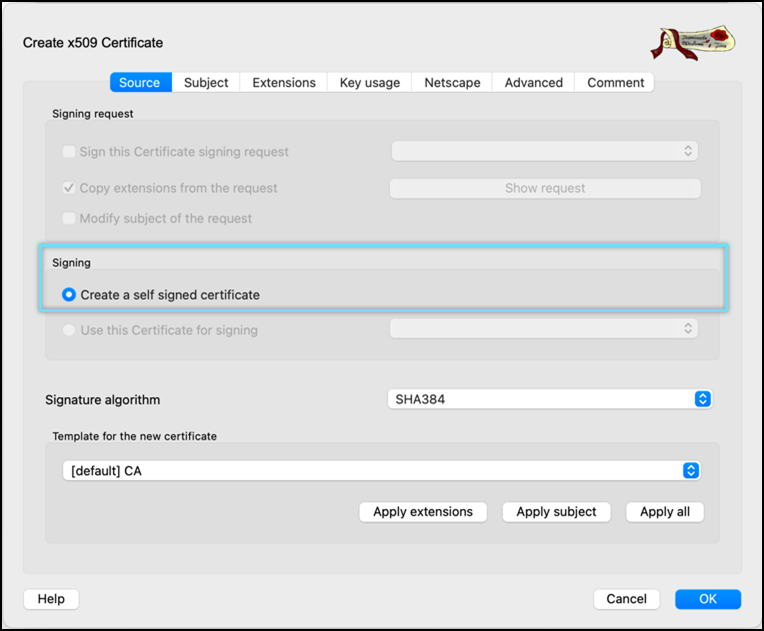
- Select Signature algorithm as SHA384.
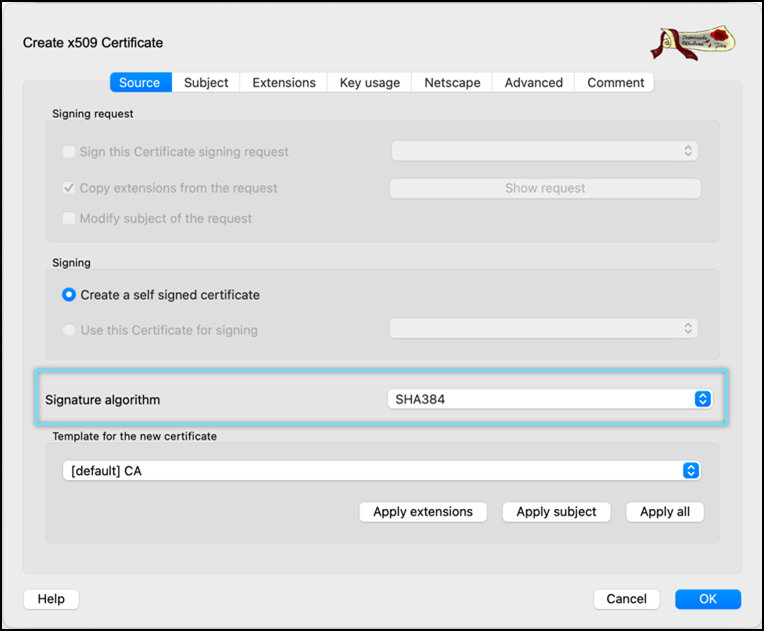
- Select Template for the new certificate as [default] CA.
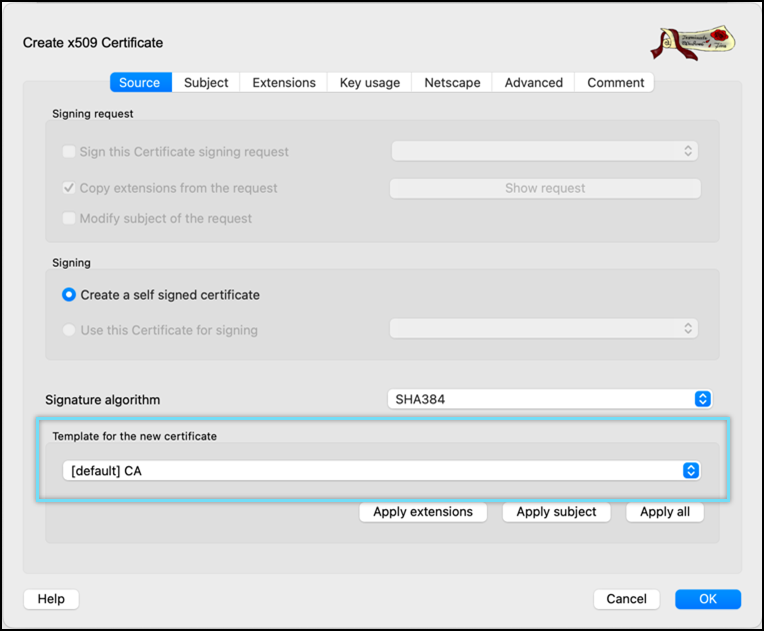
- Click Apply extensions and Apply subject.
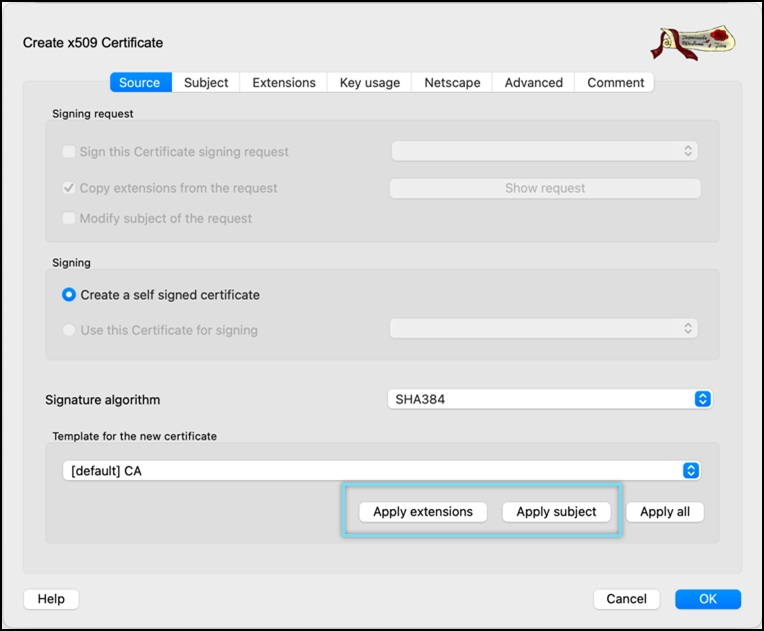
- Click the Subject tab.
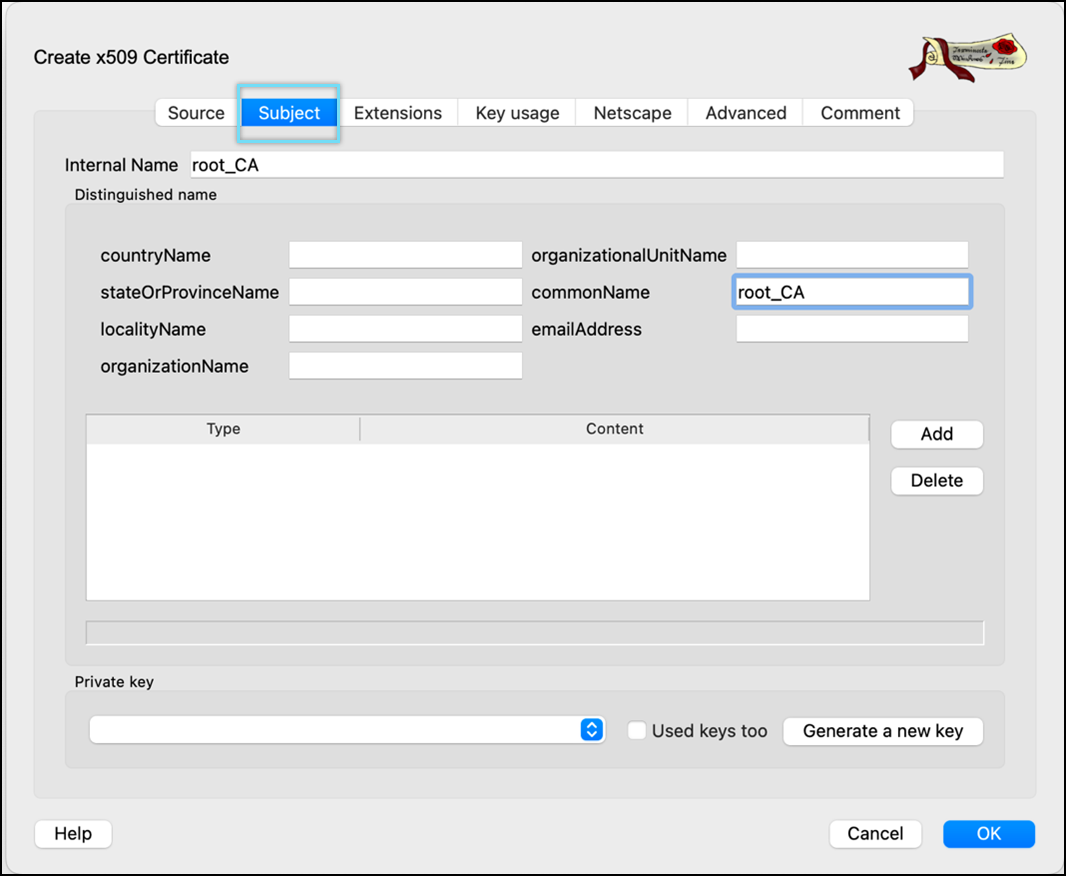
- Enter Internal Name and commonName.
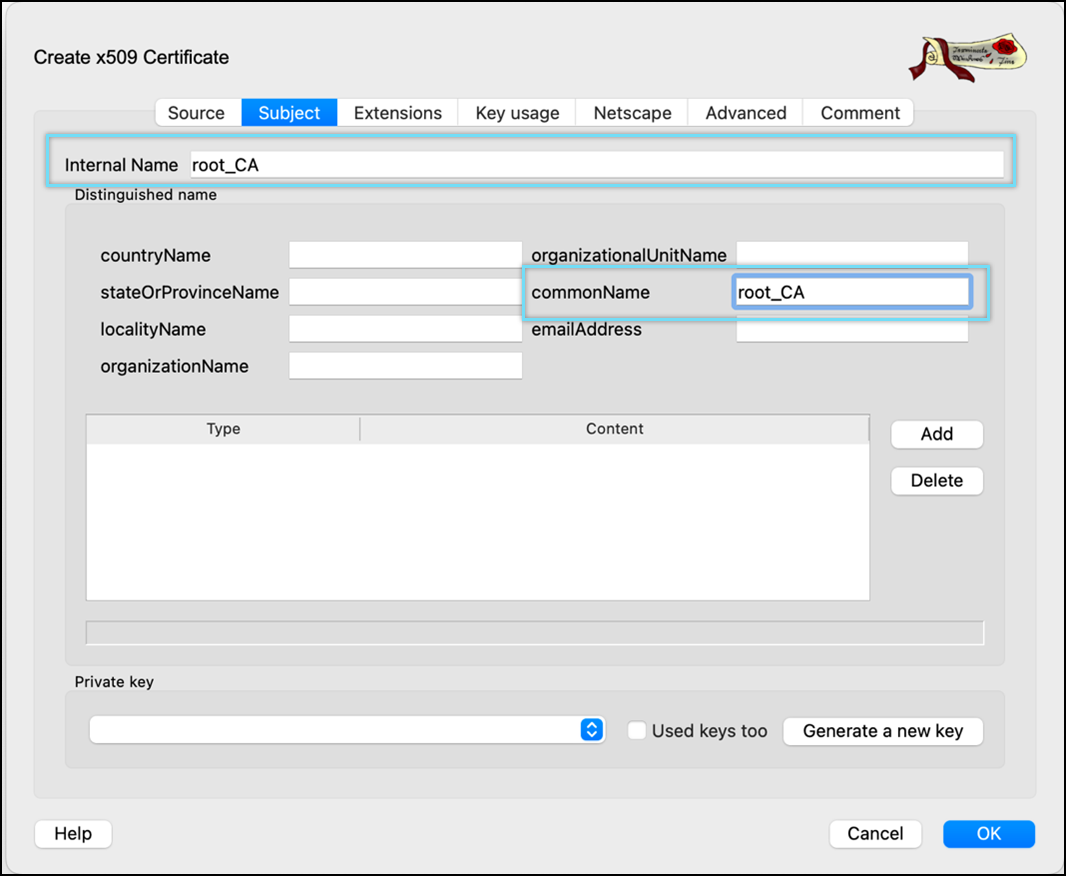
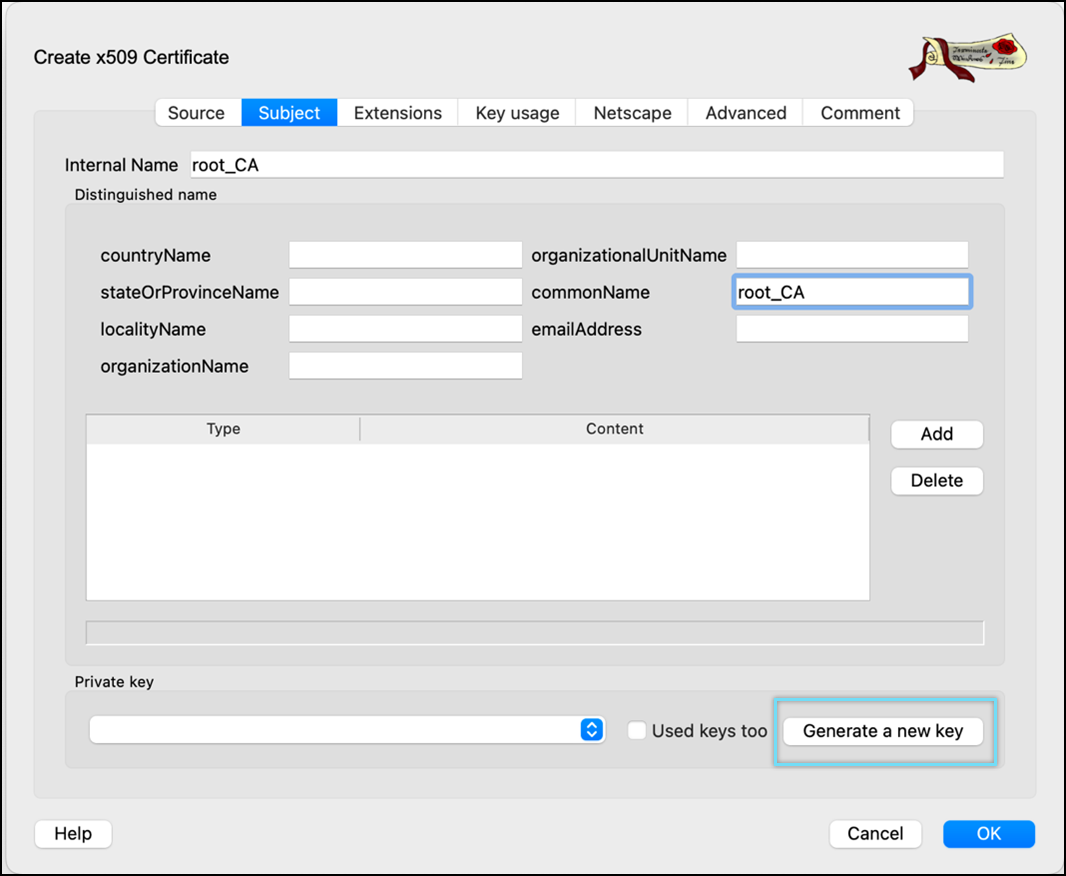
- Click Generate a new key.
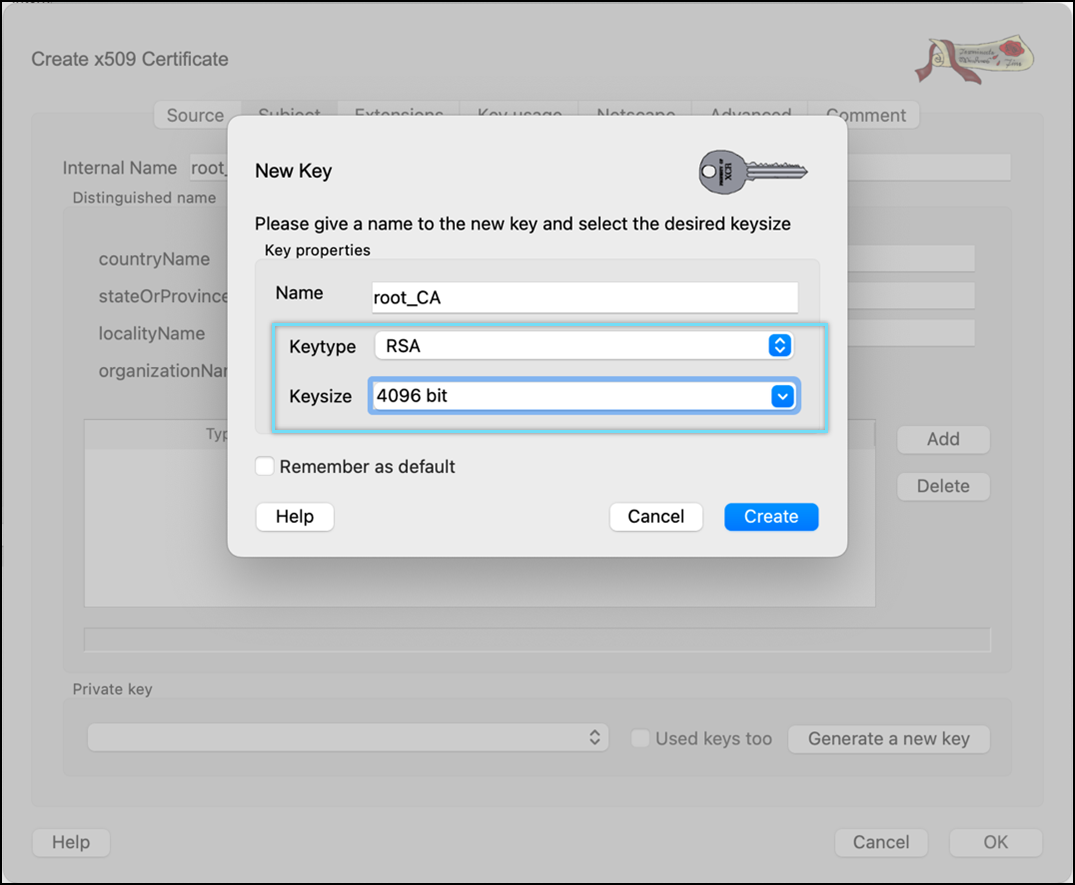
- Select keytype as RSA and Keysize as 4096 bit.
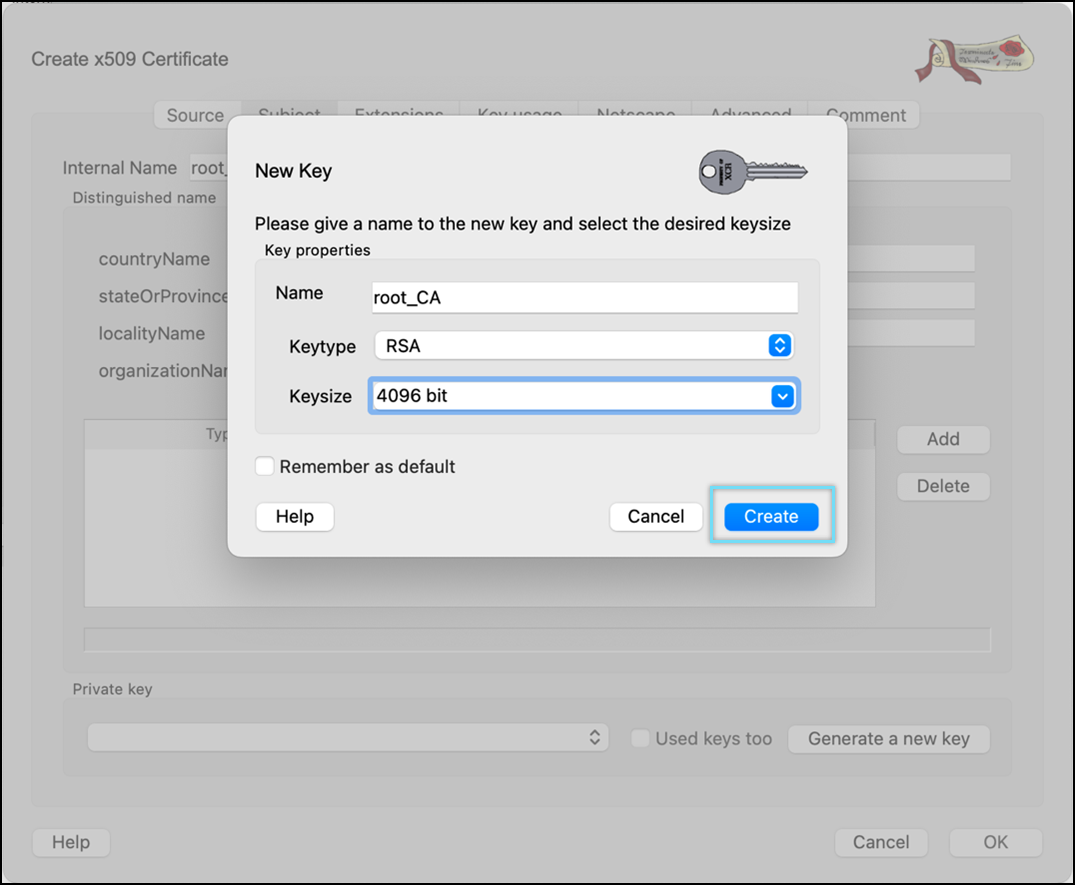
- Click Create.
Key created message window appears.
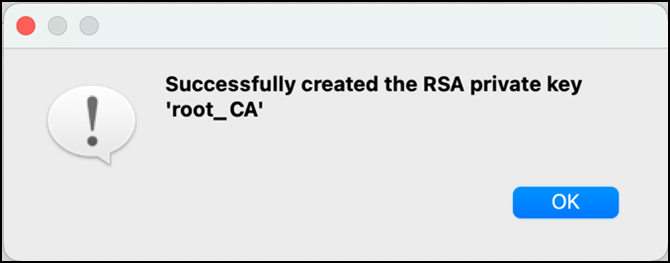
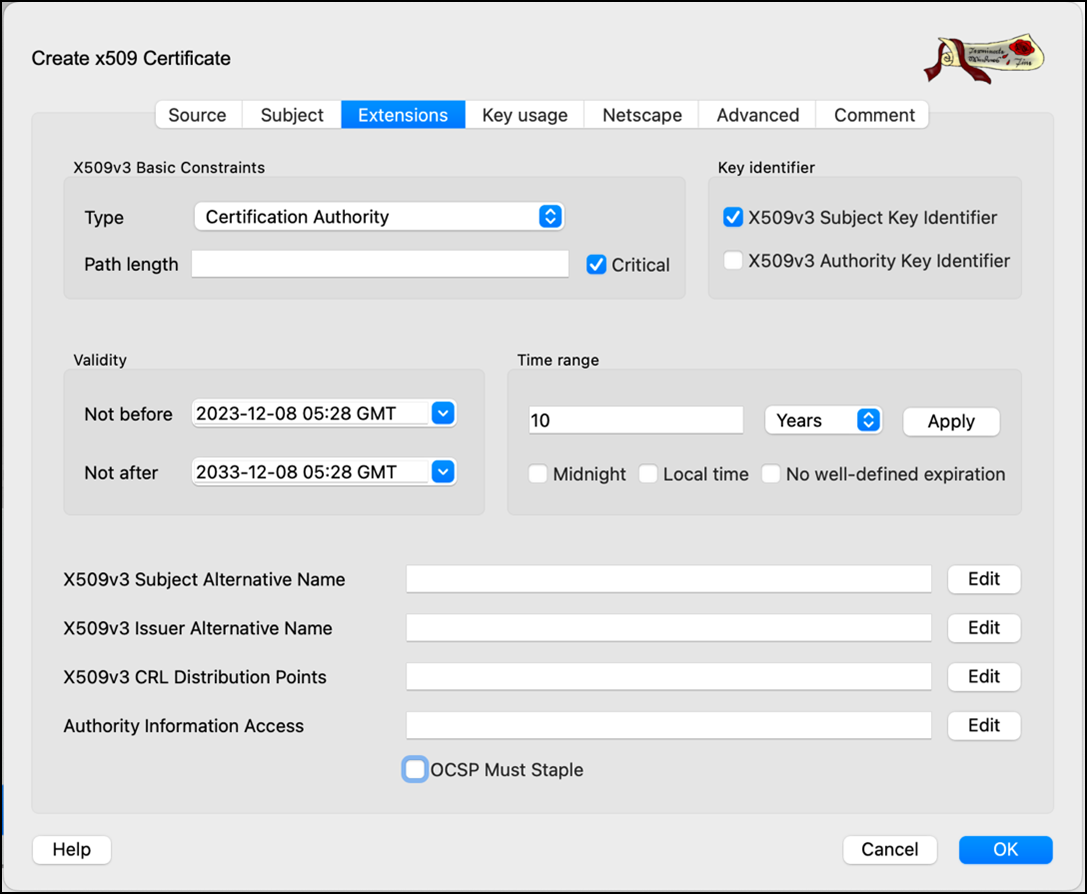
- Go to the Extension tab and retain all the settings as is.
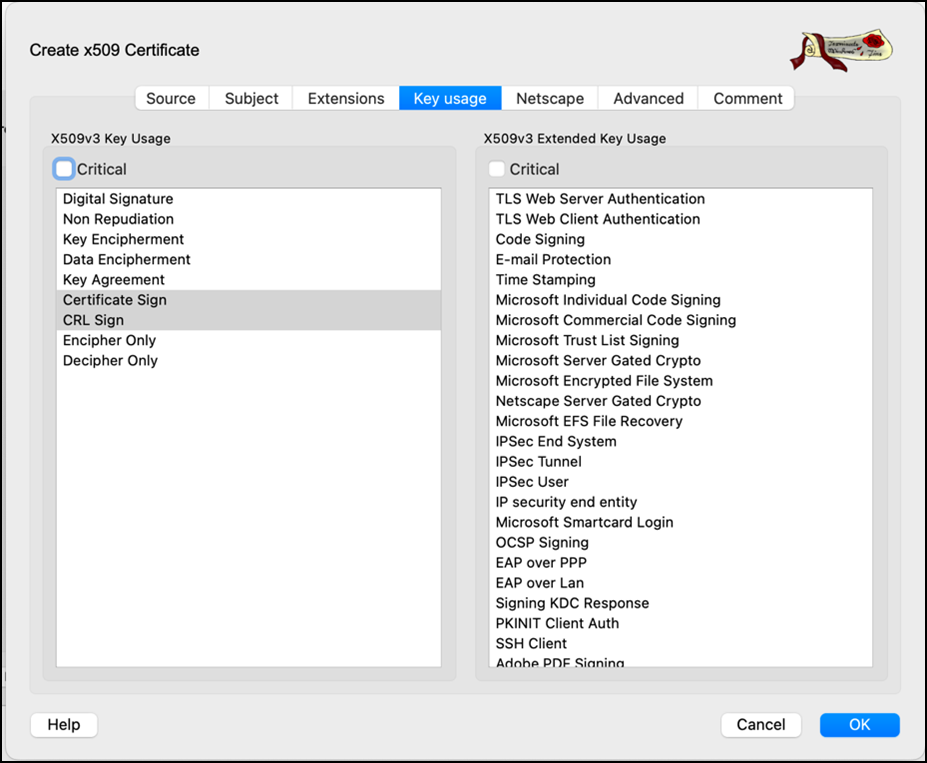
- Go to the Key Usage tab and retain all the settings as is.
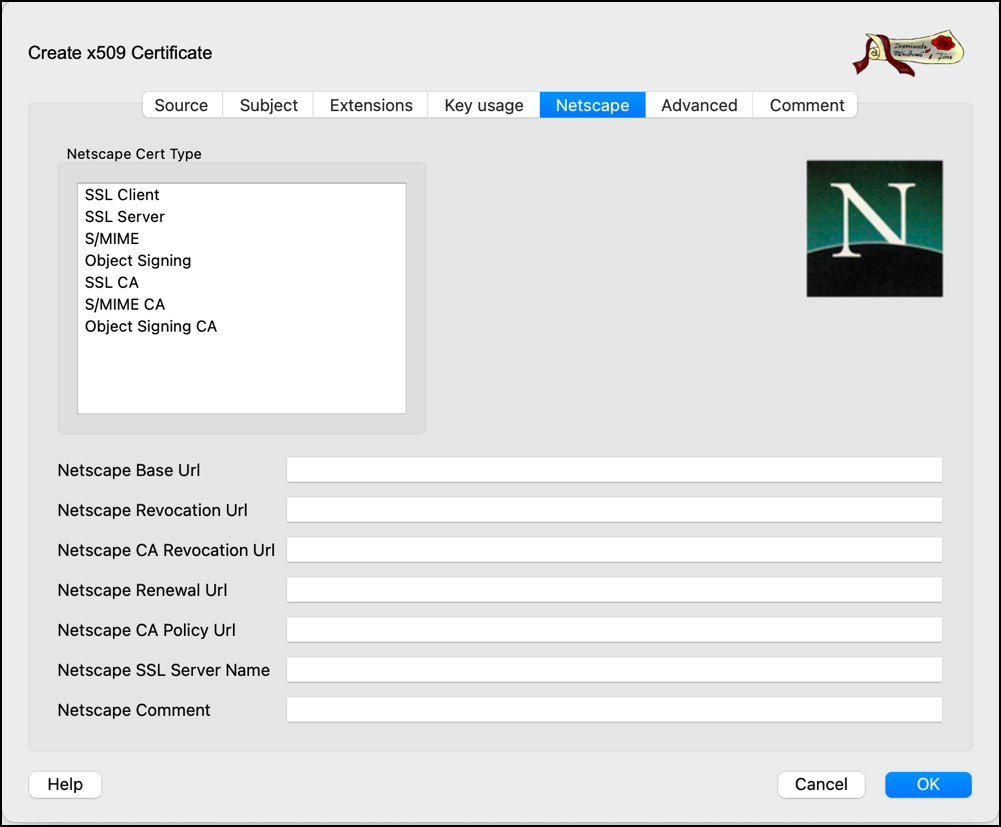
- Go to the Netscape tab and remove any selected options.
- Go to the Advanced tab and review all the information.
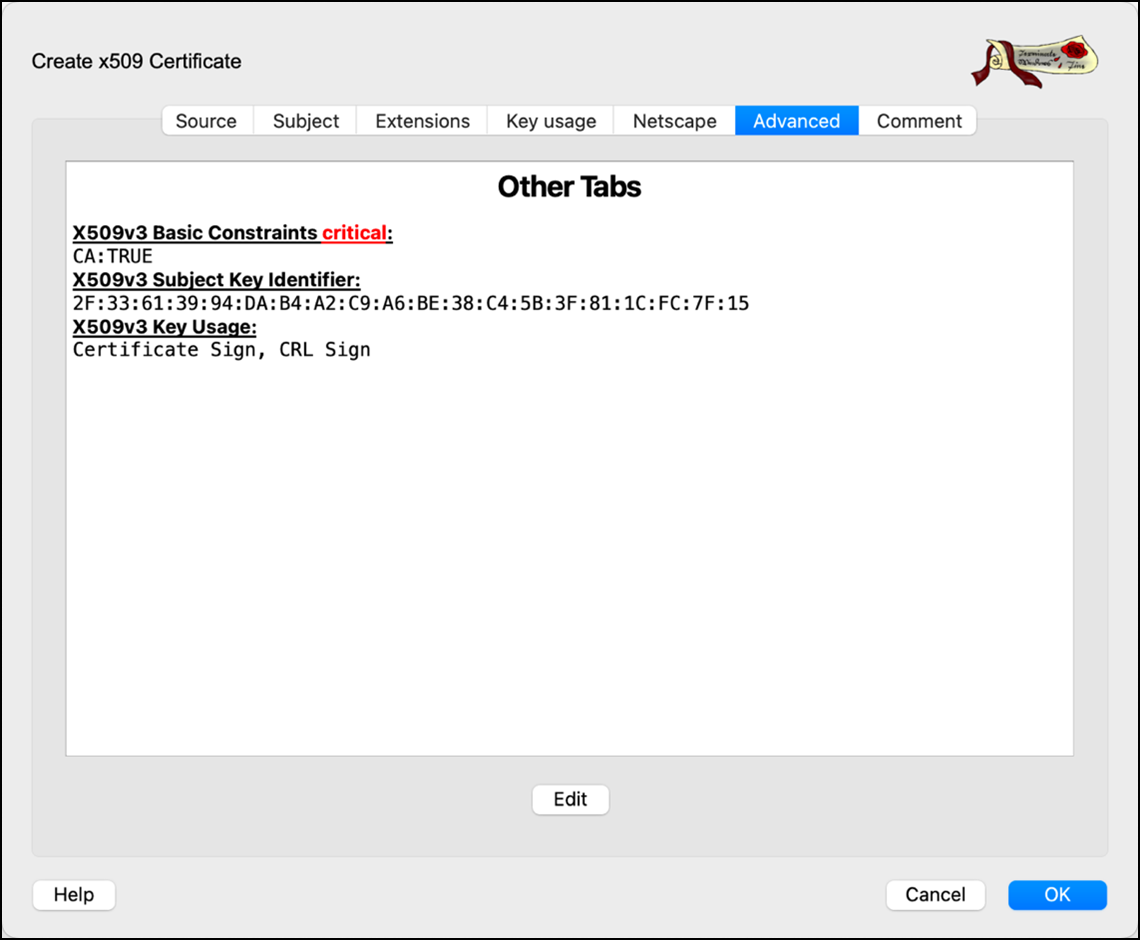
- Click OK to create the CA certificate.
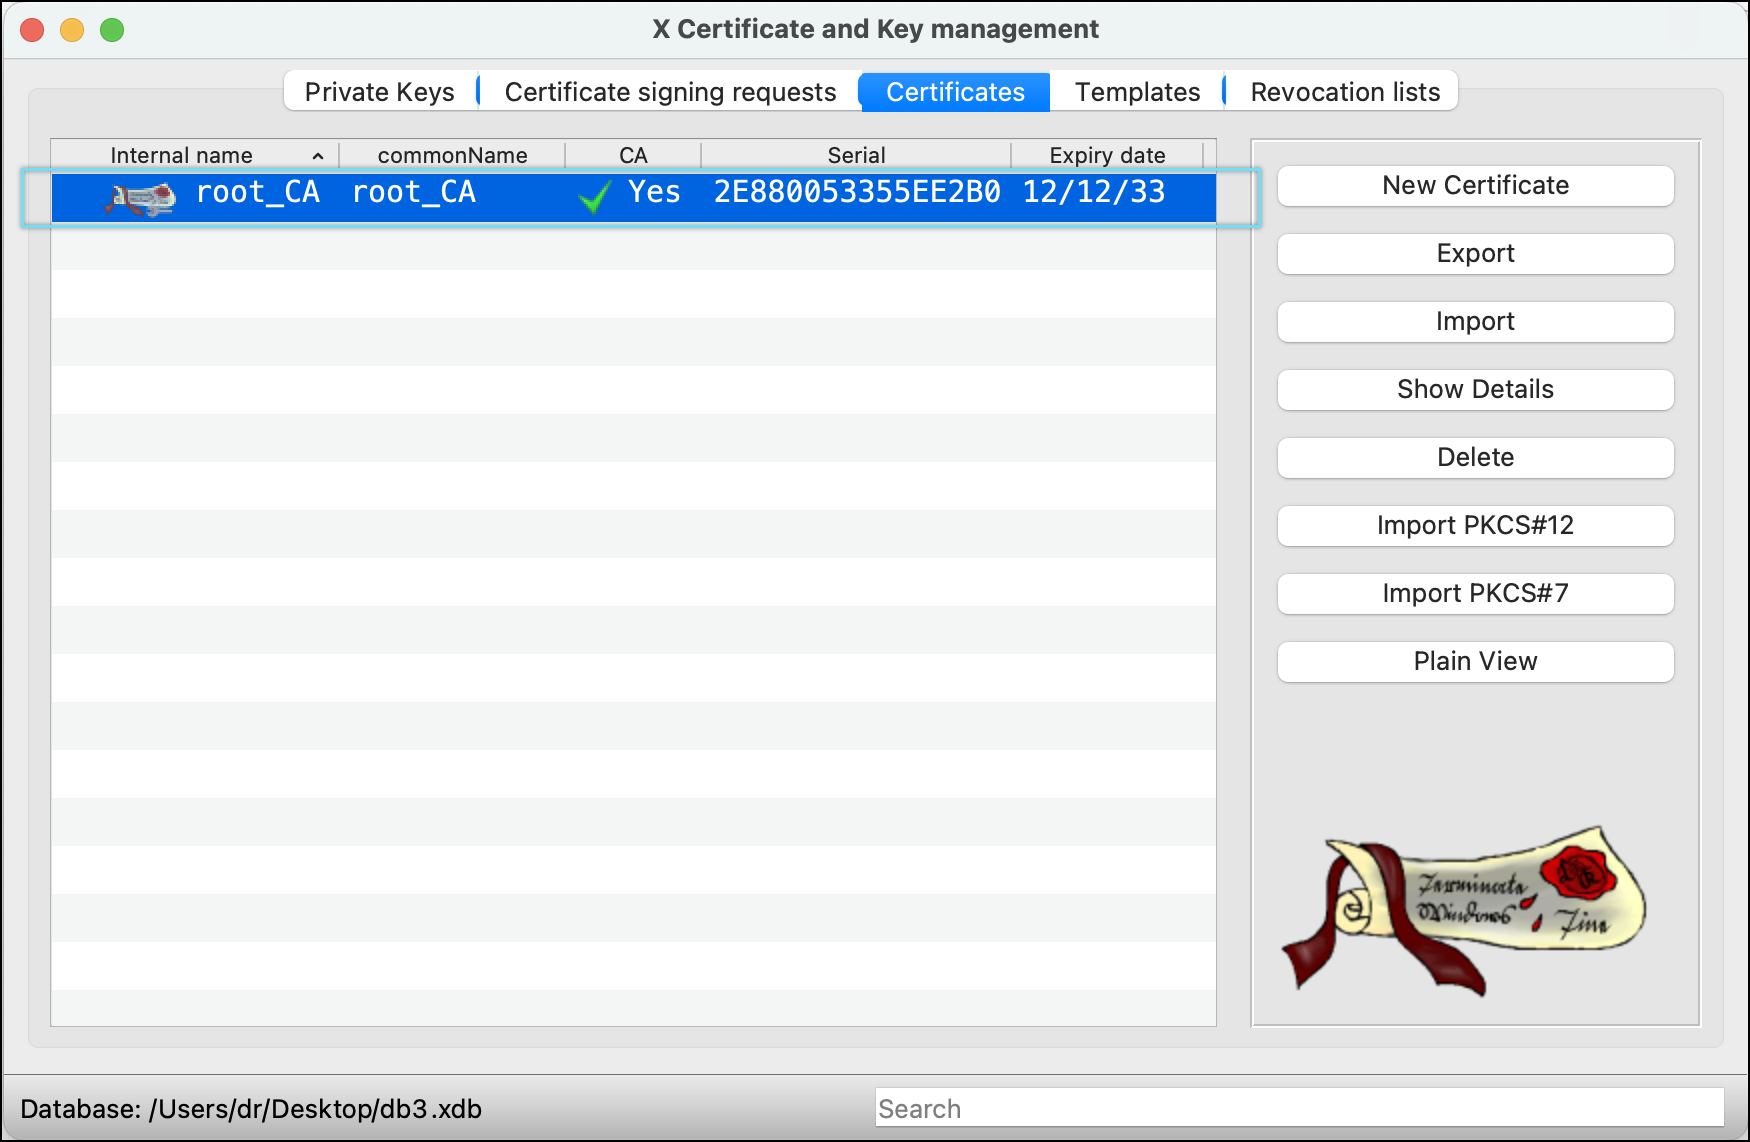
- Click the Certificates tab.

- Select the recently created root_CA certificate.
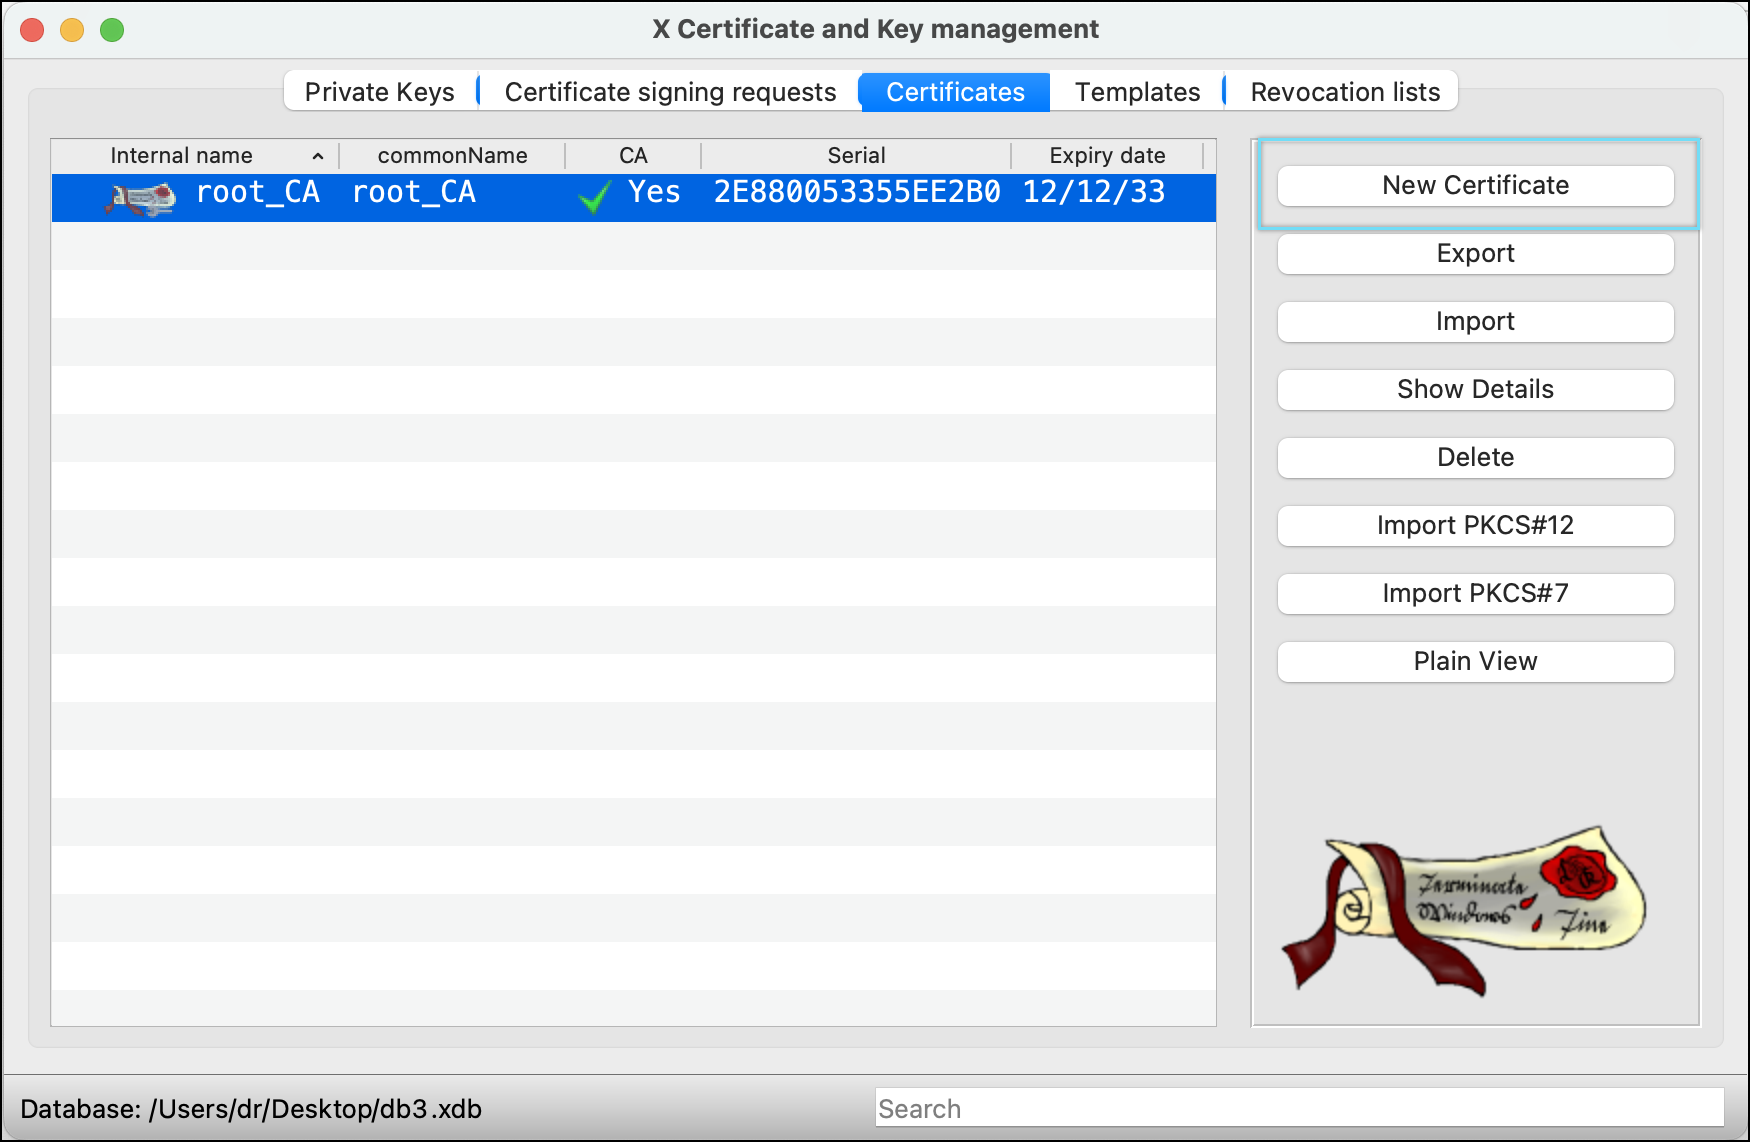
- Click New Certificate.
- Select the previously created CA(root_CA) certificate as the signing option.
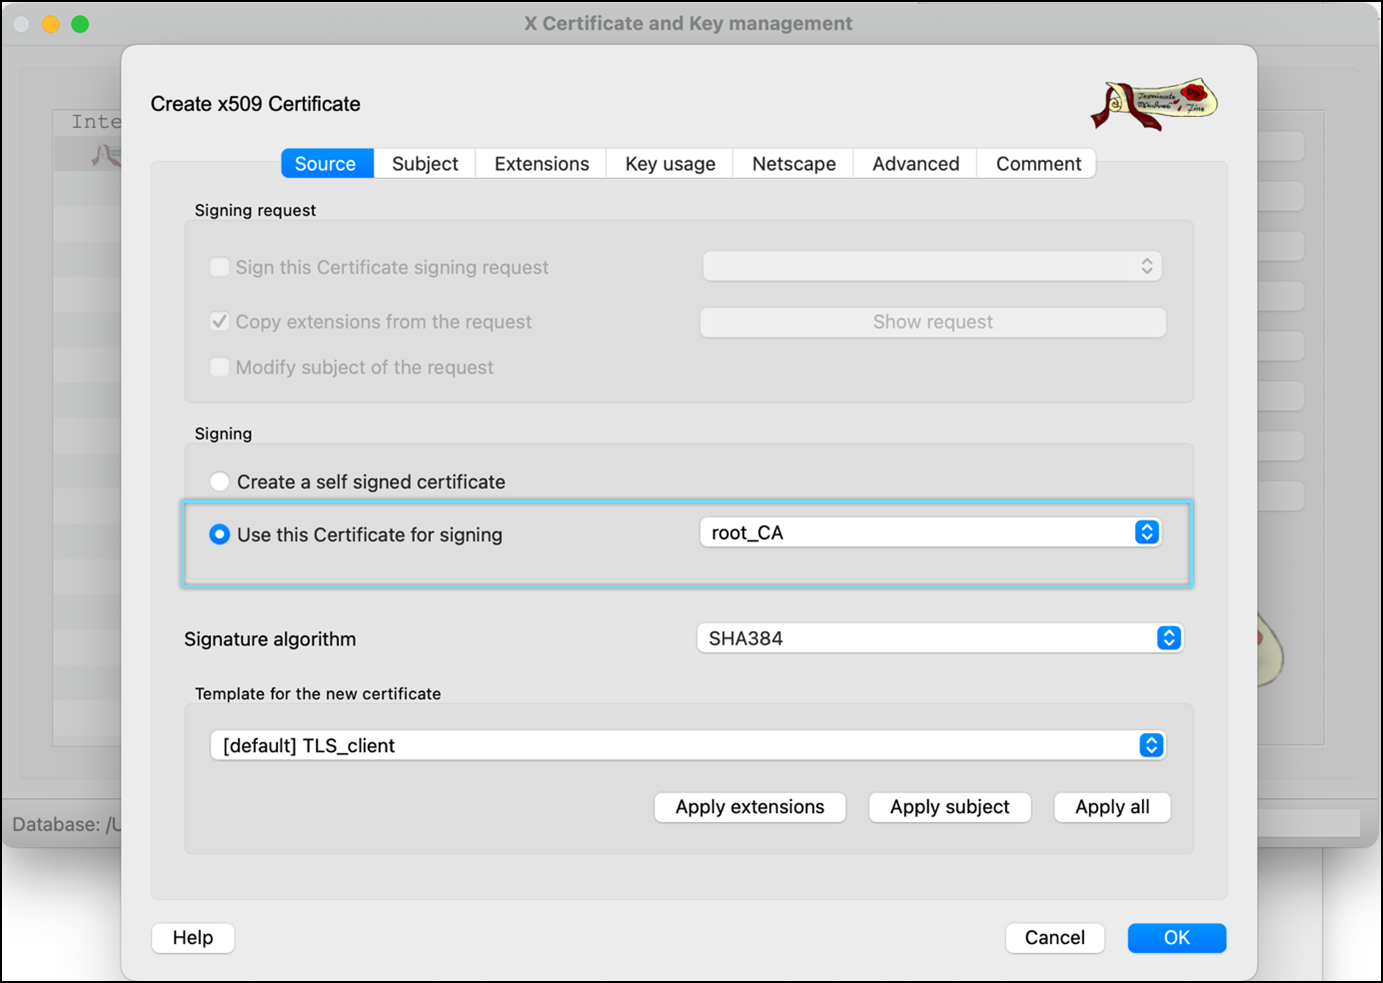
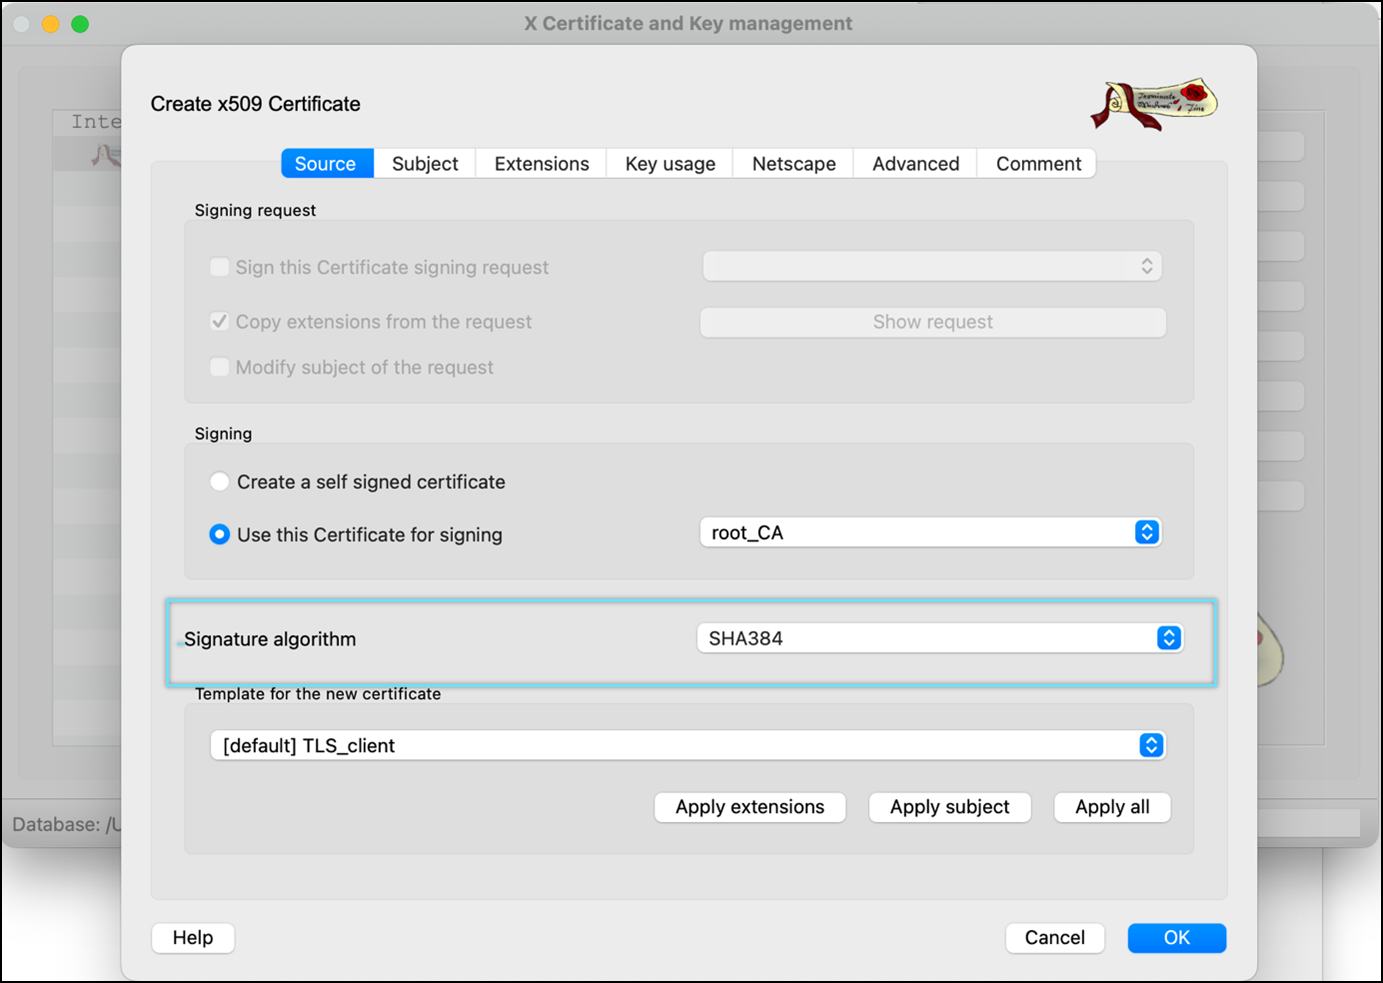
- Select Signature algorithm as SHA384.
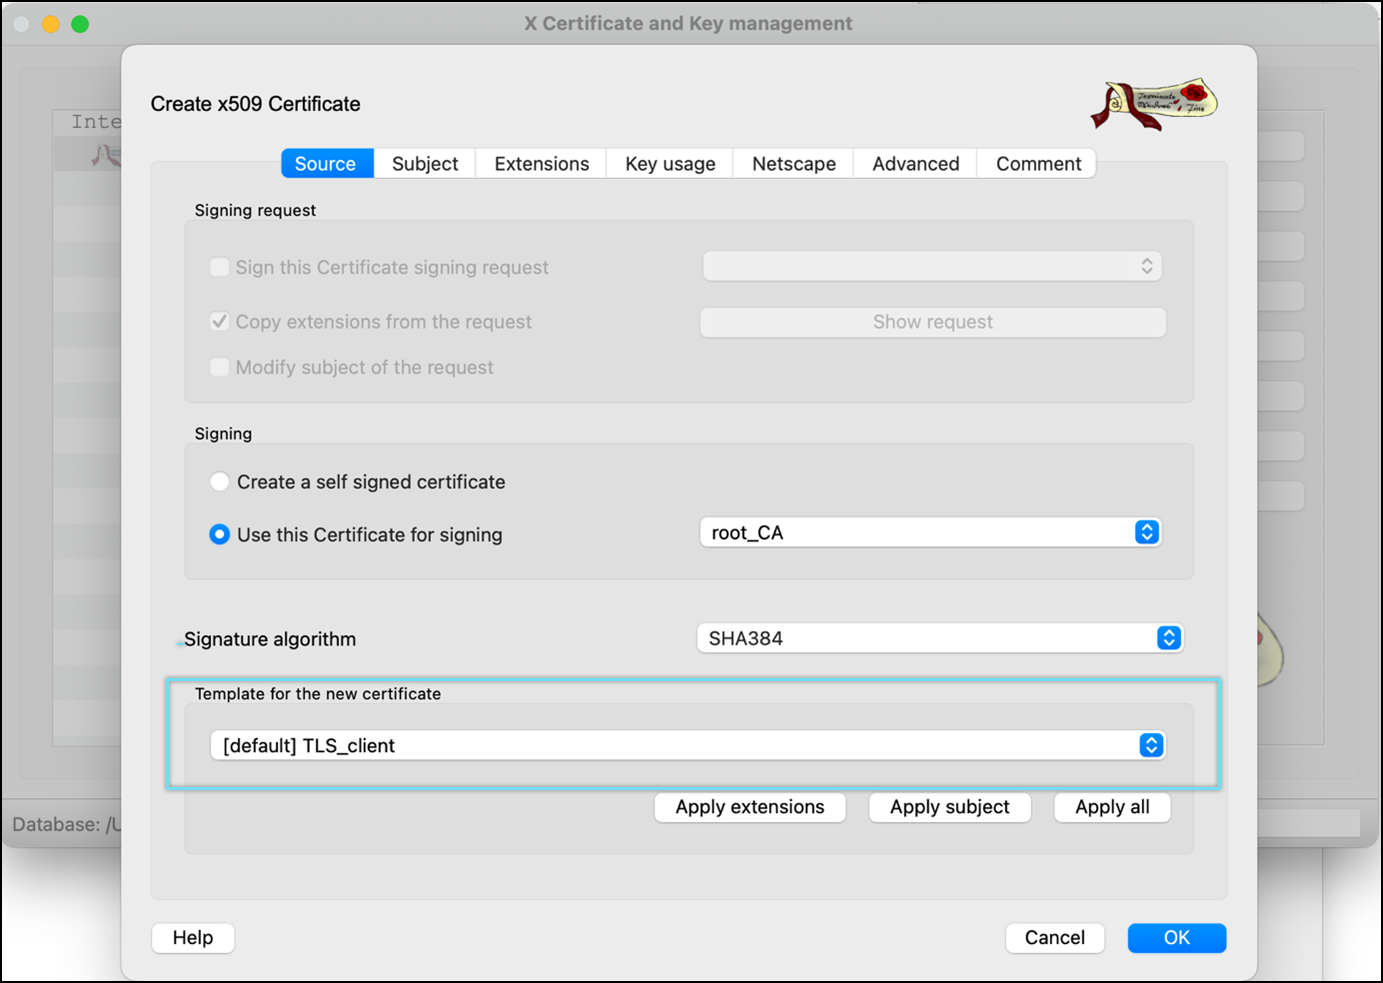
- Select the template for the new certificate as [default] TLS_client or [default] HTTPS_client.
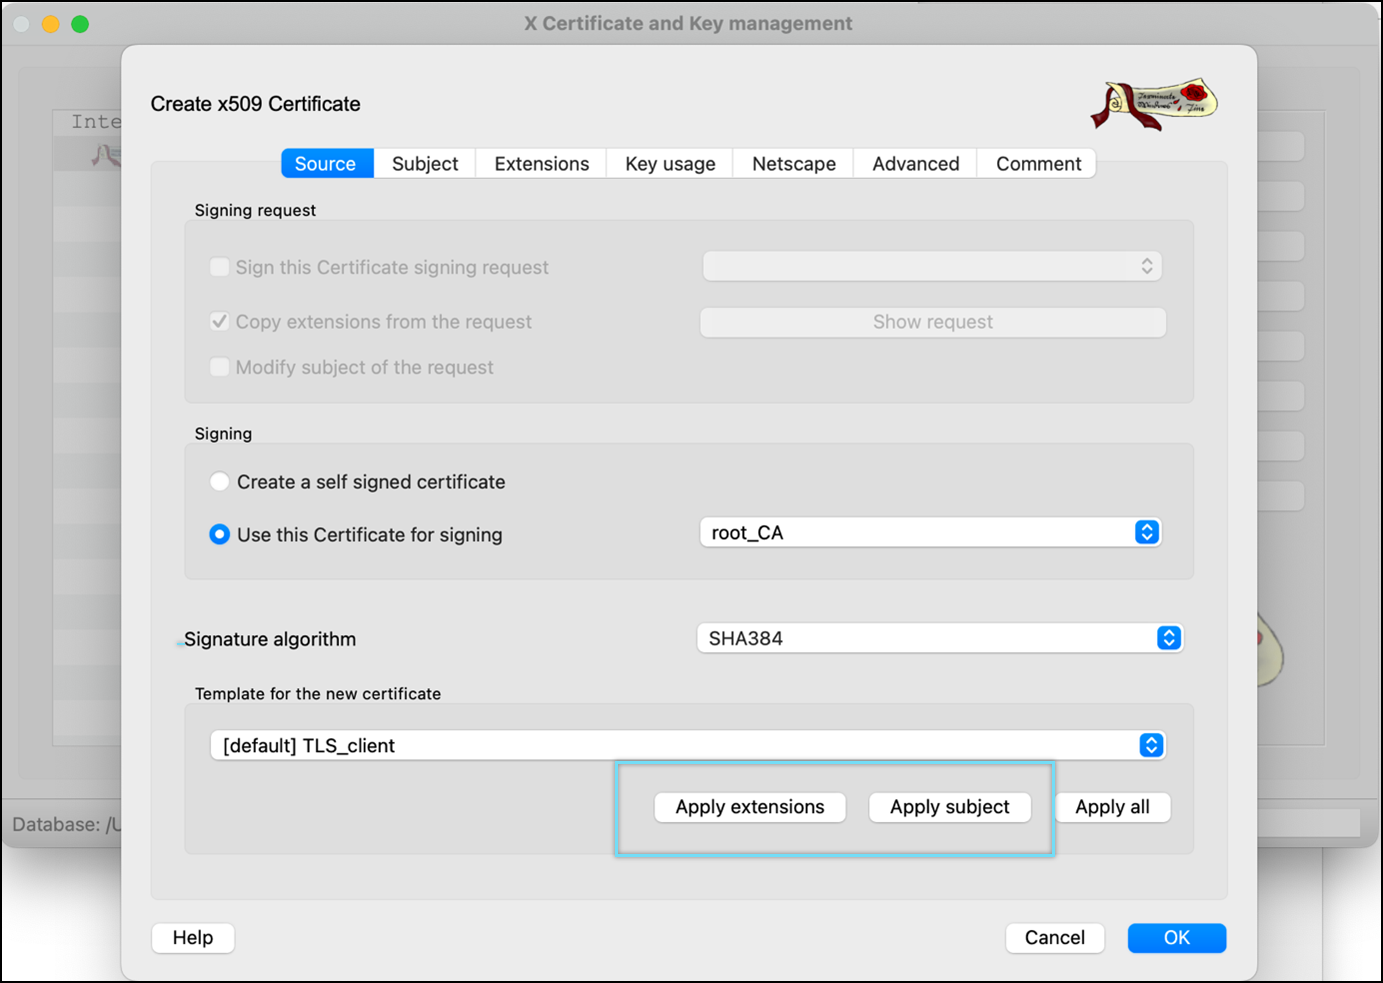
- Click Apply extensions and Apply subject.
- Click the Subject tab, enter Internal Name and commonName. Make sure the file name is the same as the common Name.
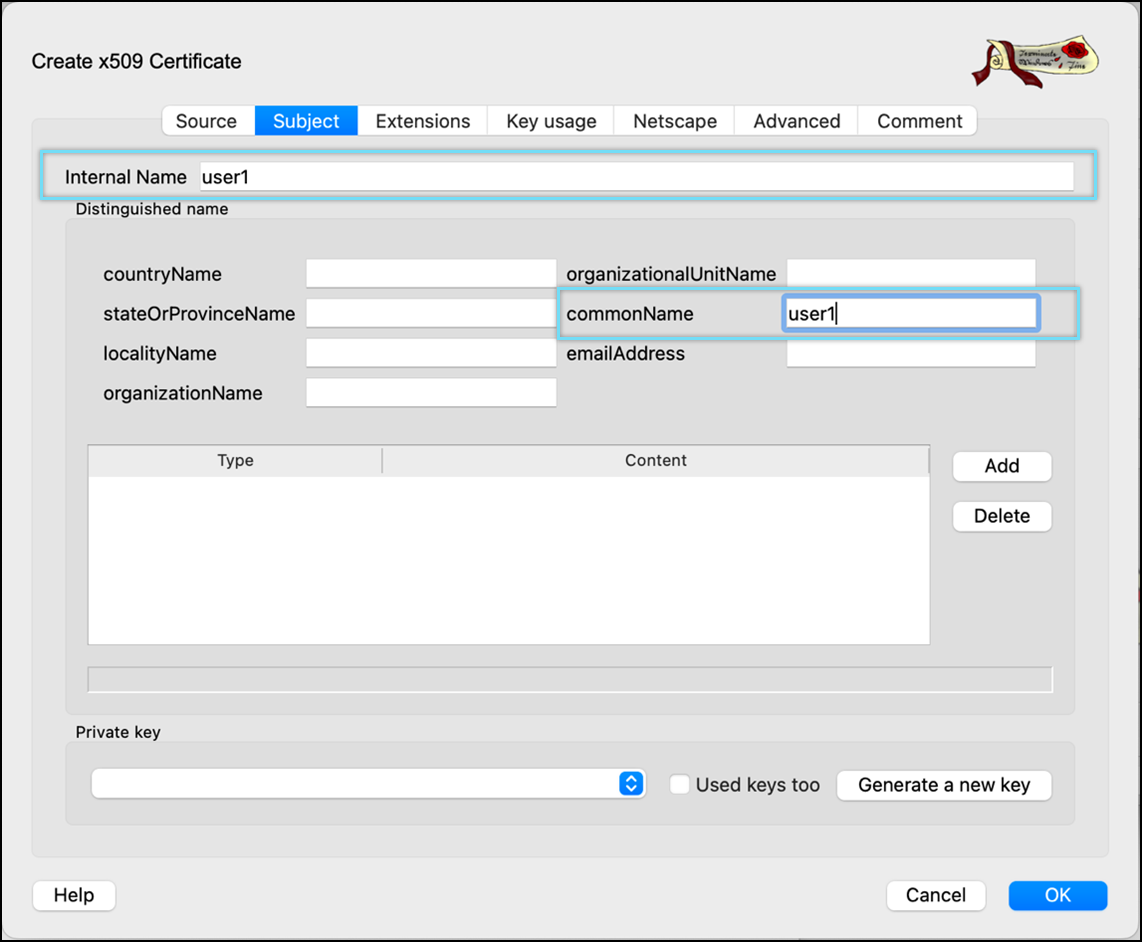
- Click Generate a new key.
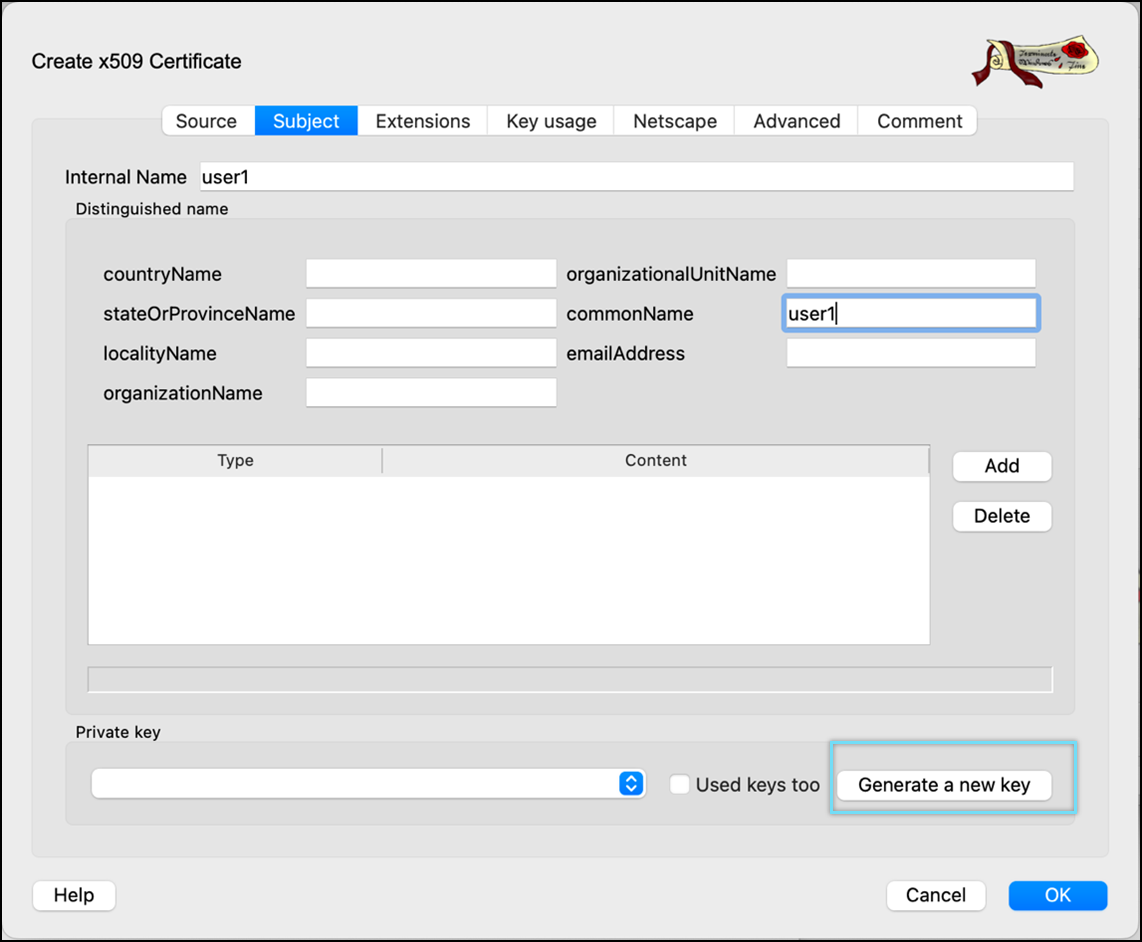
- Select keytype as RSA and Keysize as 4096 bit.
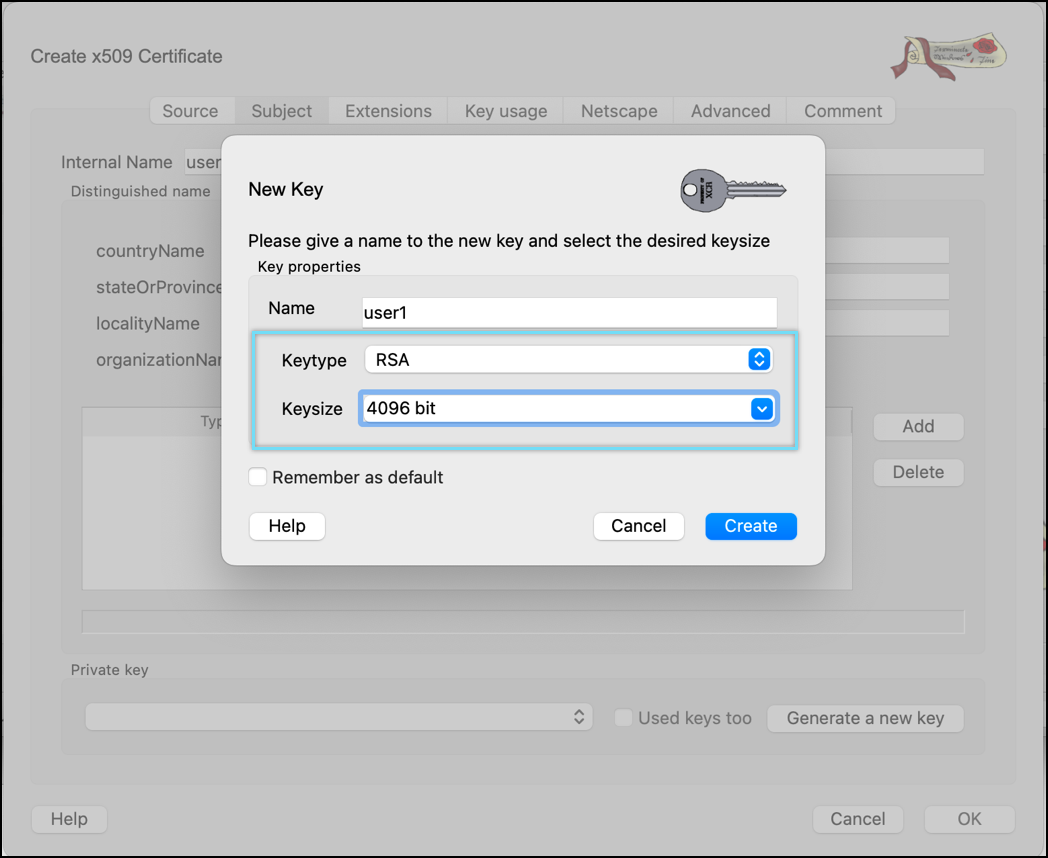
- Click Create.
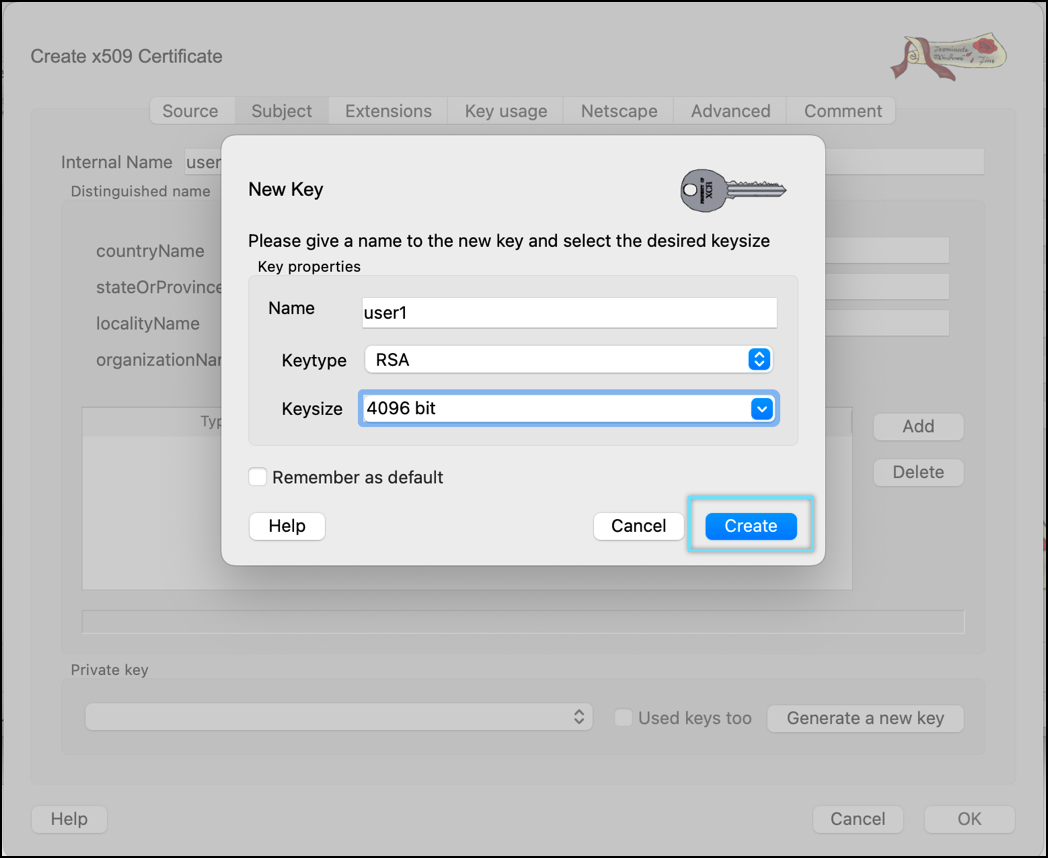
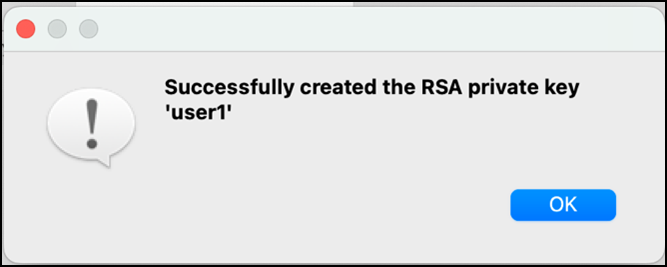
Key created message window appears.
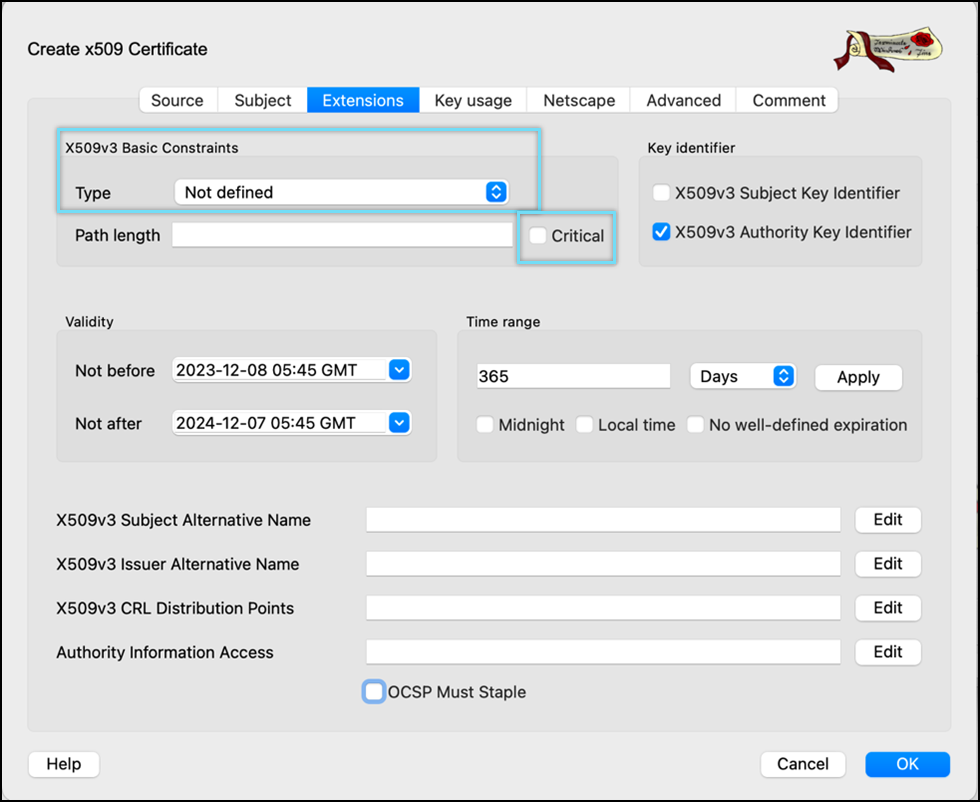
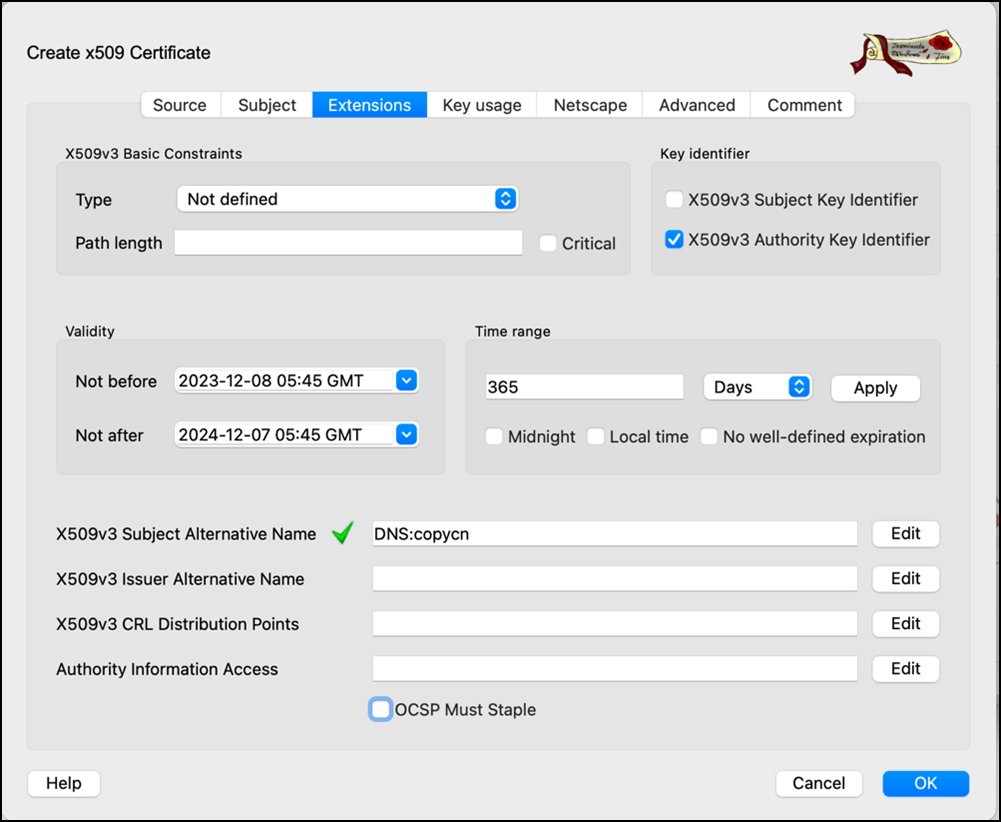
- Go to the Extension tab. Select x509v3 basic Constraints type as Not defined and uncheck the Critical option.
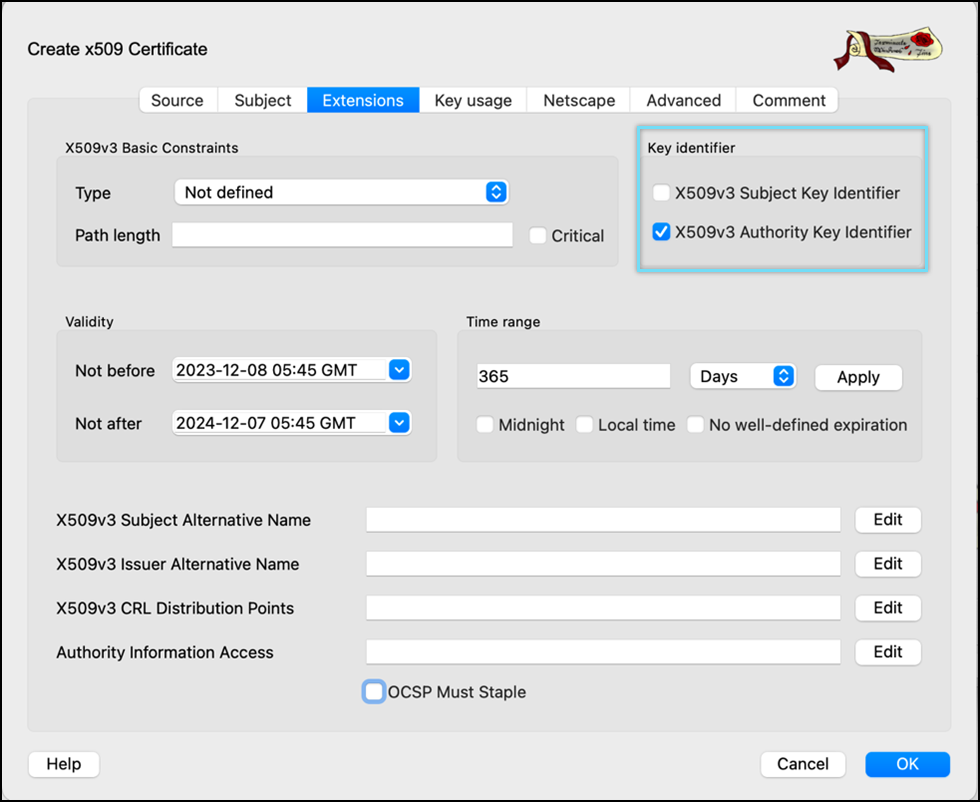
- Select Key identifier as x509v3 Authority key Identifier.
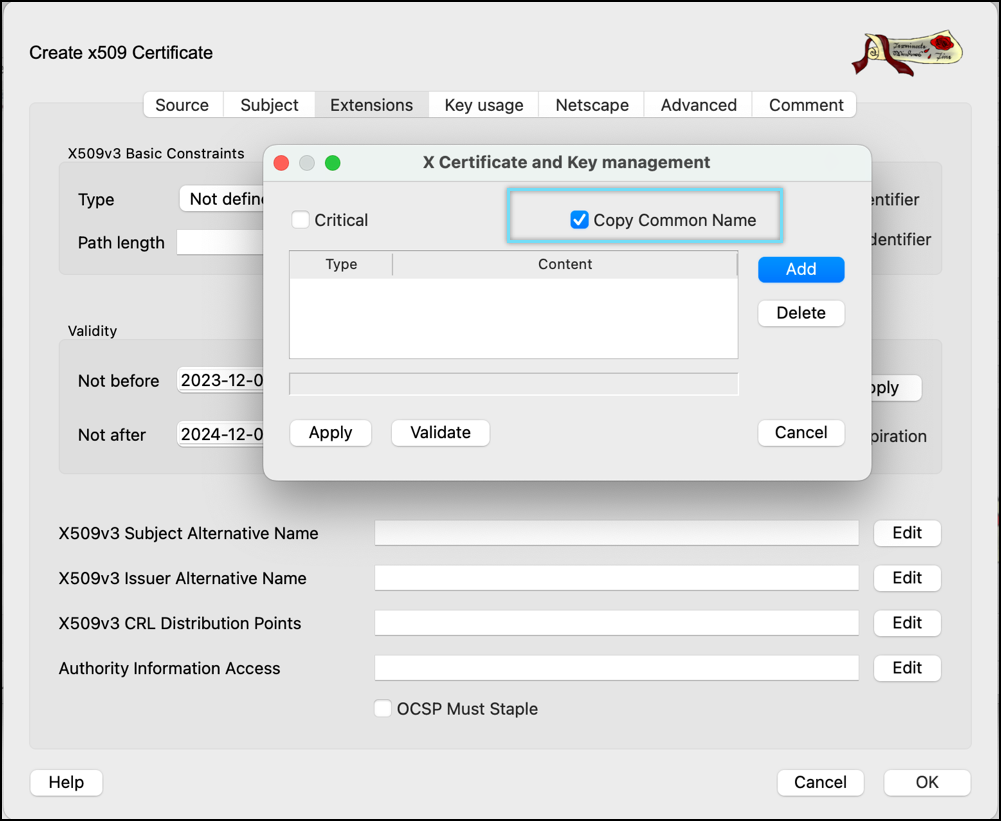
- Click Edit in the Select X509v3 Subject Alternative Name option.
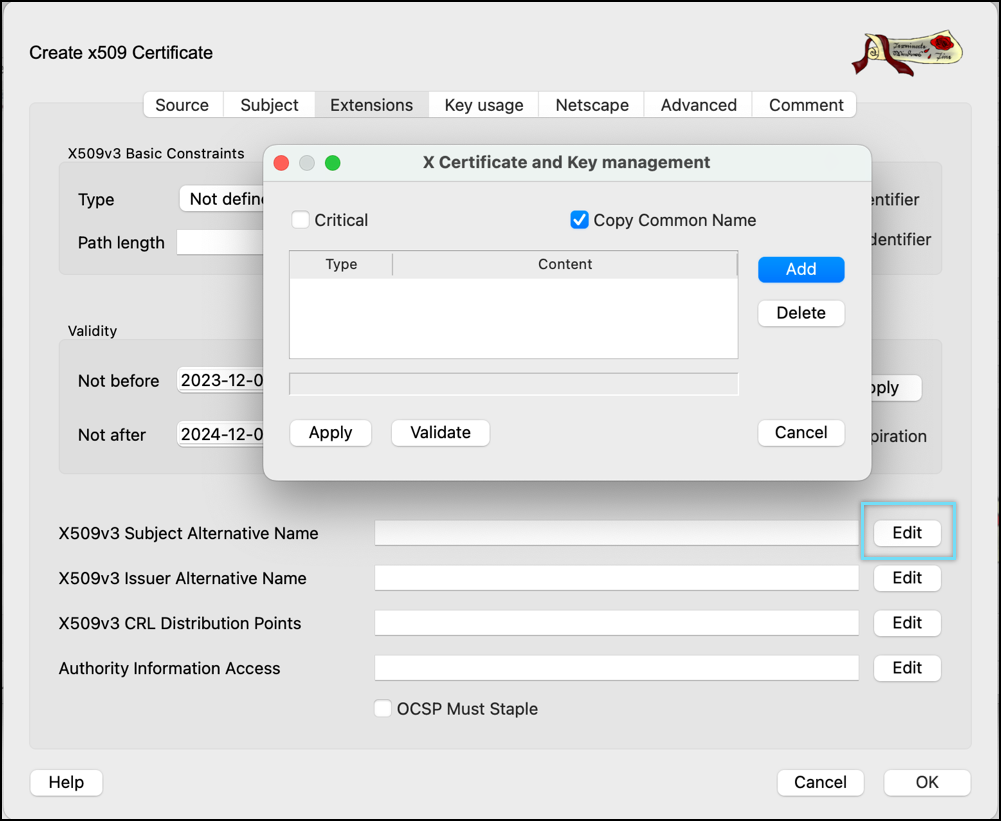
- Enable the Copy Common Name setting and click Apply.
NOTE: If Copy common name is not available, then manually enter the DNS:user1”(user1 as the common name of the client certificate added in step 26) in the X509v3 Subject Alternative Name field.
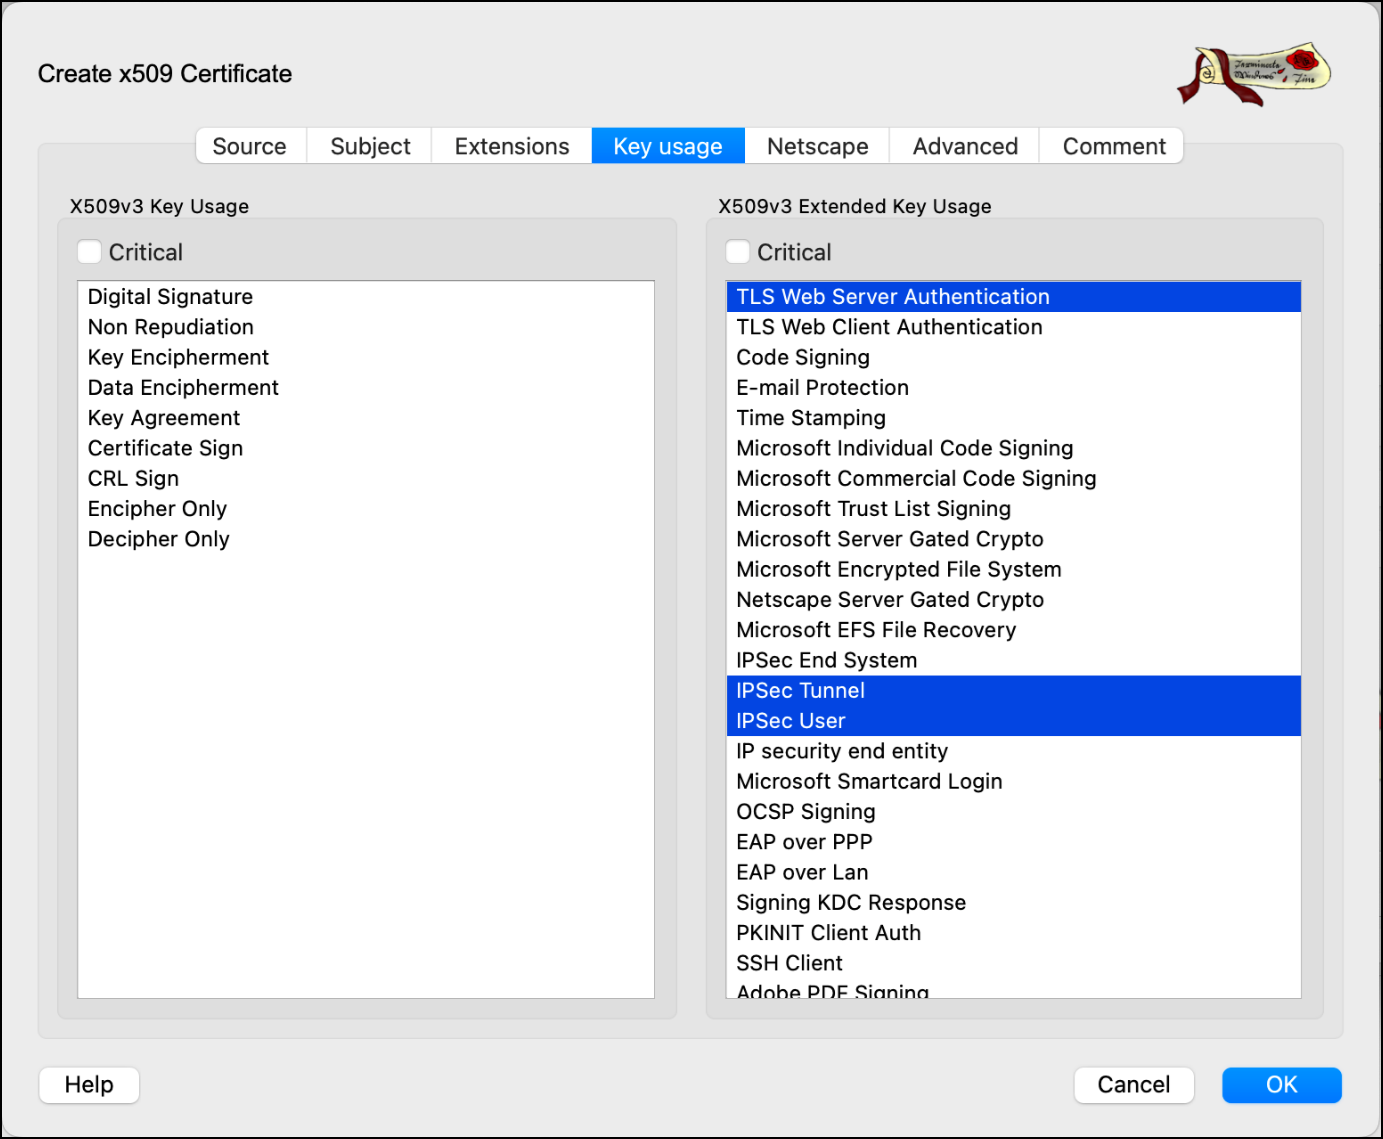
- Go to Key Usage tab, select options from the list as per below image.
- Go to the Netscape tab and remove any selected options.

- Go to the Advanced tab and review all the information.
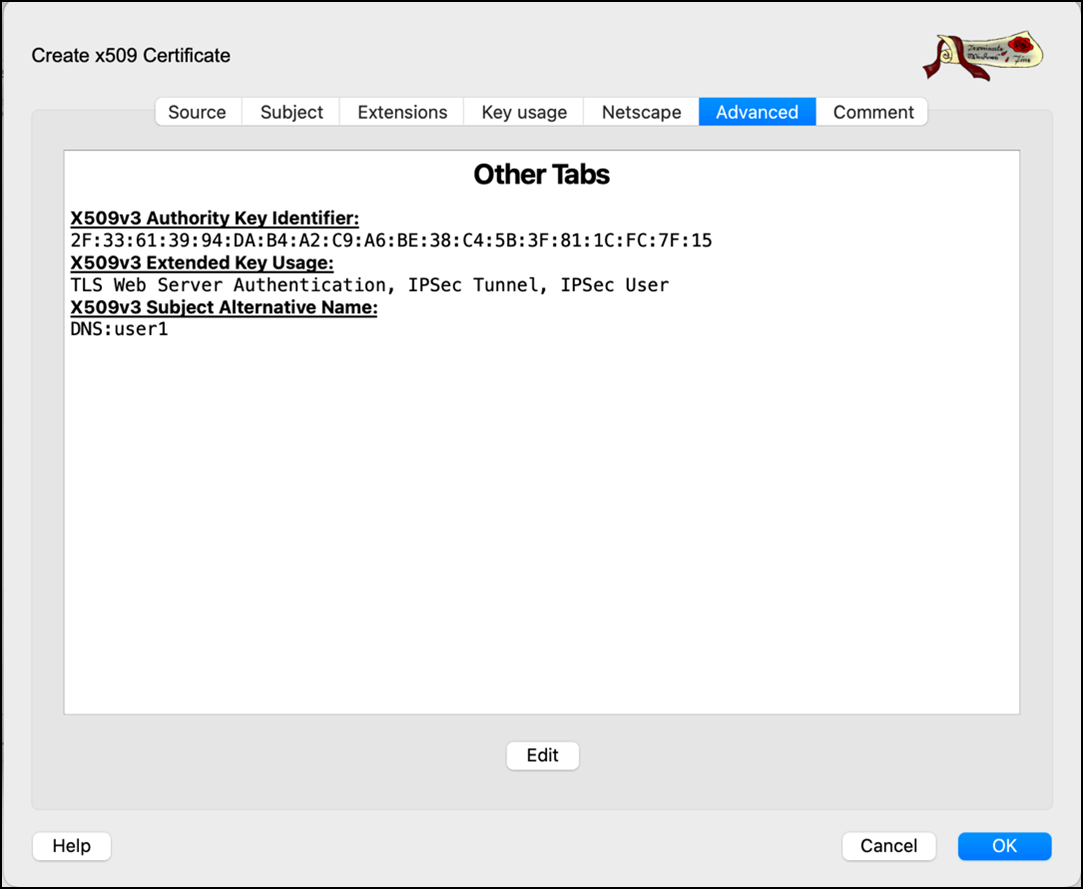
- Click OK to create the CA certificate.
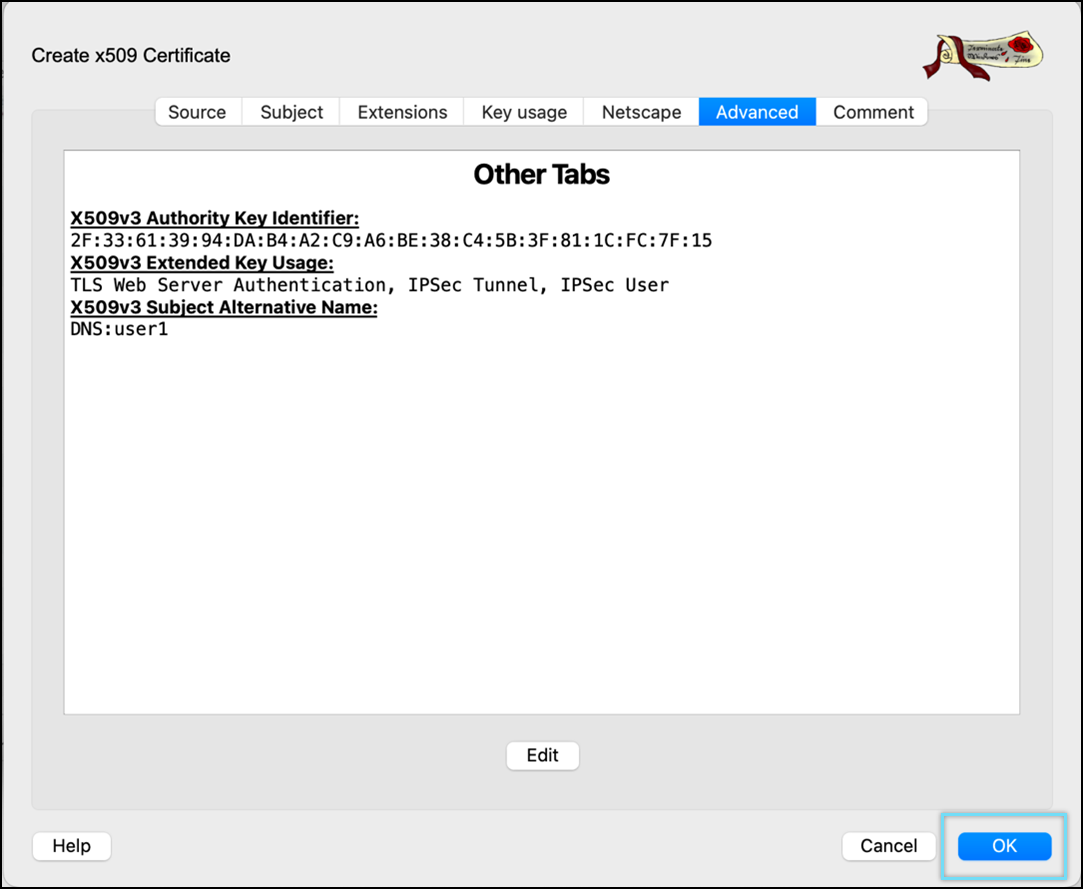
- Select CA certificate and click Export.
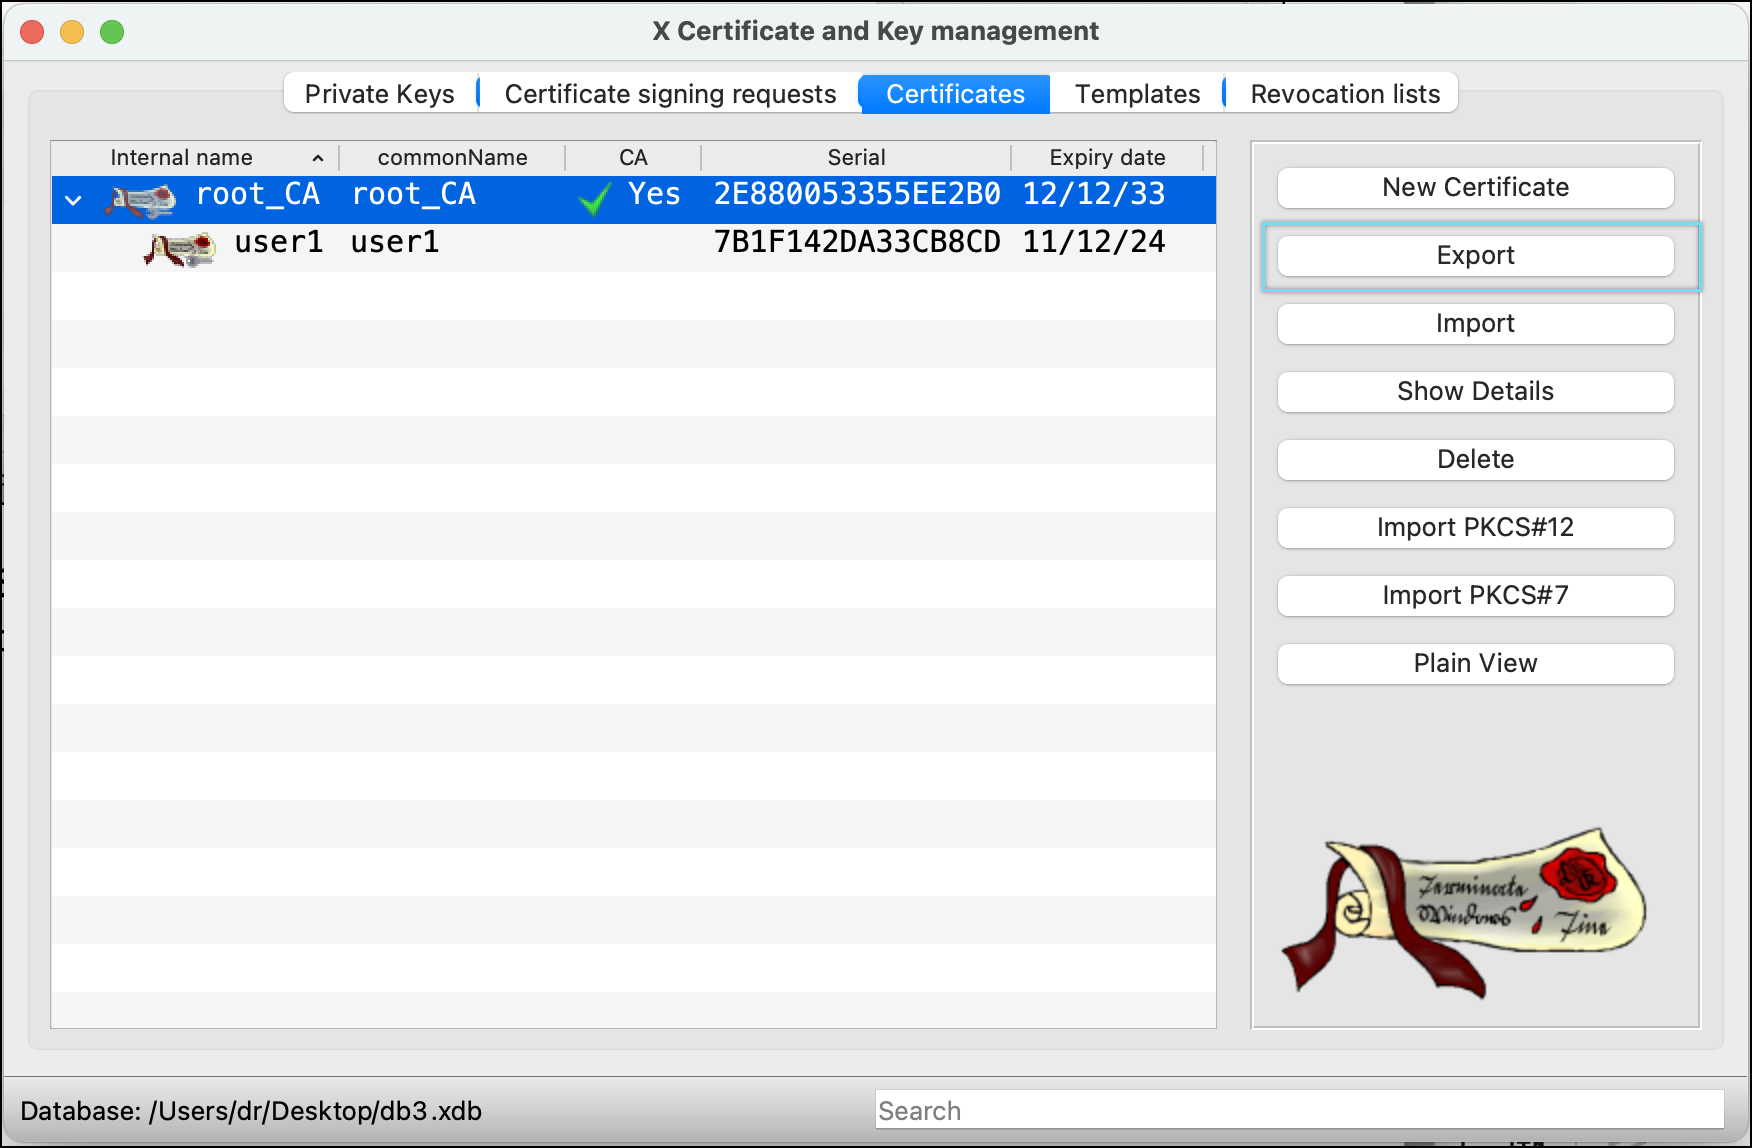
- Select File Location and Export Format as PEM + Key (*.pem) for CA certificate. Click OK to save the file.
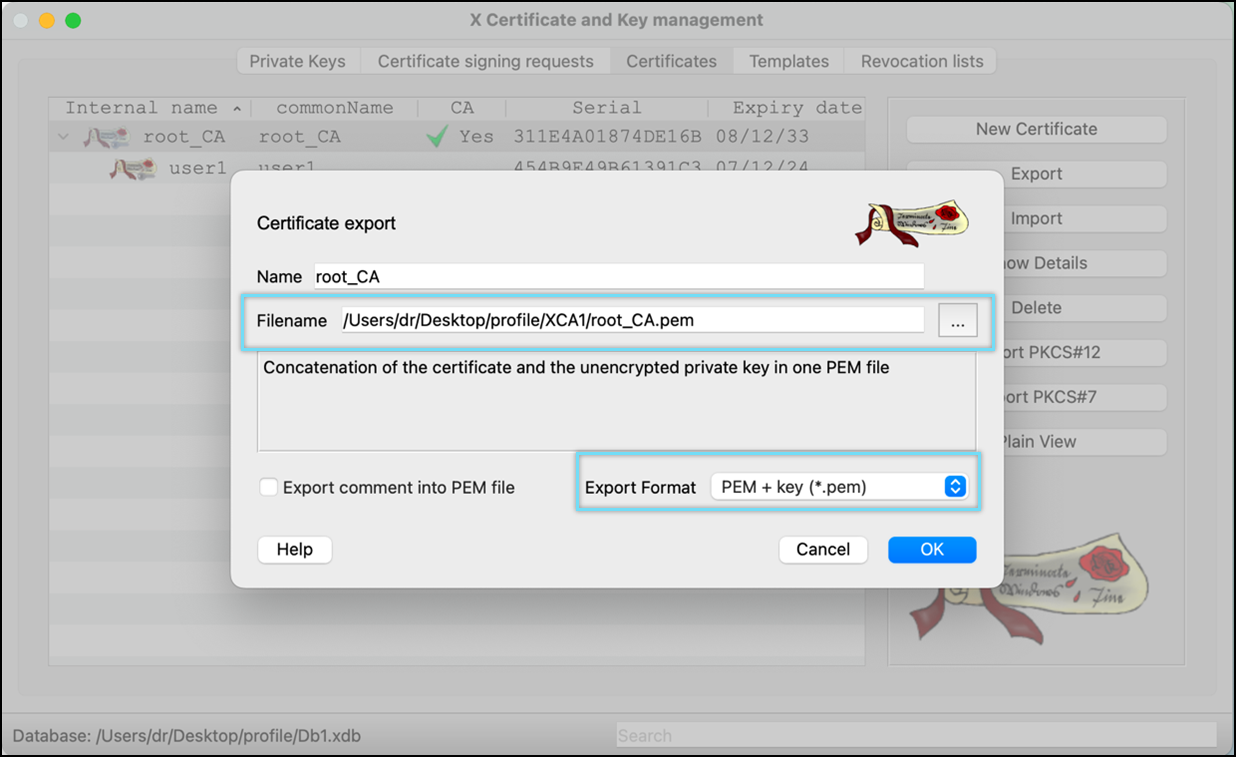
- Select Client certificate(user1) and click Export.
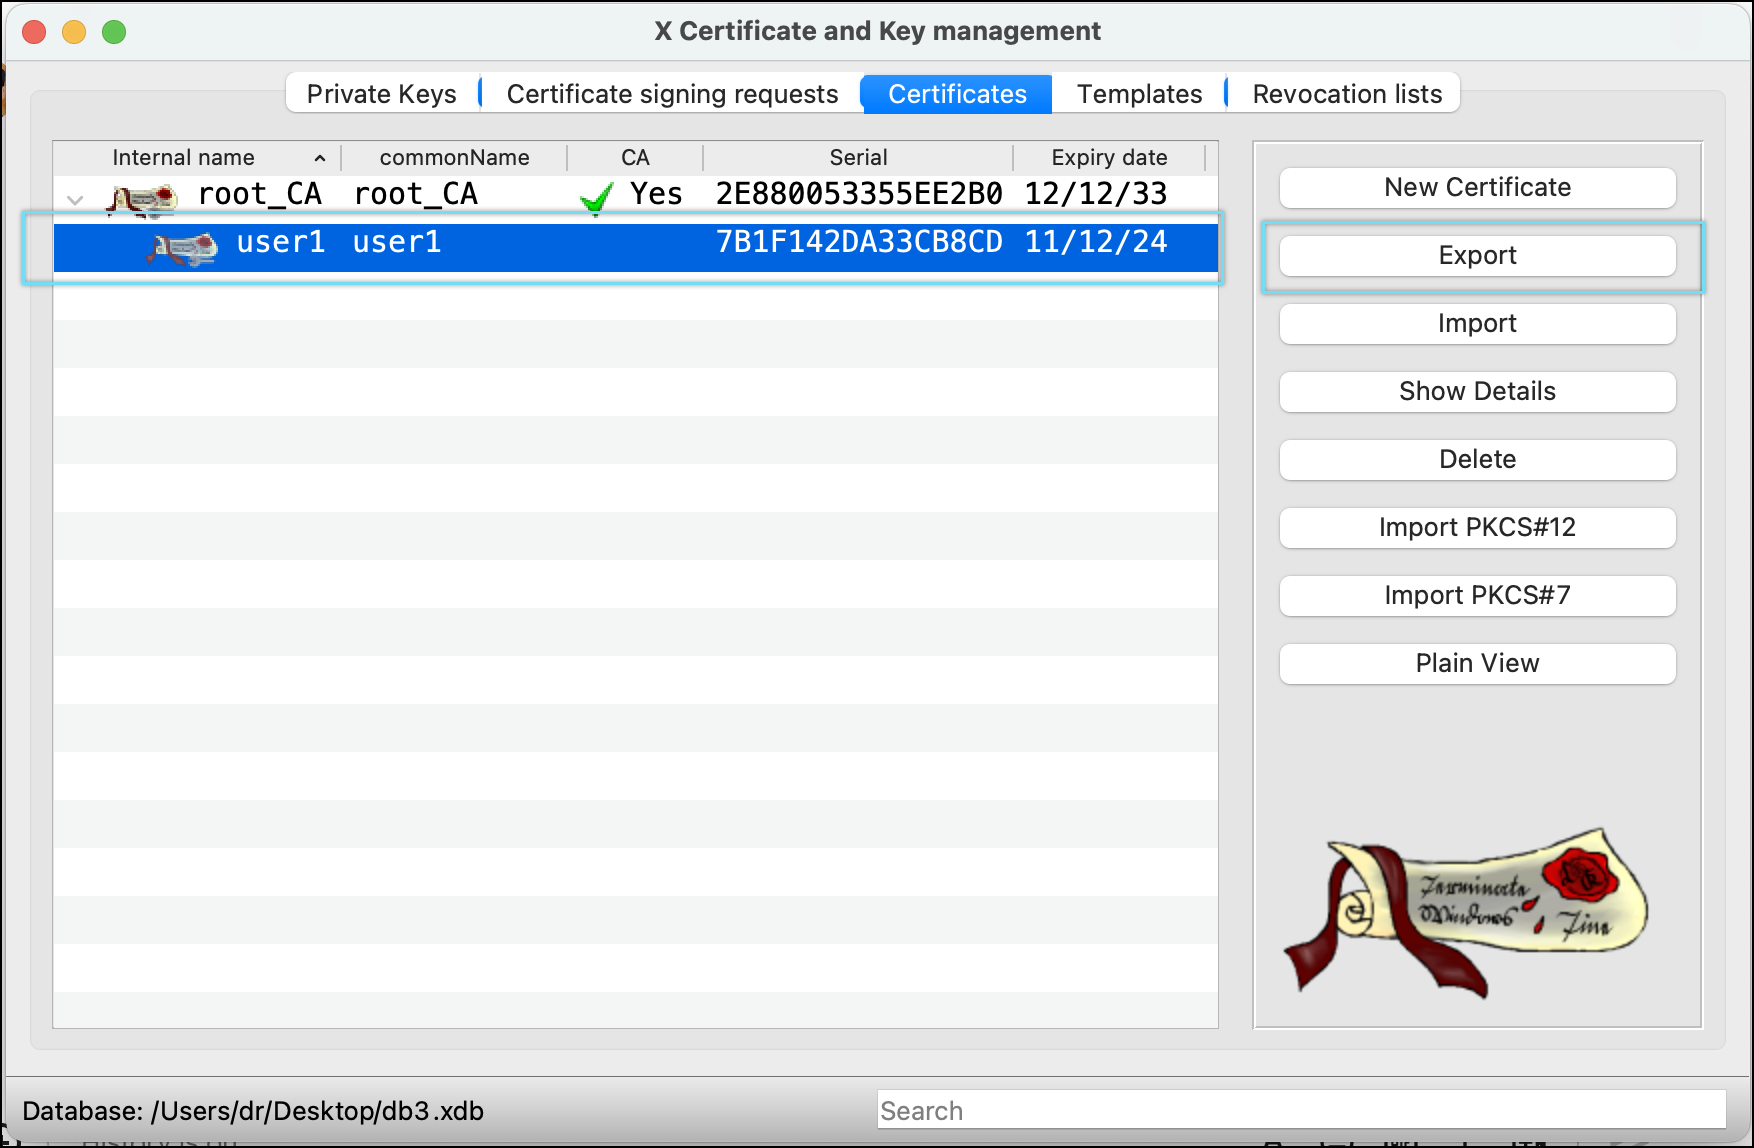
- Select File Location and Export Format as PEM + Key (*.pem) for client certificate. Click OK to save the file.
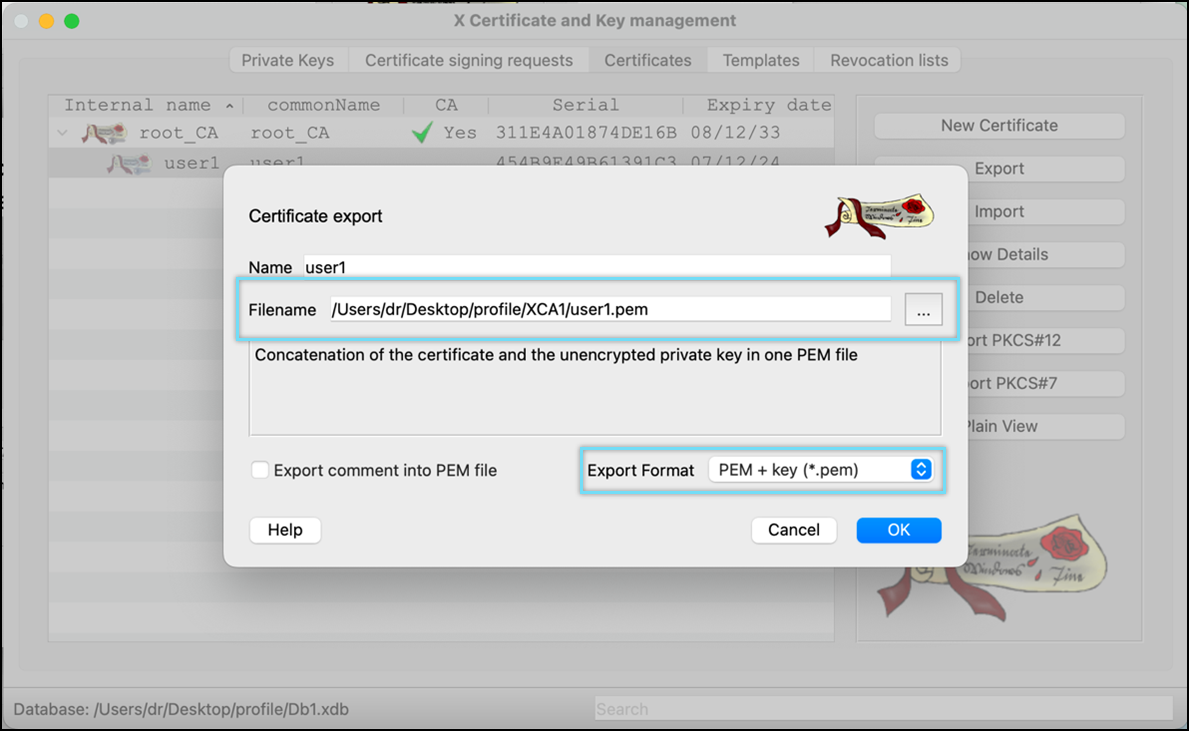
- Select Client certificate(user1) and click Export

- Select File Location and Export Format as PKCS #12 chain (*.pfx) for the client certificate. Click OK to save the file. Make sure the file name is the same as the common Name.
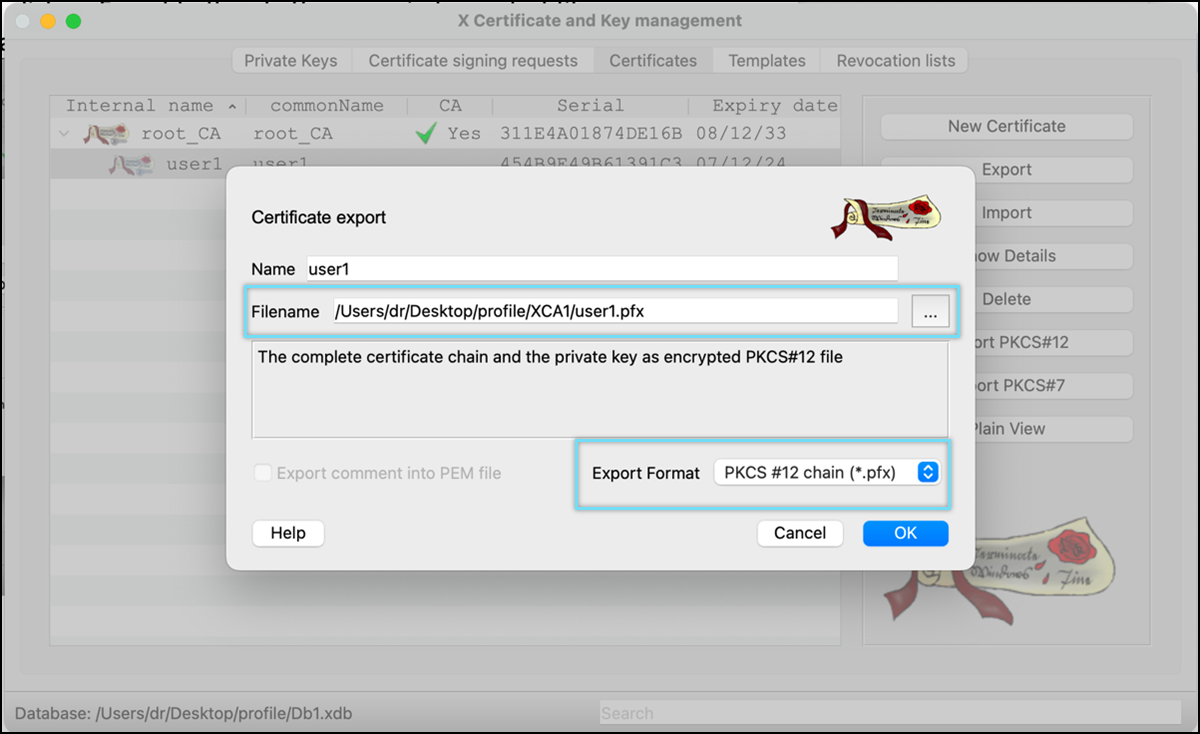
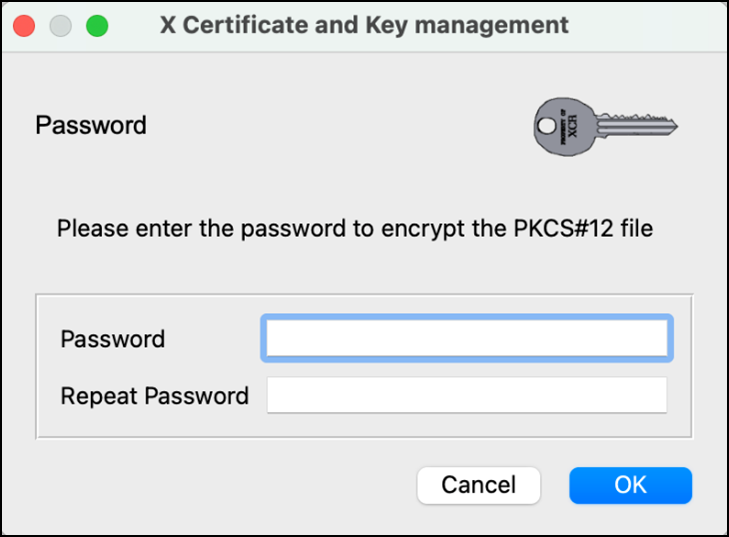
- Enter the Password and select Ok to save the file.
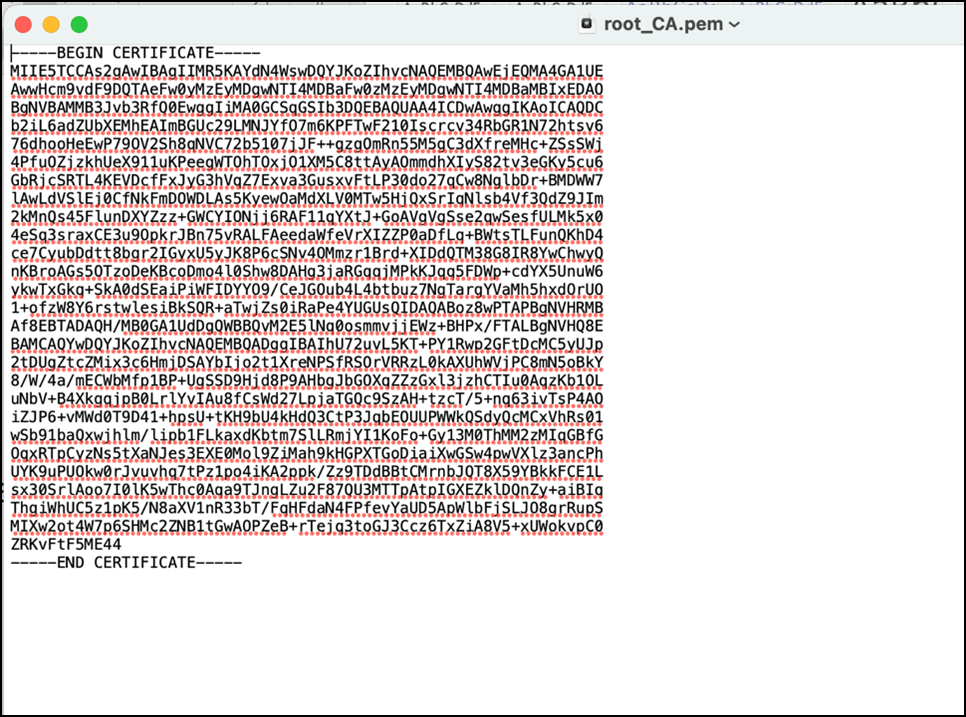
- Go to the file location and open CA and Client file in any text editor. Verify only certificate part is available in the file. remove extra information, if any.
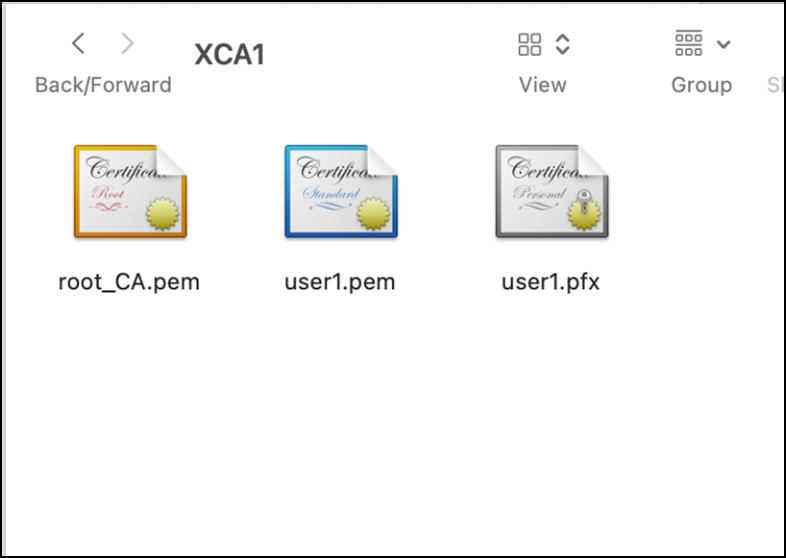
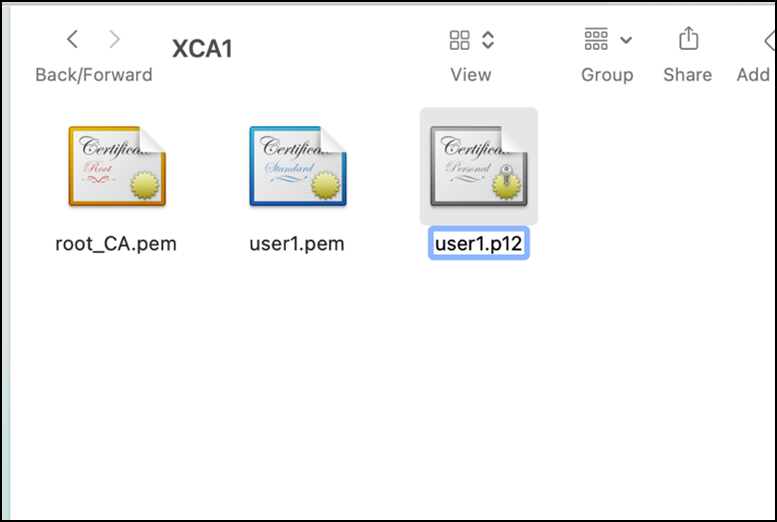
- Rename Client file (user1) .pfx file as .p12 file.
- Step 2 : Upload CA certificate generated in the Step 1 to the Skyhigh Security UI
-
Upload CA certificate generated in the Step 1 to the Skyhigh Security UI
Note: After this step, wait for 30-40 mins before connecting VPN
- Go to Settings > Infrastructure > Web Gateway Setup
.png?revision=1)
- Click Configure on the Skyhigh Mobile Cloud Security setting
.png?revision=1)
- Click Upload and select the custom CA certificate.
NOTE: Supported certificate formats are DER, PEM, CRT, and CER, and upload both root CA and intermediate CA if applicable
.png?revision=1)
- Specify the User name and an optional User Group in the User Identity certificates and click
.png?revision=1)
- Click Save.
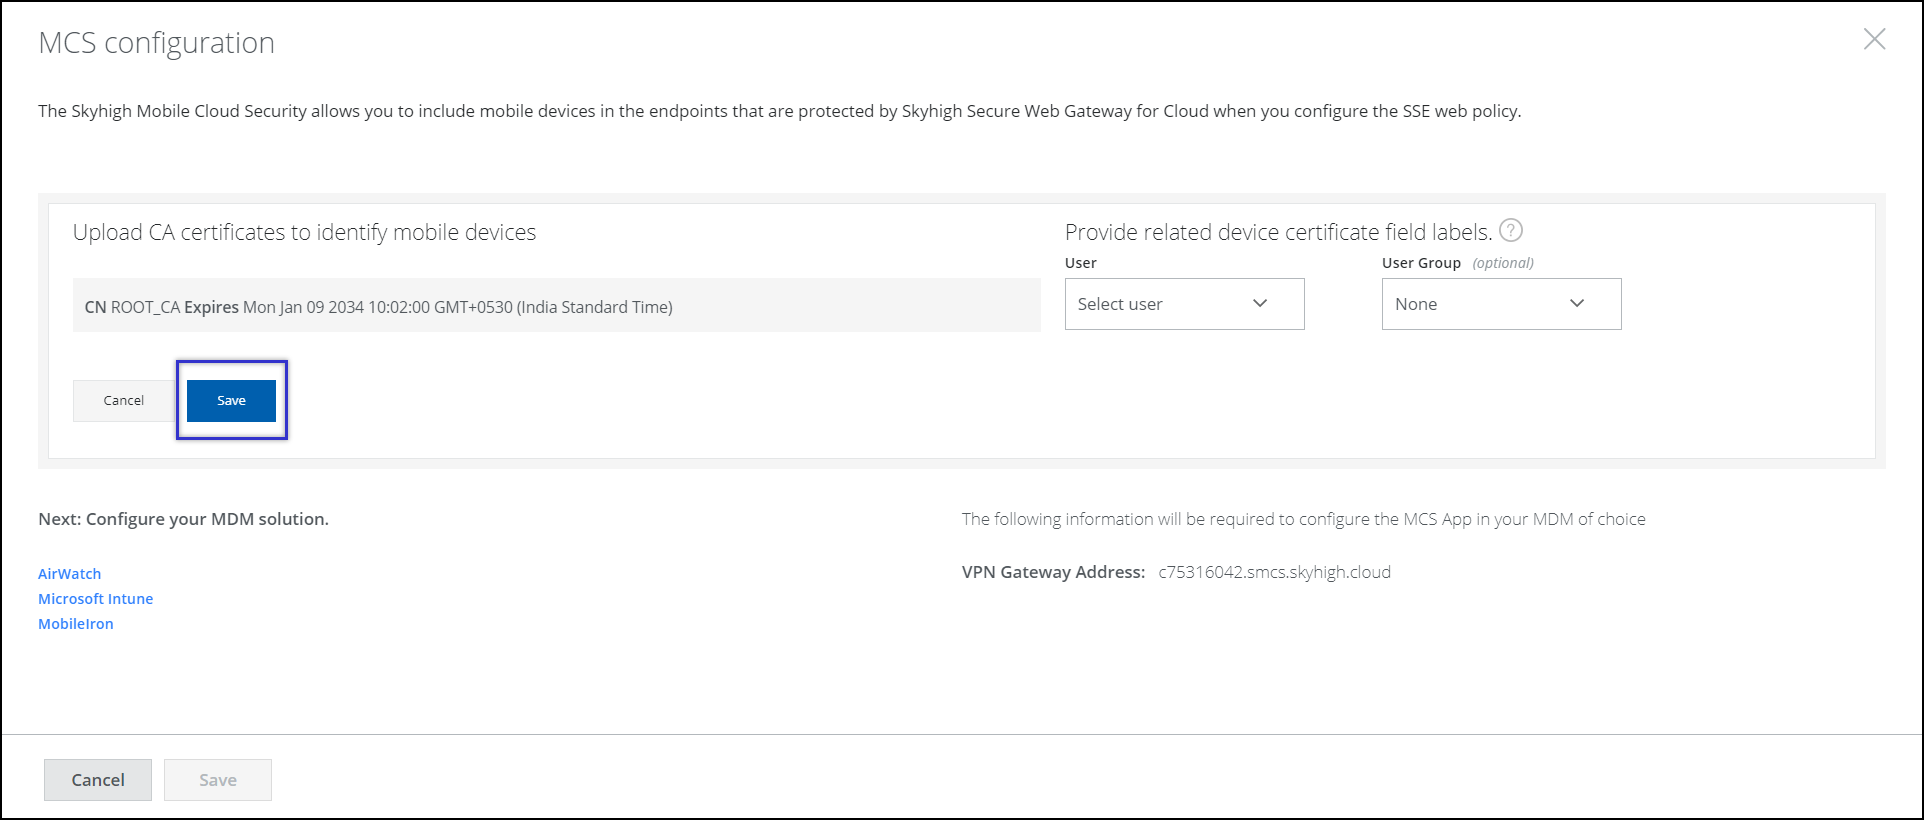
- Click Upload & Test and upload the User identity file with format as .cer, .crt, .pem or .der to validate the CA and user Identity file.
.png?revision=1)
- Click Save to save the configuration.
.png?revision=1)
- Click Publish to apply the changes.
- Step 3: Download and install iOS Skyhigh Client app from the Appstore
-
Download and install iOS Skyhigh Client app v3.1.1 from the Appstore.
Note: Make sure you uninstall the older version of the app. Install the latest version and reconfigure all settings.
- Step 4: Download and Install Skyhigh Security Certificate in Mobile
-
Download the certificate using the link and share this certificate to install in the mobile device.
- Download this certifcate in the mobile device
- Once it is downloaded, it will be available in Settings > Generic > VPN & Device management
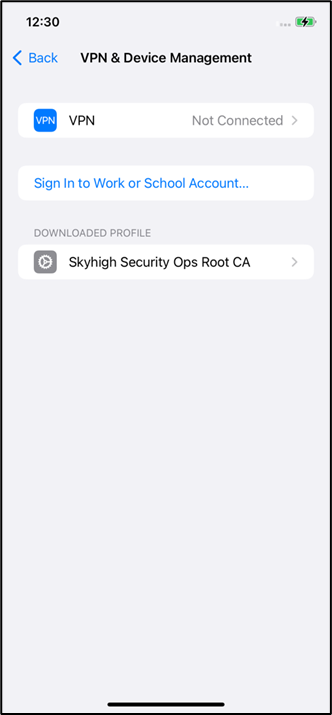
- Select the certificate and click Install.
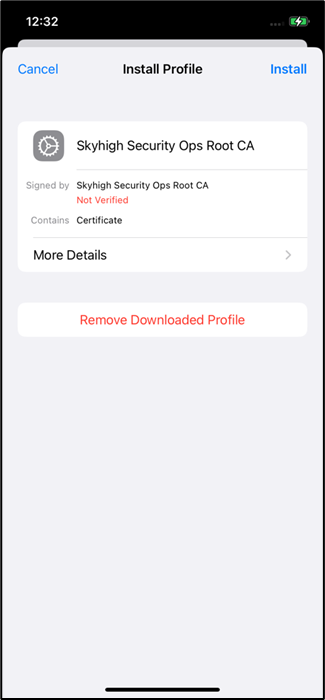
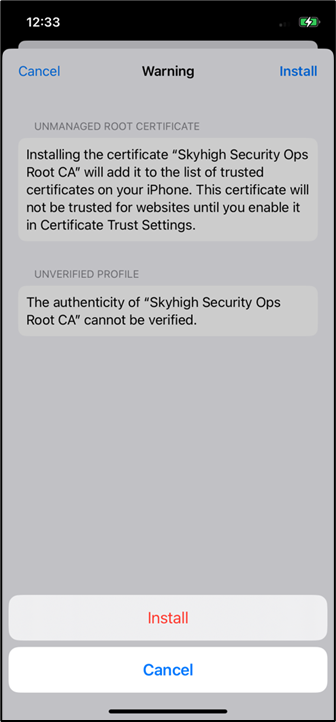
- Enter the passcode and click Install to install the certifcate.
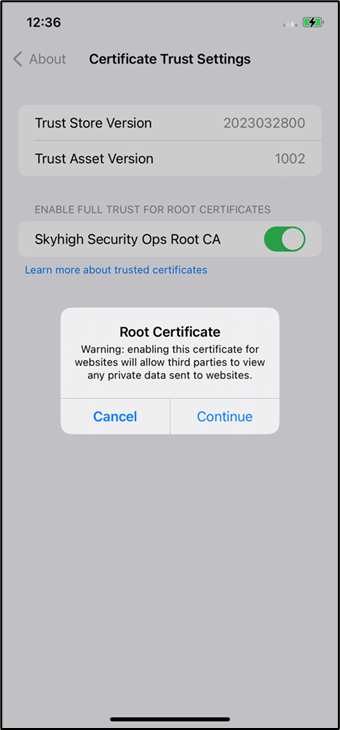
- After install, go to Settings > General > About > Certifcate Trust Settings
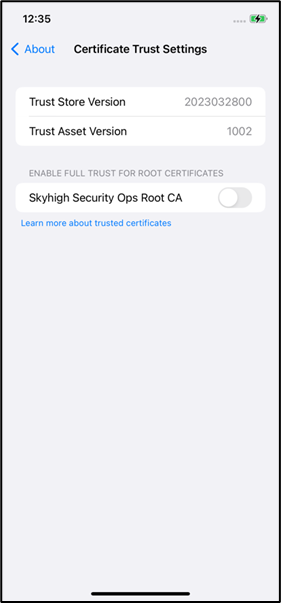
- Ensure that the certificate is installed and switch on the certificate and click continue to enable it.
- Step 5: Download Tenant Customer CA from the Skyhigh UI
-
- Go to Policy > Web Policy > Feature Configuration
.png?revision=1)
- Select HTTPS connections > Customer CA.
.png?revision=1)
- Select Customer CA and click export to download the Customer CA file.
_1.png?revision=1)
- Share this Customer CA certificate to user if selecting Manual VPN config.
- Step 6: Download Root Certificates and Install
-
- Download the Sectigo Public Server Authentication CA OV R36 certificate using this link.
- To install the certificate, navigate to Settings > General > VPN & Device Management.
The downloaded certificate appears on the VPN & Device Management screen.
Tap on Sectigo Public Server Authentication CA OV R36 certificate.

Tap Install on the Install profile screen.
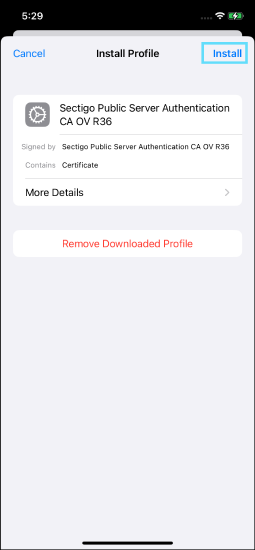
Tap Install on the Installing Profile screen.

Tap Done once installation is completed.


NOTE: For iOS 17.4 and iPadOS 17.4 or later, use only the Sectigo Public Server Authentication CA OV R36 certificate. For earlier iOS versions, use both the Sectigo Public Server Authentication Root R46 and Sectigo Public Server Authentication CA OV R36 certificates.
- Download the Sectigo Public Server Authentication Root R46 certificate using this link.
- To install the certificate, navigate to Settings > General > VPN & Device Management.
The downloaded certificate appears on the VPN & Device Management screen.
Tap on Sectigo Public Server Authentication Root R46 certificate.

Tap Install on the Install profile screen.

Tap Install on the Installing Profile screen.

The certificate installation is complete.

- Go to Settings > General > About > Certificate Trust Settings > Toggle on ENABLE FULL TRUST FOR ROOT CERTIFICATE.

- Download the Sectigo Public Server Authentication CA OV R36 certificate using this link.
- Step 7: Configure VPN profile
-
Manual Configuration:
Install the Tenant customer CA in the iOS device
Note: The iOS device should have a passcode to install and trust a CA certificate.
- Export the Tenant customer CA to device using Airdrop or mail
- Once Tenant Customer CA is downloaded, it will be available in the device settings
- Go to device Settings > General > VPN & Device mangement.
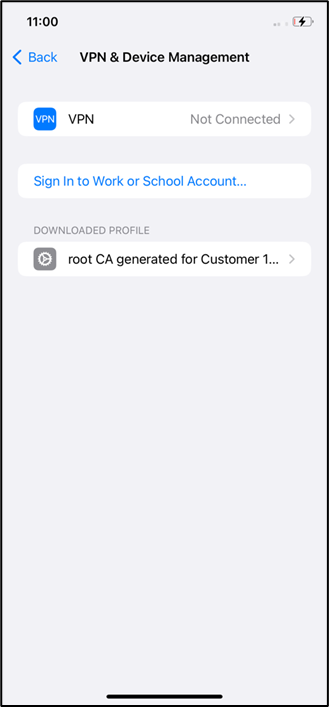
- Click the certificate and tap install.
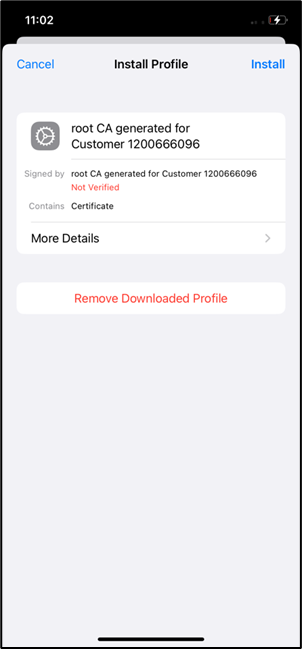
- Enter the passcode and click install to install the certificate.
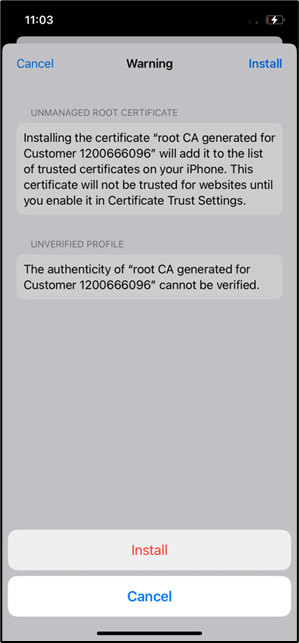
- Profile installed message confirms that certificate is installed correctly.
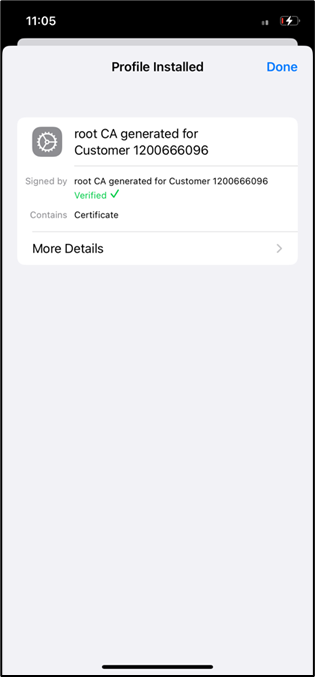
- Go to settings > General > About > Certificate Trust settings, verify the Tenant Customer CA and enable the certificate switch.
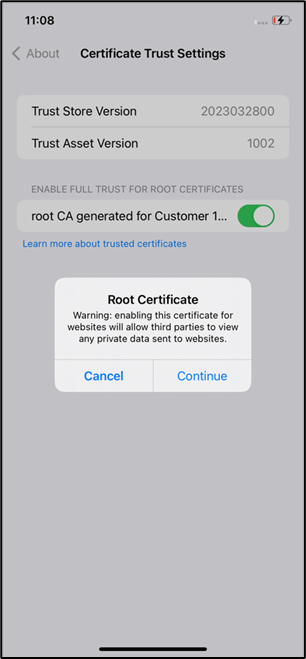
- Click continue to trust the certificate.
Upload User Identity(.p12) file.
The .p12 file is a password protected file, so admin has to share the password to the user. Long press and save the file on your device.
Note: Make sure to upload the .p12 file to the Skyhigh Client app. Don't install this file directly.
- Open the installed app
- Read the disclaimer and select I agree to use data as specified in Terms.
- Tap Proceed.
- Tap Browse & Upload to upload the .p12 file.
Search for the .p12 file and select it to complete the upload process.
- Enter the password and tap Continue.
The Skyhigh Client app asks for permission to add VPN configuration on your phone.
- Tap Allow.
- Enter the iPhone passcode.
- Tap Get Started.
Prompts you to enter login credentials.
- Enter your corporate username and password.
After successful authentication, you can use the Skyhigh Client or enter the full URL of the private application in an external browser to access private applications.
Note: To disable VPN, go to Settings > General > VPN > Disable VPN.
MDM configuration:
Admin pushes VPN Configuration and Tenant Customer CA certificate using MDM, users should ensure that the configuration exists on the iOS device.
You can use the VMware, Microsoft Intune, or Ivanti Neurons MDM solution to manage your users' iOS devices. For configuring details, see
- Configure VMware MDM for iOS
- Configure Microsoft Intune MDM for iOS
- Configure the Ivanti Neurons MDM for iOS
- Create VPN configuration(.mobileconfig file)
- Download Apple Configurator from the Mac Appstore
- Click on File > New Profile
- Navigate to General and add any name.
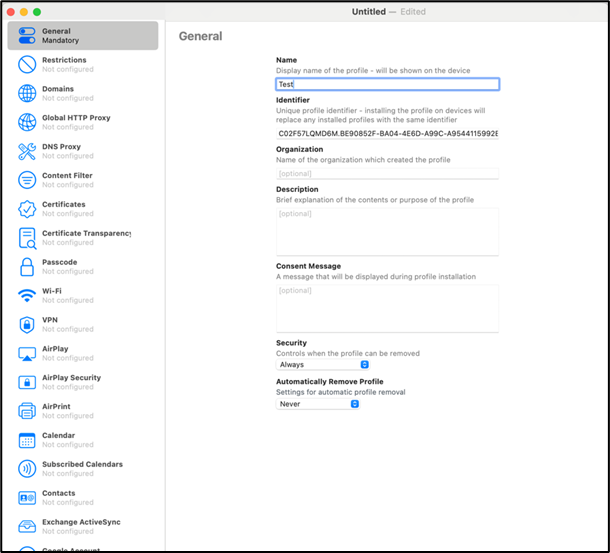
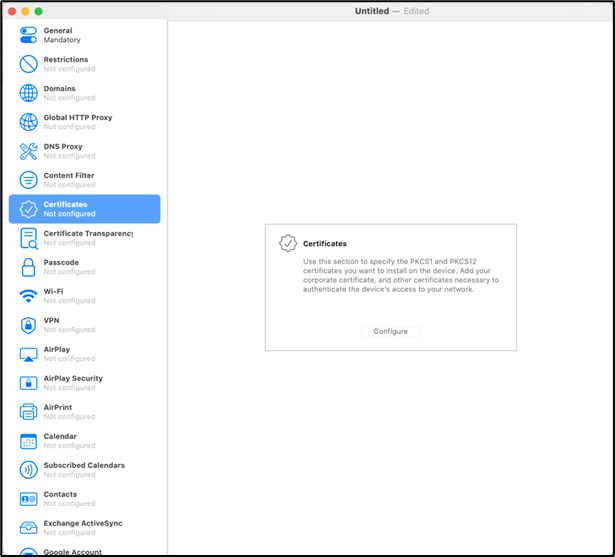
- Navigate to Certificates and click Configure.
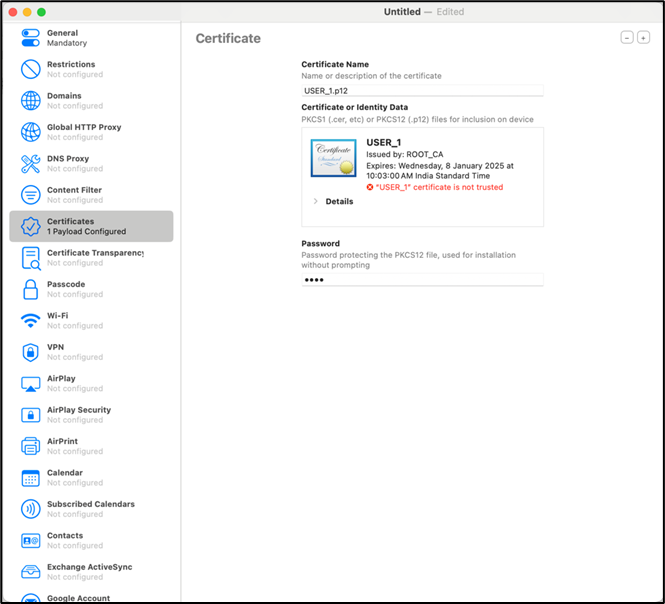
- Select User Identity(.p12) file generated and enter the password.
- Rename Tenant Customer CA(certificate_authority.pem) downloaded from the Skyhigh tenant to certificate_authority.crt
- Click + icon in Certificates, select the Tenant Customer CA(certificate_authority.crt) file, and the Sertigo Public Server Authenticate CA OV R36 file. To download the Sertigo Public Server Authenticate CA OV R36 certificate file, see Download the Intermediate CA certificate and Install section.

- Navigate to VPN settings and click Configure.
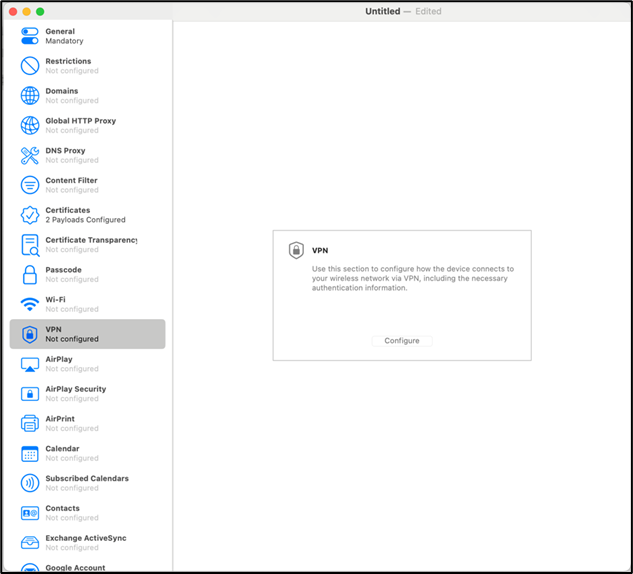
- Enter the values as mentioned below
- Connection Name: Any random name
- Connection Type: IKEv2
- Server: mobile.skyhigh.cloud
- Remote Identifier:
-
mobile.skyhigh.cloud:
Note: When you create a mobileconfig file, it adds the following key value pair which causes certificate installation failure. Delete this key pair to make the certificate work.
Open the .mobileconfig file in any TextEdit and delete the below key and values.
<key>DNS</key>

            <dict>

            <key>SupplementalMatchDomainsNoSearch</key>

            <integer>0</integer>

</dict> -
pa-mobile.skyhigh.cloud:
-
DNS Supplemental Match Domain in the VPN config should be set to empty string:
-
Click + in DNS Server addresses, DNS Search Domain and DNS Supplemental Match Domains and keep the default values as it is and save the file.

-
Open the .mobileconfig file in any TextEditor and search for “DNS” and edit the values as follows
<key>SearchDomains</key>

                    <array>

                    </array>

                    <key>ServerAddresses</key>

                    <array>

                    </array>

                    <key>SupplementalMatchDomains</key>

                    <array>

                        <string></string>

                    </array>

                    <key>SupplementalMatchDomainsNoSearch</key>

<integer>0</integer> -
Open the file in the Apple Configurator again and verify the updated fields as below.

-
-
-
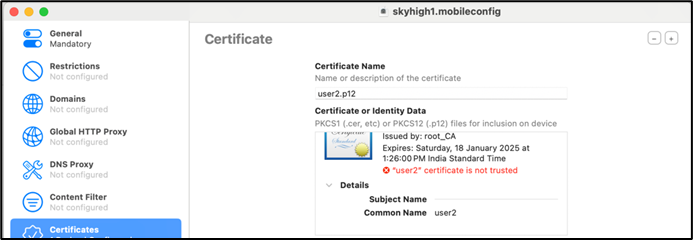
- Local Identifier: Copy the common name of User identity file appeared in Certificates(Eg: “user2”
-
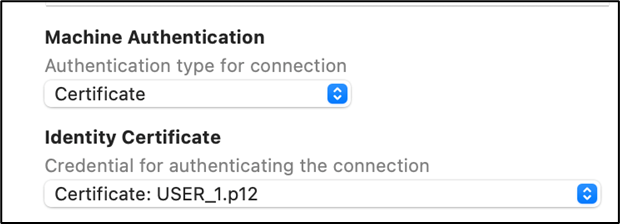
Machine Authentication: Select Certificate in the drop down
-
Identity Certificate: Select the user identity(.p12) file
-
Select Enable EAP

-
EAP Authentication: Select Certificate in dropdown
- Push this VPN configuration to device using MDM
- Use the Skyhigh Client app
- Ensure VPN configuration exists in Settings > General > VPN.
- Ensure the Tenant Customer CA certificate is enabled in Settings > General > About > Certificate Trust settings.
- Open the Skyhigh Client app
- Read the disclaimer and select I agree to use data as specified in Terms.
- Tap Proceed.
- Select Open VPN Settings.
- Go to Settings > General > VPN and enable the VPN config which admin had pushed. Wait until VPN state shows Connected.
- Navigate back to Skyhigh Client app and tap Get Started
Prompts you to enter login credentials. - Enter your corporate username and password.
After successful authentication, you can use the Skyhigh Client or enter the full URL of the private application in an external browser to access private applications.
Note: To disable VPN, go to Settings > General > VPN > Disable VPN.
