Access Private Applications Through Trellix ePO - OnPrem
Guidelines to access Private Applications from the endpoints managed by Trellix ePO - OnPrem
To access private applications from the endpoints managed by ePO, the Client Proxy extension must be installed on ePO and Client Proxy package should be deployed to the endpoints.
Export the tenant credentials
Do the following to export the tenant credentials from SSE to an .xml file:
- Go to Settings > Infrastructure > Client Proxy Management.
- In the policy tree, select Global Configuration.
- Click Tenant Authentication to open Tenant Authentication and Global Settings.
- From the Actions drop-down list, select Export Credentials.
Downloads the tenant credentials to an .xml file.
Install the Client Proxy extension on Trellix ePO on-premise
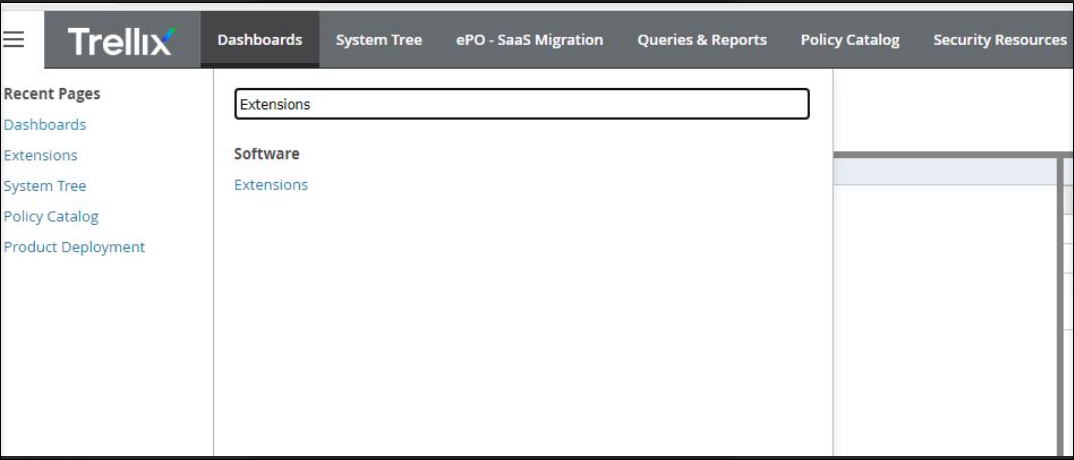
- On the Trellix ePO console, select Menu > Software > Extensions.
- Click Install Extension.

- Click Choose File to navigate to the latest version of the extension file.
- Select the extension file and click OK.
The Client Proxy extension software is installed on the Trellix ePO server.
.png?revision=1)
- Go to the Policy Catalog > Skyhigh Client proxy and click New Policy.
- Enter the policy name in the Create a new policy dialog box.
.png?revision=1)
- Go to the Proxy Servers tab and configure the proxy server address.
.png?revision=1)
- Go to Client Configuration tab:
- In the Customer Identifier, import the tenant credentials (exported from SSE) to ePO.
- In the Apply Policy From Skyhigh SSE setting, select the Download Policy from Skyhigh SSE checkbox.
- When you select this checkbox and push the policy to all endpoints, the endpoints will synchronize with the SSE SCP policy.
- In the Secure Channel for Cloud Proxies setting, select the Enable Secure Channel checkbox.
- In the Traffic Redirection Settings, select the Always redirect network traffic to proxy servers checkbox.
Note: After synchronization between SSE and ePO, the endpoints will start applying only the SSE SCP policy. Even if you clear this checkbox, endpoints will honor only the SSE SCP policy and not the ePO SCP policy.
.png?revision=1)
- Click Save.
- Displays the saved Client Proxy policy on the Policy Catalog page.
- Select the policy and click Edit.
- From the Actions drop-down list, select Export Policy to File.
.png?revision=1)
- Select Skyhigh Client Proxy Policy Client File to download the SCP client file. You need to import this file to the SSE UI.
.png?revision=1)
- Select Systems > System Tree > My Organization.
- Select the organizational level where you want to assign Client Proxy policy to all endpoints.
- Go to the Assigned Policies tab.
- Select Edit Assignment.
.png?revision=1)
- From the Assigned policy drop-down list, select the policy.
_2.png?revision=1)
-
You can push the policy through ePO to the client or client will pull this policy through Trellix Agent.
Create or import ePO policy on Skyhigh SSE
- Go to Settings > Infrastructure > Client Proxy Management.
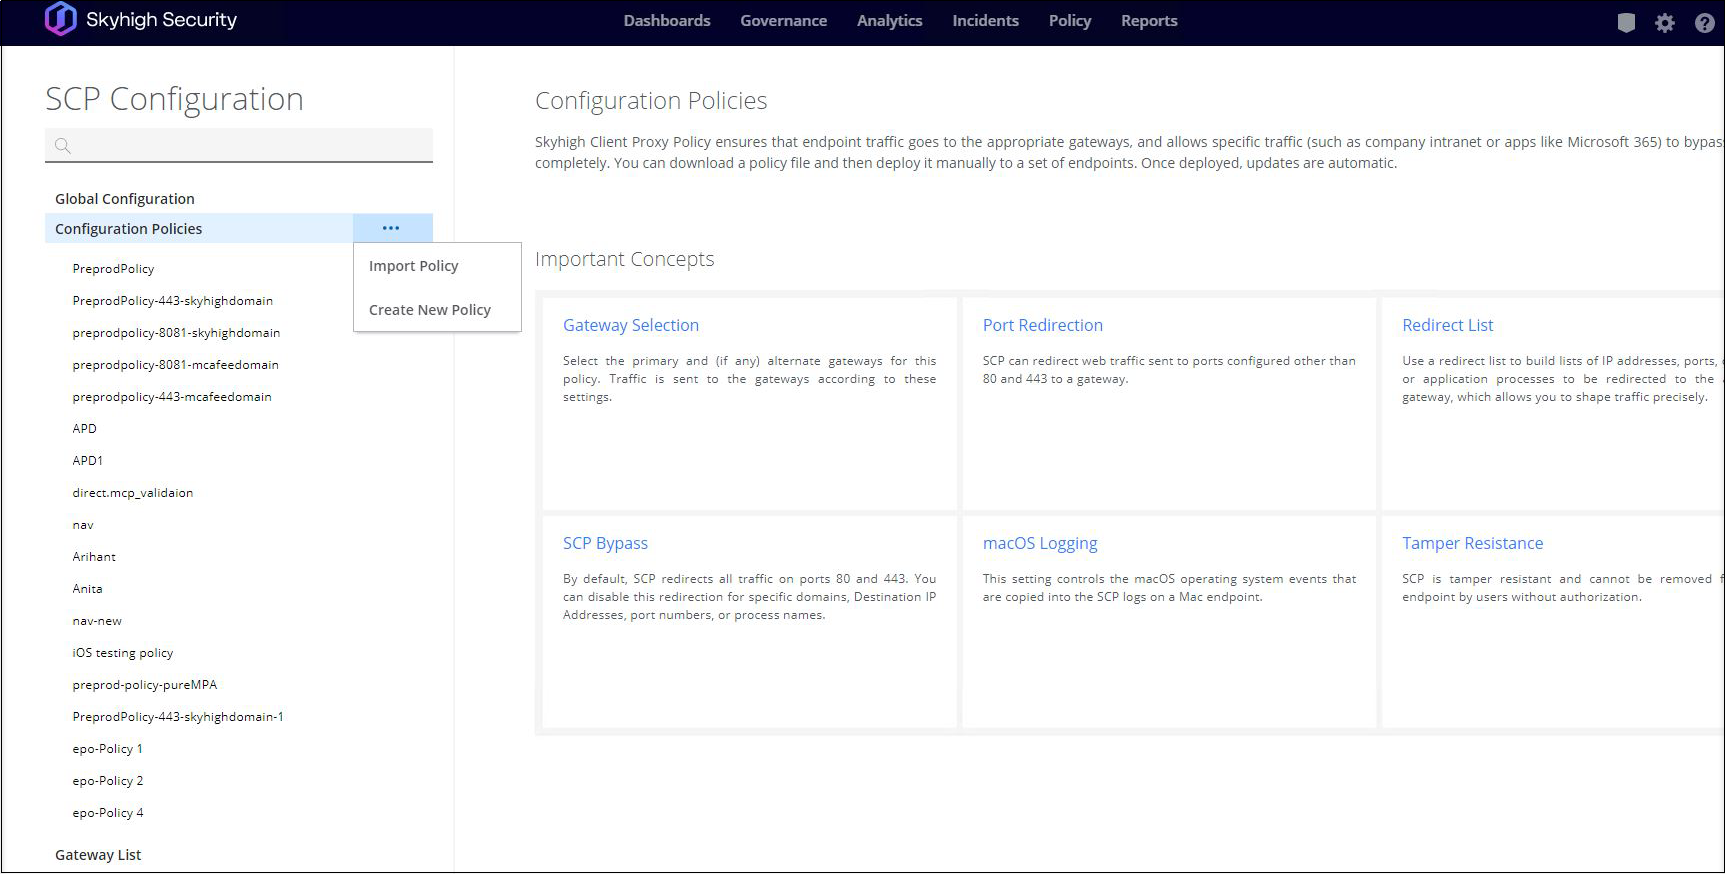
- In the policy tree, select Configuration Policies.
You can create a new policy or import the policy exported from ePO. - Click the highlighted menu icon (...) next to the branch, select Create New Policy or Import Policy.
- Import Policy - Imports the policy to SSE UI. Export the policy from SSE and importing this policy on ePO is not supported for private applications.
- Create New Policy - Enter the same name as the policy name on ePO. The name is case sensitive. Also, make sure to complete all Client Proxy configurations such as block list, bypass list and so on.

- Configure the private applications and connector groups.

- Once ePO and SCP endpoints synchronize, verify the Policy Revision number in the About Skyhigh Client Proxy window, which should be same as the SSE policy revision number.
It may take up to 5 minutes to get SSE policy to get enforced.
.png?revision=1)
- Endpoints can now access private applications.
