Configure SAML in Skyhigh SSE
Use your own Identity Provider (IDP) and share authentication and identity information with Skyhigh Secure Web Gateway (SWG) in the form of SAML assertions.
Prerequisites
To configure SAML authentication, you need the following information:
- Service provider's entity ID
- Identity Provider's entity ID
- URL of your Identity Provider
- Name of the attribute that uniquely identifies users
- Name of the attribute that lists group memberships
- Certificate to verify signed SAML responses and assertions
- Names of one or more domains that identify your organization
Match SAML Settings to your IDP
For SAML authentication to succeed, make sure that the values you configure for the following SAML settings exactly match in Skyhigh CASB and in your Identity Provider service.
- Service Provider's Entity ID
- Identity Provider's Entity ID
- User ID attribute in SAML response
- Group ID attribute in SAML response
Configure SAML
SAML authentication is mandatory for accessing Private Applications. Once you have authenticated, you will not need to re-authenticate for 12 hours.
To configure SAML in Skyhigh CASB:
- In Skyhigh CASB navigation bar, go to Settings > Infrastructure > Web Gateway Setup.
- Click New SAML.
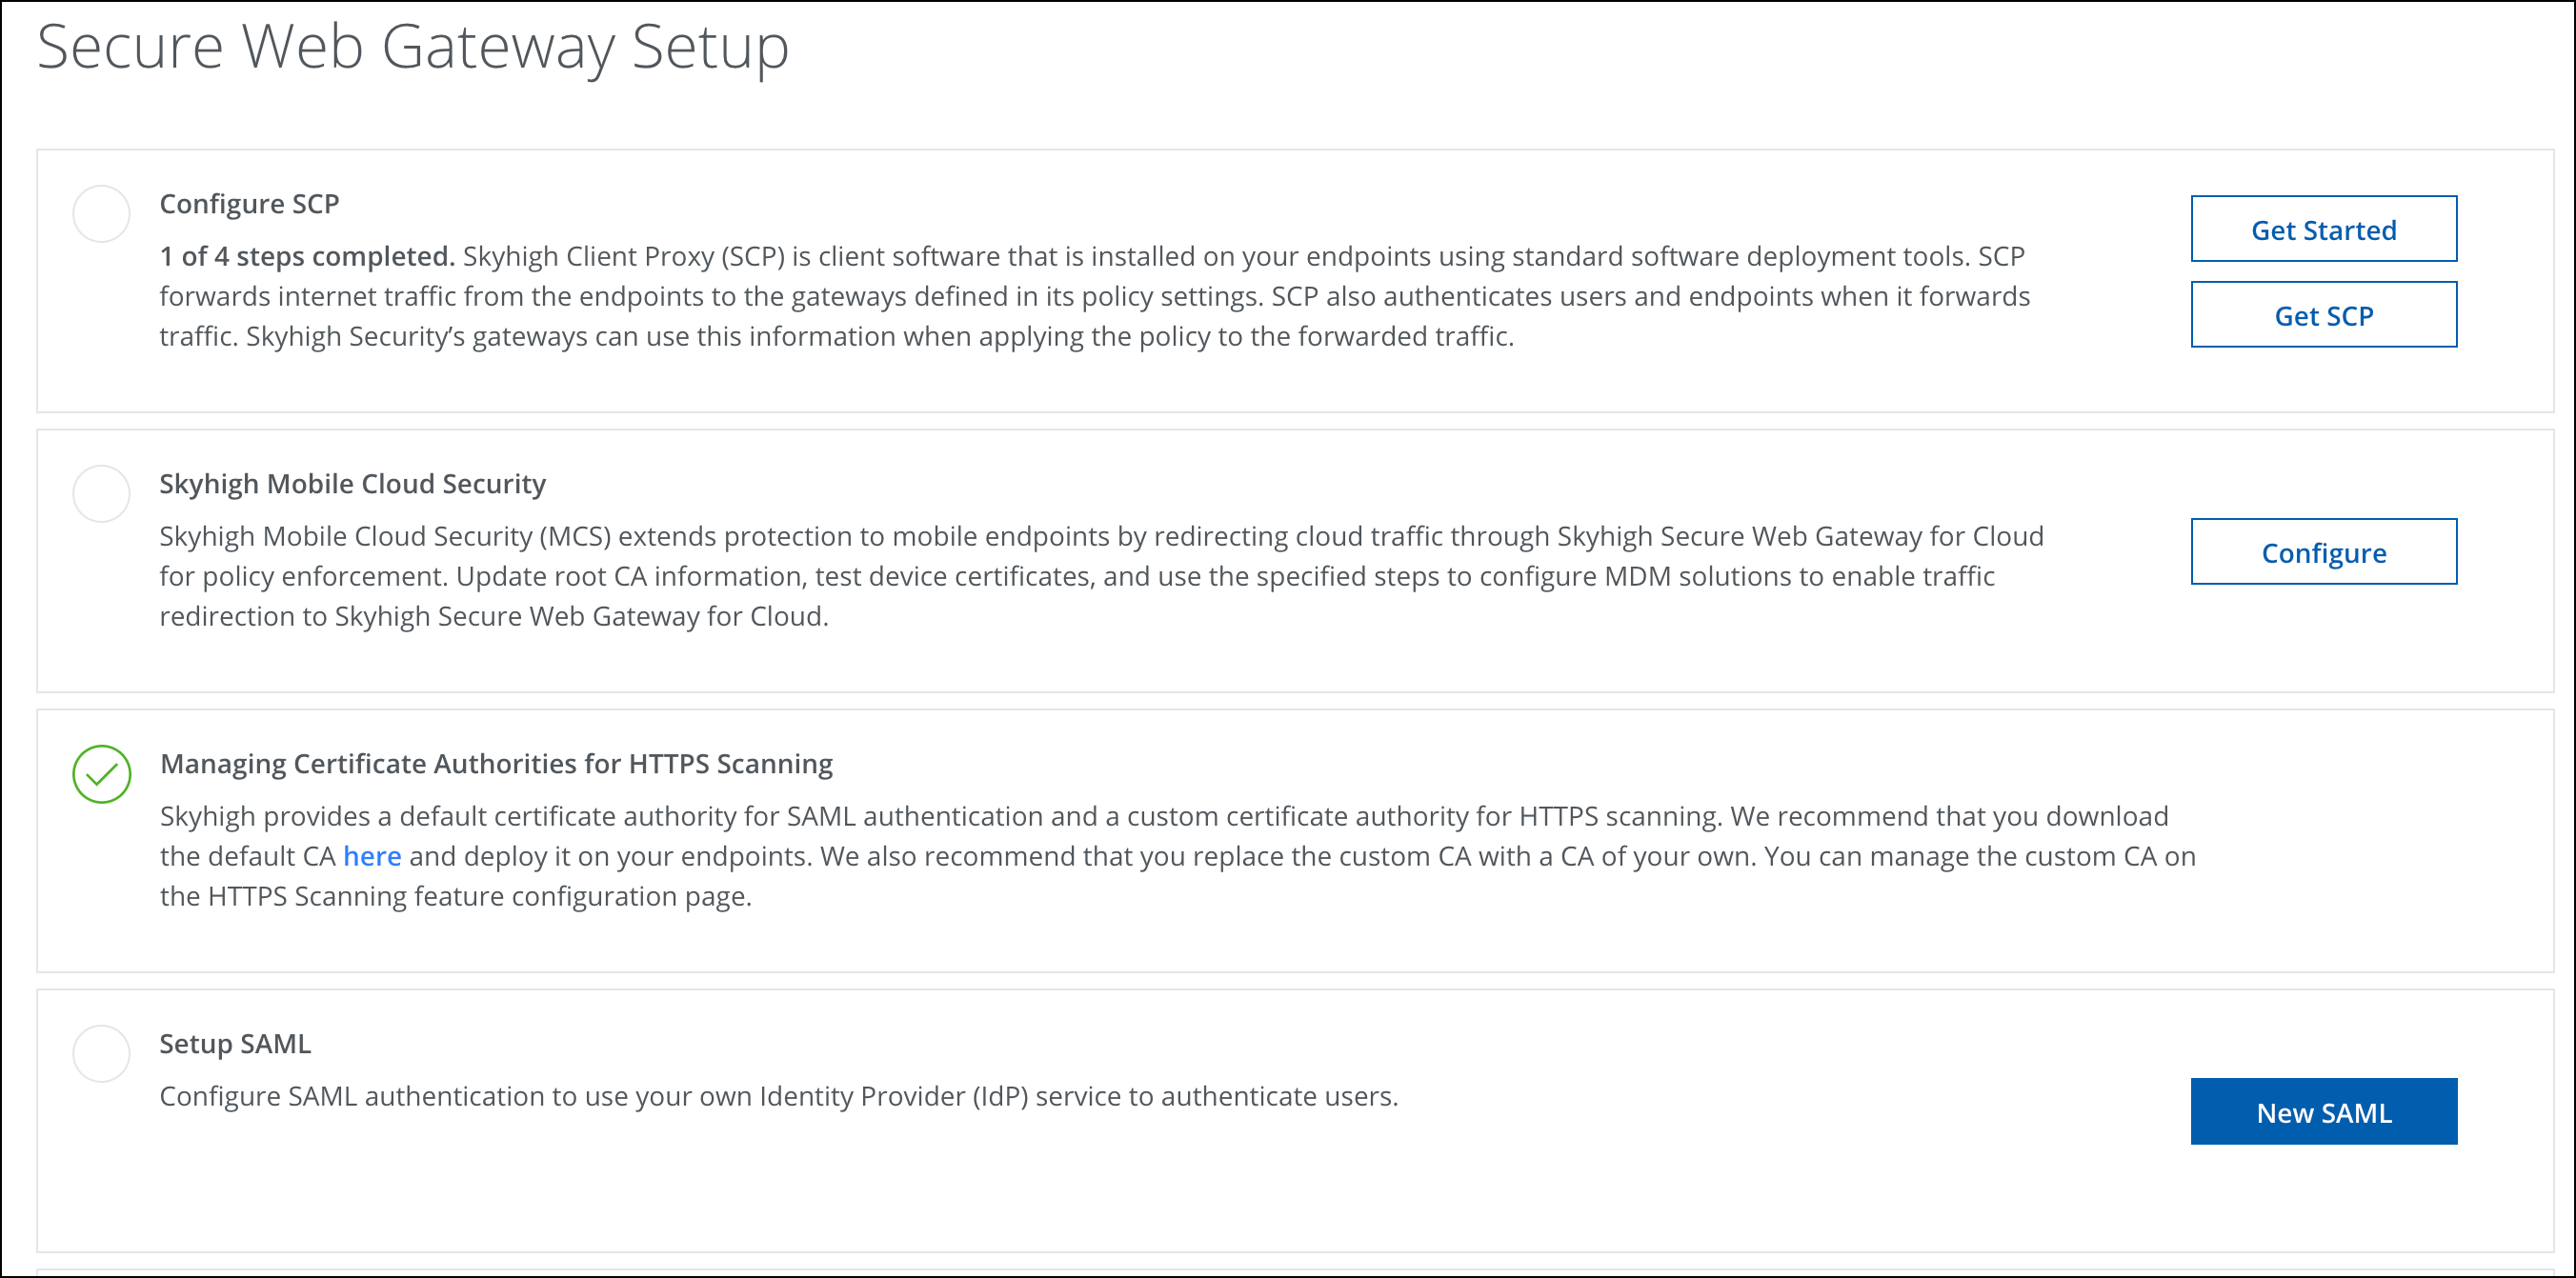
- Enter a unique SAML Configuration Name, then provide values for these SAML settings:
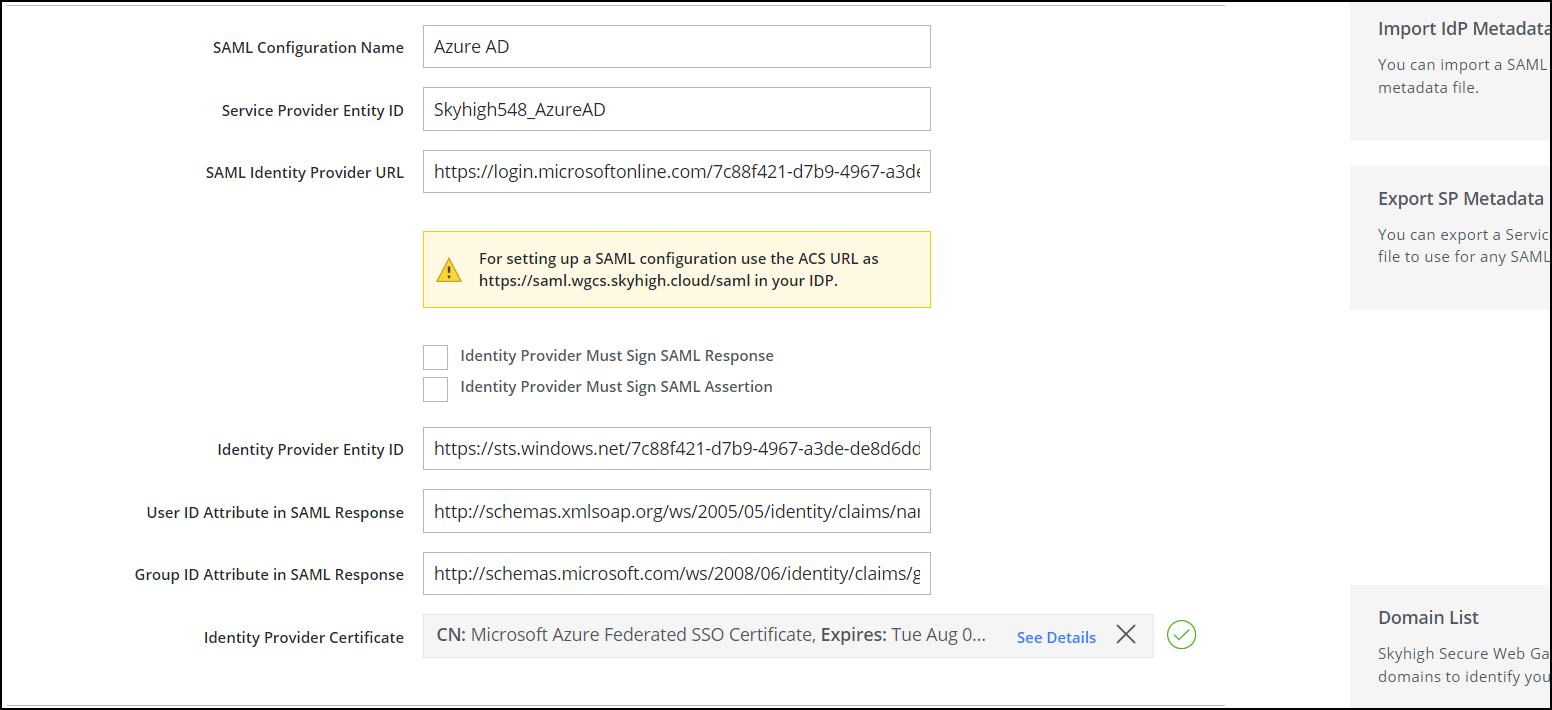
- Service Provider Entity ID. The unique identifier assigned to SWG by your organization. The IDP uses this value to identify SAML requests sent by SWG.
- SAML Identity Provider URL. Specifies the URL of the SAML service provided by your IDP. SWG redirects SAML requests to this URL. Ask your IDP for the URL.
- Identity Provider Must Sign SAML Response. If your IDP signs the SAML response, select this checkbox. When it's selected, SWG verifies that all SAML responses are signed by the IDP.
- Identity Provider Must Sign SAML Assertion. If your Identity Provider signs the SAML assertion in the SAML response, select this checkbox. When it's selected, SWG verifies that all SAML assertions are signed by the IDP.
- Identity Provider Entity ID. The unique identifier assigned to the IDP by your organization. SWG uses this value to identify SAML responses sent by the IDP.
- User ID attribute in SAML response. Specifies the name of the attribute that uniquely identifies the user. SWG uses this setting when it extracts the user ID from the SAML assertion.
Note: Make sure to specify the attribute name in the URL format (for example, if you have configured the SAML attribute on the SAML application.
 - Group ID attribute in SAML response. Specifies the name of the attribute whose value is a list of group names. SWG uses this setting when it extracts group membership information from the SAML assertion. The service uses this information when applying group policies.
- Identity Provider Certificate. Click Upload Certificate, browse for the certificate file provided by your IDP, then click Open.
SWG uses this certificate to verify the signatures of SAML responses and assertions signed by the IDP. The supported certificate file types are: .cer, .crt, and .pem.
- Configure a list of domain names, one per line. SWG uses these values to identify your organization.
- Click Save.
The named SAML configuration is saved.
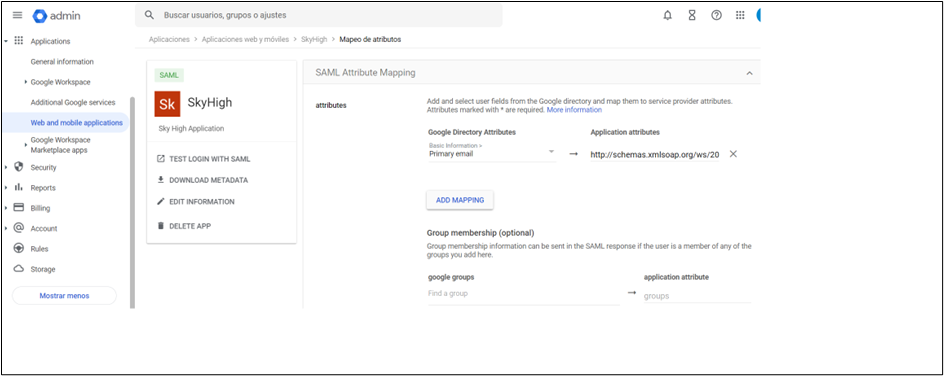
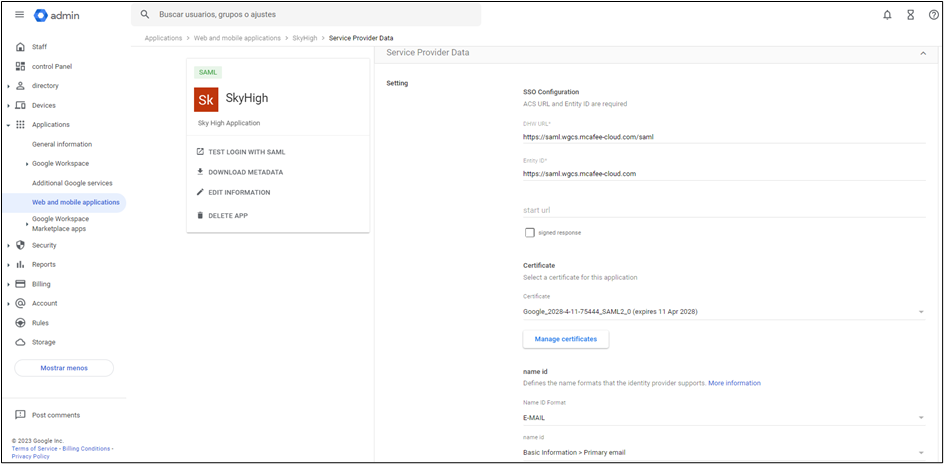
Example of SAML configuration which uses google as IDP:
Example of SAML configuration using AWS as IDP:
- Login to AWS account as an Administrator
- Navigate to IAM Identity Center
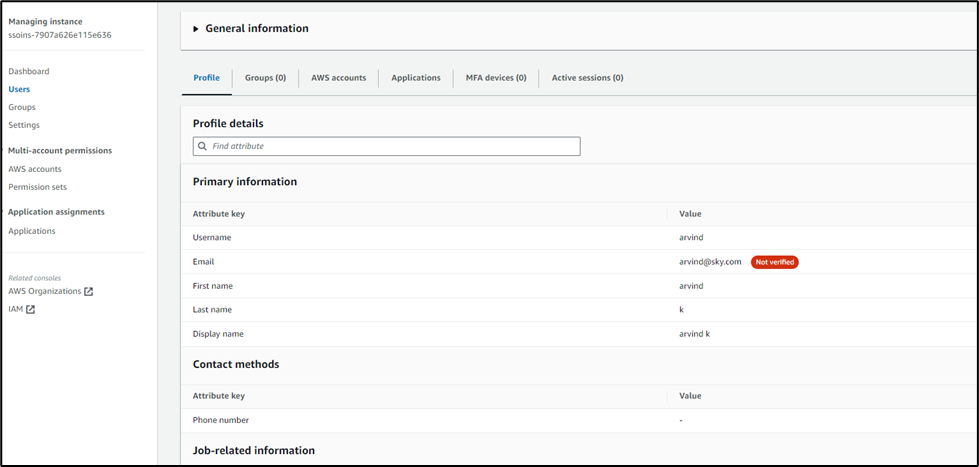
- Add user and make sure you add email and note down the email domain

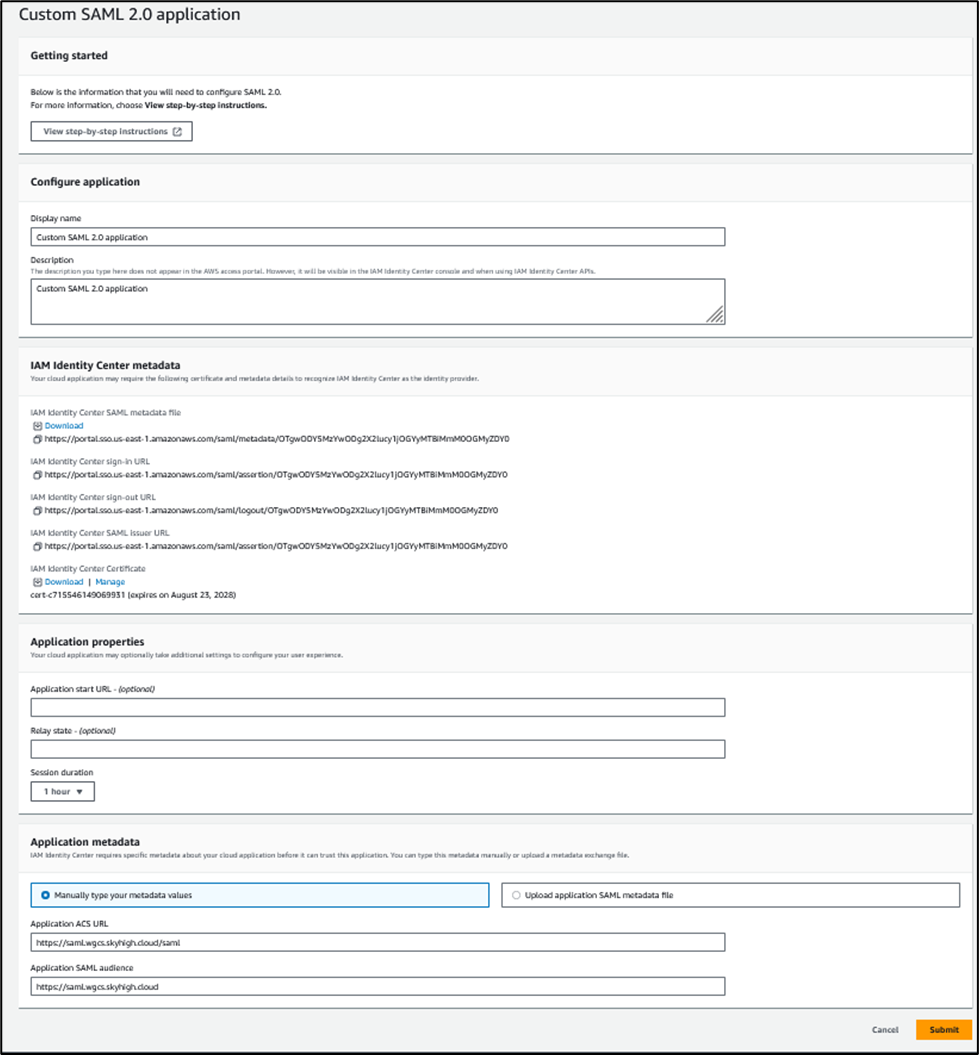
- Go to Applications > Customer managed and add application

- Add details and download the metadata.
- Assign the created app to the user.
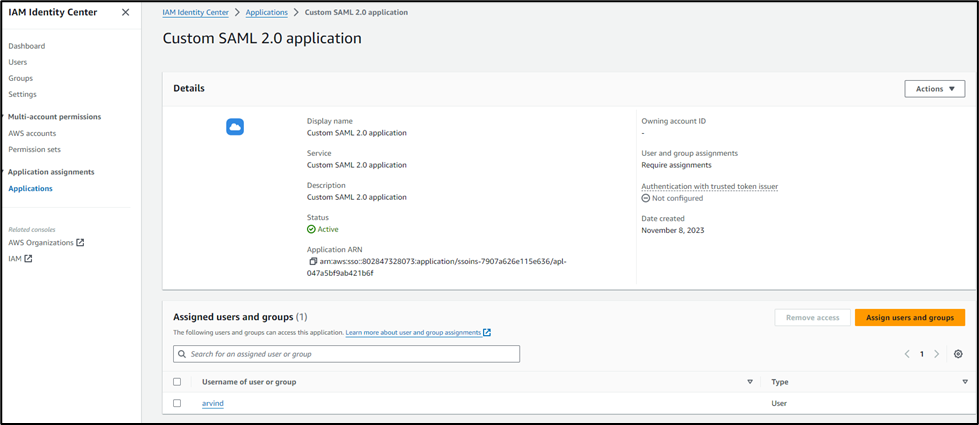
- Once the user is assigned with the application, this is displayed on the users page.
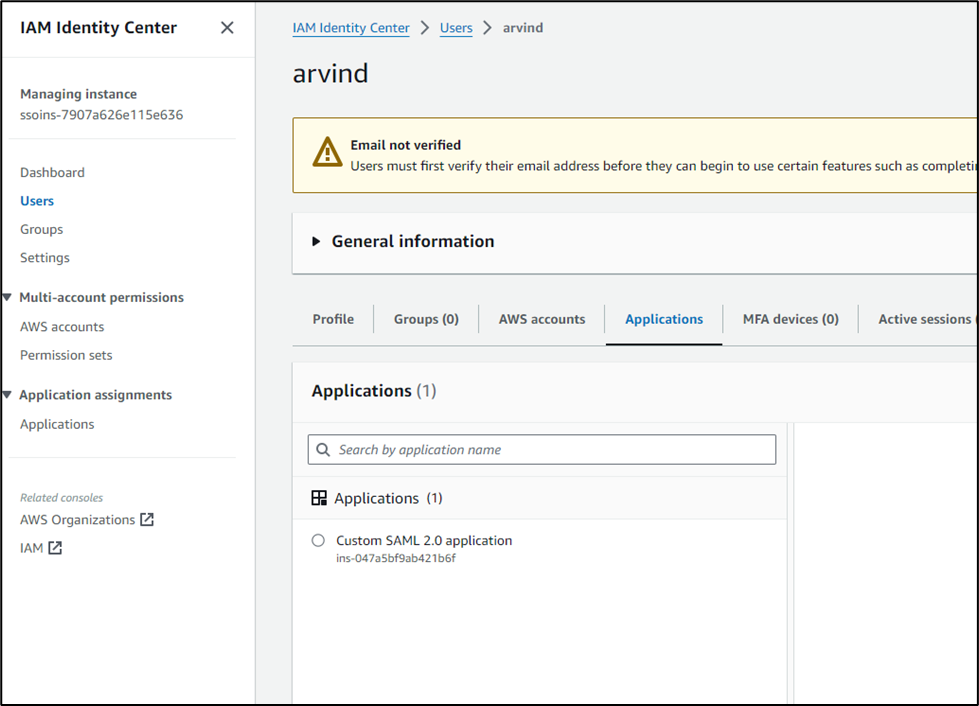
- Edit the application attribute list and add the attributes shown below
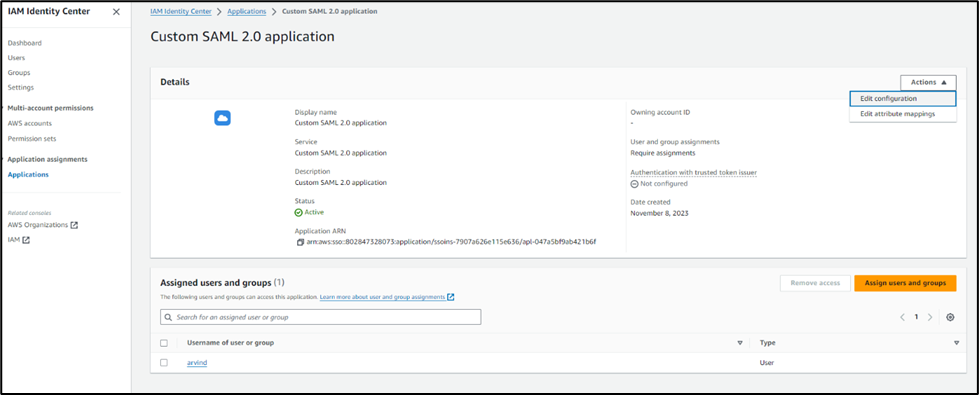

- IDP configuration is now completed.
- Login to Skyhigh Security UCE tenant and configure SAML.
- Go to Infrastructure > Webgateway setup > Setup SAML > New SAML
- Upload the downloaded metadata file which contains AWS IDP certificate.
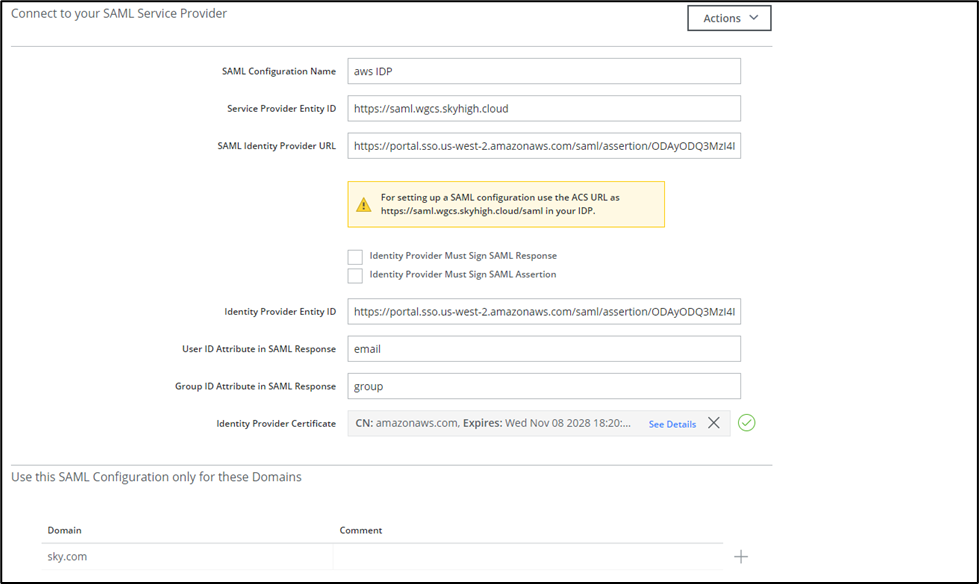
- Add the domain which is same as the user domain added in AWS IDP.
- SAML configuration is now completed.
- Refer to mindtouch documentation to create Private application.
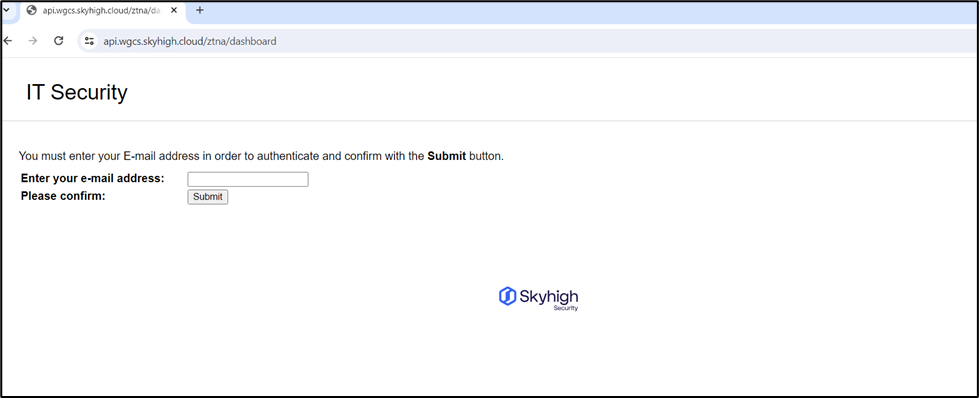
- While accessing Private application from the client machine you will be prompted to enter an email. Use the same email use in the saml configuration, redirected to AWS IDP to authenticate the user. After successful authentication it redirect's back to private application page.
