Deploy Secure app connector V2 on VMWare vCenter using OVA for TCP Applications
NOTE: Make sure to allow the following domains and HTTP(S) ports when you are using a firewall, For more details, see Secure App Connector V2 Prerequisites and Firewall settings For Private Applications
Prerequisites
- Skyhigh Security recommends Secure App Connector have at least 4CPU, 8GB RAM, and 50GB HDD.
- The OVA is compatible with ESXi version 6.7 and above.
Steps to Deploy
- Download the latest OVF package. For information about how to download, see Download Secure App Connector V2.
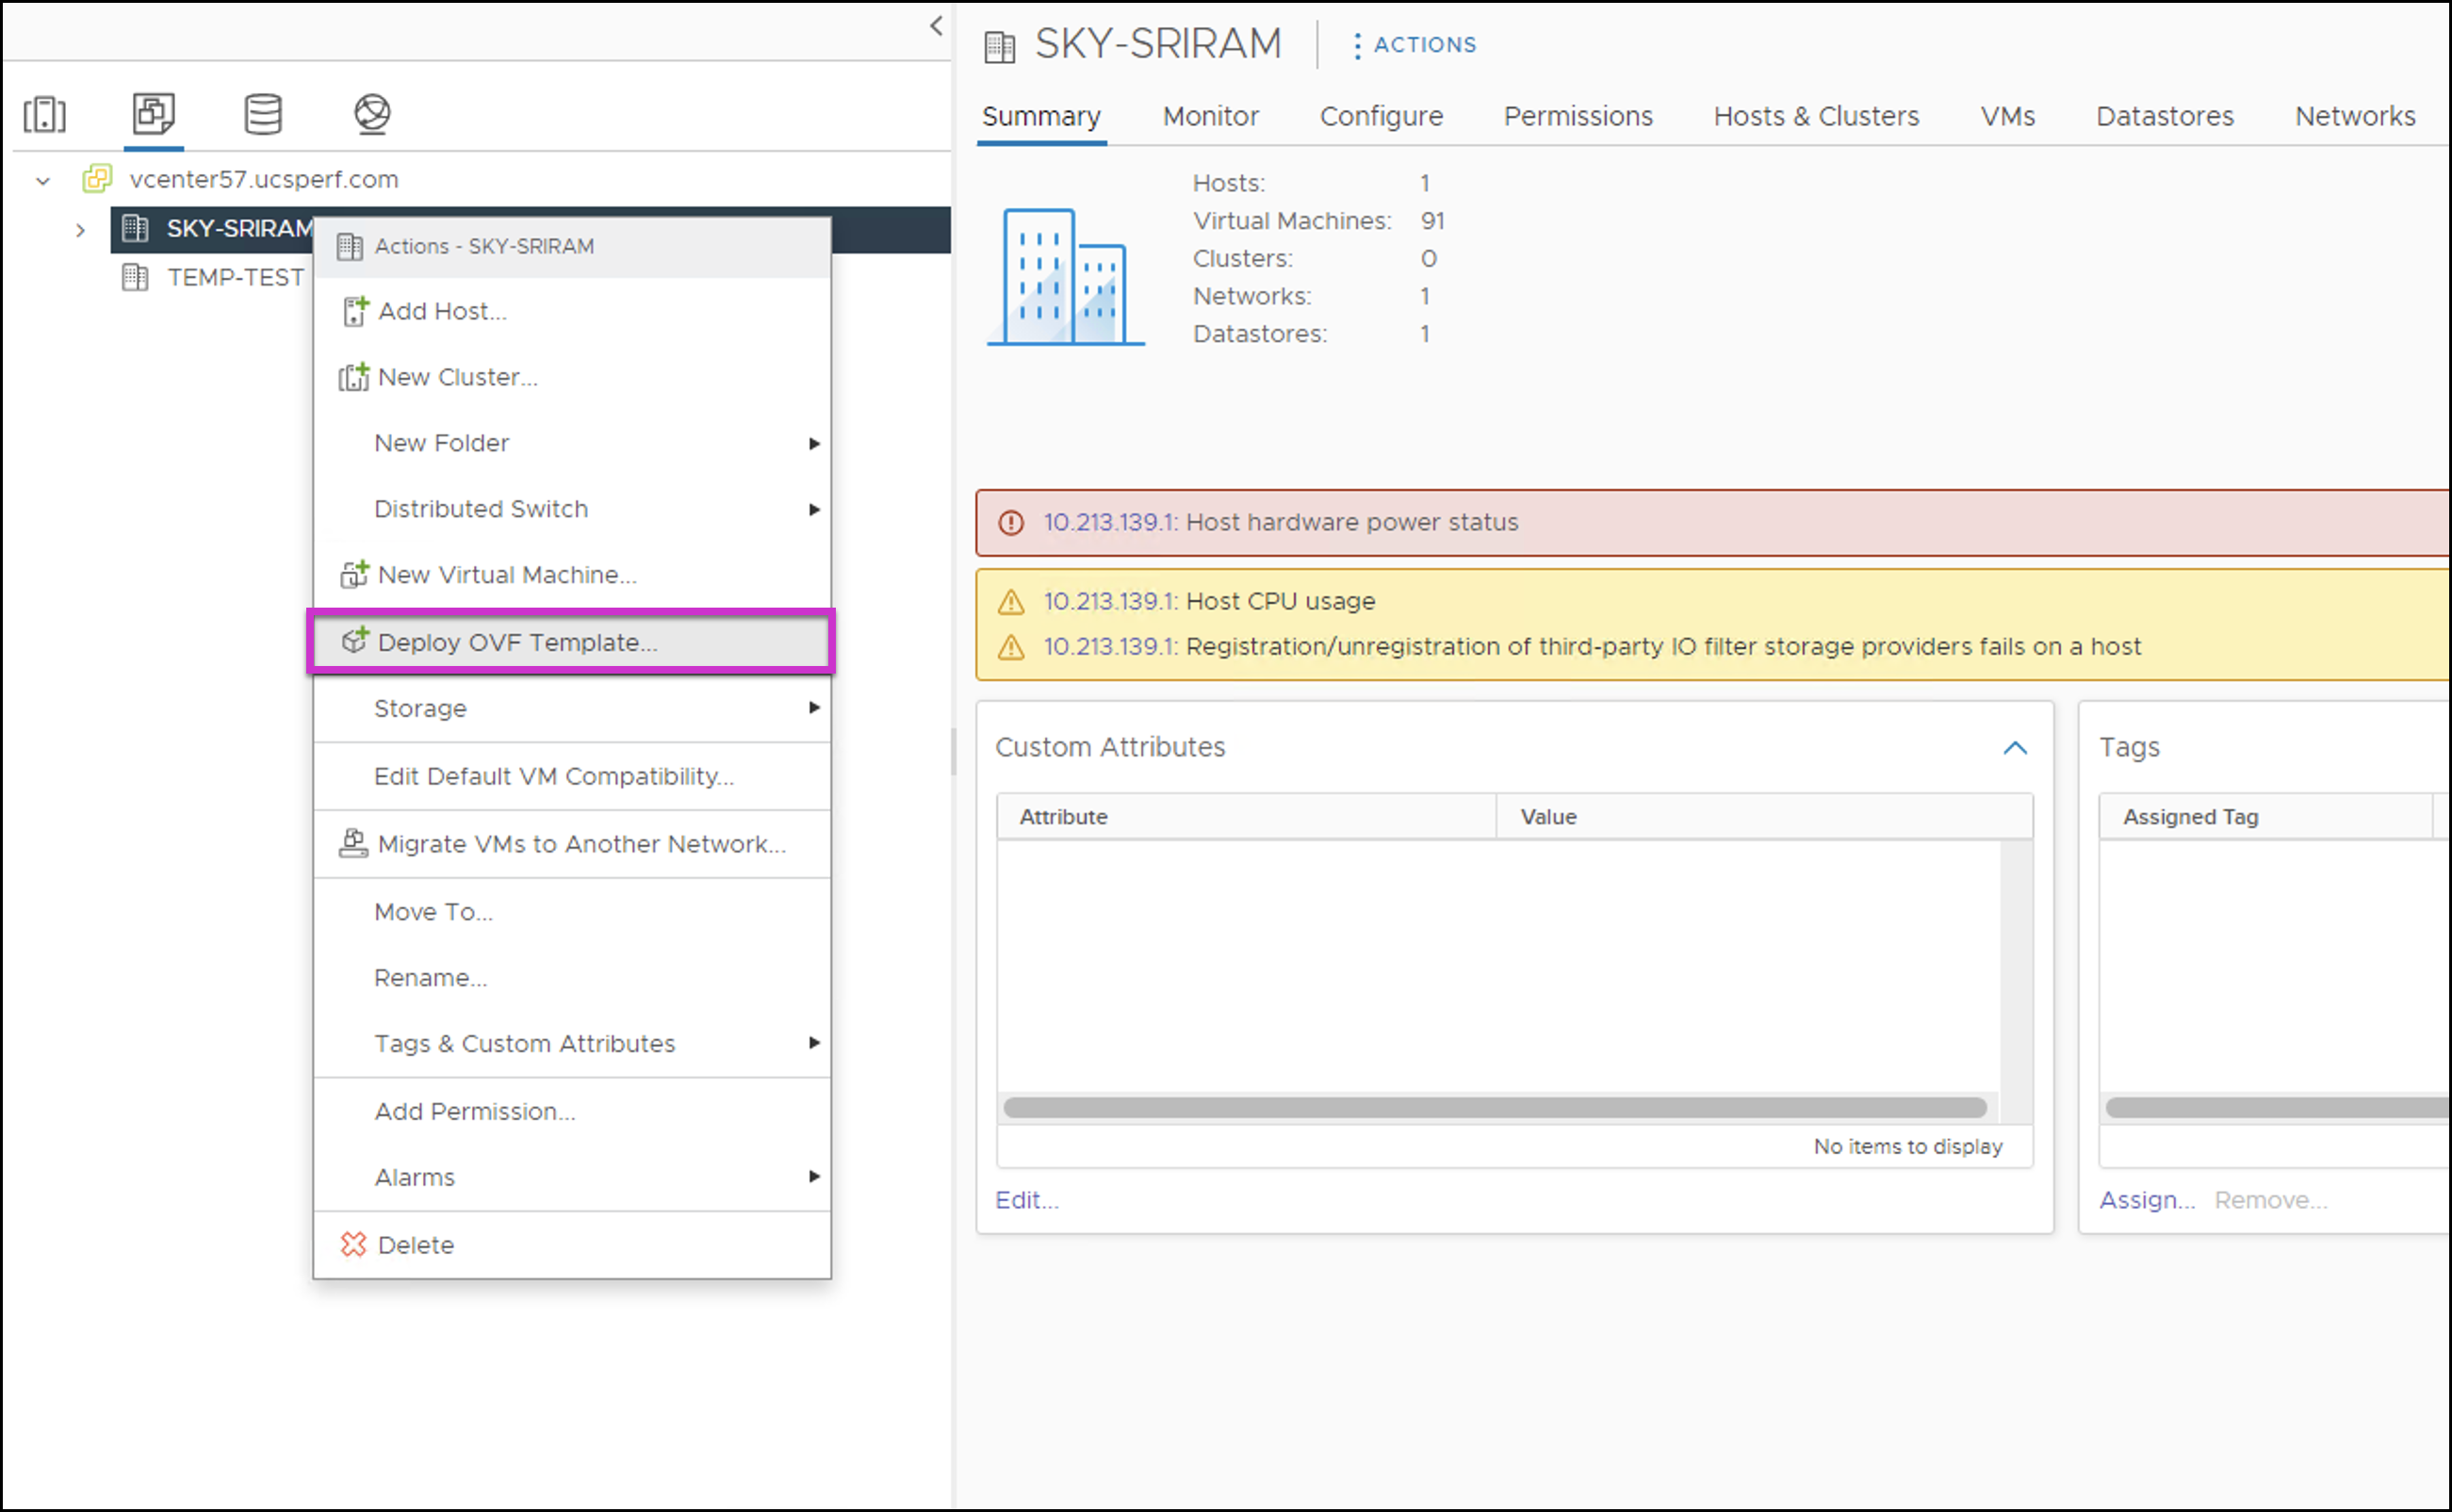
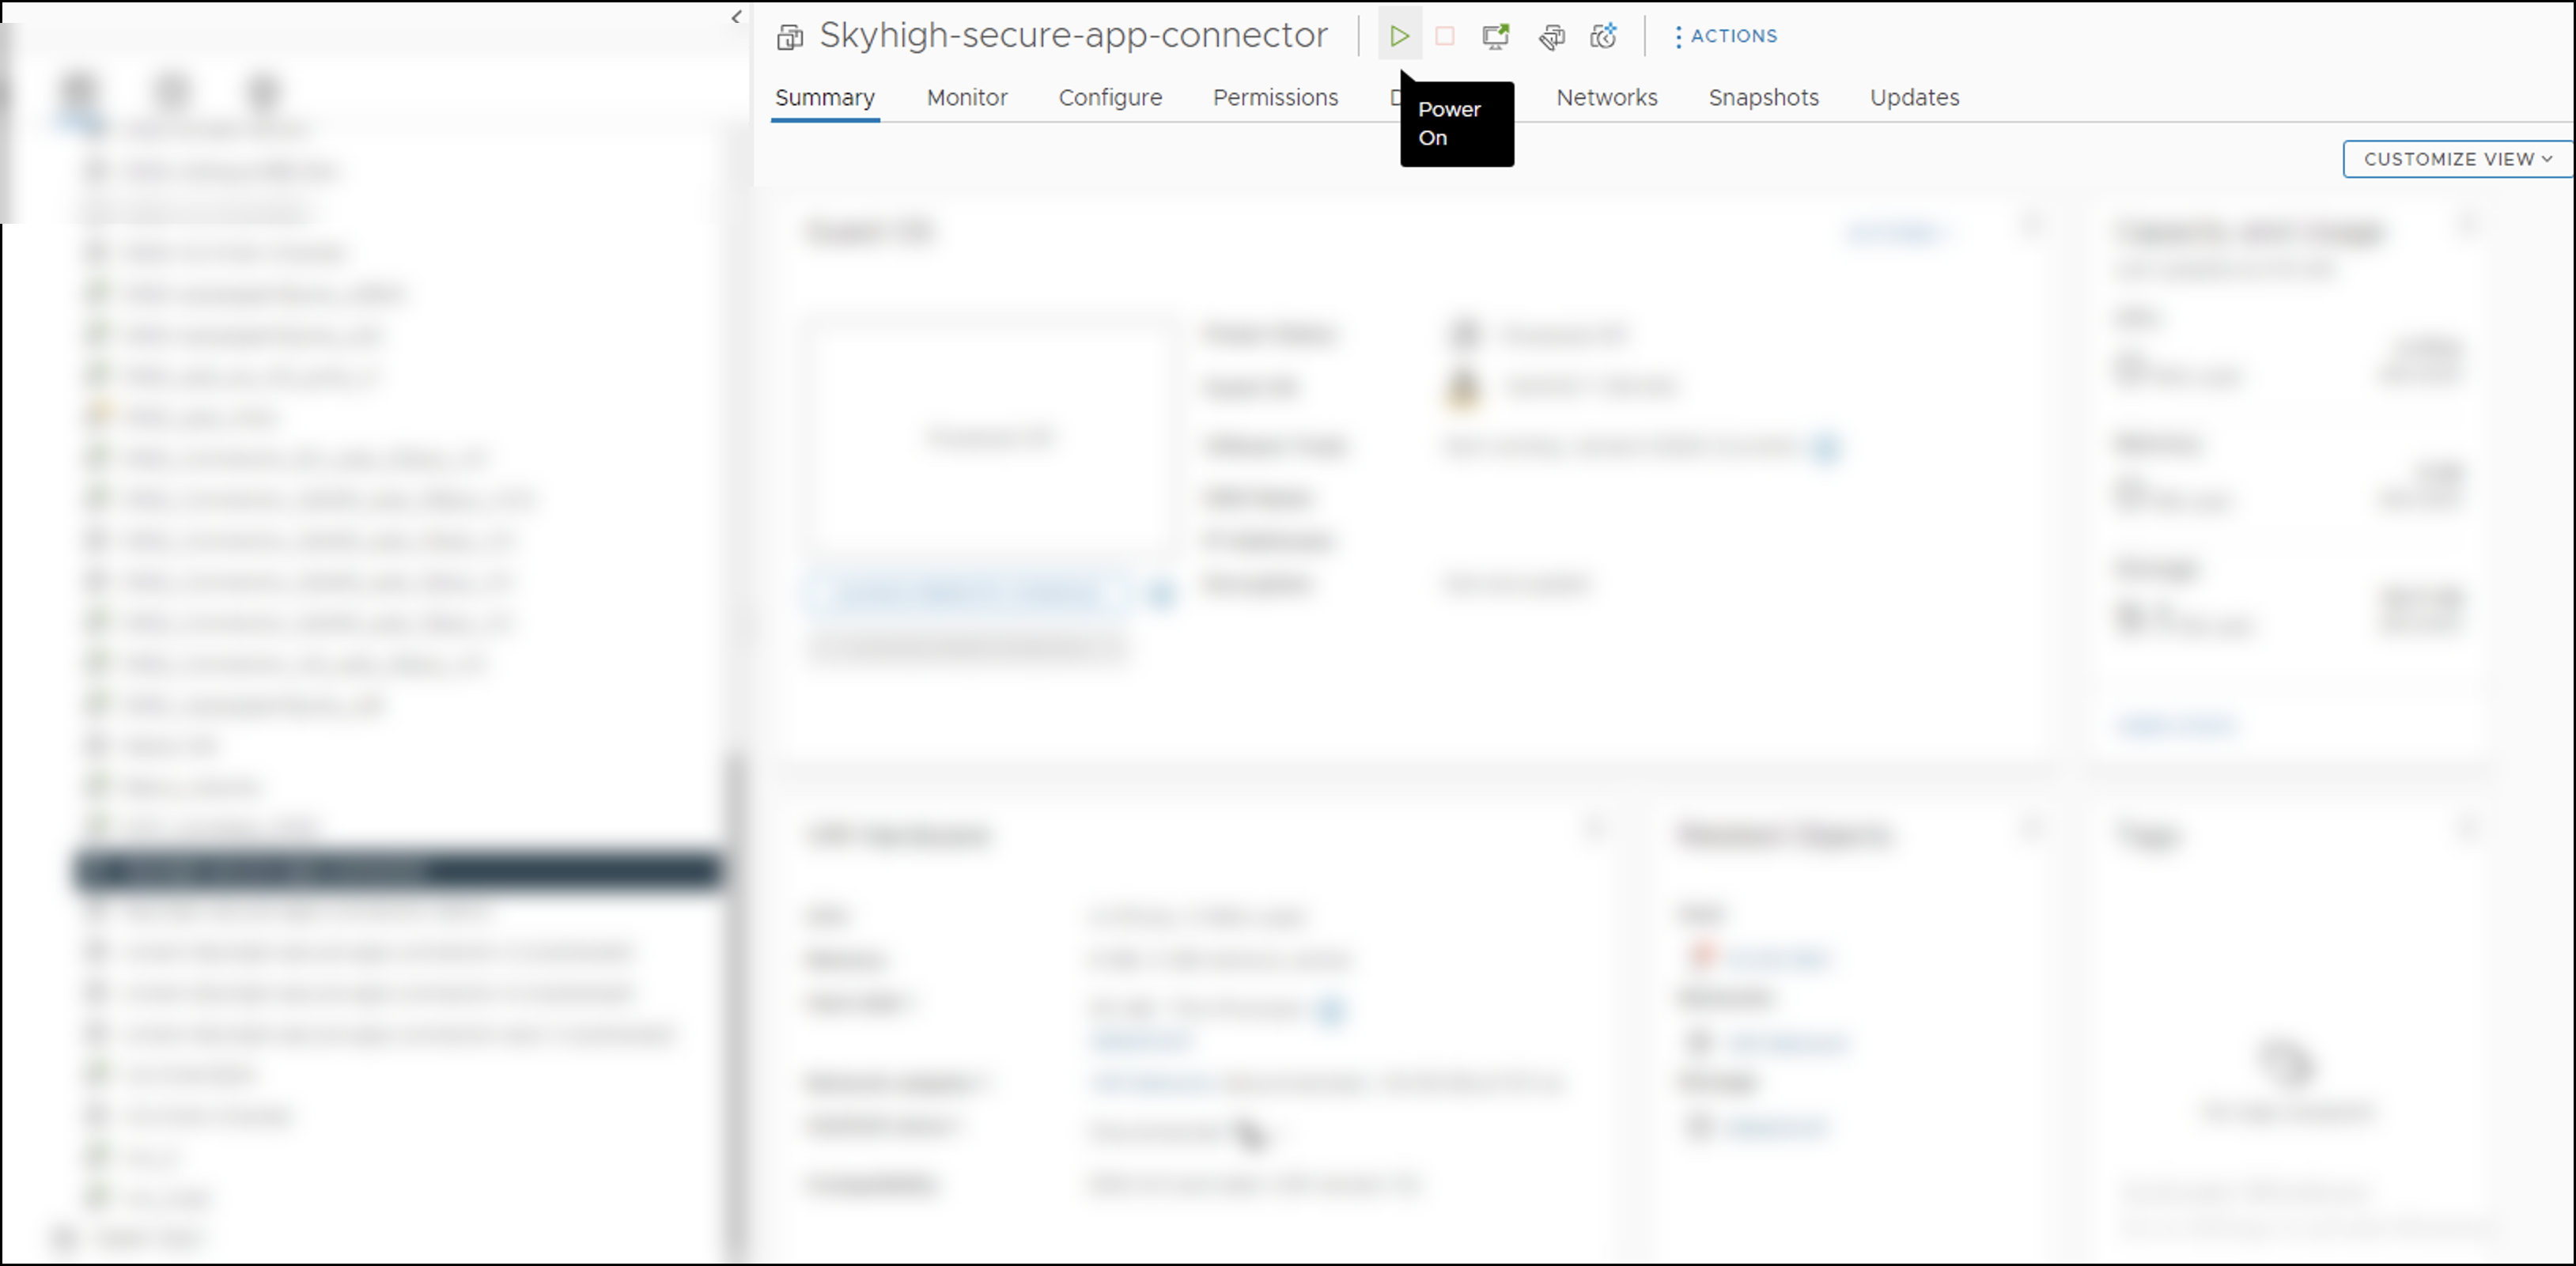
- Connect to a VCenter Server with the vSphere Web Client and log in.
.png?revision=1)
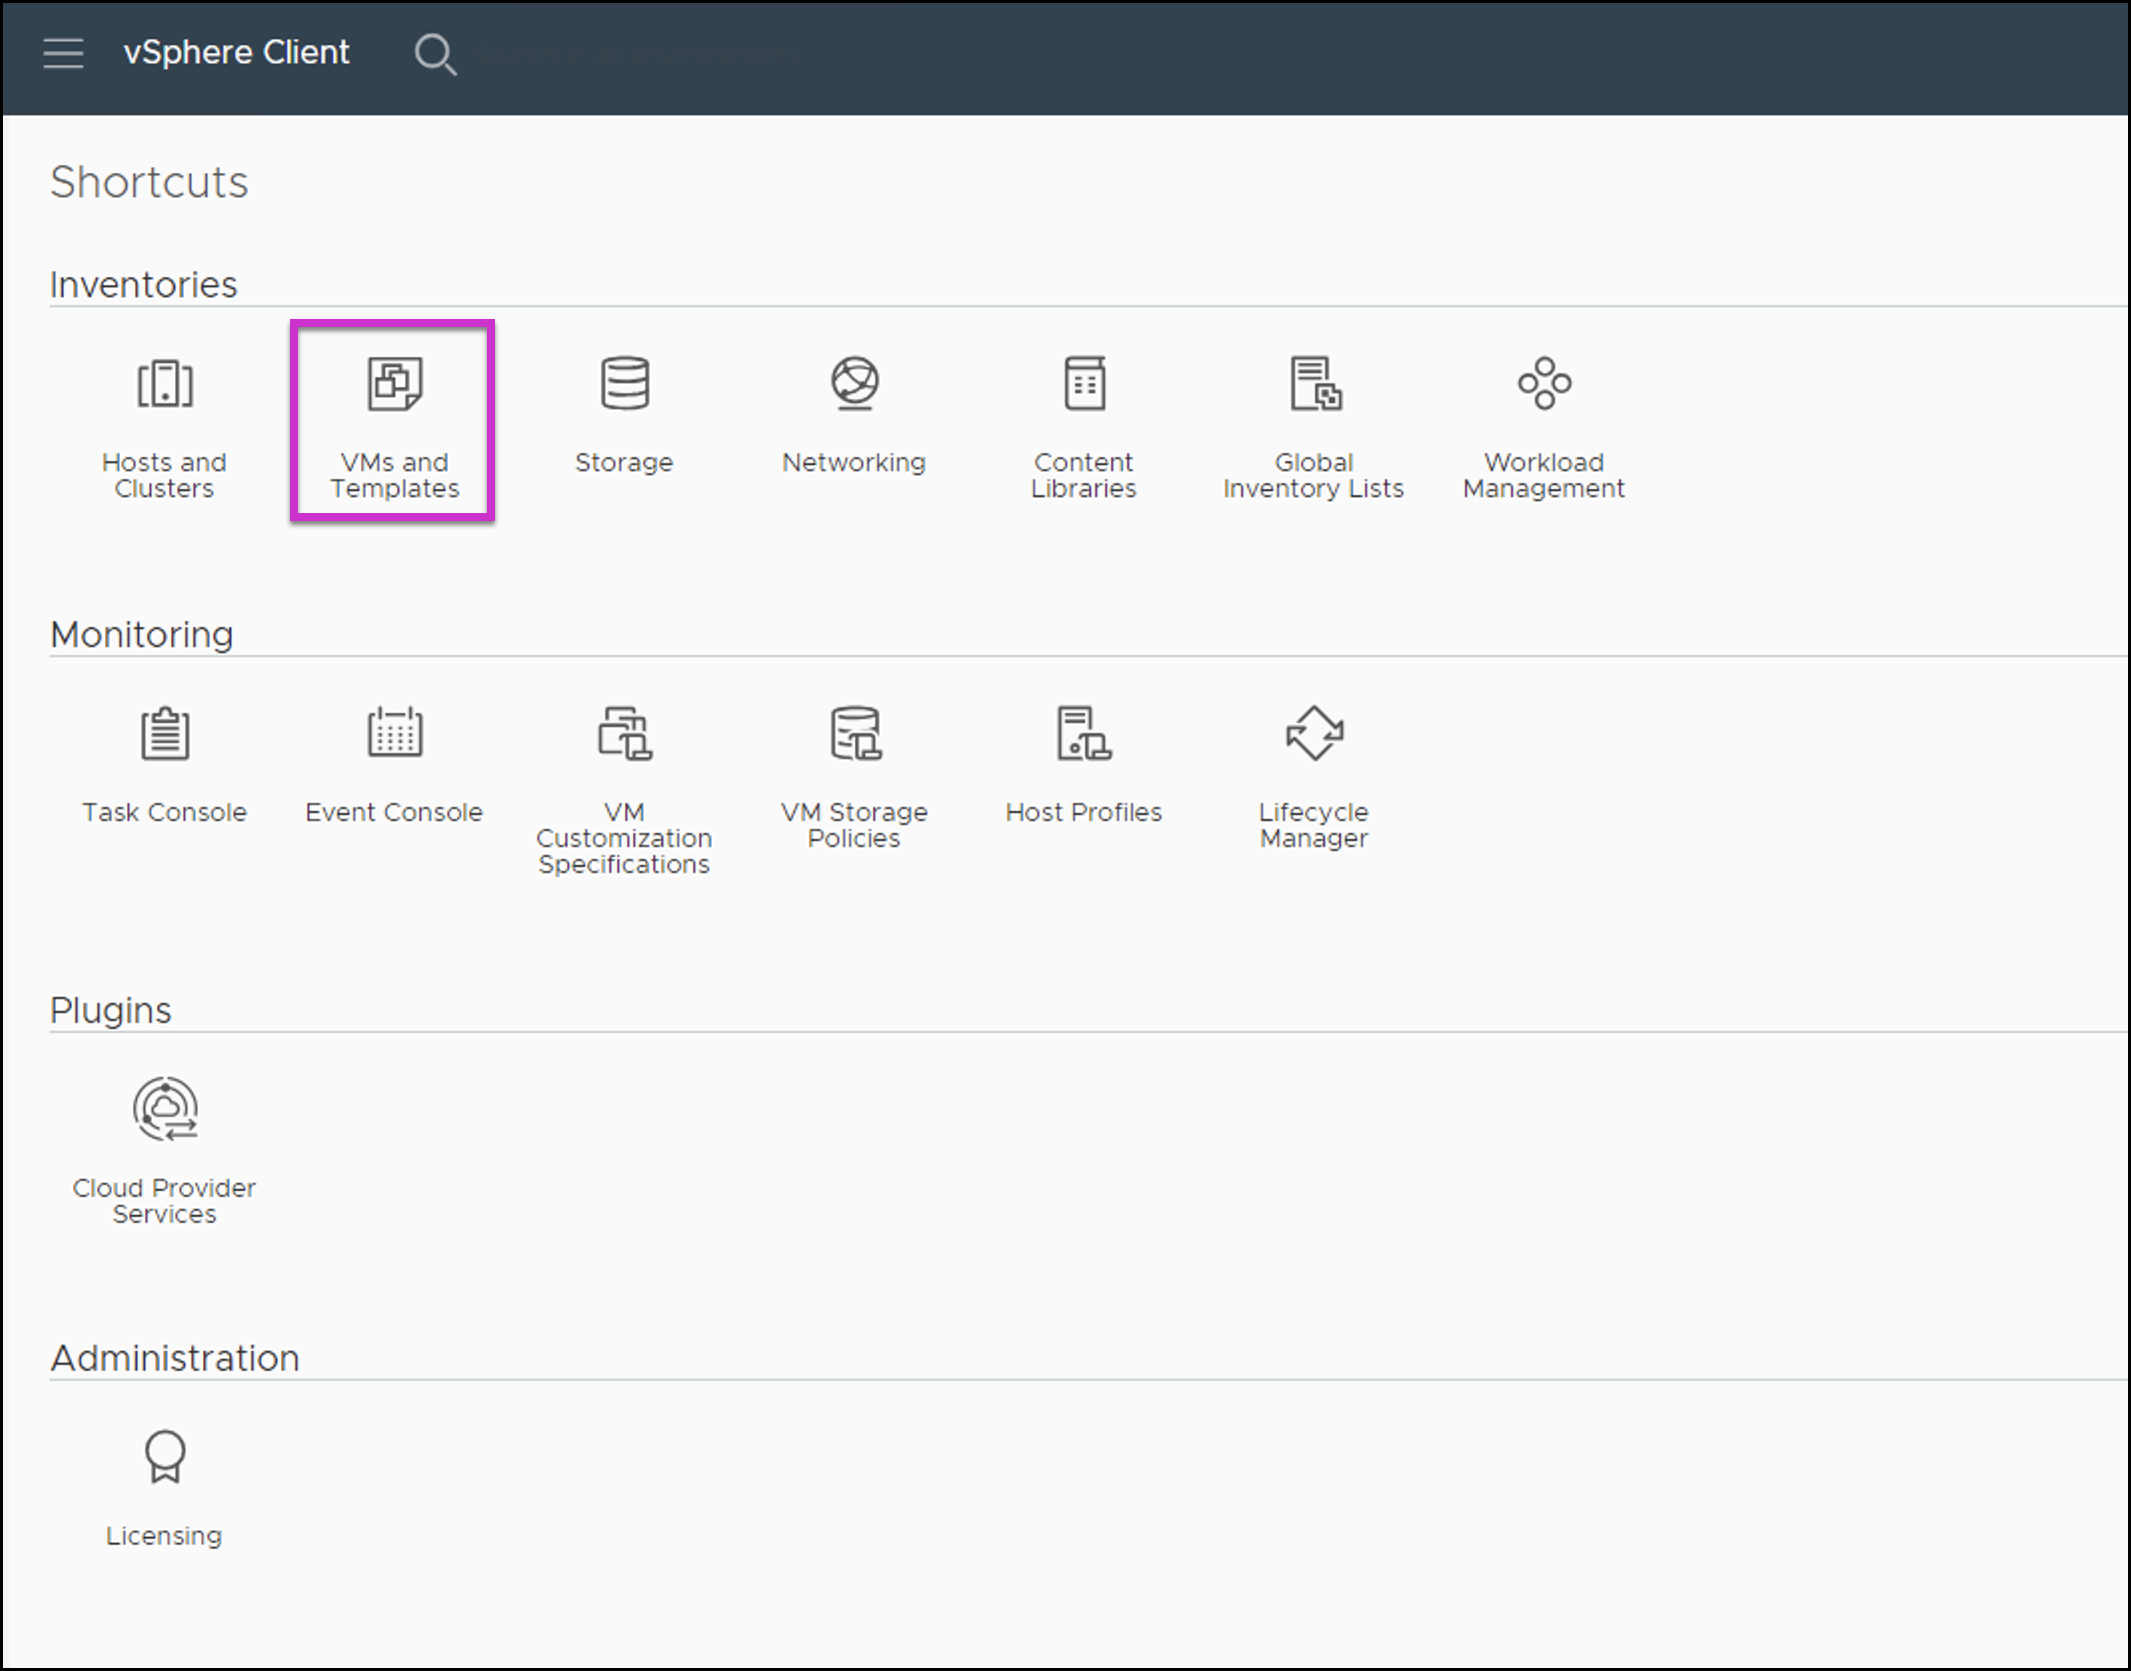
- On the home page, select VMs and Templates.
- Select Deploy OVF template to start deploying OVF.
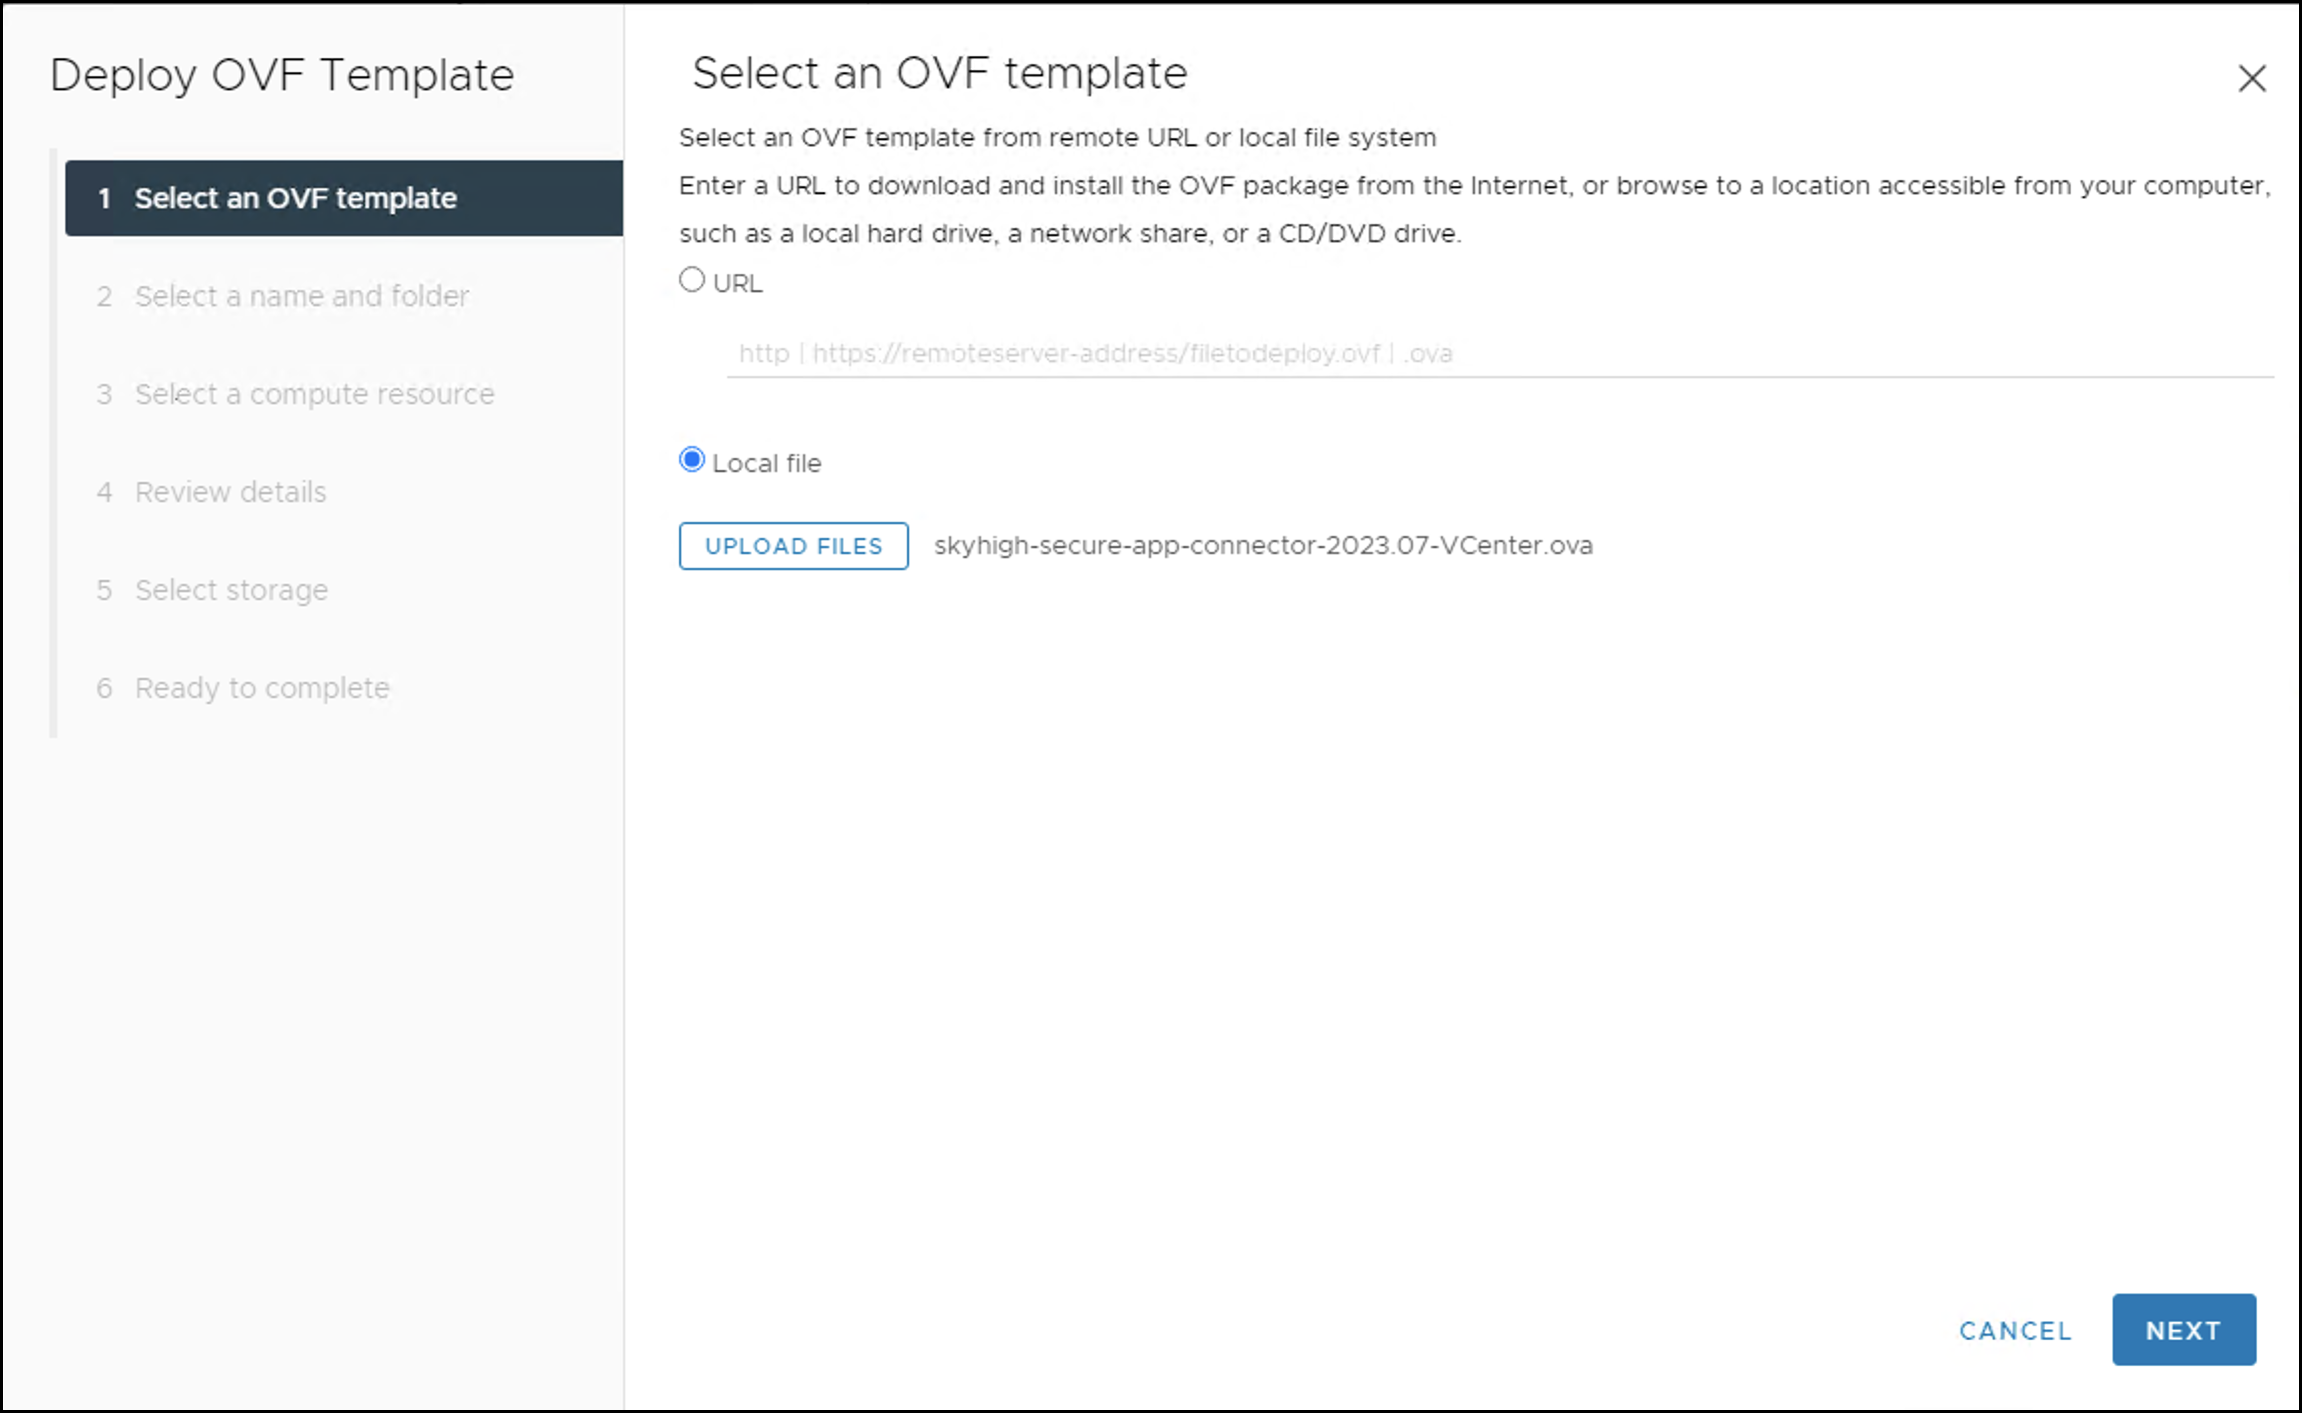
- In the Select an OVF template window, make sure you select the Local file option and browse to the location of the OVF template from the local system and click Next.
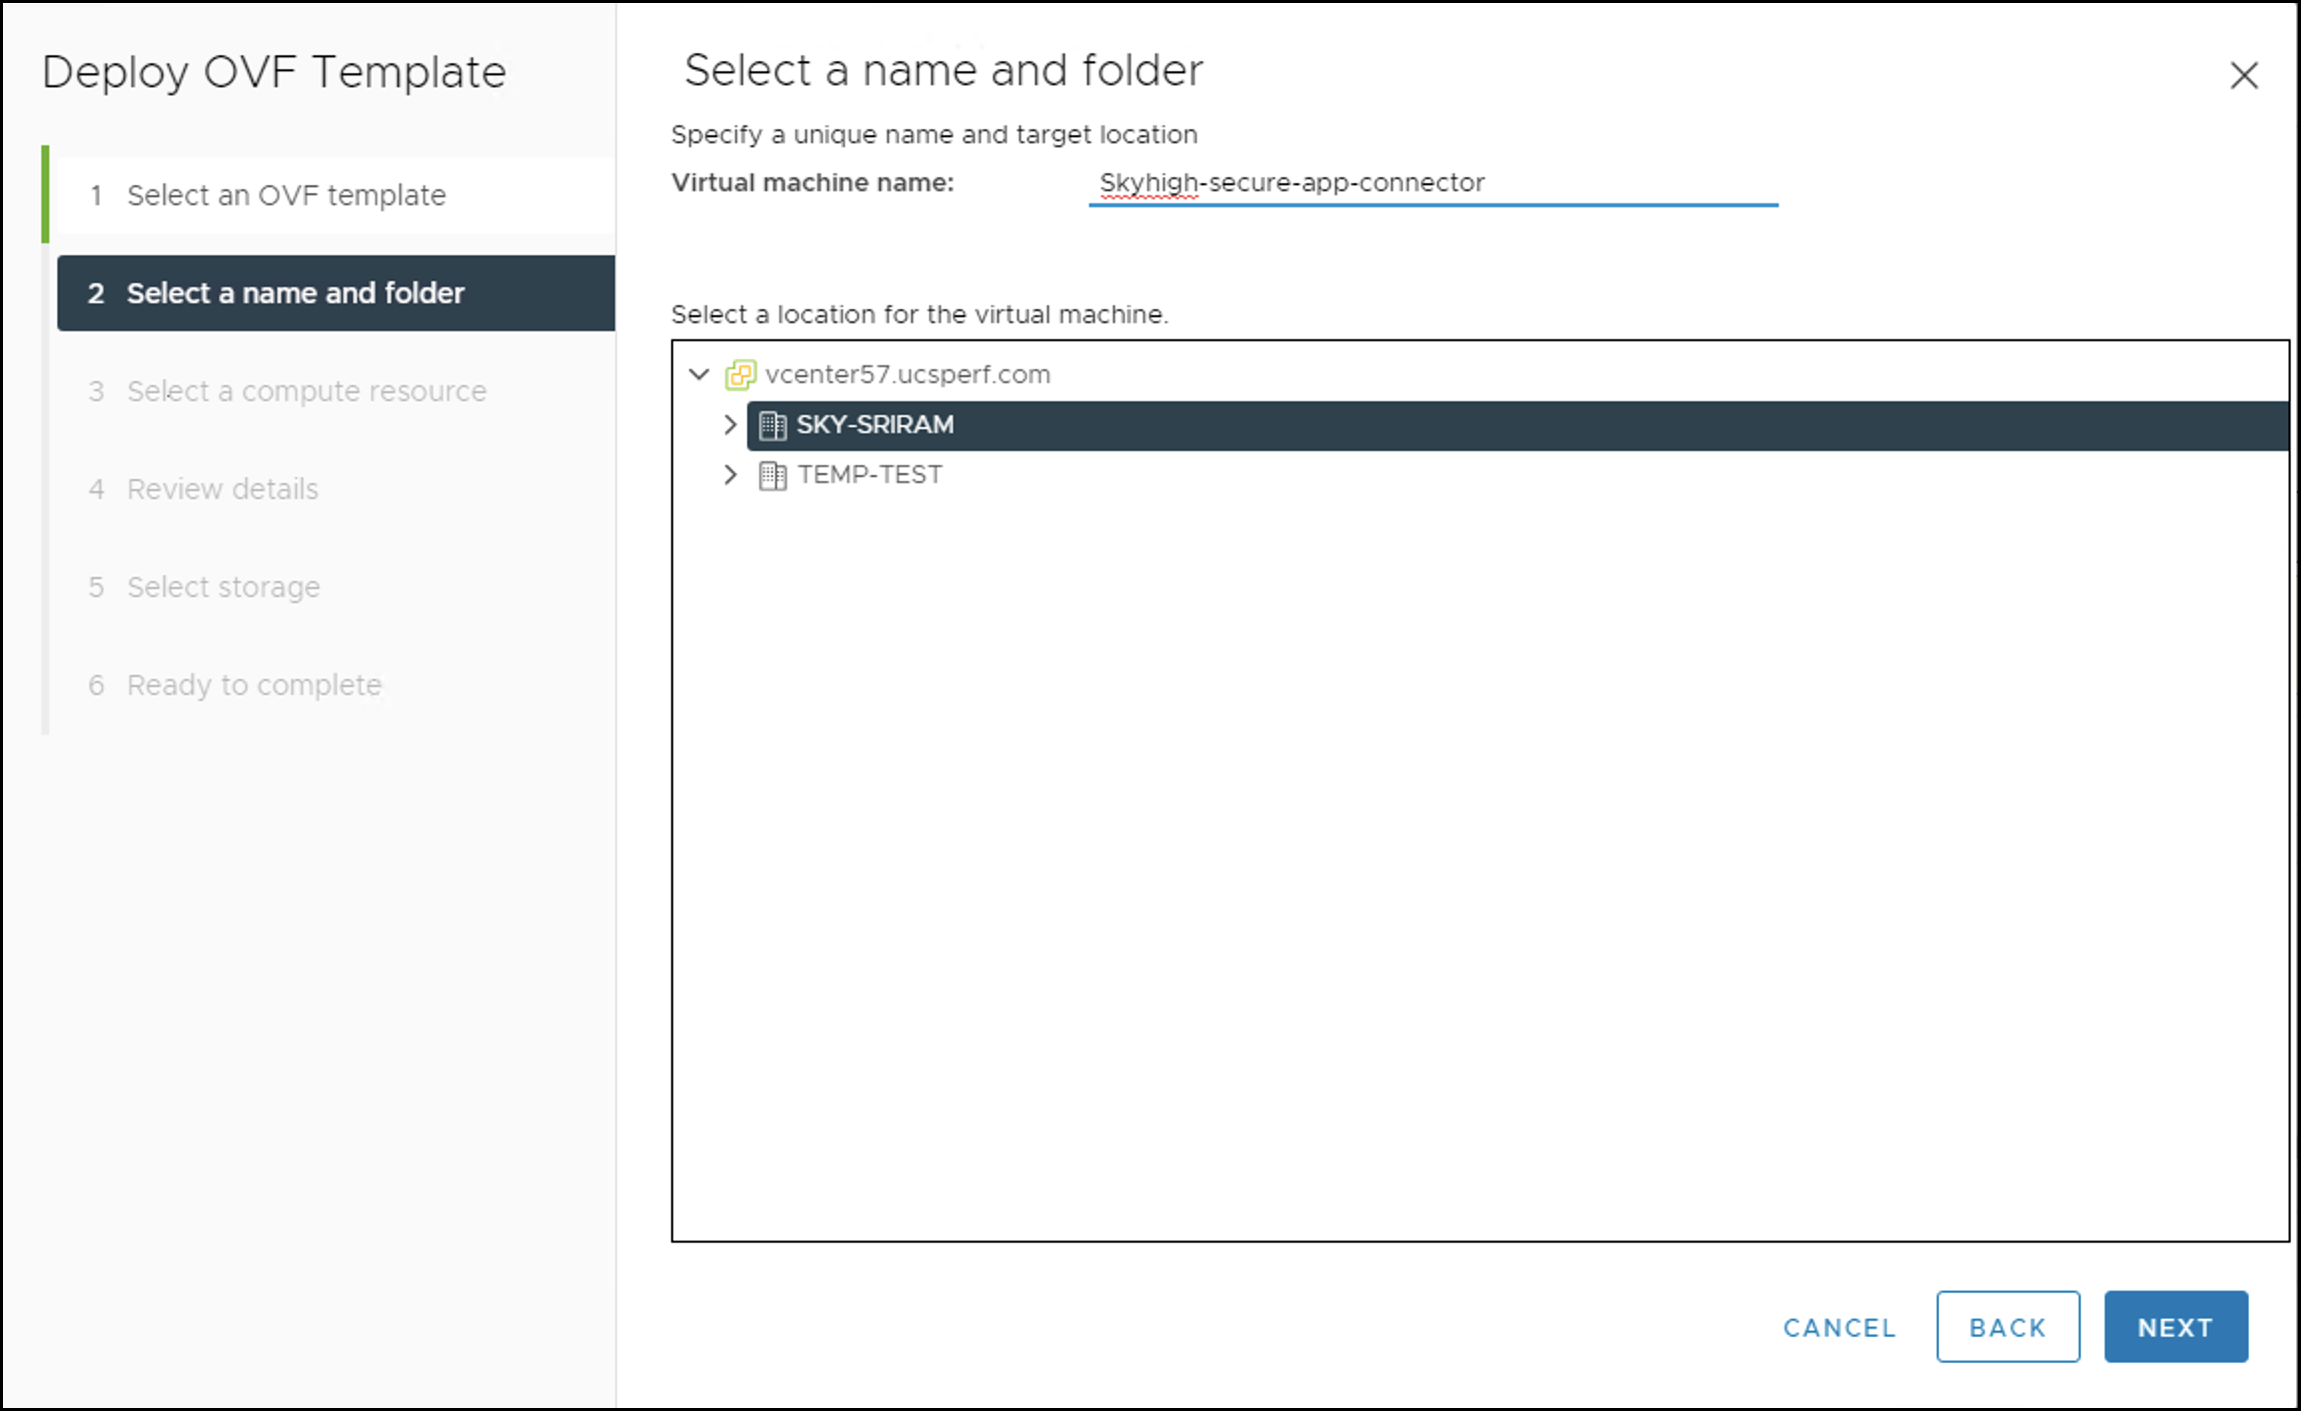
- Name a virtual machine and select a storage location for the same and click NEXT.
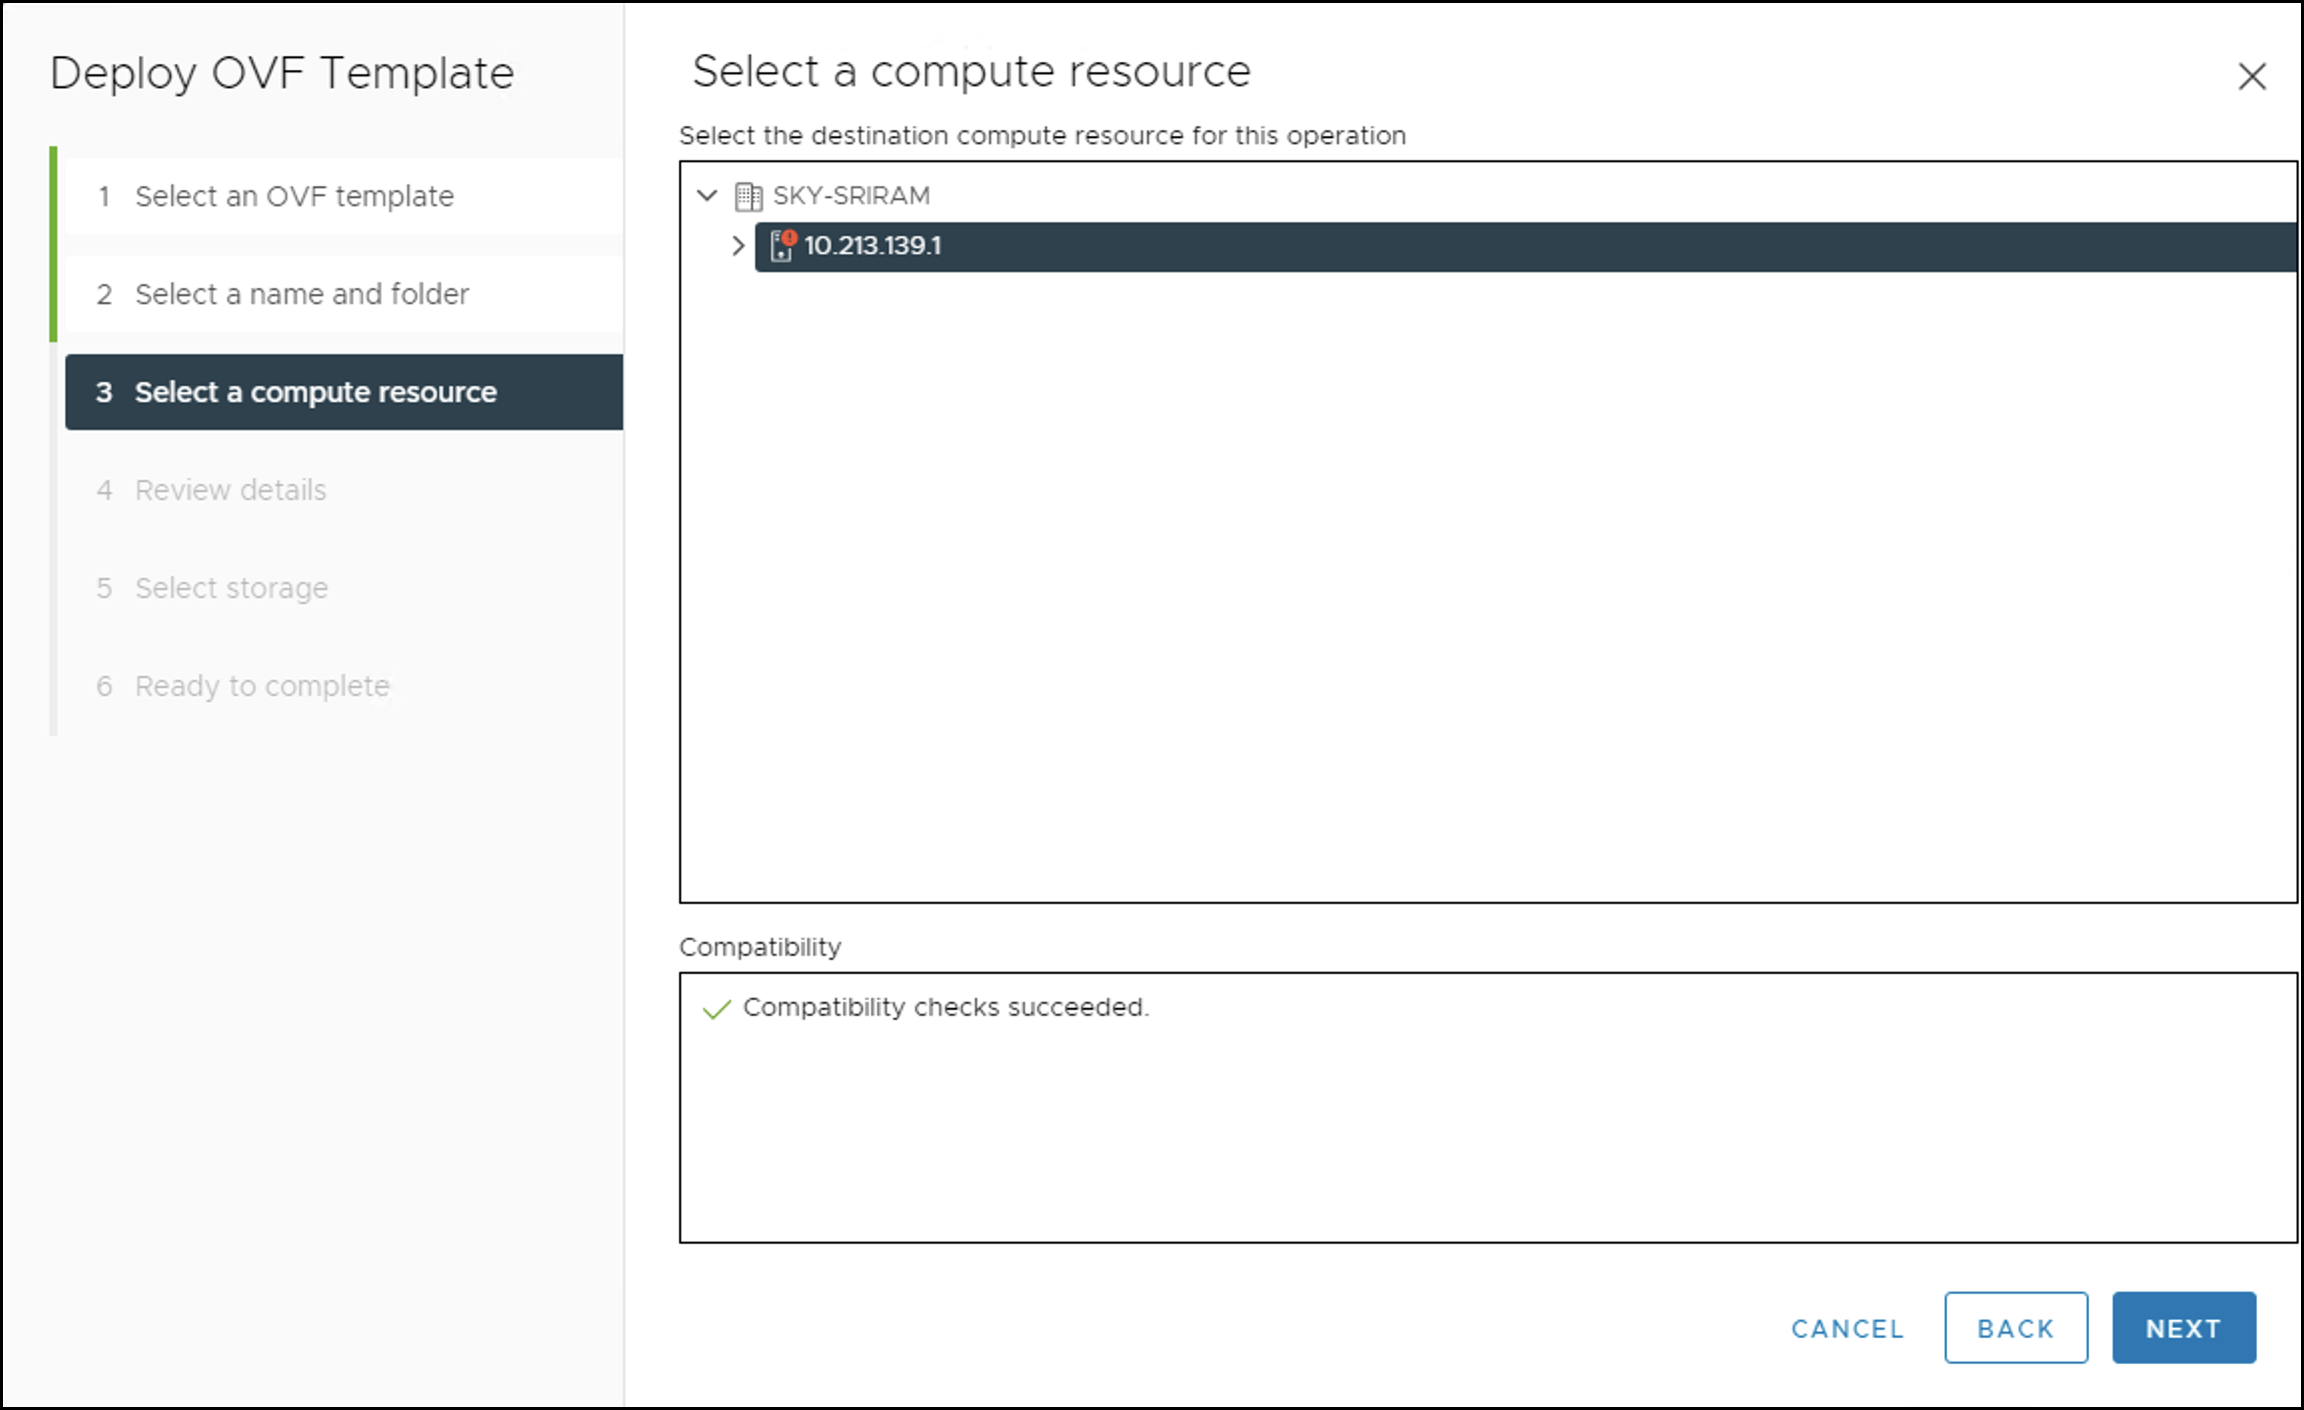
- Select a compute resource and click NEXT.
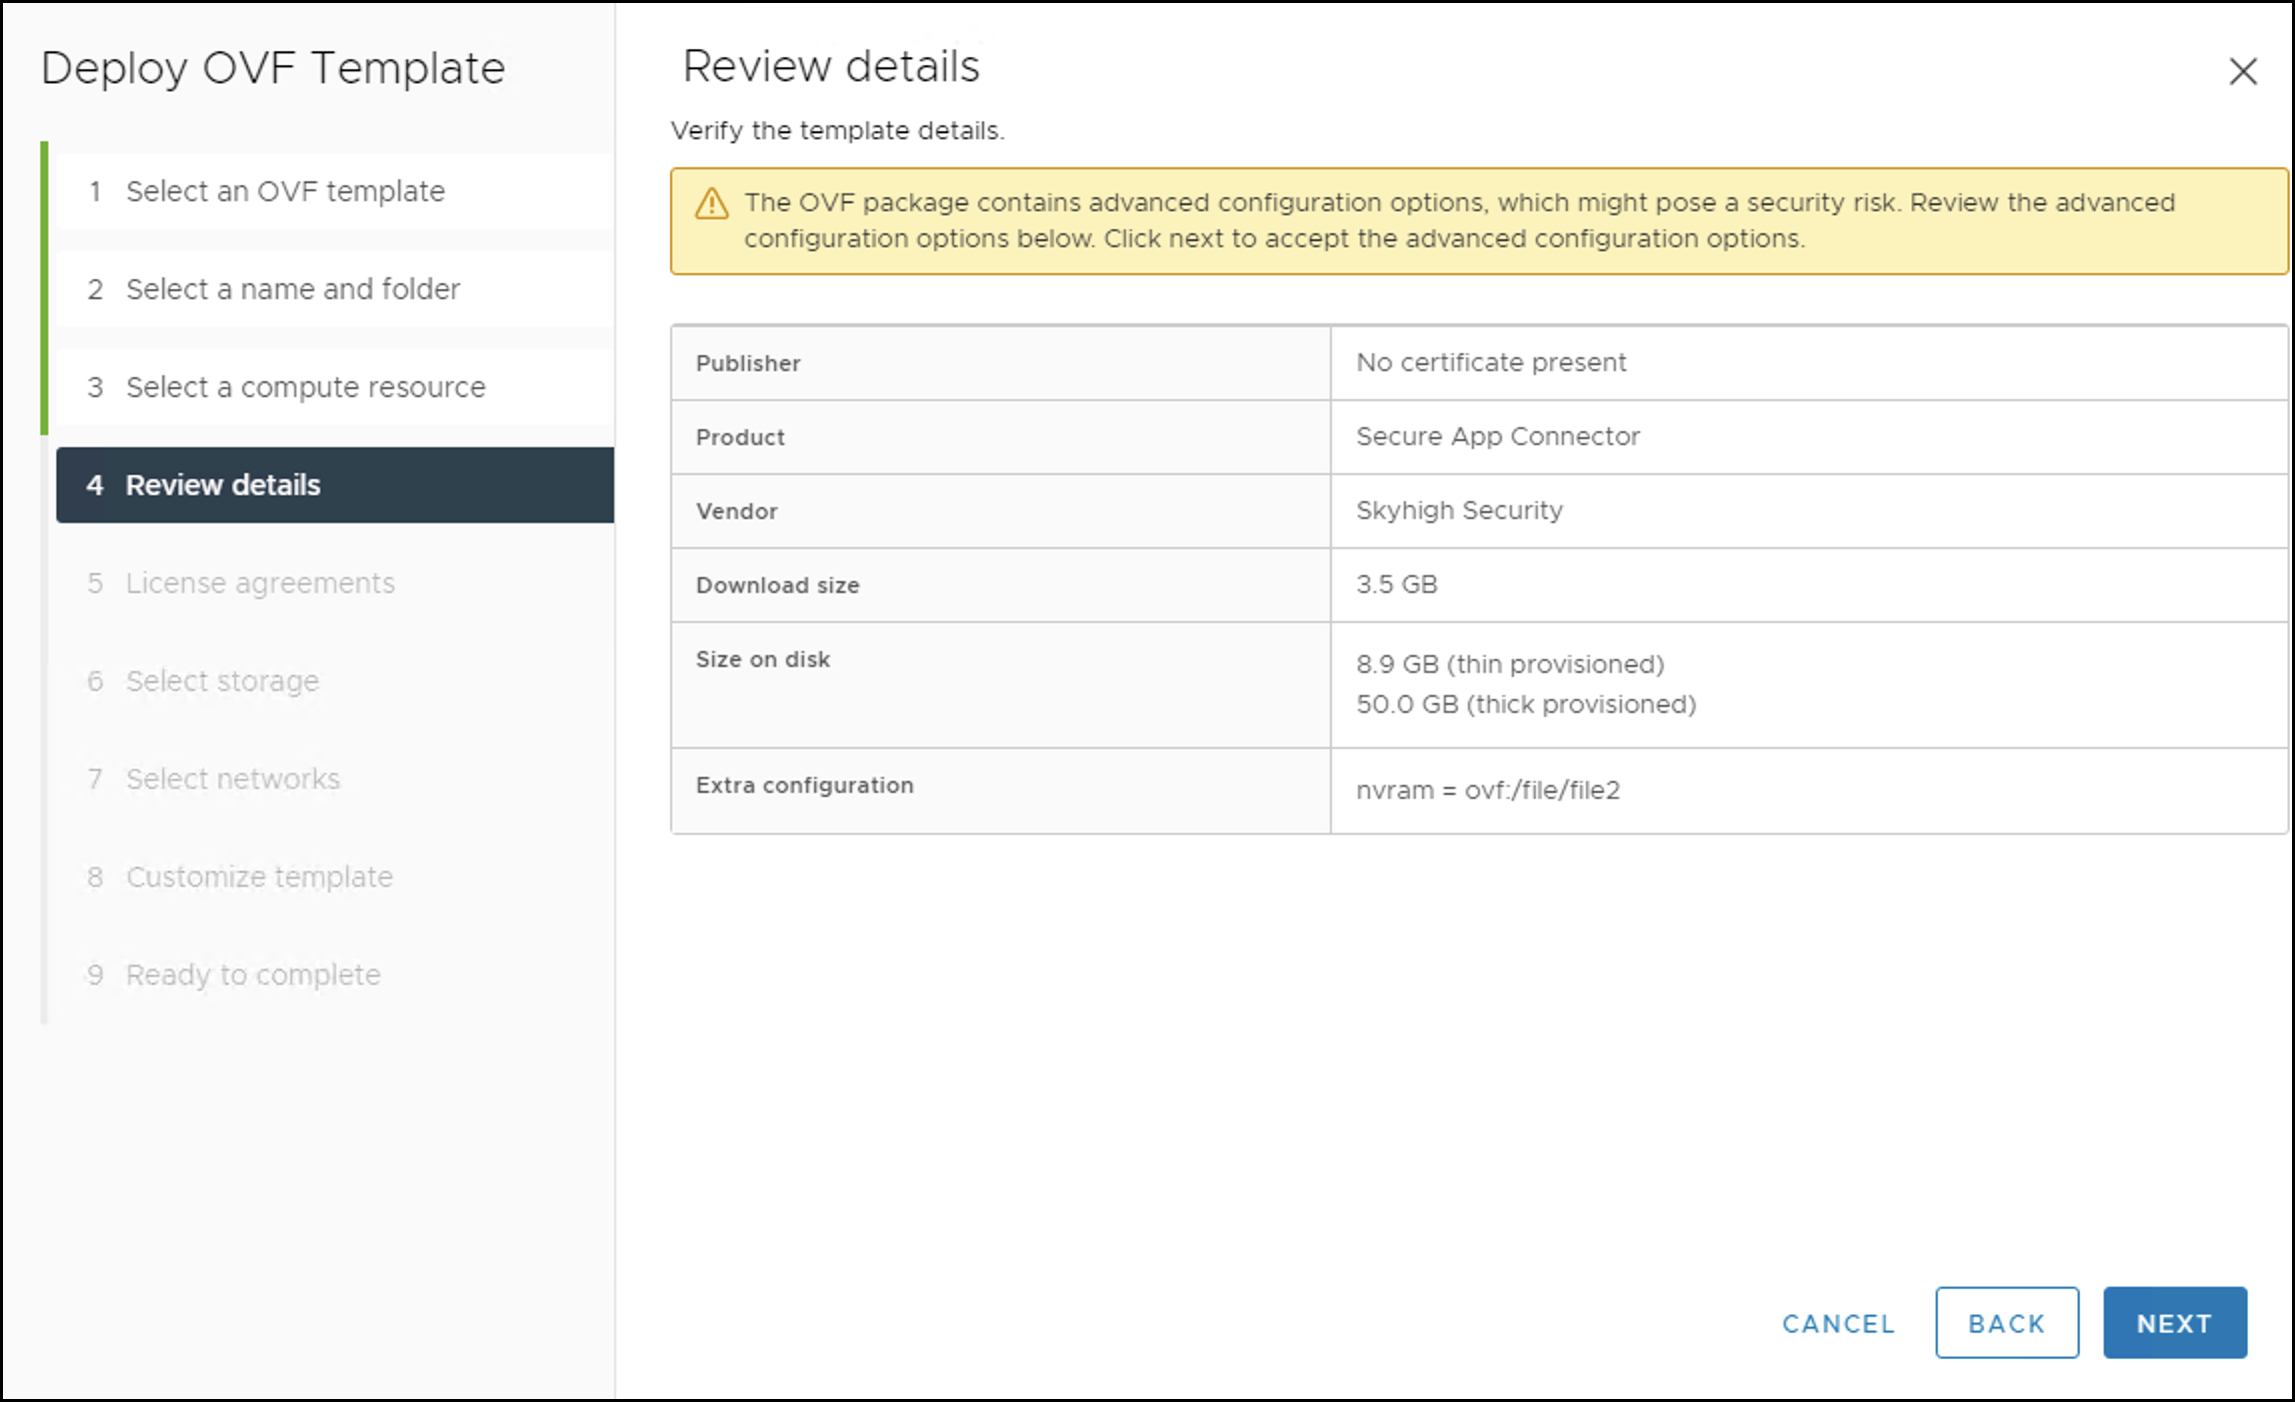
- Review the package details which contain advanced configuration options, and then click Next.
NOTE: The warning shown can be ignored as it's the default warning that VCenter triggers while implementing custom configuration.
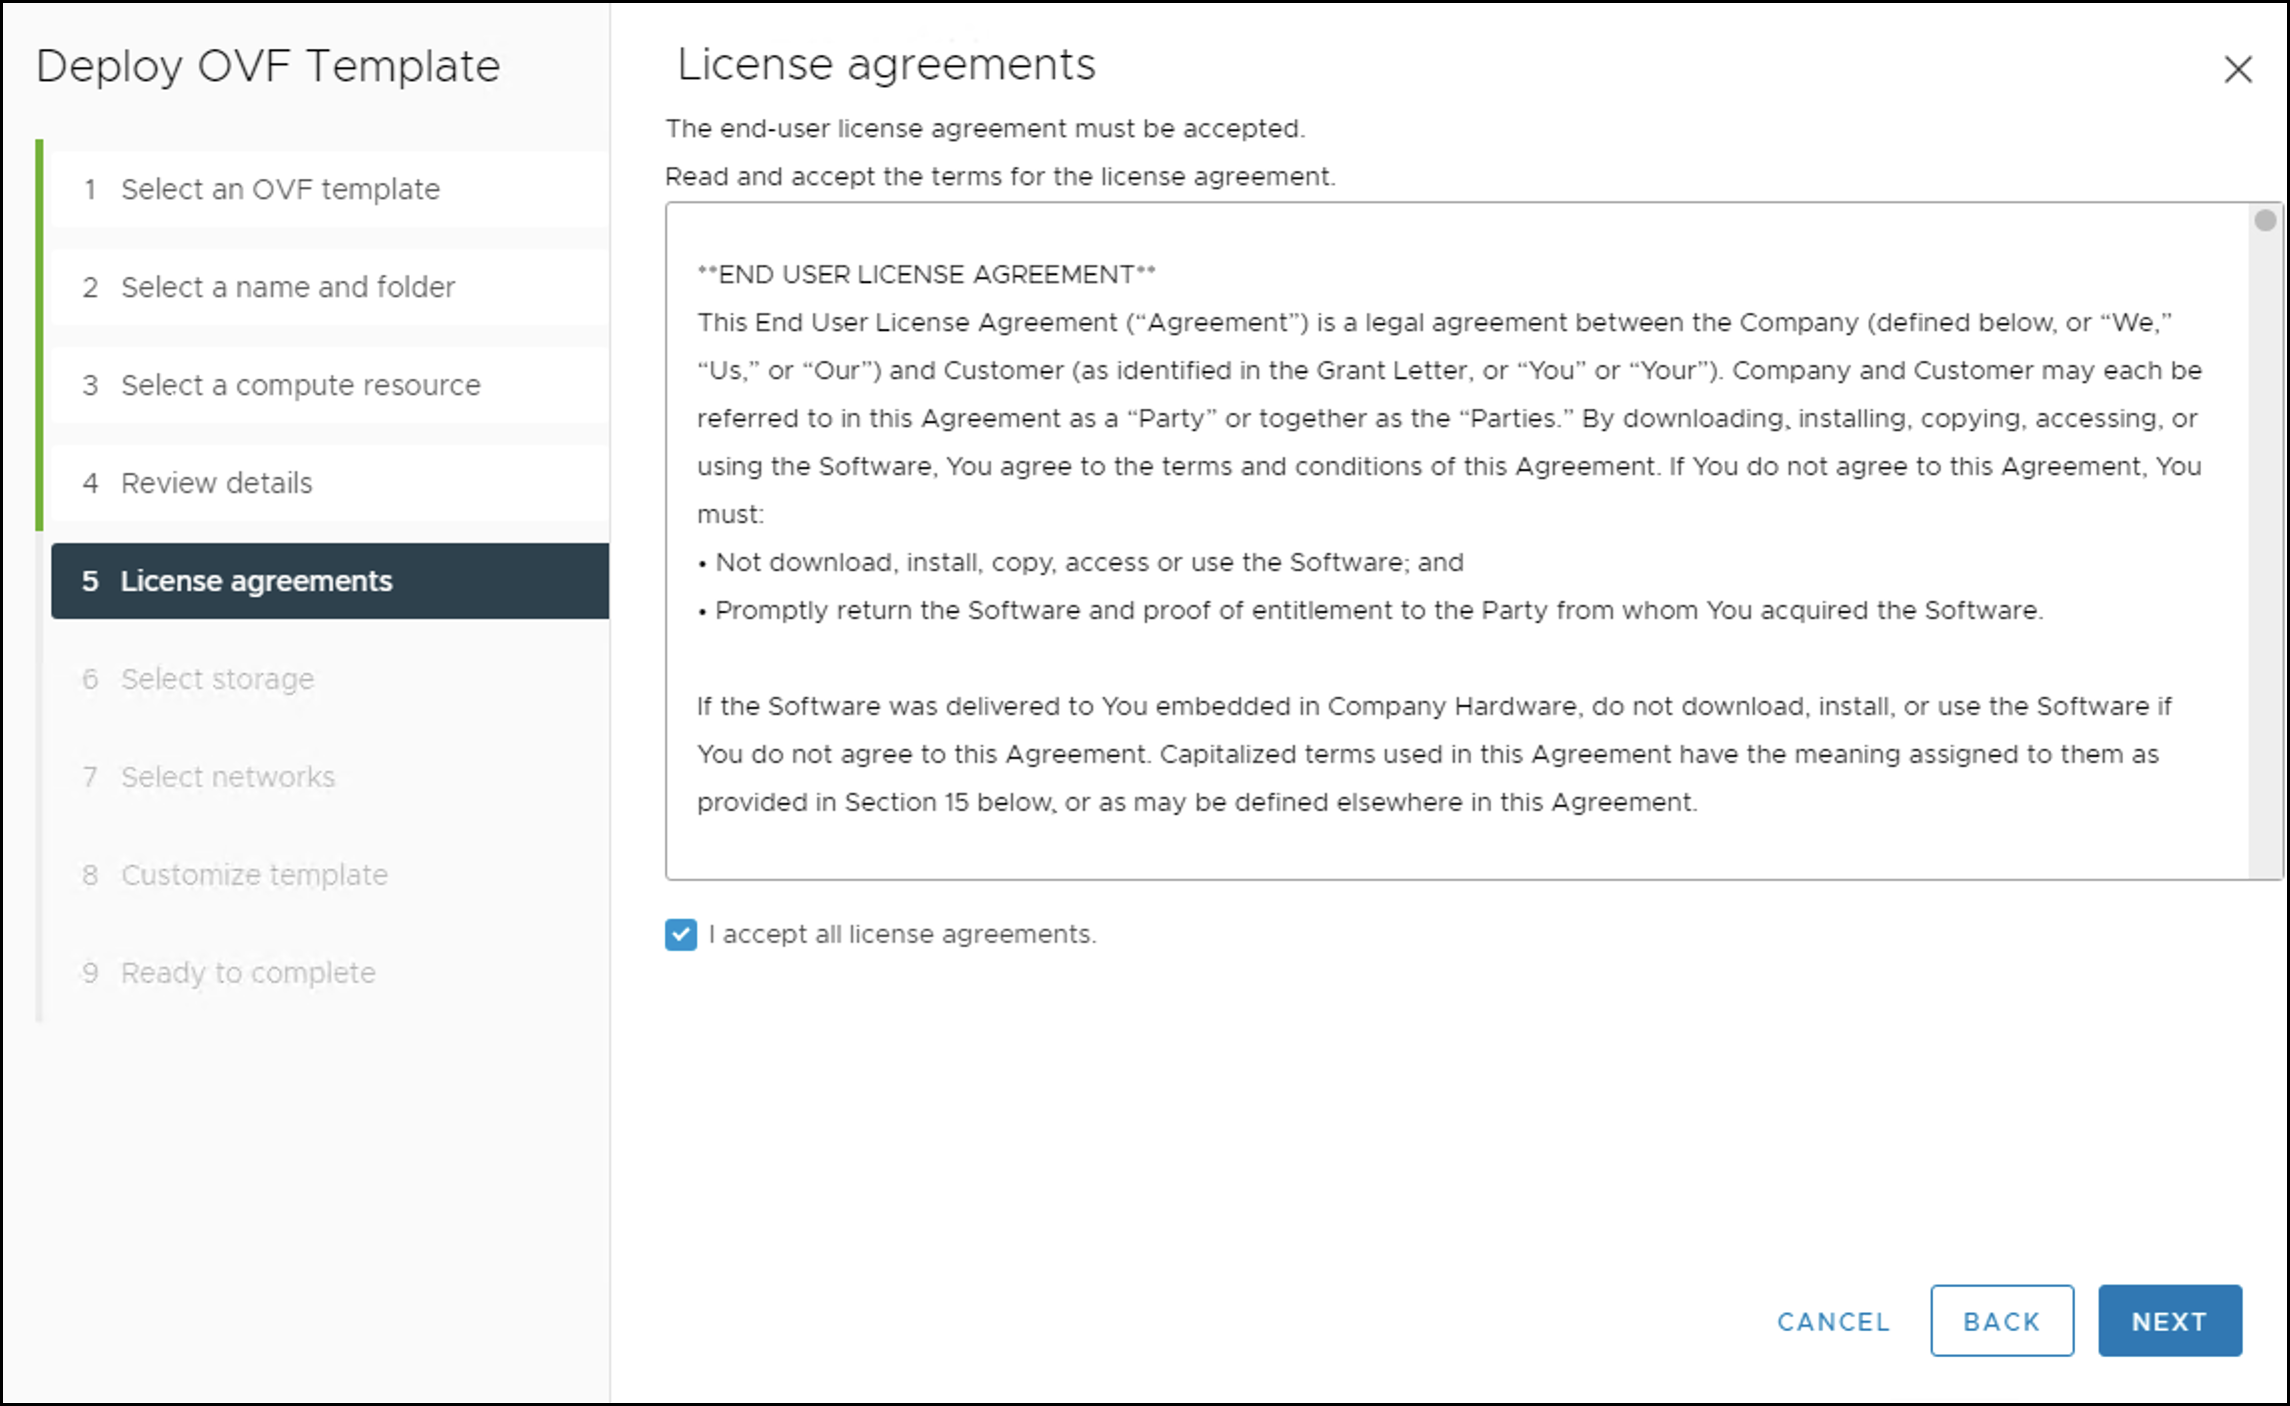
- Read and accept all the terms of the license agreement and click NEXT.
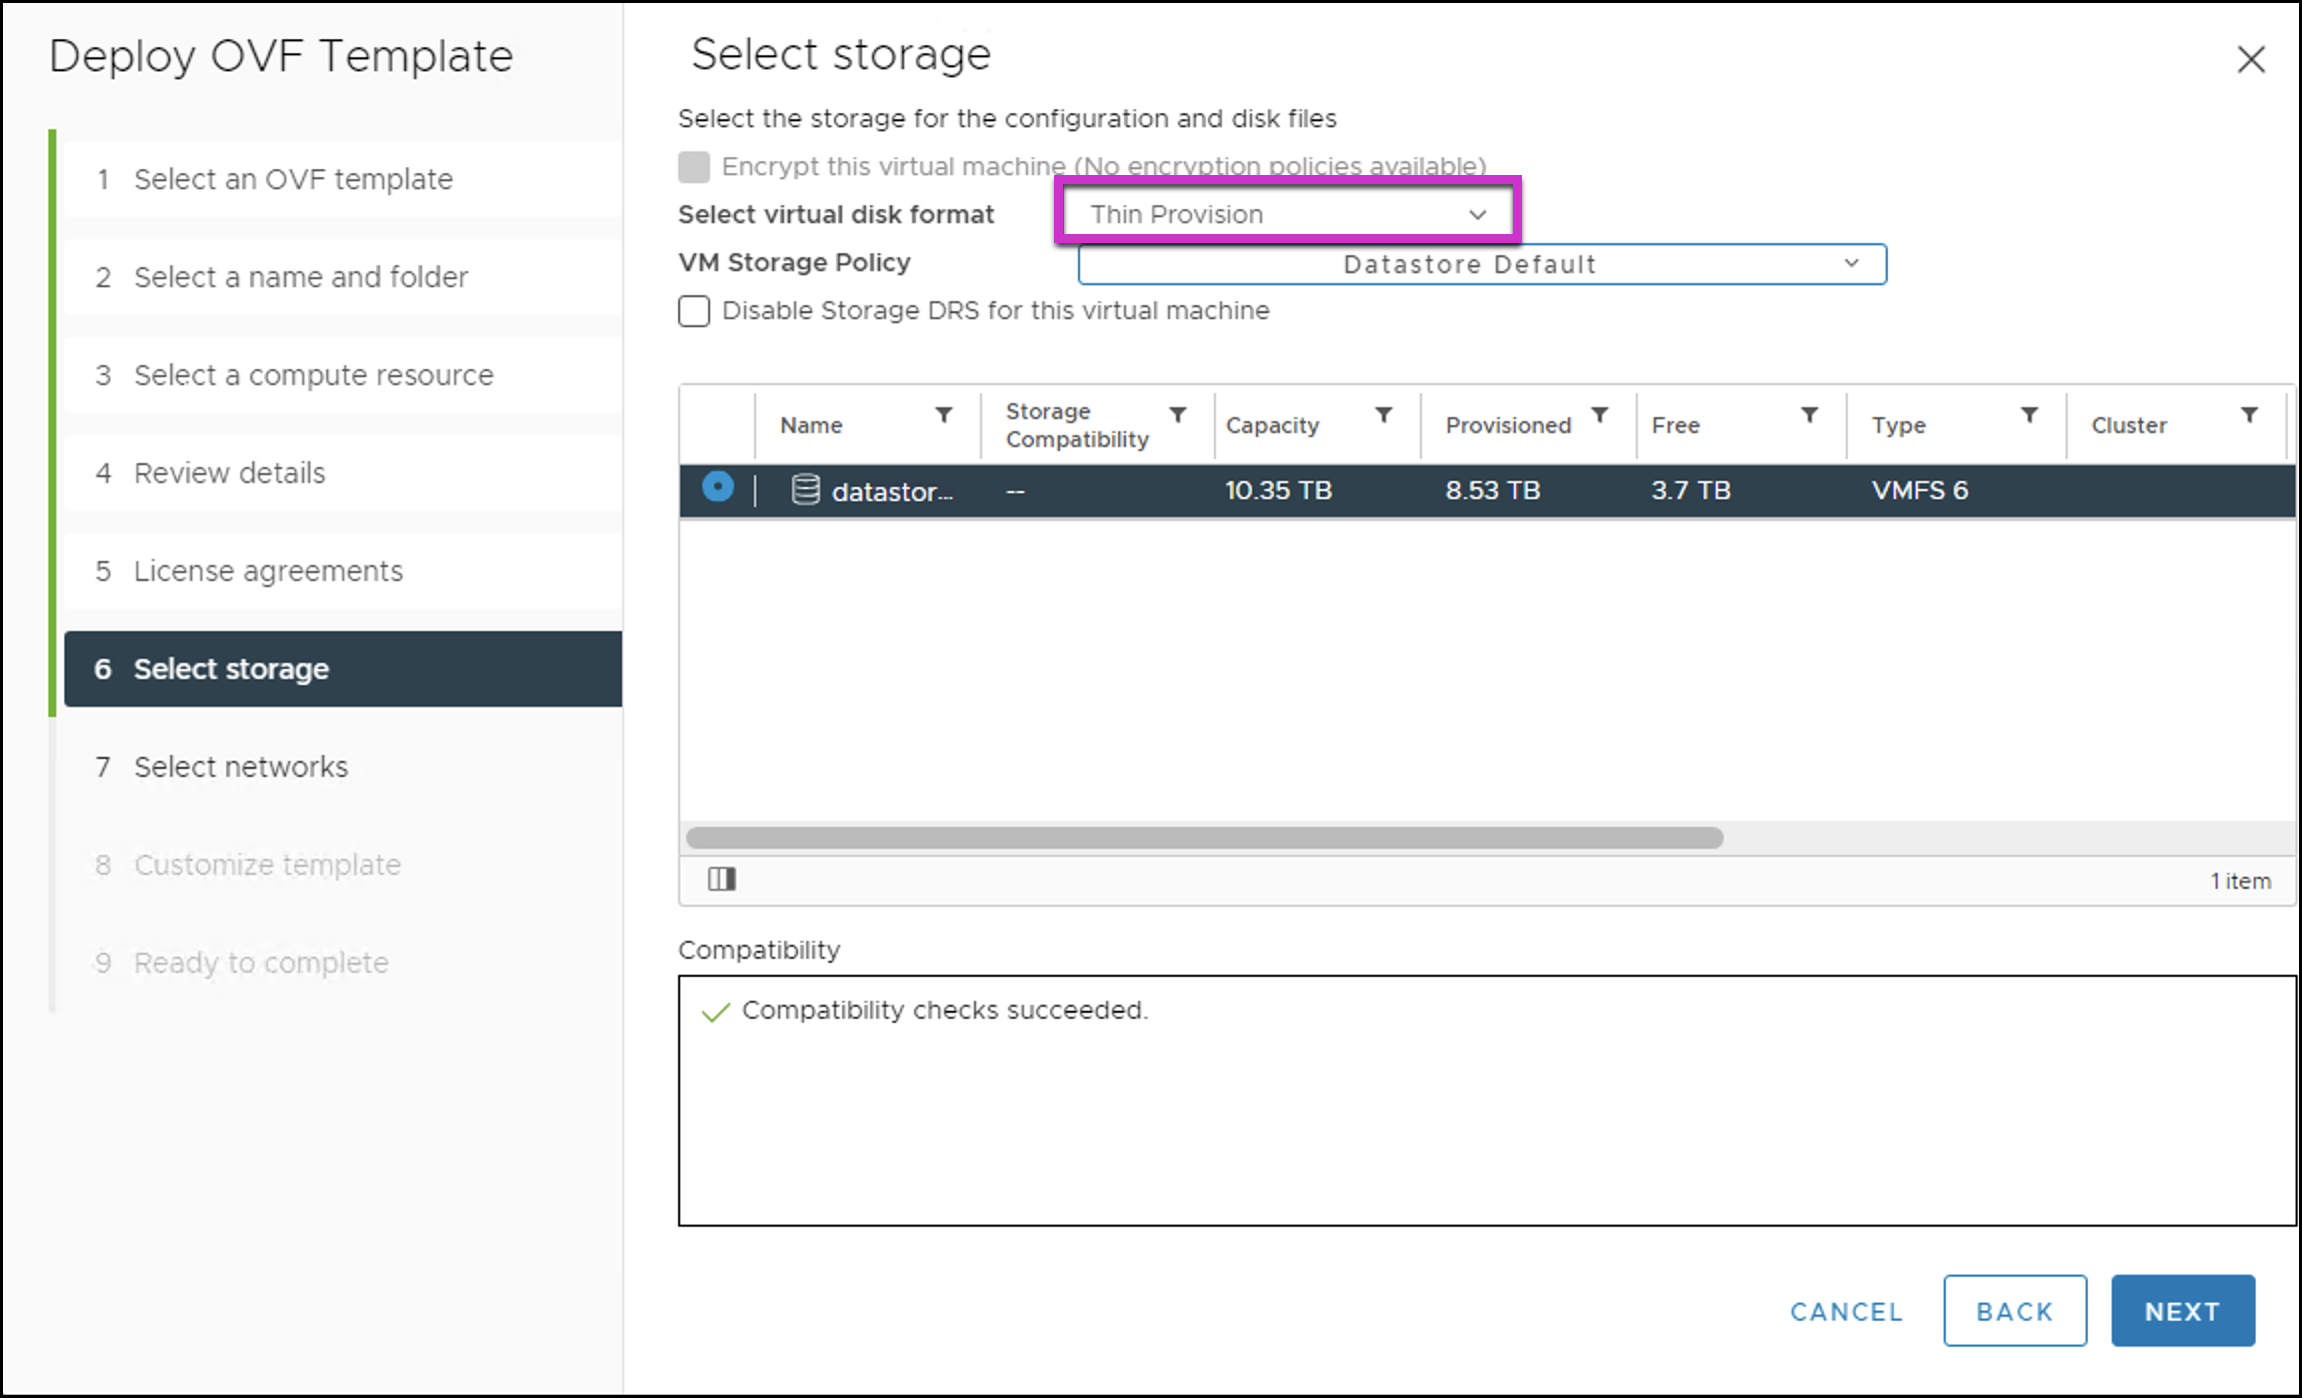
- Select Thin Provision as the virtual disk format for the configuration, and click NEXT.
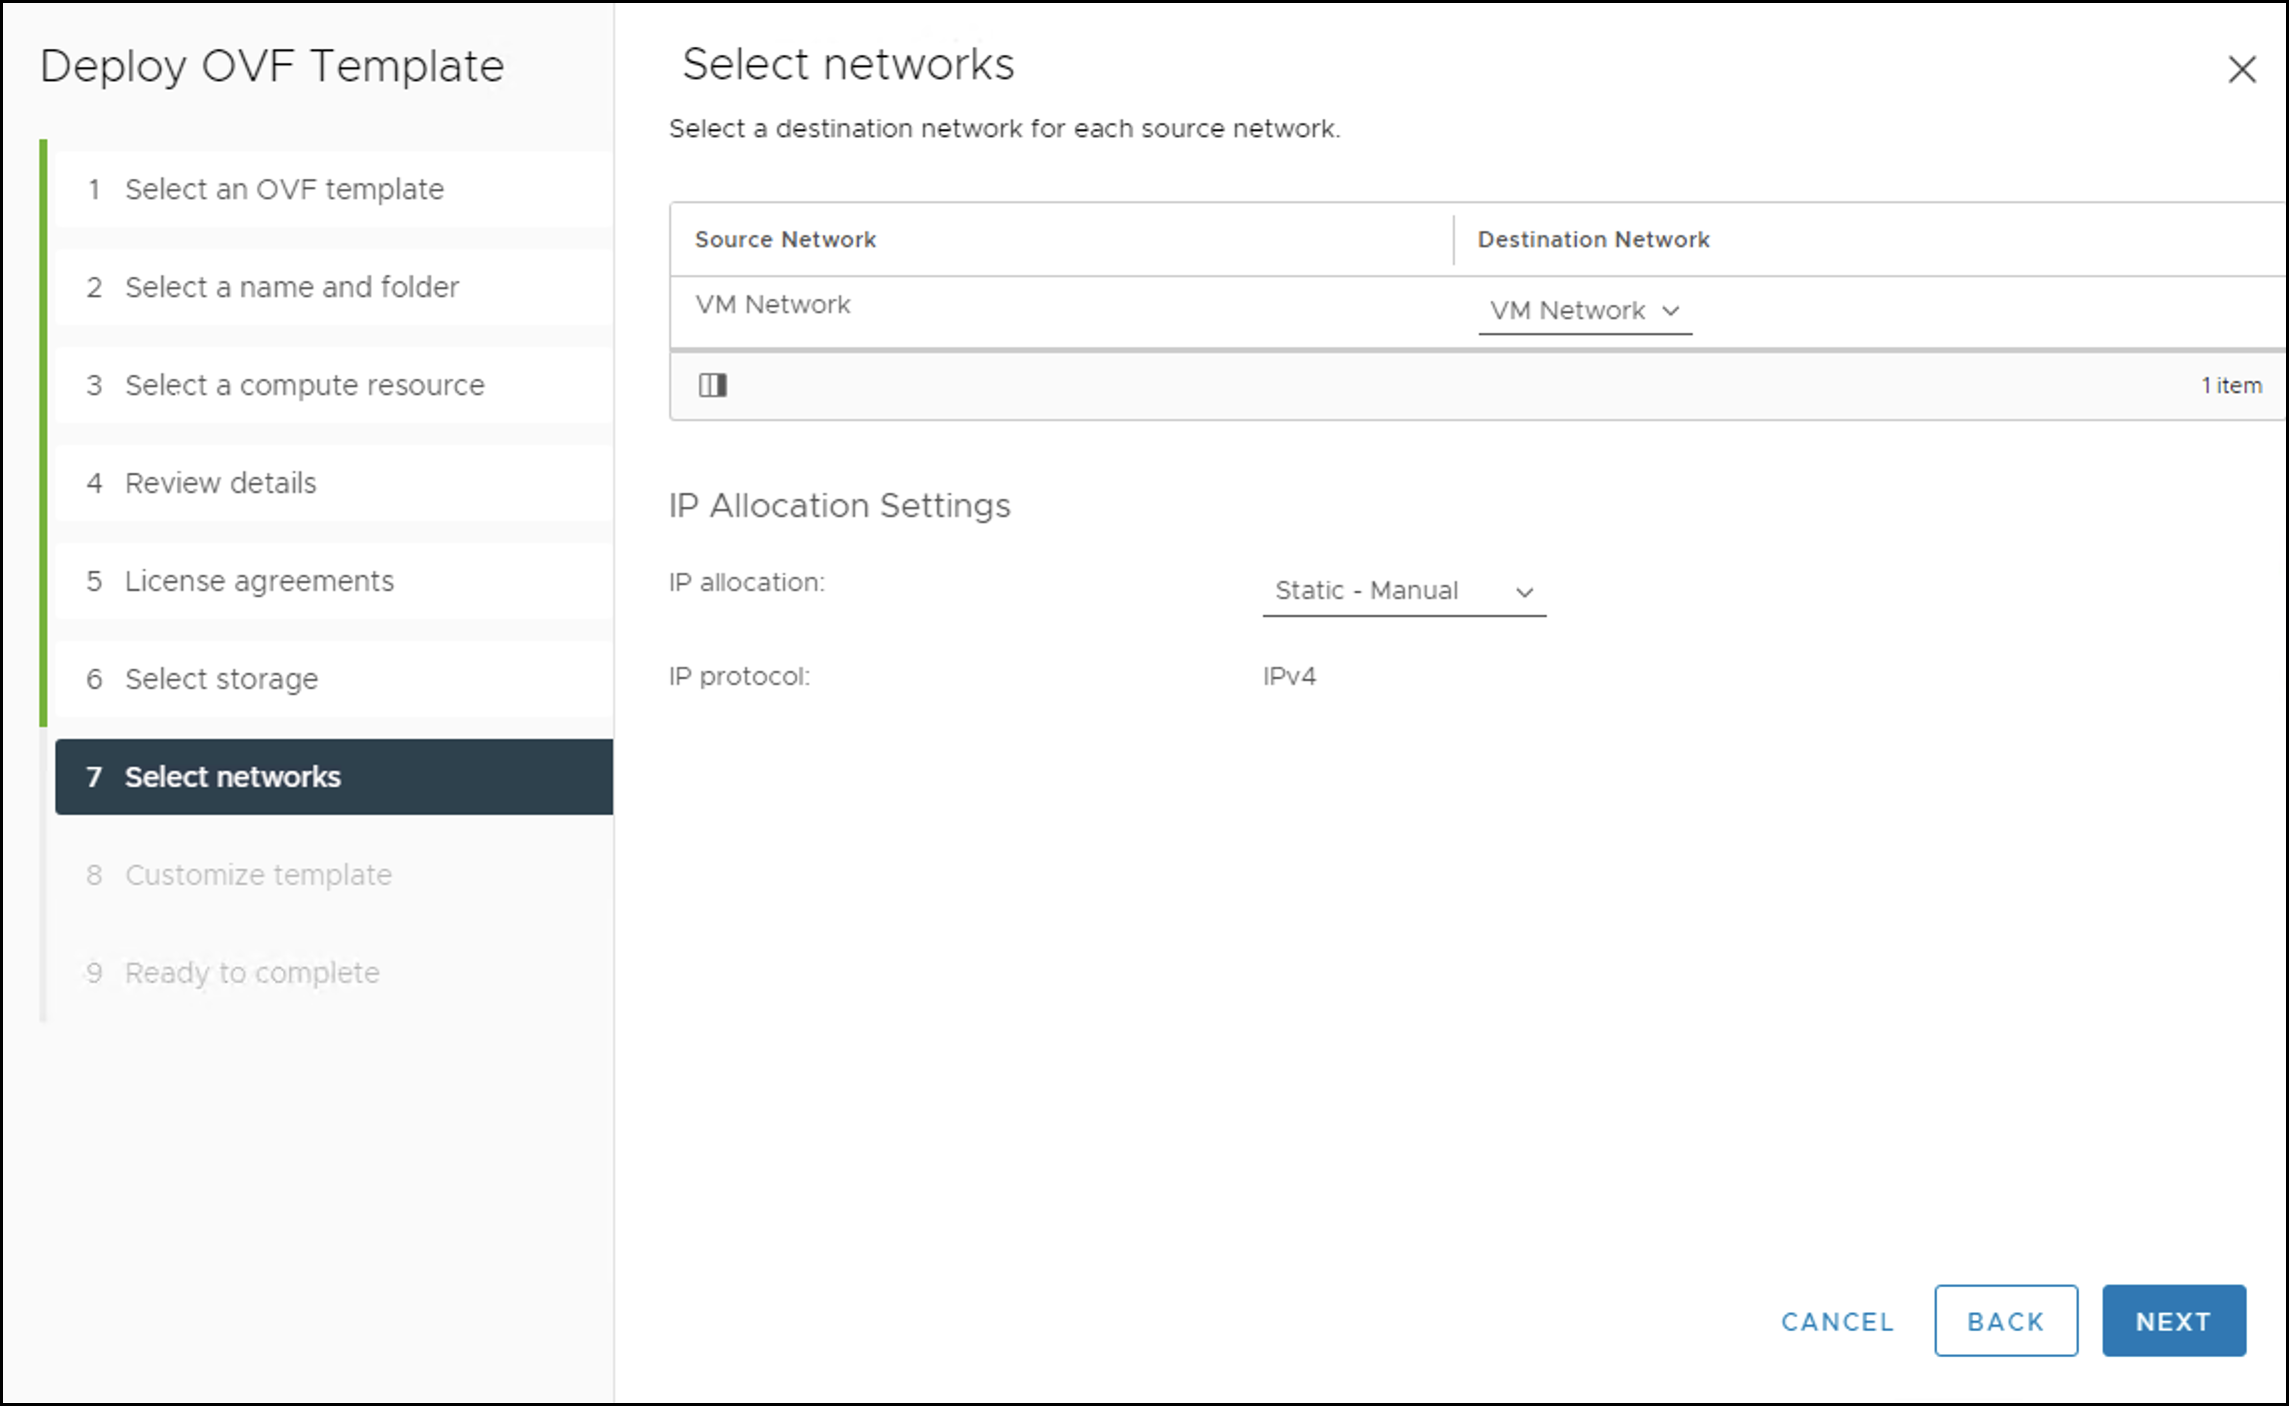
- Configure the IP allocation network setting and click NEXT.
- Select DHCP if DHCP service is available in your environment.
- Select Static - Manual If DHCP service is not available in your environment.
- The host should be able to connect to private applications that will be configured for this connector.
- Do not select IP Pool in IP allocation.
- Refer to the following steps to get the config file. For more details, see Configure Secure App Connector V2.
IMPORTANT: The config file is a mandatory input for installation.
.png?revision=1)
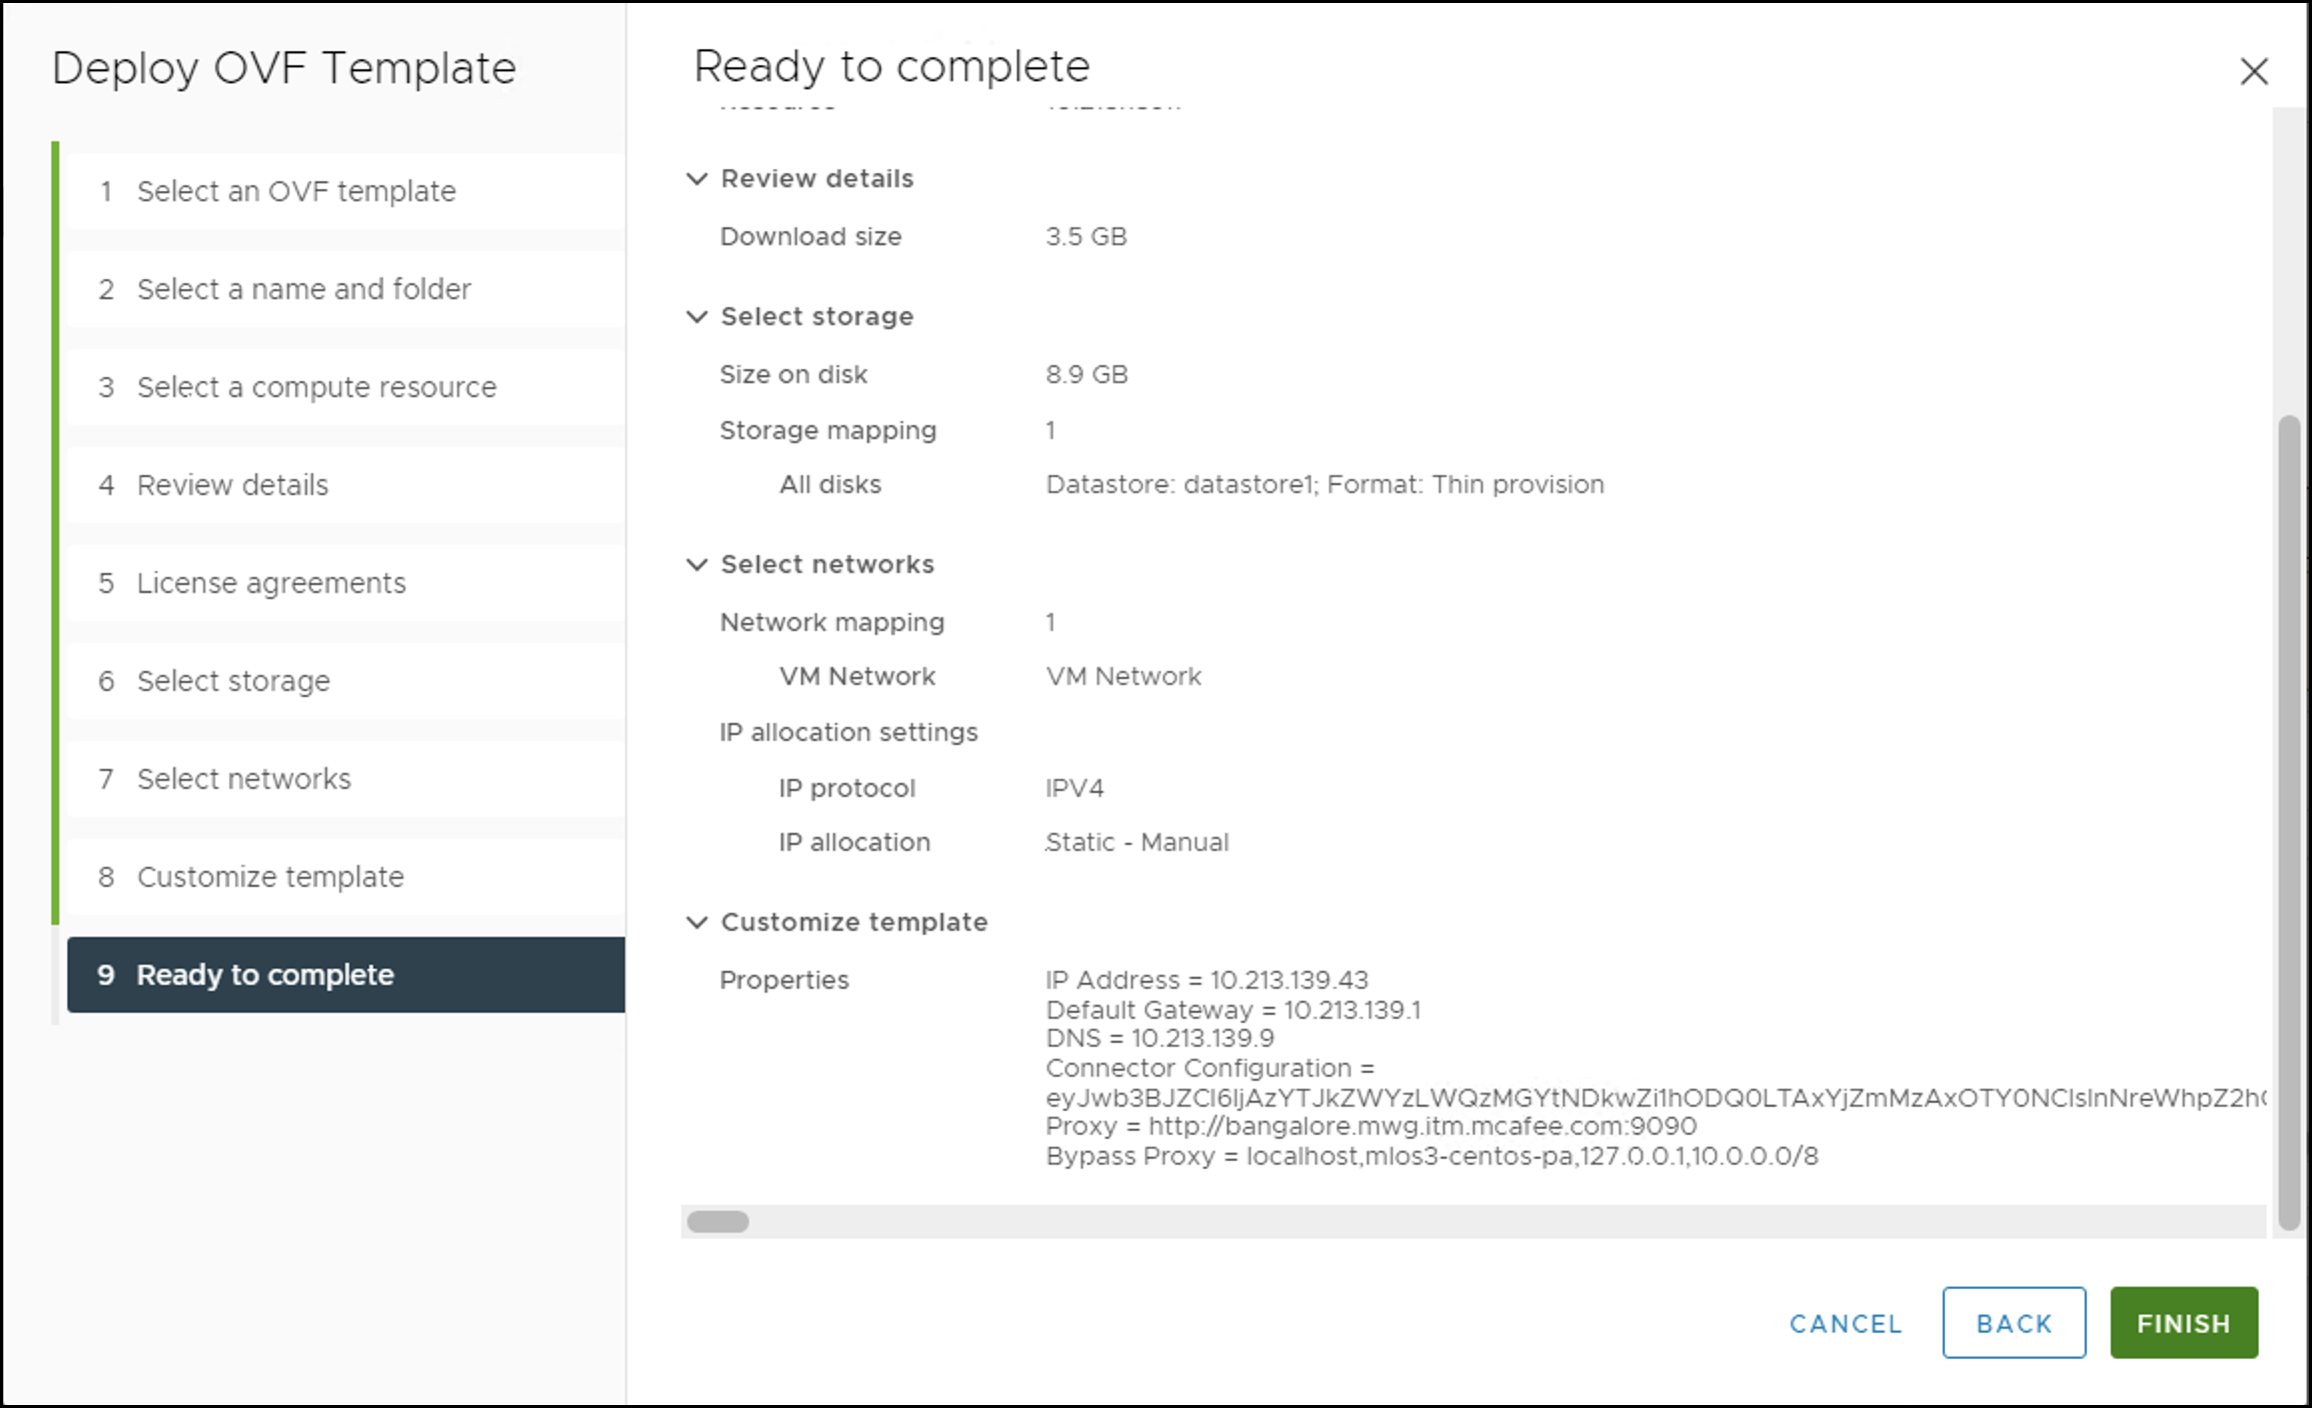
- Configure Network Settings, Proxy Settings, and Private Access Settings and click Next.
<PROXY>: Address of the proxy server (optional)<Bypass Proxy>: List of domains that can be added to bypass the proxy (optional). This parameter can be ignored if you don't have any domains that need to bypass the proxy, even when a proxy is used
- Set the <PROXY> and <BYPASS_PROXY> parameters only when your connector uses a proxy server to reach the Internet.
- No configuration settings are added to IP, DNS & Gateway if DHCP is selected.
- All the connectors are setup with the default hostname out of the box. Changing it would affect connector functionality. If DNS auto-registration is enabled in the VMWare host, we recommend you to add another entry for this host with the desired DNS name.
After downloading the config file, paste the connector configuration content from SSE to vCenter UI.
IMPORTANT: Ensure config file contents are properly pasted in the Connector Configuration textbox. If any character is missing while adding it, the installation will fail.
NOTE: Ensure you follow this format: <URI Schema>://<Proxy-hostname>:<Proxy-port>. If this format isn't followed, installation will fail for a proxy. Only one proxy is supported for a connector.
Eg: http://proxy.corp.com:80 or https://proxy.corp.com:443
Note: 1st 3 DNS entries will be used, and the rest will be ignored.
.png?revision=1)
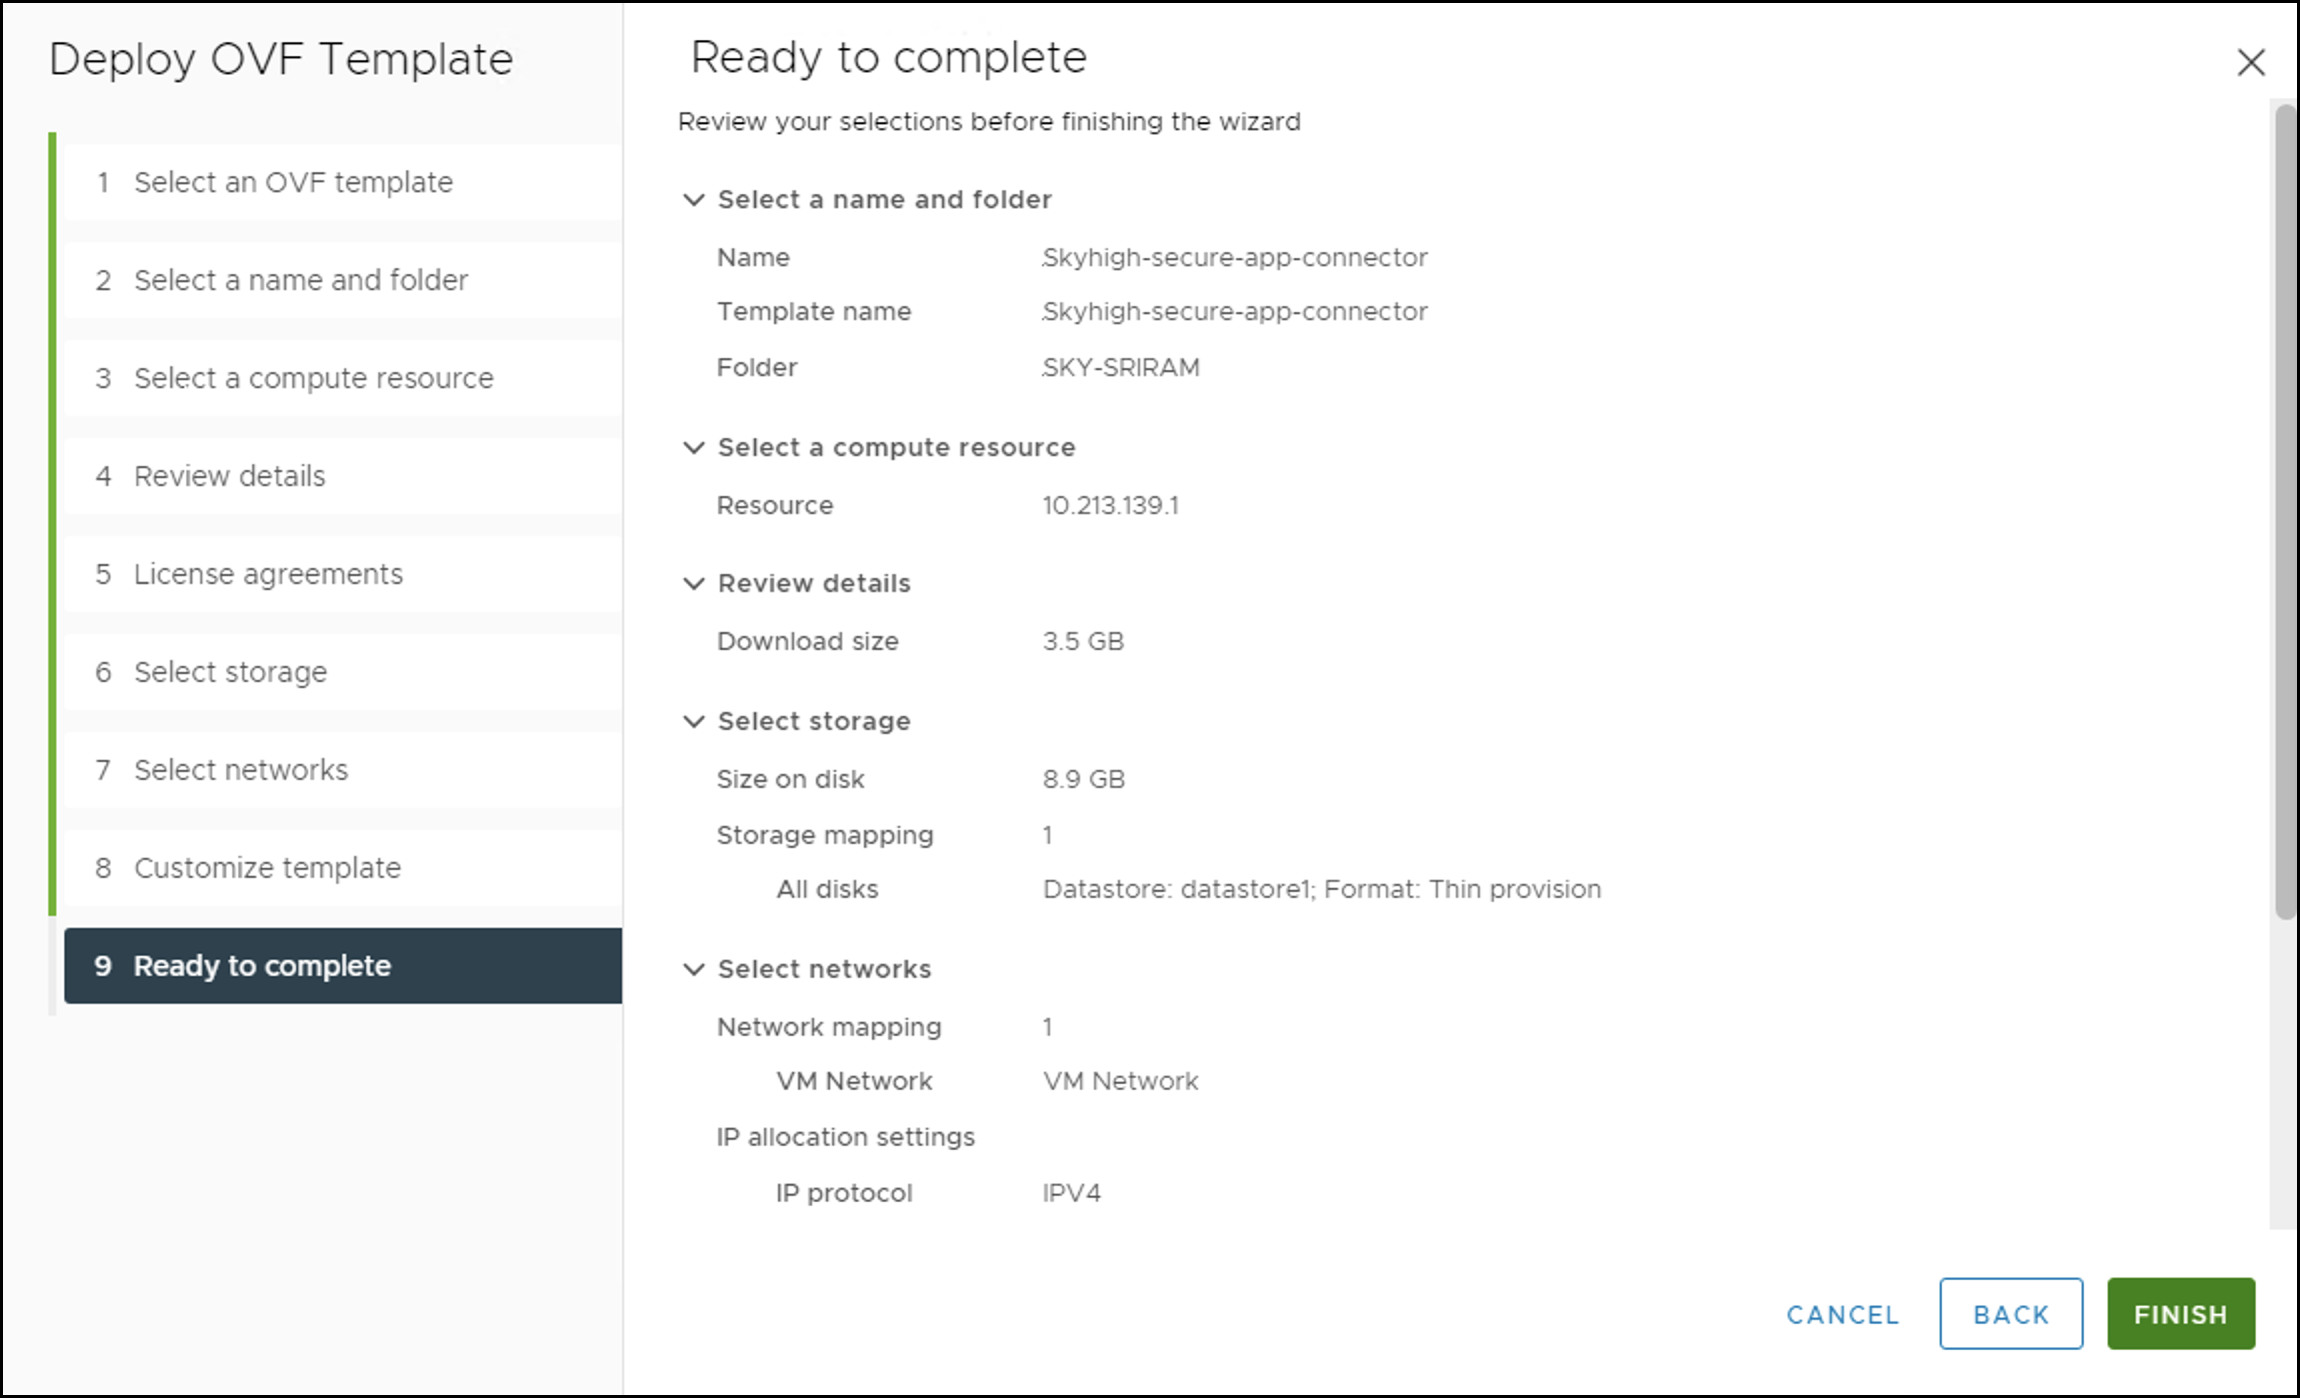
- Review all the settings and click Finish.
- The OVA file will be deployed in ~5-10 minutes (depending on the network speed).
- Verify if the connector configuration has been properly entered and not truncated.
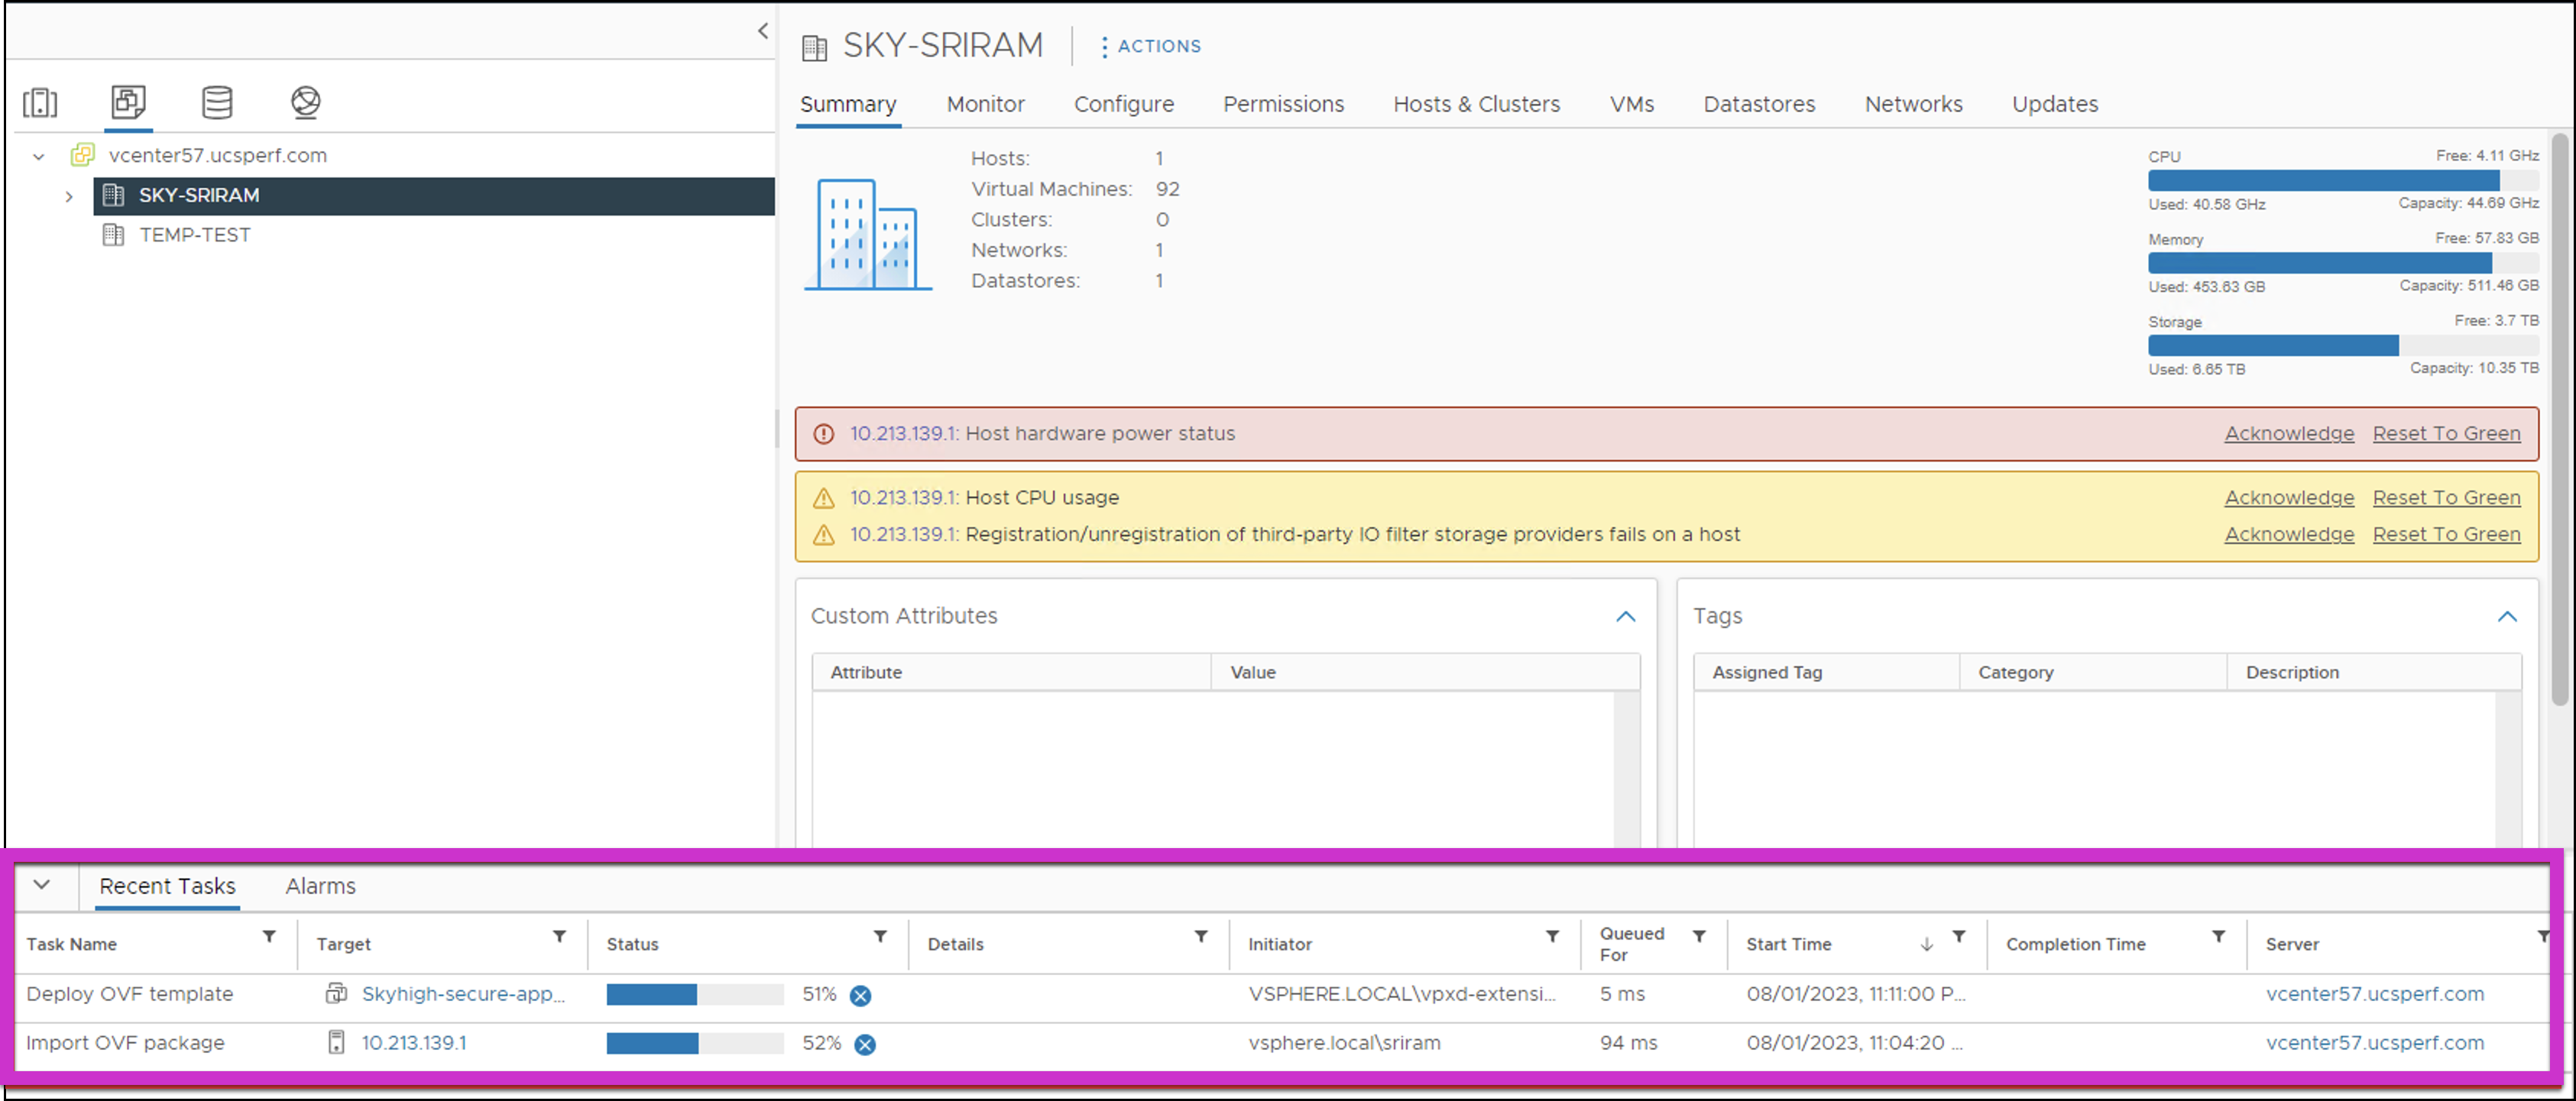
- Deployment progress can be monitored in the Recent Tasks panel.
- Power ON the VM once the OVA deployment is completed. You can access the VM via Remote Console.
Change the Password after the OVA Deployment
To change the default user name and the password (Login: admin / Password: Welcome@123) once OVA deployment is completed.
To change the root user password:
- Login to the host VM.
- Type
sudo passwdcommand. - Enter a new password in the New password field.
- Re-enter the new password in the Retype new password field.
- When the new password is set, the passwd: all authentication tokens updated successfully message appears.
To change the user admin password:
- Login to the host VM.
- Type
passwdcommand. - Enter the existing user password In the current user admin field.
- Enter a new password in the New password field.
- Re-enter the new password in the Retype new password field.
- When the new password is set, the passwd: all authentication tokens updated successfully message appears.
OVA Deployment Validation
- If the DHCP service is selected during OVA deployment, then IPV4 address allocation will be done automatically. In case the IPV4 address is not assigned then restart VM.
To verify the connector deployment, For more details, see Secure App Connector V2 CLI for TCP Applications.