Manage AI Services via SWG On-Prem
NOTE: This topic is applicable only for Skyhigh Secure Web Gateway (On-Prem) users.
Skyhigh Secure Web Gateway (On-Prem) provides a recommended list of Artificial Intelligence (AI) services to control the usage of AI services within your organization. This list includes URLs (host names and domain names) for chatbots, virtual assistants, machine learning, and generative AI models, such as ChatGPT, Bard, and more.
You can now use the list named AI-ML Domains in your web policy to apply security controls on AI services. For example, you can configure a web policy in Secure Web Gateway (On-Prem) using this Skyhigh recommended list and block access to AI services.
Configure a Web Policy
Skyhigh Secure Web Gateway (On-Prem) allows you to configure a web policy to control the usage of AI services within your organization. Follow the steps below to configure your web policy:
- ► Step 1: Create a List of AI Services
-
You can create a list of AI services based on Skyhigh's recommended list (AI-ML Domains). This list will be used to define the criteria for rules in your web policy.
To create a list of AI services:
- Log in to Skyhigh Secure Web Gateway (On-Prem) using admin credentials.
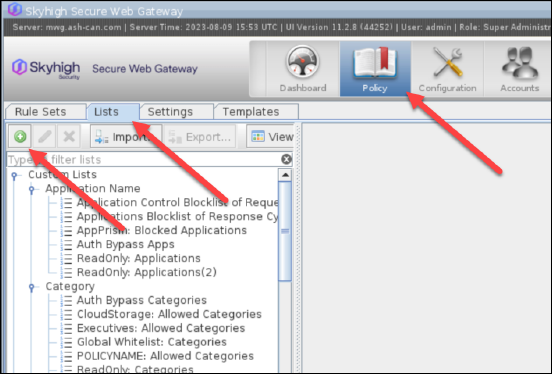
- Go to Policy > Lists > Strings.
- Under Lists, select Strings, and click +.
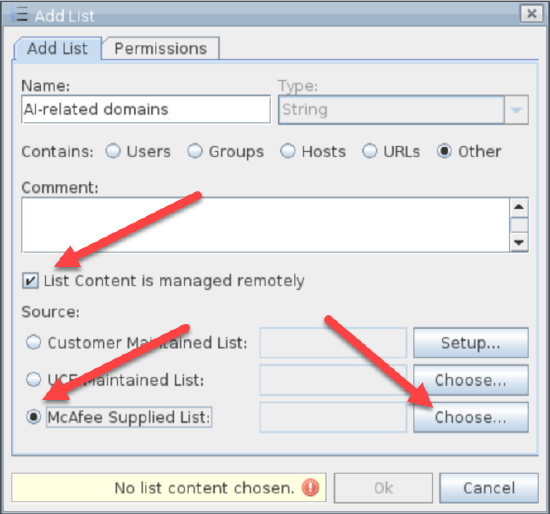
- On the Add List tab, name the list and describe its source:
- Name. Enter a descriptive name for the list.
- List Content is managed remotely. Select this check box if the list of AI services is managed remotely.
- Source. Select Skyhigh Supplied List (or McAfee Supplied List) as the source for the list of AI services, and click Choose.
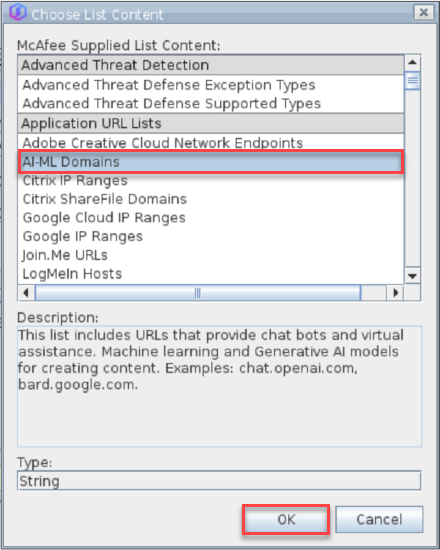
- In the Choose List Content dialog, under Application URL Lists, select AI-ML Domains.
NOTES
- If the Skyhigh recommended list (AI-ML Domains) is not available for selection, you must update your appliances.
- To update your appliances, go to Configuration > Appliances, select the appliance by its name, and then click Update Engines > Trigger Update.
- Click OK > OK.
- Click Save Changes.
You can view the newly created list of AI services under Lists in your web policy.
- ► Step 2: Create a Rule Set
-
After creating the list of AI services, you must create a rule set for AI services. You can then add rules to the newly created rule set.
To create a rule set:
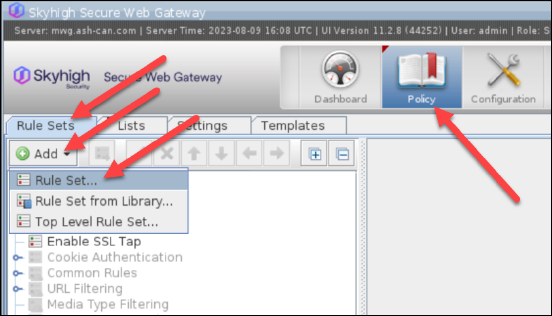
- In Skyhigh Secure Web Gateway (On-Prem), go to Policy > Rule Sets.
- Click Add > Rule Set.
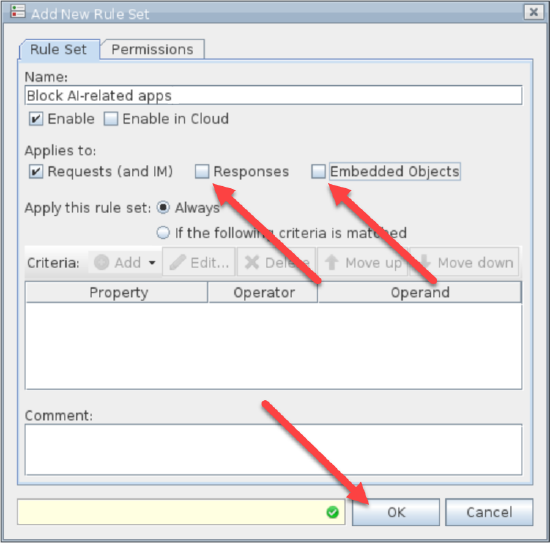
- On the Rule Set tab, name the rule set and describe its status and scope:
- Name. Enter a descriptive name to help identify the rule set.
- Applies to. Make sure that Responses and Embedded Objects are not selected for the rule set.
- Click OK.
You can view the newly created rule set for AI services under Rule Sets in your web policy.
Add Rule to Rule Set
You can now add a rule to the newly created rule set and define the criteria based on which the rule is applied in your web policy.
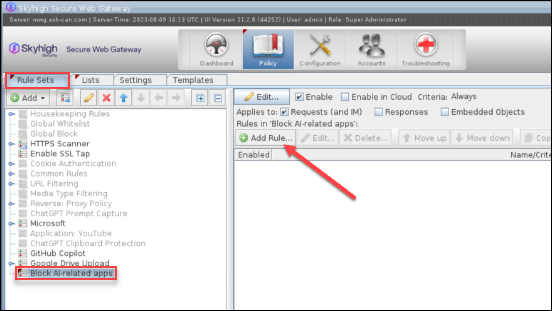
- In Skyhigh Secure Web Gateway (On-Prem), go to Policy > Rule Sets.
- Under Rule Sets, select the newly created rule set, and click Add Rule.
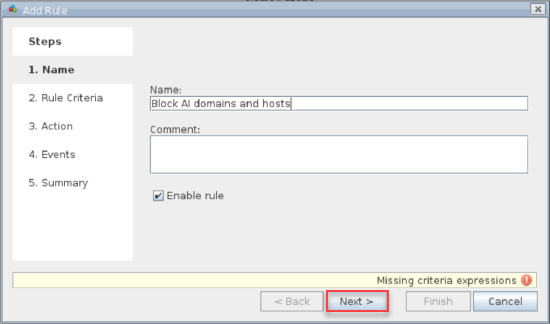
- In the Add Rule dialog, configure the following steps:
- Name. Enter a descriptive name to help identify the rule, and click Next.
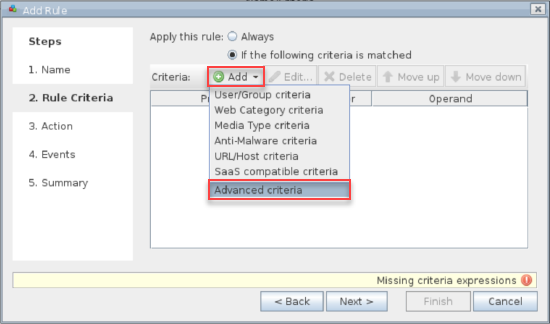
- Rule Criteria. Configure the criteria for the rule that the web policy enforces. Click Add > Advanced criteria.
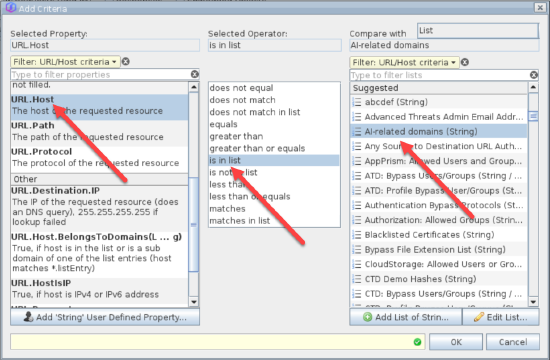
- In the Add Criteria dialog, configure the following to set a condition for the rule that triggers a response if this condition matches:
- Selected Property. Select the property as URL.Host to categorize AI services based on their hostname.
- Selected Operator. Select the operator as is in list to build a condition.
- Compare with. Select the newly created list of AI services which is configured in Step 1. For example, select AI-related domains.
- In the Add Criteria dialog, configure the following to set a condition for the rule that triggers a response if this condition matches:
- Name. Enter a descriptive name to help identify the rule, and click Next.
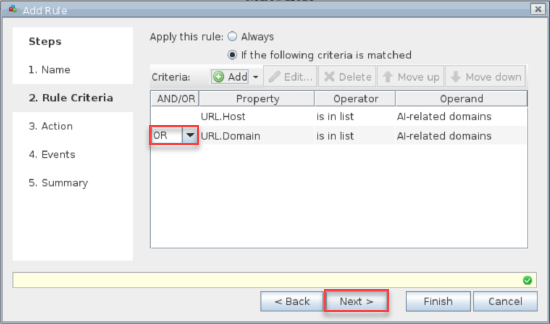
- You must create another criteria to add the property as URL.Domain and repeat the steps mentioned in Rule Criteria.
- Select the condition OR in the Rule Criteria step, and click Next.
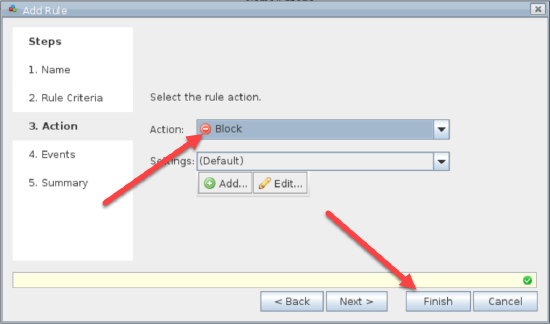
- Action. Select the response action that is triggered when the policy rule is matched. For example, select Block.
- Click Next.
- Click Finish.
- Click Save Changes.
Your web policy is now configured successfully to control the usage of AI services.