Skyhigh Mobile Client for iOS Devices
The Skyhigh Client for Mobile application enables end users to securely access the Internet and private applications from iOS devices. When end users access websites or private applications, the traffic is forwarded to the Skyhigh SWG (Cloud & On-Prem) for policy enforcement before it is forwarded to the actual website or private application.
NOTES:
- This topic is intended for MDM administrators who manage end users' iOS devices via the Skyhigh Client app.
- Skyhigh recommends creating a new user group and applying all relevant policies and configurations to the group. Once the Skyhigh Client setup and deployment are complete, MDM administrators can add new users to the group.
- The recommended iOS version for installing the Skyhigh Client on iOS devices is 16 or higher.
Prerequisites
Generate a self-signed certificate authority(CA) and use this file to generate a user identity(.p12) file. Upload the CA file to the Skyhigh UI. Download the customer Tenant CA certificate from the Skyhigh UI.
- MDM Setup: Create a VPN profile along with a user identity(.p12) file and Customer tenant CA certificate and push it directly to the iOS devices using MDM.
- BYOD Setup: Share the Customer tenant CA certificate and upload a user identity (.p12) file to the user. The user has to install the CA certificate and trust in the device settings. The user has to install the app and upload p12 file which creates VPN.
- Generate Certificate Authority (CA) and User Identity (.p12) certificates
-
Create a self-signed CA file and use the same file to generate the User Identity files and sign those.
NOTE: You can create one user identity file per user or device.
- ▼ Generate Certificates using XCA tool
-
You can generate the certificate using the XCA tool.
- Download and install the XCA 2.4.0 tool.
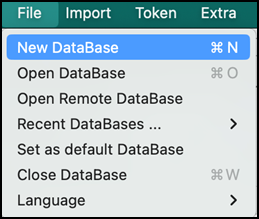
- Create a New Database, go to File > New Database, and enter the password to save it.
- Click the Certificates tab.

- Click New Certificate.

- Select Create a self signed certificate as the signing option.

- Select Signature algorithm as SHA384.

- Select Template for the new certificate as [default] CA.

- Click Apply extensions and Apply subject.

- Click the Subject tab.

- Enter Internal Name and commonName.

- Click Generate a new key.

- Select keytype as RSA and Keysize as 4096 bit.

- Click Create.

Key created message window appears.
- Go to the Extension tab and retain all the settings as is.

- Go to the Key Usage tab and retain all the settings as is.

- Go to the Netscape tab and remove any selected options.

- Go to the Advanced tab and review all the information.

- Click OK to create the CA certificate.

- Click the Certificates tab.
- Select the recently created root_CA certificate.

- Click New Certificate.

- Select the previously created CA(root_CA) certificate as the signing option.

- Select Signature algorithm as SHA384.

- Select the template for the new certificate as [default] TLS_client or [default] HTTPS_client.

- Click Apply extensions and Apply subject.

- Click the Subject tab, enter Internal Name and commonName. Make sure the file name is the same as the common Name.

- Click Generate a new key.

- Select keytype as RSA and Keysize as 4096 bit.

- Click Create.

The key created message window appears.

- Go to the Extension tab. Select x509v3 basic Constraints type as Not defined and uncheck the Critical option.

- Select Key identifier as x509v3 Authority key Identifier.

- Click Edit in the Select X509v3 Subject Alternative Name option.

- Enable the Copy Common Name setting and click Apply.
NOTE: If Copy common name is not available, then manually enter the DNS:user1”(user1 as the common name of the client certificate added in step 26) in the X509v3 Subject Alternative Name field.


- Go to Key Usage tab, select options from the list as per the image below.

- Go to the Netscape tab and remove any selected options.
- Go to the Advanced tab and review all the information.

- Click OK to create the CA certificate.

- Select CA certificate and click Export.

- Select File Location and Export Format as PEM + Key (*.pem) for CA certificate. Click OK to save the file.

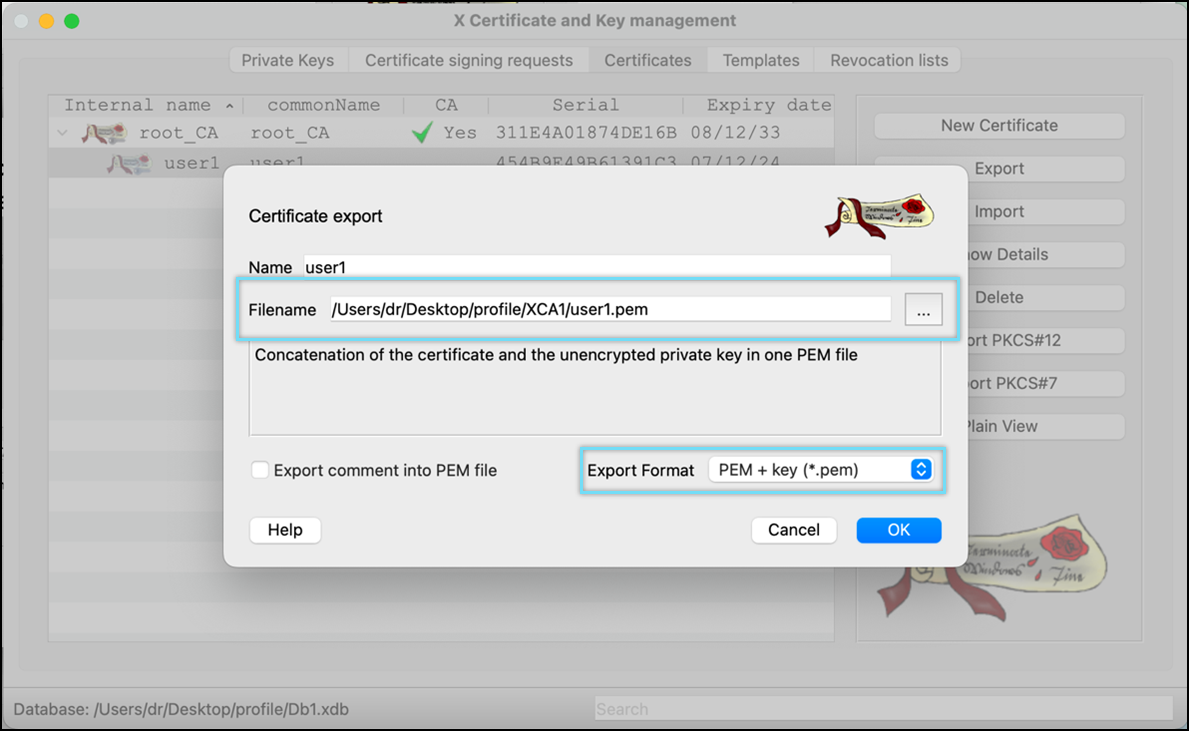
- Select Client certificate(user1) and click Export.

- Select File Location and Export Format as PEM + Key (*.pem) for client certificate. Click OK to save the file.
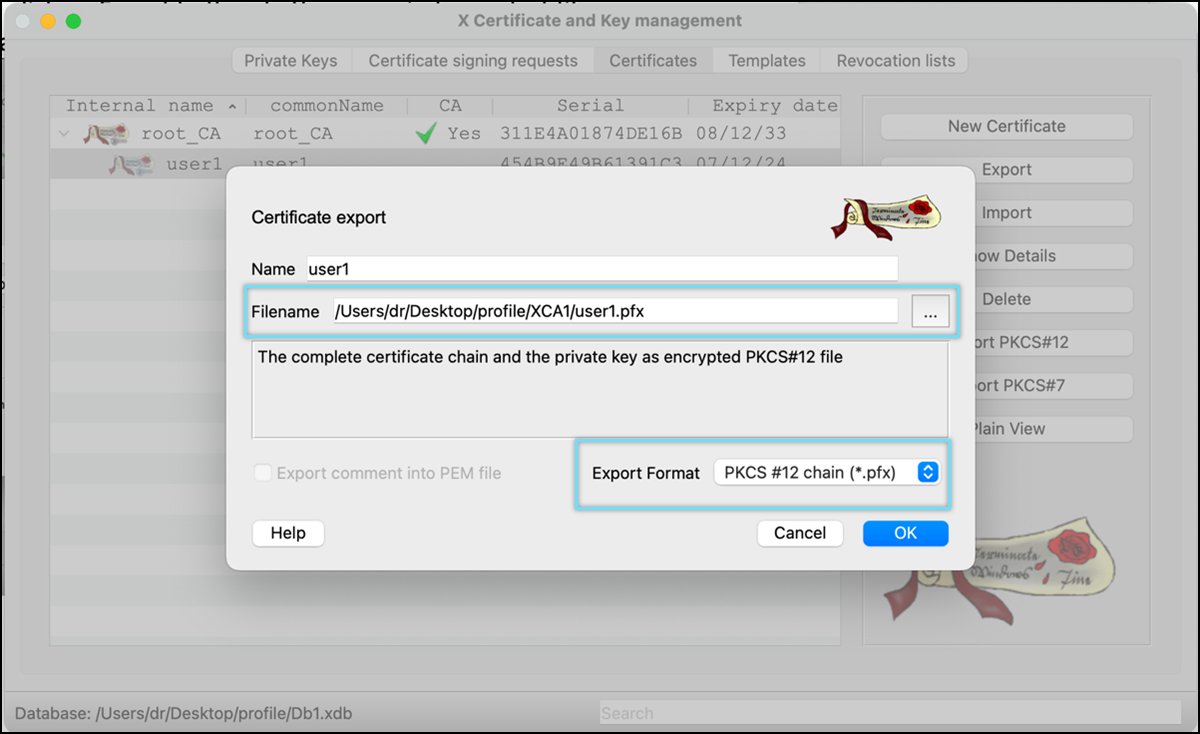
- Select Client certificate(user1) and click Export.
- Select File Location and Export Format as PKCS #12 chain (*.pfx) for the client certificate. Click OK to save the file. Make sure the file name is the same as the common Name.
- Enter the Password and select Ok to save the file.

- Go to the file location and open CA and Client file in any text editor. Verify only certificate part is available in the file. remove extra information, if any.


- Rename Client file (user1) .pfx file as .p12 file.

- Upload CA certificate generated to the Skyhigh Security UI
-
Upload the CA certificate generated in Step 1 to the Skyhigh Security UI.
NOTE: After this step, wait for 30-40 minutes before connecting VPN
- Go to Settings > Infrastructure > Web Gateway Setup.
.png?revision=1)
- Click Configure on the Skyhigh Mobile Cloud Security setting.
.png?revision=1)
- Click Upload and select the custom CA certificate.
NOTE: supported certificate formats are DER, PEM, CRT, and CER.
.png?revision=1)
- Specify the User name and an optional User Group in the User Identity certificates and click
.png?revision=1)
- Click Save.

- Click Upload & Test and upload the User identity file with format as .cer, .crt, .pem or .der to validate the CA and user Identity file.
.png?revision=1)
- Click Save to save the configuration.
.png?revision=1)
- Click Publish to apply the changes.
- Download Tenant Customer CA from Skyhigh UI
-
- Go to Policy > Web Policy > Feature Configuration
.png?revision=1)
- Select HTTPS connections > Customer CA.
.png?revision=1)
- Select Customer CA and click Export to download the Customer CA file.
_1.png?revision=1)
- Share this Customer CA certificate to the user if selecting Manual VPN config.
- Download Root Certificates and Install
-
- Download the certificate using this link.
- To install the certificate, navigate to Settings > General > VPN & Device Management.
The downloaded certificate appears on the VPN & Device Management screen.
Tap on Sectigo Public Server Authentication CA OV R36 certificate.

Tap Install on the Install profile screen.
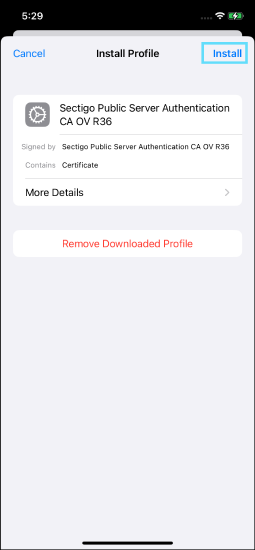
Tap Install on the Installing Profile screen.

Tap Done once installation is completed.


NOTE: For iOS 17.4 and iPadOS 17.4 or later, use only the Sectigo Public Server Authentication CA OV R36 certificate. For earlier iOS versions, use both the Sectigo Public Server Authentication Root R46 and Sectigo Public Server Authentication CA OV R36 certificates.
- Download the Sectigo Public Server Authentication Root R46 certificate using this link.
- To install the certificate, navigate to Settings > General > VPN & Device Management.
The downloaded certificate appears on the VPN & Device Management screen.
Tap on Sectigo Public Server Authentication Root R46 certificate.

Tap Install on the Install profile screen.

Tap Install on the Installing Profile screen.

The certificate installation is complete.

- Go to Settings > General > About > Certificate Trust Settings > Toggle on ENABLE FULL TRUST FOR ROOT CERTIFICATE.

Setup Skyhigh Client App and Certificate Deployment using MDM
- Skyhigh Client App and Certificate Deployment
-
- ▼ MDM Setup
-
Prerequisite: iPhone/iPad is already enrolled in the Intune portal.
Admin has to create VPN profile along with generated user identity file(.p12) and downloaded Tenant customer CA certificate using Apple Configurator and push the VPN profile to the enrolled device. Admin has to create custom Line-of-business app using the IPA file shared and push the app to the enrolled device. Users should ensure that this configuration exists on the iOS device.a. Create a VPN profile using the Apple configurator:
- Download Apple Configurator from the Mac Appstore.
- Click on File > New Profile.
- Navigate to General and add any name.

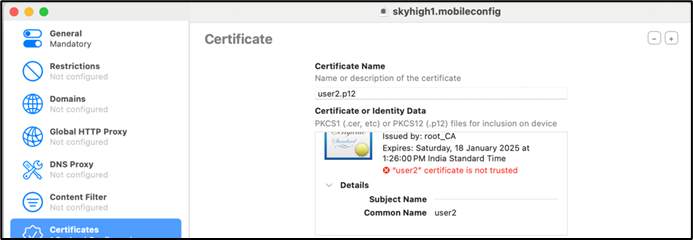
- Navigate to Certificates and click Configure.

- Select User Identity(.p12) file generated and enter the password.

- Rename Tenant Customer CA(certificate_authority.pem) downloaded from the Skyhigh tenant to certificate_authority.crt.
- Click + icon in Certificates, select the Tenant Customer CA(certificate_authority.crt) file, and the Sertigo Public Server Authenticate CA OV R36 file. To download the Sertigo Public Server Authenticate CA OV R36 certificate file, see Download the Intermediate CA certificate and Install section.

- Navigate to VPN settings and click Configure.

- Enter the values as mentioned below:
- Connection Name: Any random name.
- Connection Type: IKEv2.
- To enable Always ON VPN, click on the check box. Always-ON VPN works only on the supervised devices.

- To enable Always ON VPN, click on the check box. Always-ON VPN works only on the supervised devices.
- Server: mobile.skyhigh.cloud
- Remote Identifier:
-
mobile.skyhigh.cloud:
NOTE: When you create a mobileconfig file, it adds the following key-value pair which causes certificate installation failure. Delete this key pair to make the certificate work.
Open the .mobileconfig file in any TextEdit and delete the below key and values.
<key>DNS</key>

                <dict>

                <key>SupplementalMatchDomainsNoSearch</key>

                <integer>0</integer>

                </dict>
-
- Local Identifier: Copy the common name of the User identity file that appeared in Certificates(Eg: user2)
-
Machine Authentication: Select Certificate in the drop-down.
-
Identity Certificate: Select the user identity(.p12) file.

-
Select Enable EAP

-
EAP Authentication: Select Certificate in the dropdown.
b. Push VPN configuration to the device using MDM:
This provides the configuration flow of pushing VPN profile to mobile device from Intune MDM (Mobile Device Management).
Creation of custom VPN Profile:
- Login to the Intune MDM account using the link.
- Make sure your device appears in the Devices -> iOS/iPadOS when you log in.

- Go to Devices > Configuration > Create.
- Click New Policy to create a new VPN configuration.

- Select Platform as iOS/iPadOS.
- Select Profile type as Templates.
- Select the Template name as Custom.

- Once Profile Type is selected as Custom, a window will be opened to upload the Apple Configurator profile file.
- Enter Name and Description and click Next.

- Enter the Configuration profile name and upload
.mobileconfigfile created using Apple Configurator 2 and click Next.

- Select your devices group in Assignments > Included group and click Next.
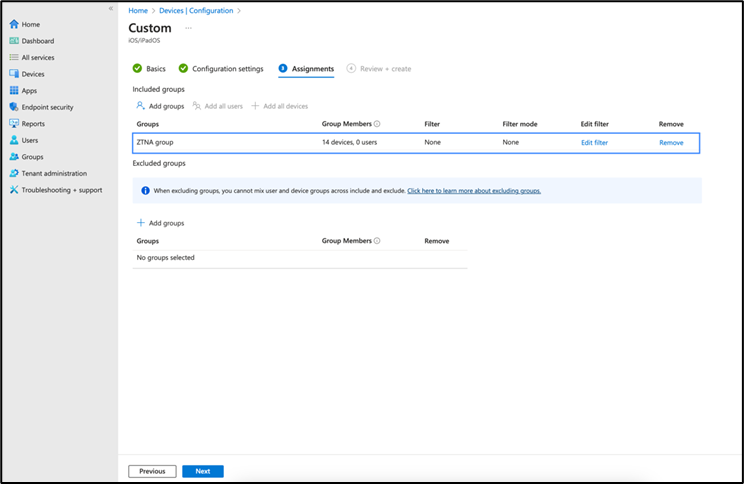
- Review the profile and click Create to create the VPN configuration profile.

- Once the profile is assigned to the respective group, MDM takes some time to push the profile to the respective devices.
c. Push Skyhigh Client App ipa to mobile devices:
- Go to Apps -> iOS/iPadOS and click Create.
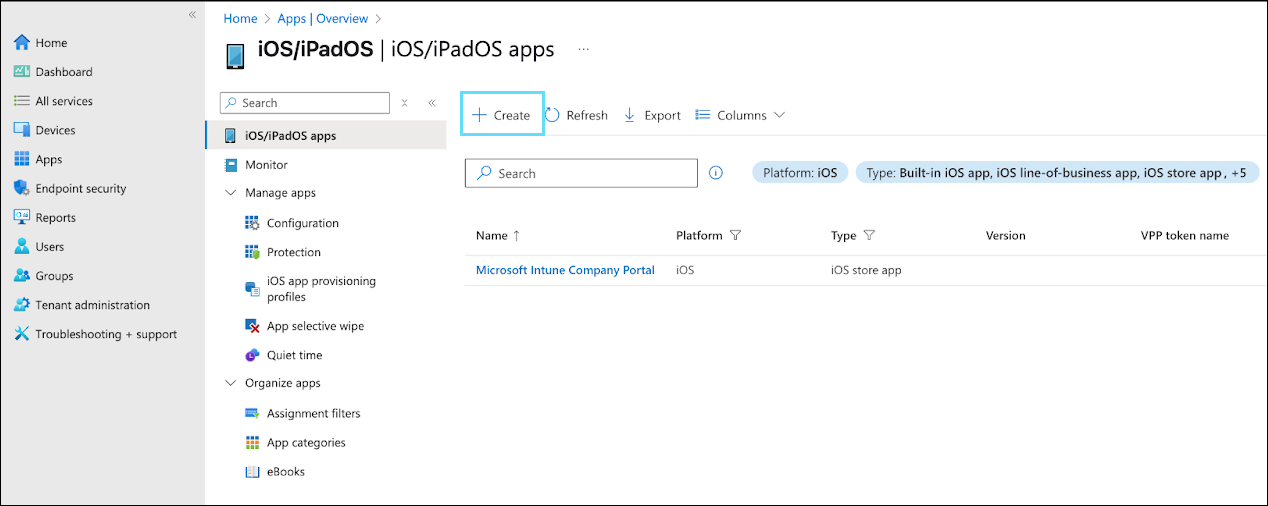
- Select App Type as Line-of-business app.

- In the App information page, click Select app package file.
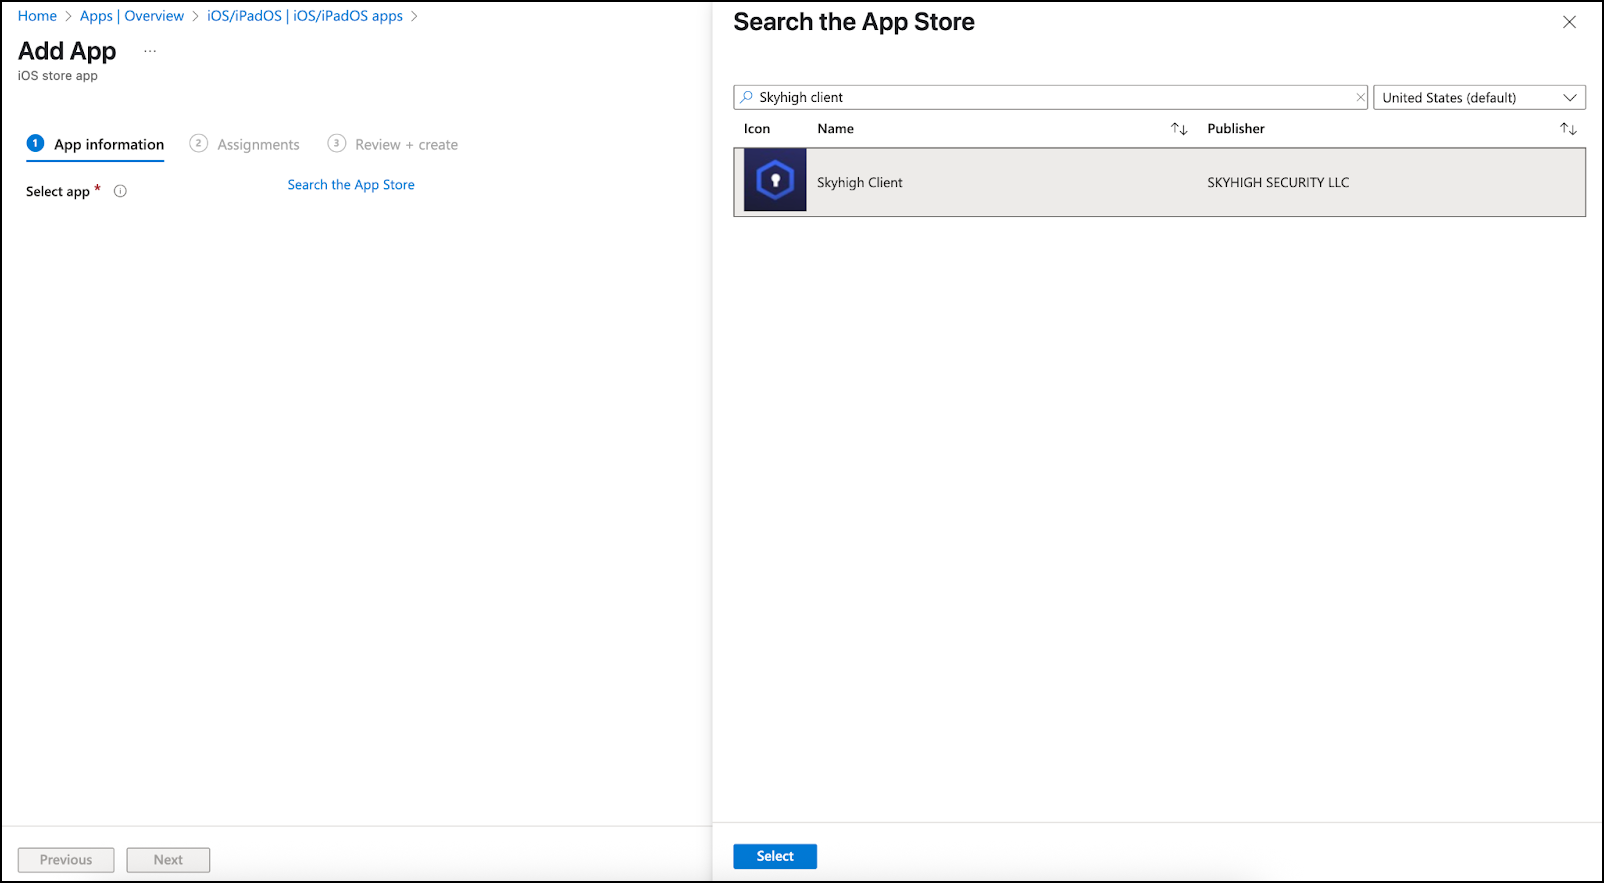
- Enter the Publisher name and select Next.

- Select the required device group in the Assignment section and click Next.

- Review the app information and click Create.

- Verify the app created.

- Once the app is created, MDM takes some time to push the app to the respective device.
NOTE: To make Microsoft Teams calls, add
microsoft.com, live.com, skype.comin Policy > Web Policy > Policy > Global Bypass> Domains Bypass.For details about Skyhigh Client App installation and troubleshooting, see Skyhigh Client App for iOS Devices.